There are lots of reasons why more and more people are interested in learing how to be able to develop Android applications. Unarguably, Android is the most popular mobile operating system, with almost 2 billion devices activated and it offers a unified approach to application development for mobile devices.
That means, that developers need only develop for Android, and their applications will be able to run on different devices powered by Android. This particular asset gives Android endless possibilites! This means that and application that is designed to work on mobile phone devices can be also transfered to Android powered TV sets or Android Car systems.
This is why, Android is an exciting space to make apps that can help you in every aspect of your life, can help you communicate, organize, educate, entertain or just to make your life easier in every device that they might run on!
Table Of Contents
In this special example, we are going to set our Android Development Studio IDE, make our very first Android application and discover the Android Development world in the easiest possible way.
The mobile development world can be very fun, because the direct results we see when creating our own application, can be highly motivating and rewarding.
1. What is Android?
Android is a mobile operating system currently developed by Google, based on the Linux kernel and designed primarily for touchscreen mobile devices such as smartphones and tablets. And as we said before, Android offers a unified approach to application development for mobile devices.
Android is an open-source operating system named Android. Google has made the code for all the low-level “stuff” as well as the needed middleware to power and use an electronic device, and gave Android freely to anyone who wants to write code and build the operating system from it. There is even a full application framework included, so third-party apps can be built and installed, then made available for the user to run as they like.
The “proper” name for this is the Android Open Source Project, and this is what people mean when they say things like Android is open and free. Android, in this iteration, is free for anyone to use as they like.
2. Installing Android Studio
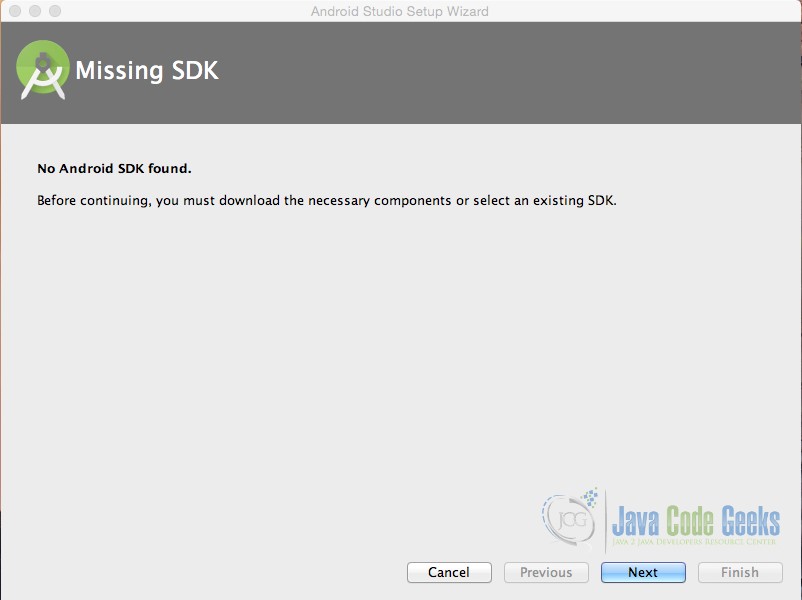
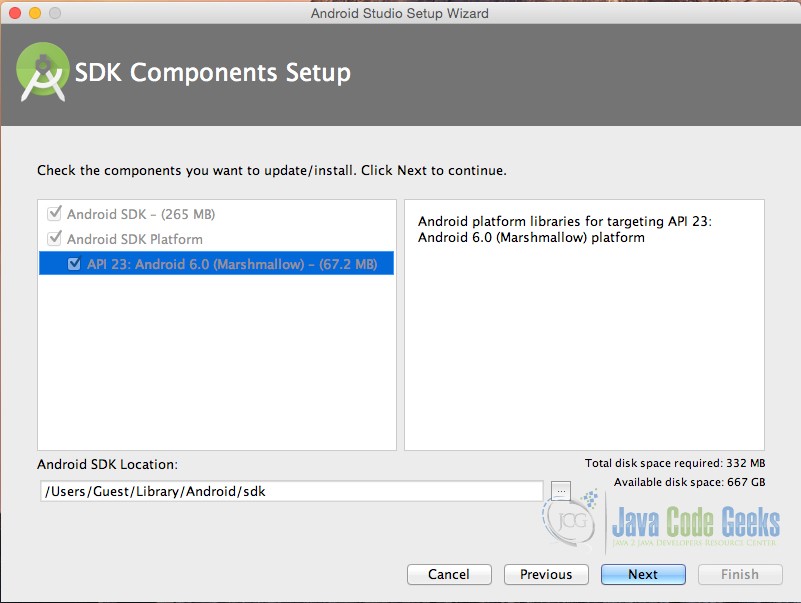
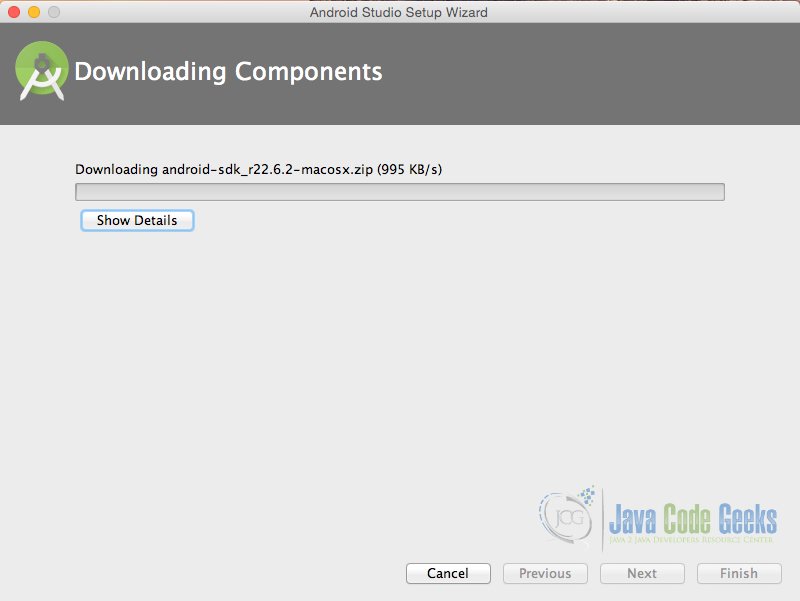
In order to write an Android application, we are going to need a development environment. Google has made a very useful tool for all Android Developers, the Android Studio. Android Studio is the official IDE for Android development, and with a single download includes everything you need to begin developing Android apps. Included in the download kit, are the Software Development Kit (SDK), with all the Android libraries we may need, and the infrastructure to download the many Android emulator instances, so that we can initially run our application, without needing a real device.
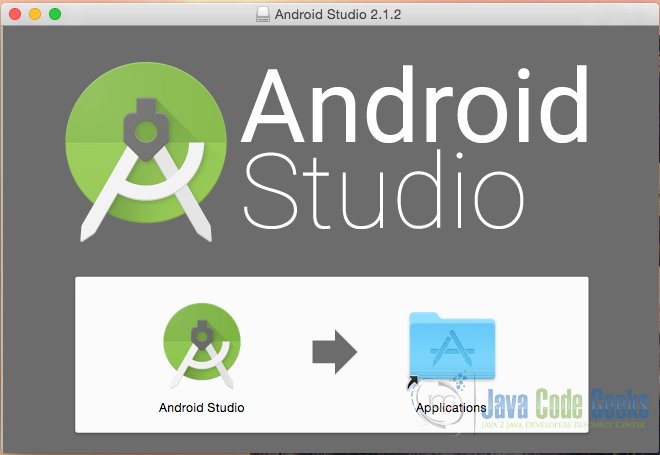
So, we are going to download and install Android Studio.
First we have to have installed the Java Development Kit (JDK) from Oracle. If you do not, please you should download the latest JDK from the Oracle’s special section here.

3. Android versions and Android SDK Manager
Google, releases almost every year (or even sooner than a year), a new Android version in order to update the mobile operating system, so that it contains new features and possibilities and of course to fix things that might not work in the right way.
So, each version of Android has it’s own SDK (software development kit), so that we can use to build apps that can run on and include all the latest features Android has added in its latest versions.
This means that it is essential that we keep up updating our applications with the latest features all the time, and if possible, without losing the consistency of the previous Android versions.
As part of the Setup Wizard you will already have the latest SDK available to you, however it’s useful to know how to install additional SDK’s if you need to work with older devices that do not run the latest version of Android.
SDK’s allow you to create AVD’s (Android Virtual Devices) to test your Apps on, customized to your personal configuration. Want to see how your Android App looks on a TV sized screen? If you have a screen big enough you can find out.
4. Supporting different screen sizes
Android runs on a variety of devices that offer different screen sizes and densities. This means that Android can handle applications that run on small mobile phone devices, as well as applications that run on large tablet densities.
This feature gives Android a great advantage, but also, although the system performs scaling and resizing on different screens, developers should make the effort to optimize their application for different screen sizes and densities. Android system provides a consistent development environment across devices and handles most of the work to adjust each application’s user interface to the screen on which it is displayed. At the same time, the system provides APIs that allow you to control your application’s UI for specific screen sizes and densities, in order to optimize your UI design for different screen configurations. For example, you might want a UI for tablets that’s different from the UI for handsets.
Below is an introduction to the terms and concepts used, a summary of the screen configurations that the system supports, and an overview of the API and underlying screen-compatibility features:
Screen size
Actual physical size, measured as the screen’s diagonal.
For simplicity, Android groups all actual screen sizes into four generalized sizes: small, normal, large, and extra-large.
Screen density
The quantity of pixels within a physical area of the screen; usually referred to as dpi (dots per inch). For example, a “low” density screen has fewer pixels within a given physical area, compared to a “normal” or “high” density screen.
For simplicity, Android groups all actual screen densities into six generalized densities: low, medium, high, extra-high, extra-extra-high, and extra-extra-extra-high.
Orientation
The orientation of the screen from the user’s point of view. This is either landscape or portrait, meaning that the screen’s aspect ratio is either wide or tall, respectively. Be aware that not only do different devices operate in different orientations by default, but the orientation can change at runtime when the user rotates the device.
Resolution
The total number of physical pixels on a screen. When adding support for multiple screens, applications do not work directly with resolution; applications should be concerned only with screen size and density, as specified by the generalized size and density groups.
Density-independent pixel (dp)
A virtual pixel unit that you should use when defining UI layout, to express layout dimensions or position in a density-independent way.
The density-independent pixel is equivalent to one physical pixel on a 160 dpi screen, which is the baseline density assumed by the system for a “medium” density screen. At runtime, the system transparently handles any scaling of the dp units, as necessary, based on the actual density of the screen in use. The conversion of dp units to screen pixels is simple: px = dp * (dpi / 160). For example, on a 240 dpi screen, 1 dp equals 1.5 physical pixels. You should always use dp units when defining your application’s UI, to ensure proper display of your UI on screens with different densities.
Android provides support for multiple screen sizes and densities, reflecting the many different screen configurations that a device may have. You can use features of the Android system to optimize your application’s user interface for each screen configuration and ensure that your application not only renders properly, but provides the best user experience possible on each screen.
To simplify the way that you design your user interfaces for multiple screens, Android divides the range of actual screen sizes and densities into sizes: small, normal, large, and xlarge
A set of six generalized densities:
- ldpi (low) ~120dpi
- mdpi (medium) ~160dpi
- hdpi (high) ~240dpi
- xhdpi (extra-high) ~320dpi
- xxhdpi (extra-extra-high) ~480dpi
- xxxhdpi (extra-extra-extra-high) ~640dpi
5. Android Project Structure
Before we try to make our first Android application, we should first see the basic parts of an Android application project, in order to recognize them and be able to understand them better.
- Activities
The Activities are the main Java classes, that contain the Android code with which we are going to develop, what do we want the application to do.
- Activities
- Layouts
The Layouts are the main xml files, that contain the Android xml code with which we are going to develop, how will our application views look like. - Values
The Layouts are the main xml files, that contain the Android xml code with which we are going to develop, how will our application views look like.- Animation Resources
- Color State List Resource
- Drawable Resources
- Layout Resource
- Menu Resource
- String Resources
- Style Resource
- Layouts
- Drawables
A drawable resource is a general concept for a graphic that can be drawn to the screen. There are several different types of drawables:- Bitmap File
A bitmap graphic file (.png, .jpg, or .gif). Creates a BitmapDrawable. - Nine-Patch File
A PNG file with stretchable regions to allow image resizing based on content (.9.png). Creates a NinePatchDrawable. - Layer List
A Drawable that manages an array of other Drawables. These are drawn in array order, so the element with the largest index is be drawn on top. Creates a LayerDrawable. - State List
An XML file that references different bitmap graphics for different states (for example, to use a different image when a button is pressed). Creates a StateListDrawable. - Level List
An XML file that defines a drawable that manages a number of alternate Drawables, each assigned a maximum numerical value. Creates a LevelListDrawable. - Transition Drawable
An XML file that defines a drawable that can cross-fade between two drawable resources. Creates a TransitionDrawable. - Inset Drawable
An XML file that defines a drawable that insets another drawable by a specified distance. This is useful when a View needs a background drawble that is smaller than the View’s actual bounds. - Clip Drawable
An XML file that defines a drawable that clips another Drawable based on this Drawable’s current level value. Creates a ClipDrawable. - Scale Drawable
An XML file that defines a drawable that changes the size of another Drawable based on its current level value. Creates a ScaleDrawable - Shape Drawable
An XML file that defines a geometric shape, including colors and gradients. Creates a ShapeDrawable.
- Bitmap File
- Drawables
Once our app is ready, we will use a build tool to compile all the project files and package them together into an .apk file that you can run on Android devices and/or submit to Google Play.
6. Create “Hello Android World” application
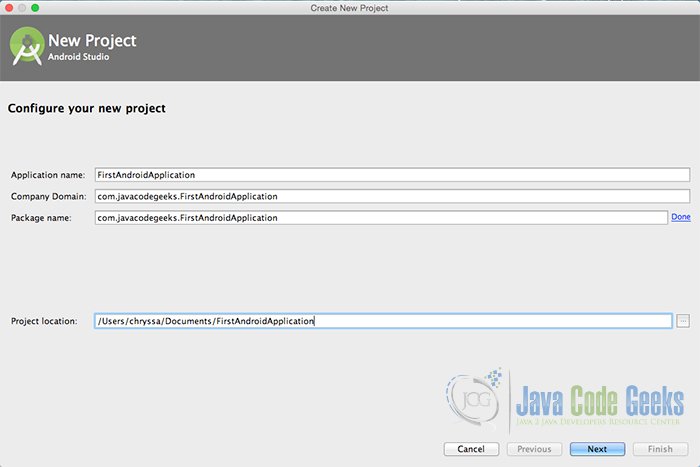
6.1. Create a New Android Studio Project
Open Android Studio and choose “Start a new Android Studio Project” in the welcome screen.

Specify the name of the application, the project and the package.
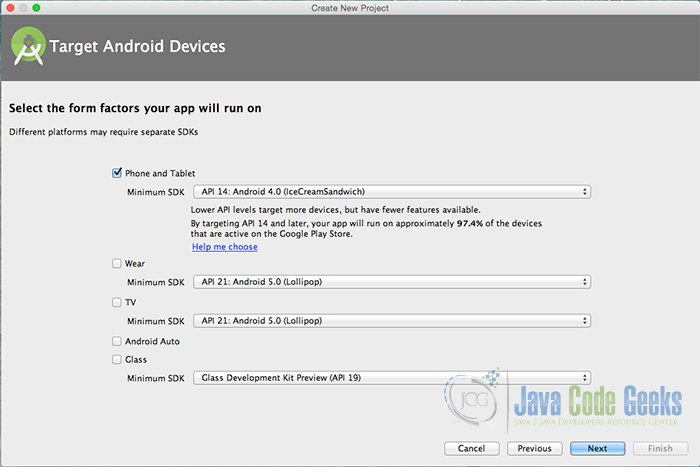
In the next window, select the form factors your app will run on.
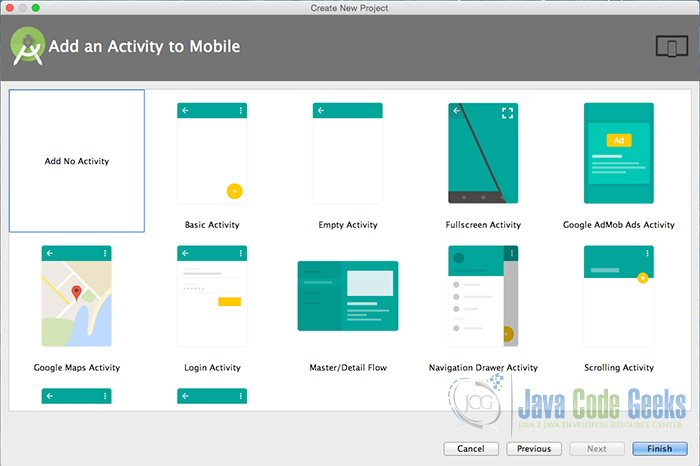
In the next window you should choose “Add no activity”. In this example, we are going to create our Activity.
Now, our project has just been created!
6.2. Create the source code of a simple FirstAndroidApplication Activity
Add a new Java class Activity inside src/com.javacodegeeks.FirstAndroidApplication/ so that we are going to have the src/com.javacodegeeks.FirstAndroidApplication/FirstActivity.java file and paste the code below.
FirstActivity.java
package com.javacodegeeks.FirstAndroidApplication;

import android.app.Activity;
import android.os.Bundle;

public class FirstActivity extends Activity {

    @Override
    public void onCreate(Bundle savedInstanceState) {
        super.onCreate(savedInstanceState);
        setContentView(R.layout.main_layout);
    }

}
6.3. Create the layout of the project
Add a new xml file inside /res/layout folder, with name main_layout.xml. We should have the /res/layout/main_layout.xml file and paste the code below.
main_layout.xml
<?xml version="1.0" encoding="utf-8"?>
<LinearLayout xmlns:android="http://schemas.android.com/apk/res/android"
    android:layout_width="match_parent"
    android:layout_height="match_parent"
    android:background="#ededed"
    android:gravity="center"
    android:orientation="vertical">

    <TextView
        android:layout_width="wrap_content"
        android:layout_height="wrap_content"
        android:layout_gravity="center"
        android:layout_marginTop="@dimen/textmargin"
        android:gravity="center"
        android:textSize="25dp"
        android:text="@string/helloAndroid" />

    <ImageView
        android:layout_width="wrap_content"
        android:layout_height="wrap_content"
        android:layout_margin="@dimen/logomargin"
        android:background="@drawable/ic_social_mood" />

</LinearLayout>
6.4. Android Manifest
Edit the AndroidManifest.xml file inside /app/manifests folder.
The AndroidManifest.xml of our project is simple and should be like this:
AndroidManifest.xml
<manifest xmlns:android="http://schemas.android.com/apk/res/android"
    package="com.javacodegeeks.FirstAndroidApplication">
    <application
        android:allowBackup="true"
        android:icon="@mipmap/ic_launcher"
        android:label="@string/app_name"
        android:supportsRtl="true"
        android:theme="@style/AppTheme">
        <activity
            android:name=".FirstActivity"
            android:label="@string/app_name"
            android:screenOrientation="portrait"
            android:theme="@android:style/Theme.NoTitleBar.Fullscreen">
            <intent-filter>
                <action android:name="android.intent.action.MAIN" />
                <category android:name="android.intent.category.LAUNCHER" />
            </intent-filter>
        </activity>
    </application>
</manifest>
6.5. Edit the FirstAndroidApplication dimensions
Add a new xml file inside /res/values folder, with name dimens.xml. We should have the /res/values/dimens.xml file and paste the code below.
dimens.xml
<?xml version="1.0" encoding="utf-8"?>
<resources>
    <dimen name="logomargin">20dp</dimen>
    <dimen name="textmargin">10dp</dimen>
</resources>
6.6. Edit the FirstAndroidApplication strings
Add a new xml file inside /res/values folder, with name strings.xml. We should have the /res/values/strings.xml file and paste the code below.
strings.xml
<resources>
    <string name="app_name">AndroidFirstApplication</string>
    <string name="helloAndroid">Hello Android!</string>
</resources>
6.7. Add the drawable for every screen density
Inside /res/values folder, we should add the folders for each screen dimension we have, and add the specific drawable for each one.

In this way, we are going to have the right drawable dimension for every different screen density.
6.8. Build, compile and run
When we are ready, we build our application by pressing the play button in our AndroidStudio main toolbar.
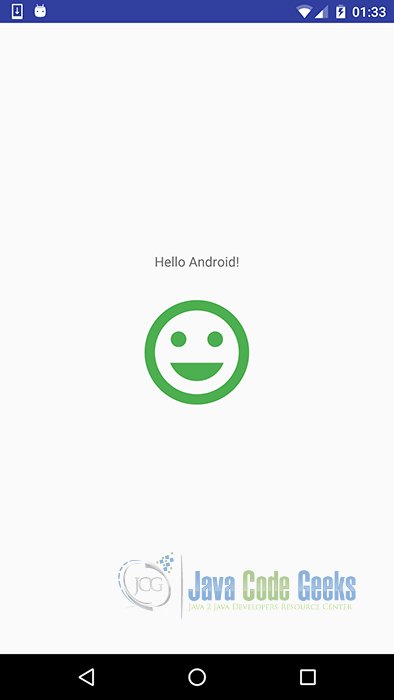
After we build, compile and run our project, the main FirstAndroidApplication application should look like this:
7.Download the Android Studio Project
This was an example of first Android application.
You can download the full source code of this example here: FirstAndroidApplication
8. How to continue?
Here is a list of basic Android tutorials, that you can follow in order to make the first basic steps in the Android World:
Android Layouts and Views
- Android FrameLayout Example
- Android LinearLayout Example
- Android ImageView Example
- Android TextView Example
- Android Button Example
Android Click and Drag Listeners
Android Styles and UI Elements
Android Activities
Android Development
Of course the most accurate and complete guide, is the official Android Developers Guide, that covers every aspect of the Android Development:

I really liked this post! I really want to learn android, I have entered in android with a great curiosity but today its become very difficult for me to learn ,It’s because I don’t find that where should I have to start, please help me because I really want to develop something very good. So please recommend me a startup
Hi Chryssa,
Thank you for this tutorial. I have followed the instructions and created my first Hello application, but my screen does not have the smiley face icon nor the JCG logo at the bottom. What am I missing?