In Android Development we do not have the option to use any other custom font in our default TextView in an xml layout file, except from the default Roboto font.
And the choices that Android gives us are limited, by letting us set only normal, sans, serif or monospace fonts, which are usually not enough, especially when we want to customise our application.
In this example we are going to make a custom Android TextView that can change its font, by customising its attributes from the xml.
For our example will use the following tools in a Windows 64-bit or an OS X platform:
- JDK 1.7
- Android Studio 1.3.2 Juno
- Android SDK 5.0
Let’s take a closer look:
1. Create a New Android Studio Project
You may skip project creation and jump directly to the beginning of the example below.
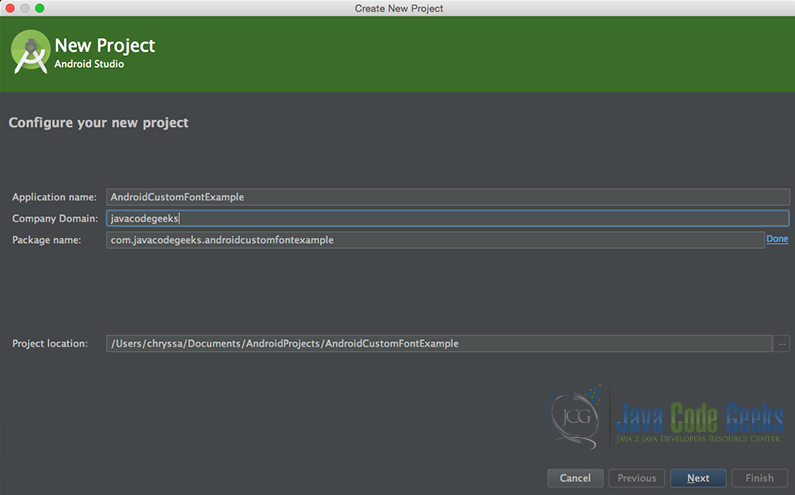
Open Android Studio and choose “Start a new Android Studio Project” in the welcome screen.

Specify the name of the application, the project and the package.
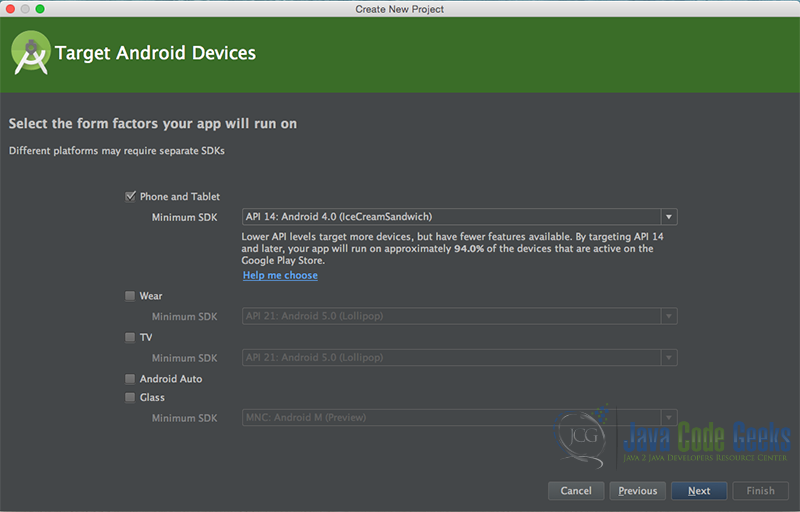
In the next window, select the form factors your app will run on.
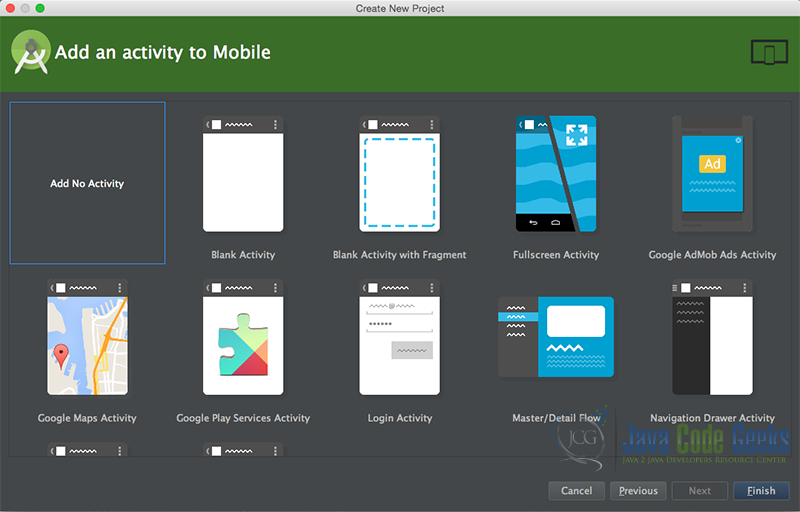
In the next window you should choose “Add no activity”. In this example, we are going to create our Activity.
Now, our project has just been created!
2. Create the source code of a simple AndroidCustomFontExample Activity
Add a new Java class Activity inside src/com.javacodegeeks.androidcustomfontexample/ so that we are going to have the src/com.javacodegeeks.androidcustomfontexample/AndroidCustomFontExample.java file and paste the code below.
AndroidCustomFontExample.java
package com.javacodegeeks.androidcustomfontexample;

import android.app.Activity;
import android.os.Bundle;

public class AndroidCustomFontExample extends Activity {
    @Override
    public void onCreate(Bundle savedInstanceState) {
        super.onCreate(savedInstanceState);
        setContentView(R.layout.activity_main);
    }
}
In this example, we are going to make an application with one very simple Activity that will only have a main layout. So, we are going to write a simple xml file, and add in the layout xml file a custom TextView.
3. Create custom XML properties
Add a new xml file inside /values/ folder, with name attrs.xml. We should have the /values/attrs.xml file and paste the code below.
attrs.xml
<?xml version="1.0" encoding="utf-8"?>
<resources>
    <declare-styleable name="CustomTextView">
        <attr name="font" format="string" />
    </declare-styleable>

</resources >
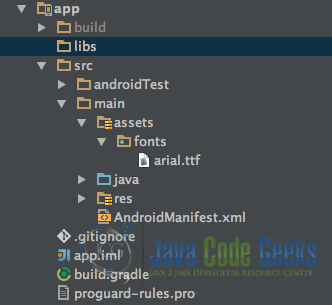
4. Create the assets folder and add a custom font.
Add a new folder named assets inside src/main/ folder so that we are going to have the src/main/assets directory. Then add a new folder named fonts inside src/main/assets folder. We are going to have the directory: src/main/assets/fonts and we are going to add a .ttf font file inside. In our example we are going to add the arial.tff file.
5. Create the code of a custom TextView class
Add a new Java class inside src/com.javacodegeeks.androidcustomfontexample/ so that we are going to have the src/com.javacodegeeks.androidcustomfontexample/CustomTextView.java file and paste the code below.
CustomTextView.java
package com.javacodegeeks.androidcustomfontexample;

import android.annotation.TargetApi;
import android.content.Context;
import android.content.res.TypedArray;
import android.graphics.Typeface;
import android.os.Build;
import android.util.AttributeSet;
import android.widget.TextView;


public class CustomTextView extends TextView {

    @TargetApi(Build.VERSION_CODES.LOLLIPOP)
    public CustomTextView(Context context, AttributeSet attrs, int defStyleAttr, int defStyleRes) {
        super(context, attrs, defStyleAttr, defStyleRes);
        init(attrs);
    }

    public CustomTextView(Context context, AttributeSet attrs, int defStyle) {
        super(context, attrs, defStyle);
        init(attrs);
    }

    public CustomTextView(Context context, AttributeSet attrs) {
        super(context, attrs);
        init(attrs);

    }

    public CustomTextView(Context context) {
        super(context);
        init(null);
    }

    private void init(AttributeSet attrs) {
        if (attrs != null) {
            TypedArray a = getContext().obtainStyledAttributes(attrs, R.styleable.CustomTextView);
            String fontName = a.getString(R.styleable.CustomTextView_font);

            try {
                if (fontName != null) {
                    Typeface myTypeface = Typeface.createFromAsset(getContext().getAssets(), "fonts/" + fontName);
                    setTypeface(myTypeface);
                }
            } catch (Exception e) {
                e.printStackTrace();
            }

            a.recycle();
        }
    }
}
Let’s see in detail the code above.

    private void init(AttributeSet attrs) {
        if (attrs != null) {
            TypedArray a = getContext().obtainStyledAttributes(attrs, R.styleable.CustomTextView);
            String fontName = a.getString(R.styleable.CustomTextView_font);

            try {
                if (fontName != null) {
                    Typeface myTypeface = Typeface.createFromAsset(getContext().getAssets(), "fonts/" + fontName);
                    setTypeface(myTypeface);
                }
            } catch (Exception e) {
                e.printStackTrace();
            }

            a.recycle();
        }
    }
The purpose of this method is to get the attributes from the xml and use them in the custom TextView code. With getContext().obtainStyledAttributes(attrs, R.styleable.CustomTextView); we are going to get all an array with all properties from the xml.
With this code Typeface myTypeface = Typeface.createFromAsset(getContext().getAssets(), "fonts/" + fontName); we are going to use the attribute, as the font name that we want to use. With setTypeface(myTypeface); we set a new typeface for our custom TextView.
We wrap all this code with try { and } catch (Exception e) code, because we want to avoid a Runtime error, when the suggested font, does not exist in the src/main/assets/fonts folder.
6. Create the layout of the project
Add a new xml file inside /res/layout folder, with name activity_main.xml. We should have the /res/layout/activity_main.xml file and paste the code below.
activity_main.xml
<?xml version="1.0" encoding="utf-8"?>
<LinearLayout xmlns:android="http://schemas.android.com/apk/res/android"
    xmlns:app="http://schemas.android.com/apk/res-auto"
    android:layout_width="match_parent"
    android:layout_height="match_parent"
    android:gravity="center"
    android:orientation="vertical"
    android:padding="20dp">

    <com.javacodegeeks.androidcustomfontexample.CustomTextView
        android:id="@+id/custom_text_view"
        android:layout_width="wrap_content"
        android:layout_height="wrap_content"
        android:layout_gravity="center"
        android:text="This is a custom text view!"
        android:textSize="30dp"
        app:font="arial.ttf" />

</LinearLayout>
Do not forget the xmlns:app="http://schemas.android.com/apk/res-auto" declaration, when using custom attributes in an xml layout file.
7. Android Manifest
The AndroidManifest.xml of our project is very very simple:
AndroidManifest.xml
<manifest xmlns:android="http://schemas.android.com/apk/res/android"
    package="com.javacodegeeks.androidcustomfontexample">

    <application
        android:allowBackup="true"
        android:icon="@mipmap/ic_launcher"
        android:label="@string/app_name"
        android:theme="@style/AppTheme">
        <activity
            android:name=".AndroidCustomFontExample"
            android:label="@string/app_name">

            <intent-filter>
                <action android:name="android.intent.action.MAIN" />
                <category android:name="android.intent.category.LAUNCHER" />
            </intent-filter>

        </activity>
    </application>
</manifest
>
8. Build, compile and run
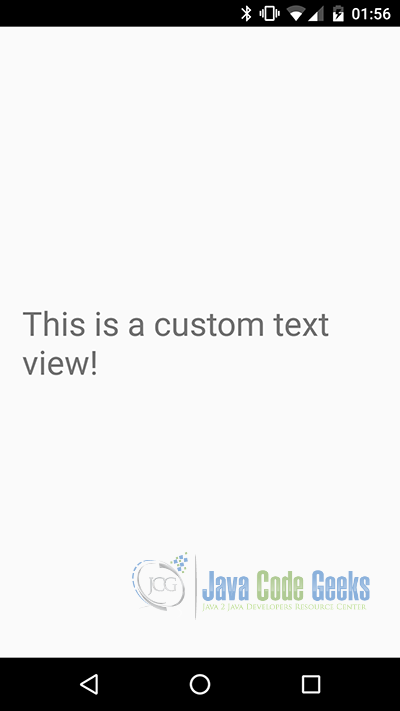
When we build, compile and run our project, the main Android Custom Font TextView application should look like this:

9. Download the Android Studio Project
This was an example of Android custom font TextView application.
You can download the full source code of this example here: AndroidCustomFontExample

Hey!
Thanks for posting this tutorial. It saved my time and effort :). I simply added your code to my project and it worked as is flawlessly!