In the example, we are going to see how can we use one of the most famous, public, social APIs, The Google Places API.
The Google Places API allows you to query for place information on a variety of categories, such as: establishments, prominent points of interest, geographic locations, and more. You can search for places either by proximity or a text string.
A Place Search returns a list of places along with summary information about each place; additional information is available via a Place Details query. You can see the full Google Places API documentation here: https://developers.google.com/places/documentation/.
In our example we are going to discuss how to make a places autocomplete search with the Google Places Autocomplete API and see how to parse these results. Our call is not going to be a userless one, we will have to create a special Google API Key.
But, lets’ see this procedure step by step.
1. Create the Google API key
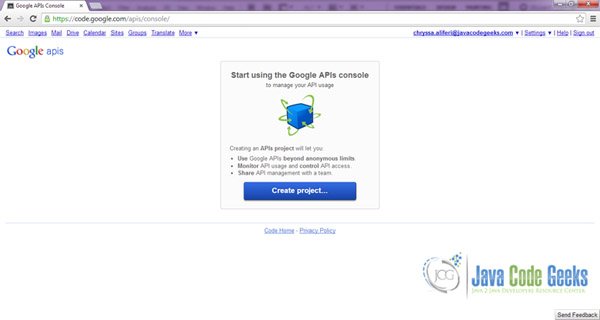
To begin with, in order to use this API, we will have to enter the Google API console portal.
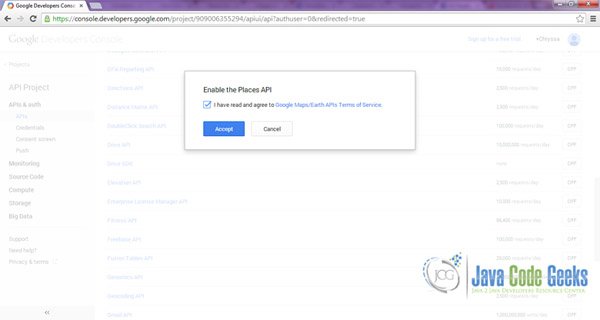
After we enter the console,we are going to see the full list, of all the APIs that Google serves. The API that we are going to use, is the Google Places API. We click on the right service, and we turn it on. We have to accept the terms of Google Maps/Earth API, by ticking the checkbox and by clicking the “Accept” button.
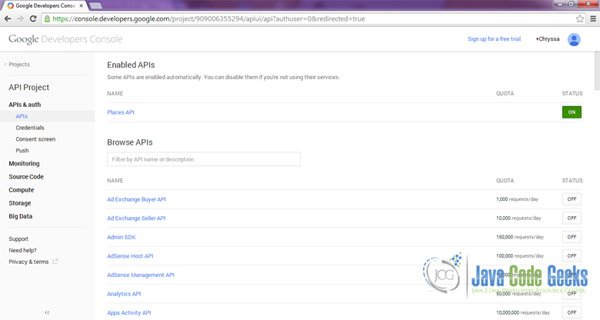
Now we can see the enabled APIs that this console user has.
In the “Overview” tab, we can have a look on the usage statistics for each one of our APIs that are enabled. We can also have a look on our quota limits for each one of our APIs.
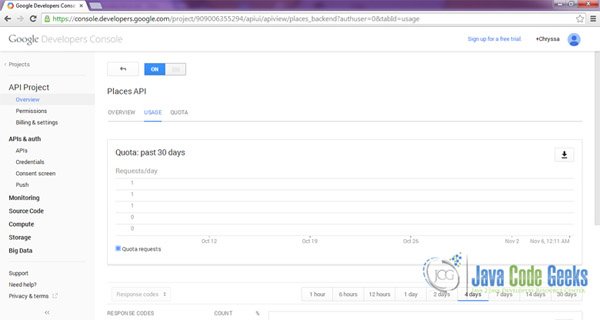
You can see here what exactly is the quota limit: https://developers.google.com/gmail/api/v1/reference/quota.
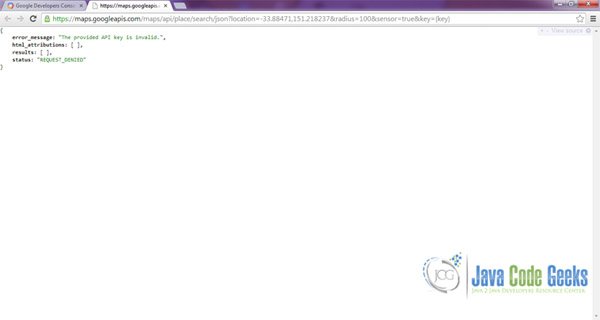
However, if we make the Google Places Autocomplete API search call from a browser, we will get as response the following:
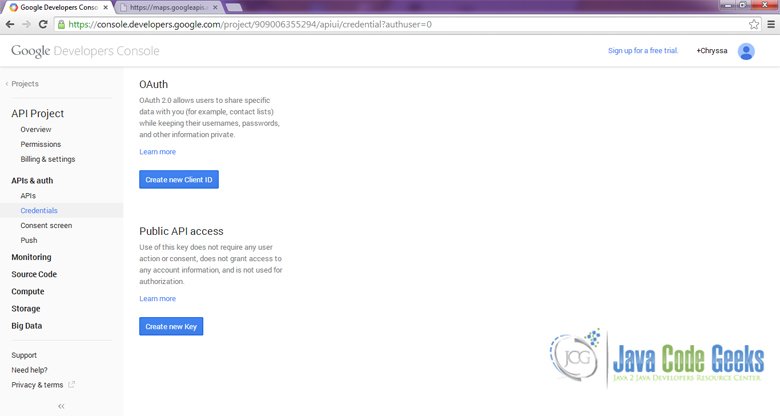
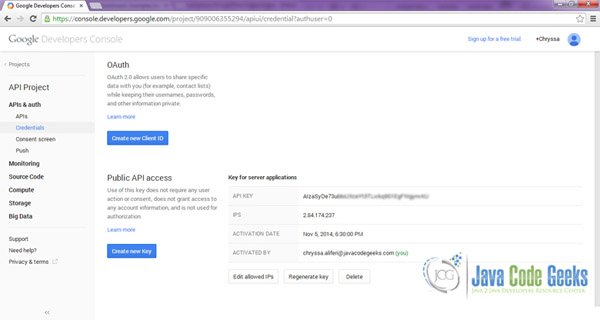
We are going to create a Public API access credential, in order to take the right response from the Google Places API search call. We only have to go to APIs&auth > Credentials tab.
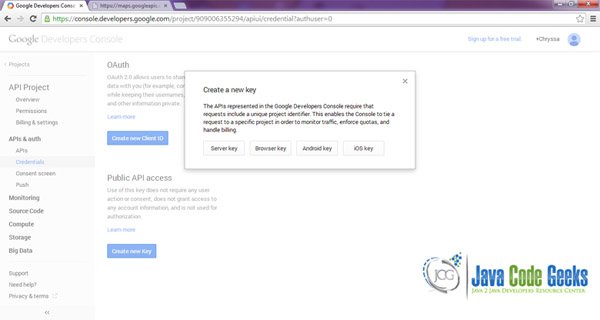
We click the “Create new Key” button, and select the “Server Key” in order to make a Key that will both work from our Android Application and from our browser. We are going to do this, exclusively for our example scope.
If you want to publish an application to the Google Play Store, that uses any of these Google API calls, you should create an Android key, by using the SHA-1 key of your original keystore (not the debug one) of the application to be exported.
Now, we are going to create a server key and configure the allowed IPs, by writing them on the “Accept Requests from these server IP address” textfield.
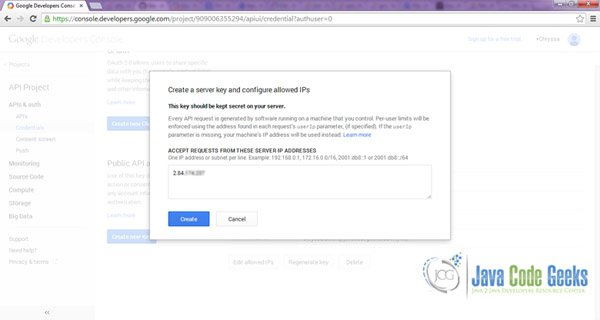
After clicking on the “Create” button, we have our Key for accessing the right results from our Google Places API call.
2. Create a the Android Application Project
Let’s start coding now! For our example will use the following tools in a Windows 64-bit or an OS X platform:
- JDK 1.7
- Eclipse 4.2 Juno
- Android SDK 4.4.2
Let’s take a closer look:
You may skip project creation and jump directly to the beginning of the example below.
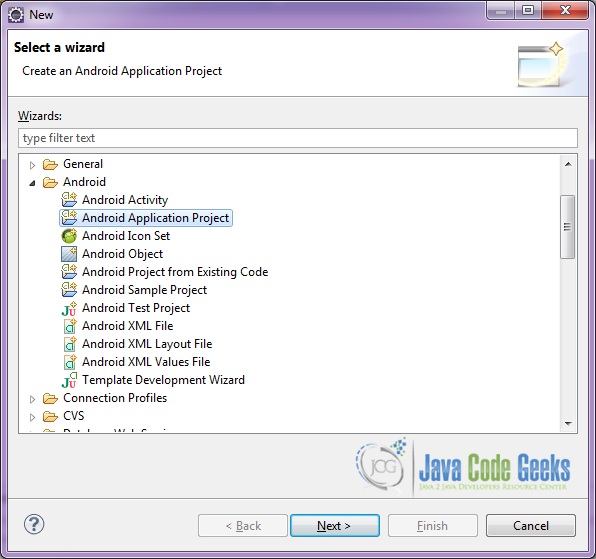
Open Eclipse IDE and go to File → New → Project → Android Application Project.
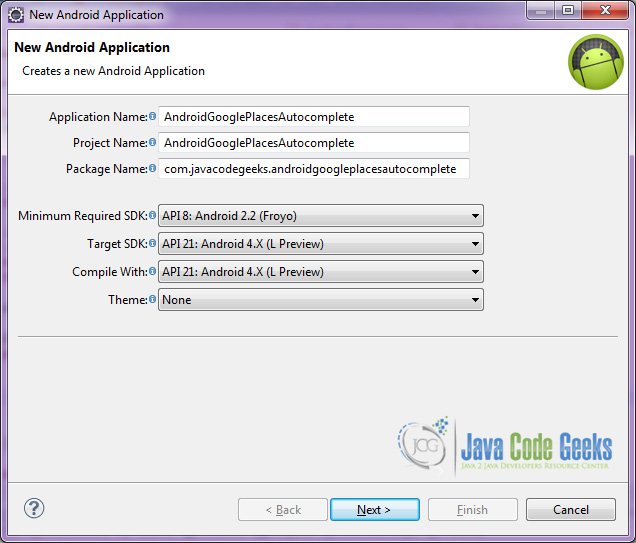
Specify the name of the application, the project and the package and then click Next.
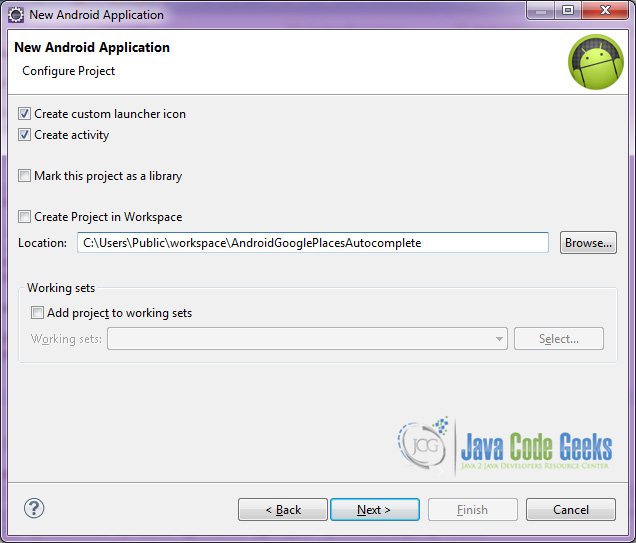
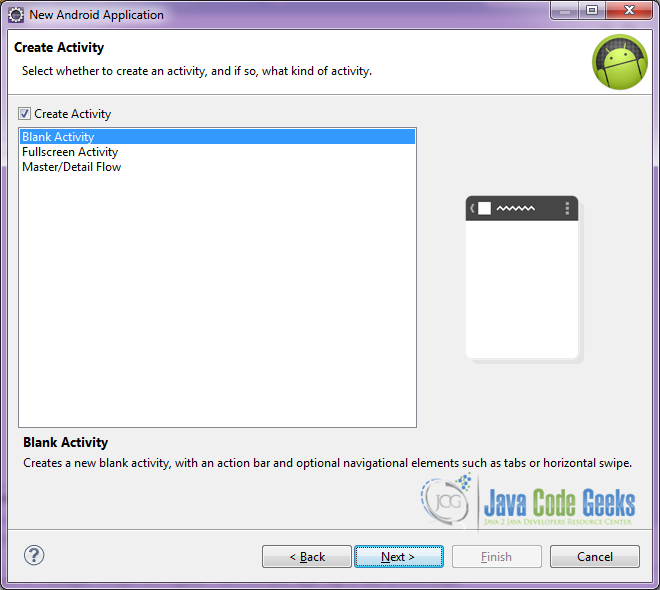
In the next window, the “Create Activity” option should be checked. The new created activity will be the main activity of your project. Then press Next button.
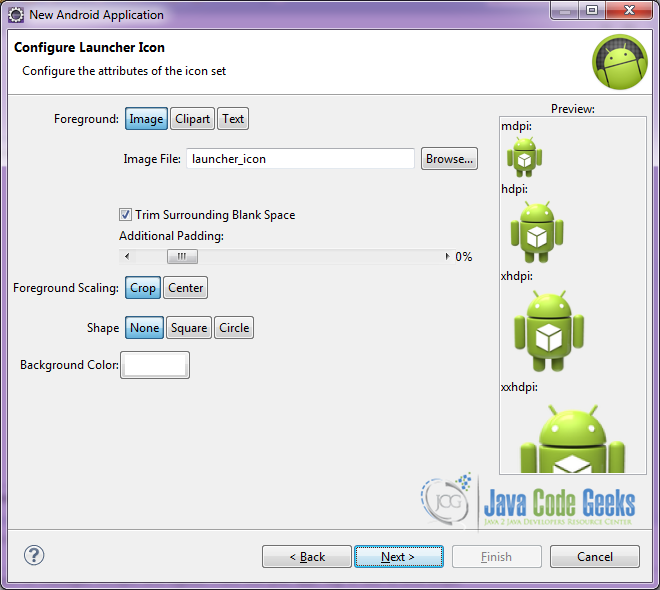
In “Configure Launcher Icon” window you should choose the icon you want to have in your app. We will use the default icon of android, so click Next.
Select the “Blank Activity” option and press Next.
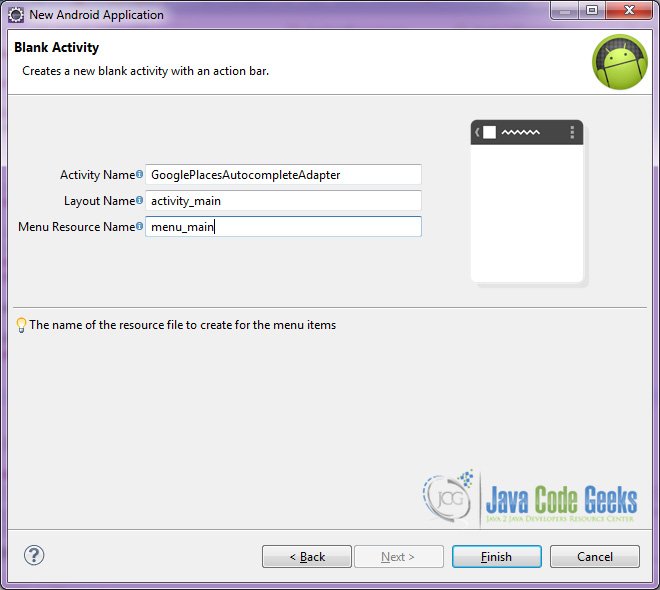
You have to specify a name for the new Activity and a name for the layout description of your app. The .xml file for the layout will automatically be created in the res/layout folder. It will also be created a fragment layout xml, that we are not going to use in this project and you can remove it if you want. Then press Finish.
3. Creating the layouts of the main GooglePlacesAutocompleteActivity
We are going to make a simple layout xml for the GooglePlacesAutocompleteActivity.class, that consists of a LinearLayout with vertical orientation, that includes one AutoCompleteTextView that implement the onClick listener in order to catch the event when clicked.
Open res/layout/activity_main.xml, go to the respective xml tab and paste the following:
activity_main.xml
<?xml version="1.0" encoding="utf-8"?>
<LinearLayout xmlns:android="http://schemas.android.com/apk/res/android"
    android:layout_width="match_parent"
    android:layout_height="match_parent"
    android:orientation="vertical"
    android:padding="20dp" >

    <AutoCompleteTextView
        android:id="@+id/autoCompleteTextView"
        android:layout_width="match_parent"
        android:layout_height="wrap_content"
        android:ems="10"
        android:text="Please enter your place" >

        <requestFocus />
    </AutoCompleteTextView>

</LinearLayout>
Also, open res/layout/list_item.xml, go to the respective xml tab and paste the following:
list_item.xml
<?xml version="1.0" encoding="utf-8"?>
<TextView xmlns:android="http://schemas.android.com/apk/res/android"
    android:layout_width="wrap_content"
    android:layout_height="wrap_content" />
4. Creating the source code of the main GooglePlacesAutocompleteActivity
Before we make the call to the Google Places API and we parse the results, we should have a look to the json response that we are going to take.
We have the call: https://maps.googleapis.com/maps/api/place/autocomplete/json?key={key}&components=country:gr&input={input strings for autocomplete search}
For this call, we used the parameters:
GOOGLE_KEY: The specific credentials we generated above
country: The country you want your autocomplete search to specify the results.
input: The letters or words that will be used as autocomplete input for the search.
Open src/com.javacodegeeks.androidcameraexample/GooglePlacesAutocompleteActivity.java file and paste the code below.
GooglePlacesAutocompleteActivity.java
package com.javacodegeeks.googleplacesautocomplete;

import java.io.IOException;
import java.io.InputStreamReader;
import java.net.HttpURLConnection;
import java.net.MalformedURLException;
import java.net.URL;
import java.net.URLEncoder;
import java.util.ArrayList;

import org.json.JSONArray;
import org.json.JSONException;
import org.json.JSONObject;

import android.app.Activity;
import android.content.Context;
import android.os.Bundle;
import android.util.Log;
import android.view.View;
import android.widget.AdapterView;
import android.widget.AdapterView.OnItemClickListener;
import android.widget.ArrayAdapter;
import android.widget.AutoCompleteTextView;
import android.widget.Filter;
import android.widget.Filterable;
import android.widget.Toast;

import com.javacodegeeks.androidgoogleplacesautocomplete.R;

public class GooglePlacesAutocompleteActivity extends Activity implements OnItemClickListener {

	private static final String LOG_TAG = "Google Places Autocomplete";
	private static final String PLACES_API_BASE = "https://maps.googleapis.com/maps/api/place";
	private static final String TYPE_AUTOCOMPLETE = "/autocomplete";
	private static final String OUT_JSON = "/json";

	private static final String API_KEY = "------your api key here -------";

	@Override
	public void onCreate(Bundle savedInstanceState) {
		super.onCreate(savedInstanceState);
		setContentView(R.layout.activity_main);
		AutoCompleteTextView autoCompView = (AutoCompleteTextView) findViewById(R.id.autoCompleteTextView);

		autoCompView.setAdapter(new GooglePlacesAutocompleteAdapter(this, R.layout.list_item));
		autoCompView.setOnItemClickListener(this);
	}

	public void onItemClick(AdapterView adapterView, View view, int position, long id) {
		String str = (String) adapterView.getItemAtPosition(position);
		Toast.makeText(this, str, Toast.LENGTH_SHORT).show();
	}

	public static ArrayList autocomplete(String input) {
		ArrayList resultList = null;

		HttpURLConnection conn = null;
		StringBuilder jsonResults = new StringBuilder();
		try {
			StringBuilder sb = new StringBuilder(PLACES_API_BASE + TYPE_AUTOCOMPLETE + OUT_JSON);
			sb.append("?key=" + API_KEY);
			sb.append("&components=country:gr");
			sb.append("&input=" + URLEncoder.encode(input, "utf8"));

			URL url = new URL(sb.toString());
			conn = (HttpURLConnection) url.openConnection();
			InputStreamReader in = new InputStreamReader(conn.getInputStream());

			// Load the results into a StringBuilder
			int read;
			char[] buff = new char[1024];
			while ((read = in.read(buff)) != -1) {
				jsonResults.append(buff, 0, read);
			}
		} catch (MalformedURLException e) {
			Log.e(LOG_TAG, "Error processing Places API URL", e);
			return resultList;
		} catch (IOException e) {
			Log.e(LOG_TAG, "Error connecting to Places API", e);
			return resultList;
		} finally {
			if (conn != null) {
				conn.disconnect();
			}
		}

		try {
			// Create a JSON object hierarchy from the results
			JSONObject jsonObj = new JSONObject(jsonResults.toString());
			JSONArray predsJsonArray = jsonObj.getJSONArray("predictions");

			// Extract the Place descriptions from the results
			resultList = new ArrayList(predsJsonArray.length());
			for (int i = 0; i < predsJsonArray.length(); i++) {
				System.out.println(predsJsonArray.getJSONObject(i).getString("description"));
				System.out.println("============================================================");
				resultList.add(predsJsonArray.getJSONObject(i).getString("description"));
			}
		} catch (JSONException e) {
			Log.e(LOG_TAG, "Cannot process JSON results", e);
		}

		return resultList;
	}

	class GooglePlacesAutocompleteAdapter extends ArrayAdapter implements Filterable {
		private ArrayList resultList;

		public GooglePlacesAutocompleteAdapter(Context context, int textViewResourceId) {
			super(context, textViewResourceId);
		}

		@Override
		public int getCount() {
			return resultList.size();
		}

		@Override
		public String getItem(int index) {
			return resultList.get(index);
		}

		@Override
		public Filter getFilter() {
			Filter filter = new Filter() {
				@Override
				protected FilterResults performFiltering(CharSequence constraint) {
					FilterResults filterResults = new FilterResults();
					if (constraint != null) {
						// Retrieve the autocomplete results.
						resultList = autocomplete(constraint.toString());

						// Assign the data to the FilterResults
						filterResults.values = resultList;
						filterResults.count = resultList.size();
					}
					return filterResults;
				}

				@Override
				protected void publishResults(CharSequence constraint, FilterResults results) {
					if (results != null && results.count > 0) {
						notifyDataSetChanged();
					} else {
						notifyDataSetInvalidated();
					}
				}
			};
			return filter;
		}
	}
}
5. Android Manifest
In order to call execute this call, we should have access to the Internet. This must be specified in the manifest, so that, our application will be granted the permission to use the Internet connection. The AndroidManifest.xml of our project is simple and contains the permissions:
AndroidManifest.xml
<manifest xmlns:android="http://schemas.android.com/apk/res/android"
    package="com.javacodegeeks.androidgoogleplacesautocomplete"
    android:versionCode="1"
    android:versionName="1.0" >

    <uses-permission android:name="android.permission.INTERNET" />

    <uses-sdk
        android:minSdkVersion="8"
        android:targetSdkVersion="21" />

    <application
        android:allowBackup="true"
        android:icon="@drawable/ic_launcher"
        android:label="@string/app_name" >
        <activity
            android:name="com.javacodegeeks.googleplacesautocomplete.GooglePlacesAutocompleteActivity"
            android:label="@string/app_name" >
            <intent-filter>
                <action android:name="android.intent.action.MAIN" />

                <category android:name="android.intent.category.LAUNCHER" />
            </intent-filter>
        </activity>
    </application>
</manifest>
5. Build, compile and run
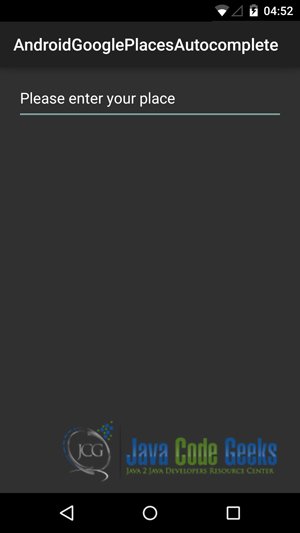
When we build, compile and run our project, the main Google Places Autocomplete API should look like this:

Download the Eclipse Project
This was an example of Android Google Places Autocomplete API.
You can download the full source code of this example here: Google Places Autocomplete API

After Runing the Code ….not showing any list ..it only worrk asa edittext
Did u got ur error solved ?
Hey Guys , Just remove or comment ‘sb.append(“&components=country:gr”);’ from java file.
for more help contact me :)