When we want to create an Android application that has an Android Activity inside of which we are planning to play a video file, we should consider in the first place Android VideoView class.
The VideoView class manages and displays a video file for applications and can load images from various sources (such as resources or content providers), taking care of computing its measurement from the video so that it can be used in any layout manager, providing display options such as scaling and tinting.
However, VideoView does not retain its full state when going into the background. In particular, it does not restore the current play state and play position. Applications should save and restore these on their own in onSaveInstanceState(Bundle) and onRestoreInstanceState(Bundle).
So, in this example, we will make an Activity that can play a 3gp video file, in portrait and landscape view, and if we pause the activity and put it in the background and later on resume it, the videoclip will be played from the play position that it was stopped.
For this tutorial, we will use the following tools in a Windows 64-bit platform:
- JDK 1.7
- Eclipse 4.2 Juno
- Android SDK 4.4
Let’s take a closer look:
1. Create a New Android Application Project
You may skip project creation and jump directly to the beginning of the example below.
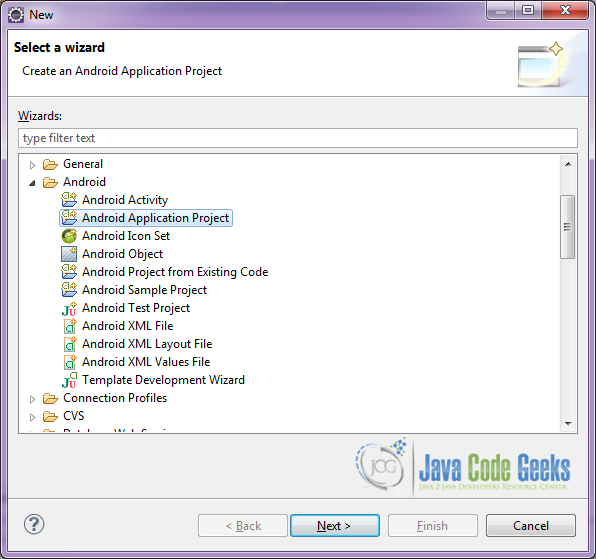
Open Eclipse IDE and go to File → New → Project → Android Application Project.
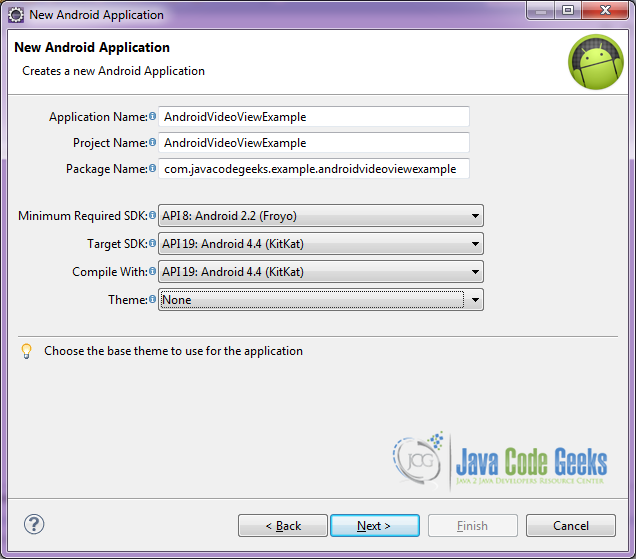
Specify the name of the application, the project and the package and then click Next.
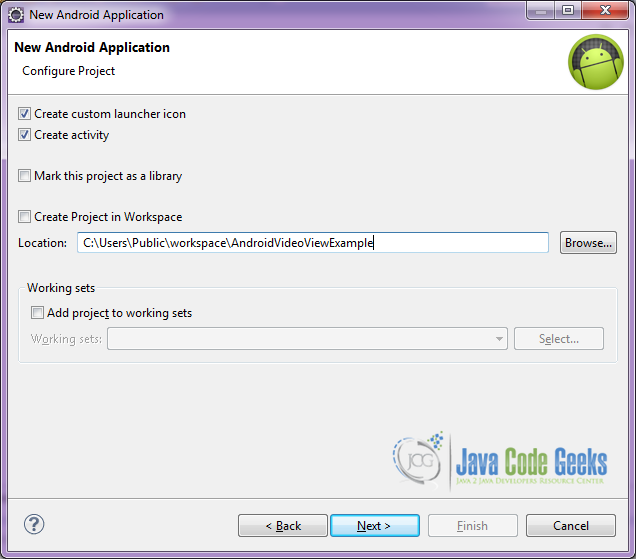
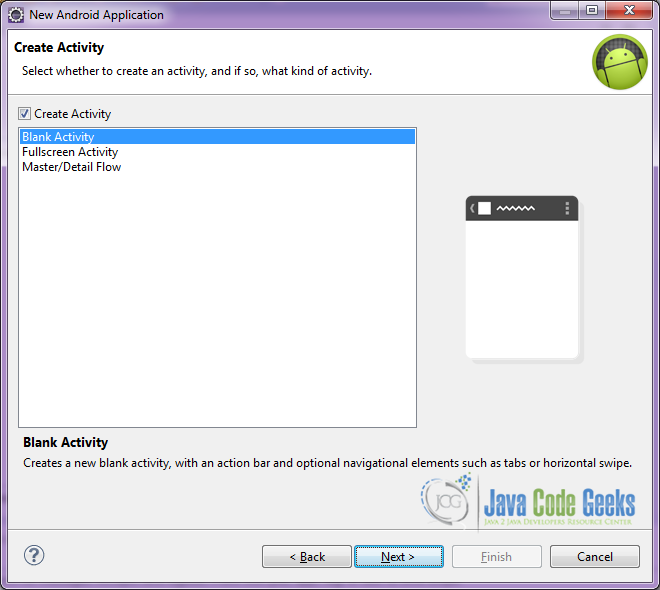
In the next window, the “Create Activity” option should be checked. The new created activity will be the main activity of your project. Then press Next button.
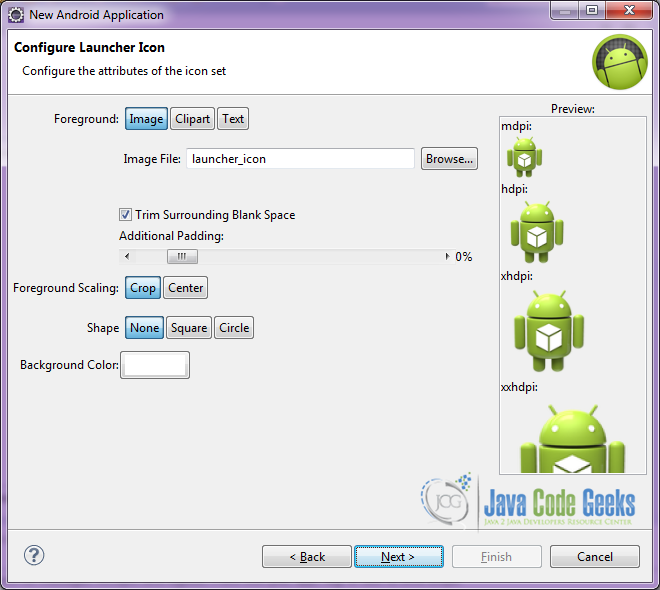
In “Configure Launcher Icon” window you should choose the icon you want to have in your app. We will use the default icon of android, so click Next.
Select the “Blank Activity” option and press Next.
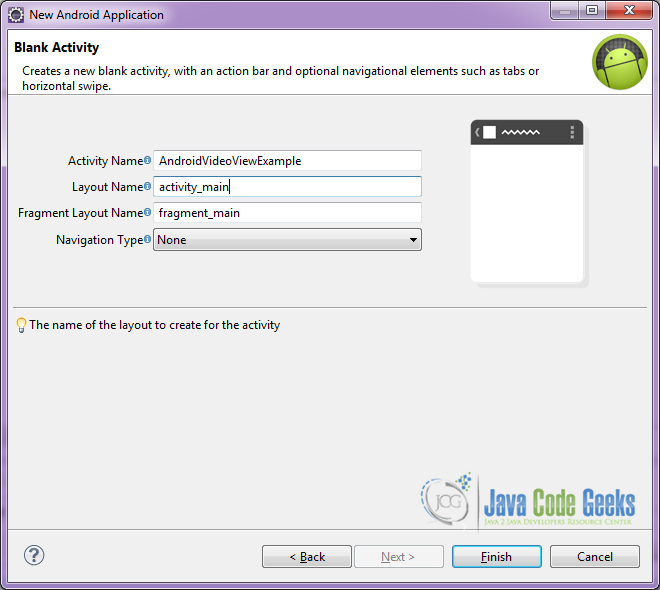
You have to specify a name for the new Activity and a name for the layout description of your app. The .xml file for the layout will automatically be created in the res/layout folder. It will also be created a fragment layout xml, that we are not going to use in this project and you can remove it if you want. Then press Finish.
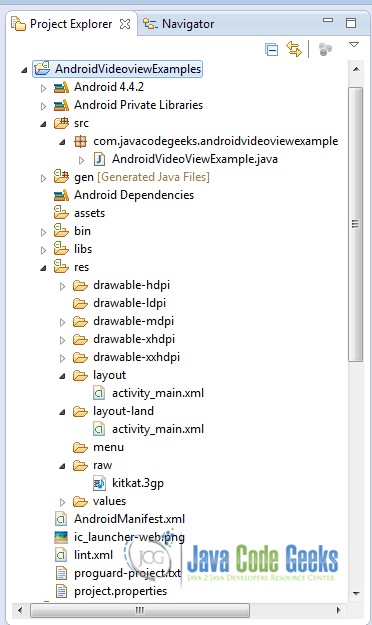
You can see the structure of the project:
2. Creating the layout of the main Activity
We are going to make a very simple layout xml, that only consists of a FrameLayout and the VideoView. However, we should keep in mind, that the video file that we want to play, should be capable of playing either in portrait, or landscape orientation.
Generally, in Android Development, we can use as many layouts as we want, even if we want to use each one for each different resolution and every different orientation. The main idea is to have more than one main layout, with the same file name but in different
res folders, each one for each different resolution and every different orientation.In our example, we don’t want to lock our activity on one orientation and we want to be capable of video playback even if we turn our mobile device on landscape. In order to achieve this, we are going to have two different layouts, with the same name, but with different properties. First of all, we have to create the folder res/layout-land/activity_main.xml in the res folder of the project.
Open res/layout/activity_main.xml, go to the respective xml tab and paste the following:
activity_main.xml
<?xml version="1.0" encoding="utf-8"?>
 <FrameLayout xmlns:android="http://schemas.android.com/apk/res/android"
   android:layout_width="fill_parent"
   android:layout_height="fill_parent"
   android:layout_gravity="center" >

     <VideoView
        android:id="@+id/video_view"
        android:layout_width="match_parent"
        android:layout_height="wrap_content"
        android:layout_gravity="center"/>

  </FrameLayout>
For our landscape layout we should make a new xml in the layout-land folder res/layout-land/activity_main.xml, and paste the following:
activity_main.xml
<?xml version="1.0" encoding="utf-8"?>
 <FrameLayout xmlns:android="http://schemas.android.com/apk/res/android"
   android:layout_width="fill_parent"
   android:layout_height="fill_parent"
   android:layout_gravity="center" >

     <VideoView
        android:id="@+id/video_view"
        android:layout_width="wrap_content"
        android:layout_height="match_parent"
        android:layout_gravity="center"/>

  </FrameLayout>
In this manner, we are going to have, two different layouts, with the same name and with the same views, but with different properties. In this way, our activity will choose the right layout for the exact need. For instance, when we turn our mobile device in landscape mode, the activity will use the res/layout-land/activity_main.xml from the layout-land folder and adjust the video in the right proportions.
In fact, the differences between the two layouts, can be found only in the
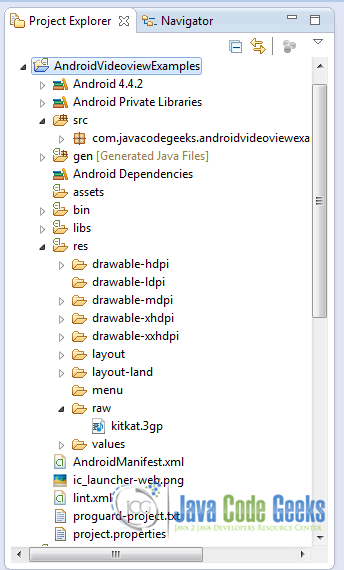
layout_width and layout_height of the VideoView. This minor change can also be done programmatically, if we use the onOrientationChanged() method from OrientationEventListener.Also, do not forget to insert a video clip in the res/raw folder of the project. We have dragged and dropped the kitkat.3gp file.
3. Creating the source code of the main Activity
Open src/com.javacodegeeks.androidvideoviewexample/AndroidVideoViewExample.java file and paste the code below.
AndroidVideoViewExample.java
package com.javacodegeeks.androidvideoviewexample;

import android.app.Activity;
import android.app.ProgressDialog;
import android.content.res.Configuration;
import android.media.MediaPlayer;
import android.media.MediaPlayer.OnPreparedListener;
import android.net.Uri;
import android.os.Bundle;
import android.util.Log;
import android.widget.MediaController;
import android.widget.VideoView;

public class AndroidVideoViewExample extends Activity {

	private VideoView myVideoView;
	private int position = 0;
	private ProgressDialog progressDialog;
	private MediaController mediaControls;

	@Override
	protected void onCreate(final Bundle savedInstanceState) {
		super.onCreate(savedInstanceState);

		// set the main layout of the activity
		setContentView(R.layout.activity_main);

		//set the media controller buttons
		if (mediaControls == null) {
			mediaControls = new MediaController(AndroidVideoViewExample.this);
		}

		//initialize the VideoView
		myVideoView = (VideoView) findViewById(R.id.video_view);

		// create a progress bar while the video file is loading
		progressDialog = new ProgressDialog(AndroidVideoViewExample.this);
		// set a title for the progress bar
		progressDialog.setTitle("JavaCodeGeeks Android Video View Example");
		// set a message for the progress bar
		progressDialog.setMessage("Loading...");
		//set the progress bar not cancelable on users' touch
		progressDialog.setCancelable(false);
		// show the progress bar
		progressDialog.show();

		try {
			//set the media controller in the VideoView
			myVideoView.setMediaController(mediaControls);

			//set the uri of the video to be played
			myVideoView.setVideoURI(Uri.parse("android.resource://" + getPackageName() + "/" + R.raw.kitkat));

		} catch (Exception e) {
			Log.e("Error", e.getMessage());
			e.printStackTrace();
		}

		myVideoView.requestFocus();
		//we also set an setOnPreparedListener in order to know when the video file is ready for playback
		myVideoView.setOnPreparedListener(new OnPreparedListener() {

			public void onPrepared(MediaPlayer mediaPlayer) {
				// close the progress bar and play the video
				progressDialog.dismiss();
				//if we have a position on savedInstanceState, the video playback should start from here
				myVideoView.seekTo(position);
				if (position == 0) {
					myVideoView.start();
				} else {
					//if we come from a resumed activity, video playback will be paused
					myVideoView.pause();
				}
			}
		});

	}

	@Override
	public void onSaveInstanceState(Bundle savedInstanceState) {
		super.onSaveInstanceState(savedInstanceState);
		//we use onSaveInstanceState in order to store the video playback position for orientation change
		savedInstanceState.putInt("Position", myVideoView.getCurrentPosition());
		myVideoView.pause();
	}

	@Override
	public void onRestoreInstanceState(Bundle savedInstanceState) {
		super.onRestoreInstanceState(savedInstanceState);
		//we use onRestoreInstanceState in order to play the video playback from the stored position
		position = savedInstanceState.getInt("Position");
		myVideoView.seekTo(position);
	}
}
Let’s see in detail the code above.
We set the activity_main.xml layout and the VideoView: in our Android Activity AndroidVideoViewExample, by:
setContentView(R.layout.activity_main);
myVideoView = (VideoView) findViewById(R.id.video_view);
and if we want to use media controls, such as play, pause and forward, we have to add MediaController class by adding the component in the Activity:
if (mediaControls == null) {
      mediaControls = new MediaController(AndroidVideoViewExample.this);
}
myVideoView.setMediaController(mediaControls);
The video clip starts and stops with the methods:
 myVideoView.start();
myVideoView.pause();
myVideoView.resume();
myVideoView.seekTo(position); //when we want the video to start from a certain point
We have also added a ProgressDialog that will show up until the video is completely loaded.
progressDialog = new ProgressDialog(AndroidVideoViewExample.this);
progressDialog.setTitle("JavaCodeGeeks Android Video View Example");
progressDialog.setMessage("Loading...");
progressDialog.setCancelable(false);
progressDialog.show();
You can see more about the android ProgressDialog in our previous example: Android ProgressDialog Example.
Also, in order to catch the loaded video file event, we have added an OnPreparedListener on our VideoView.
myVideoView.setOnPreparedListener(new OnPreparedListener() {
      public void onPrepared(MediaPlayer mediaPlayer) {

      // close the progress bar and play the video
      progressDialog.dismiss();
      myVideoView.seekTo(position);

      if (position == 0) {
              myVideoView.start();
      } else {
              myVideoView.pause();
      }
   }
});
Here is a bit more tricky point. If you compile and run the application at this point, the video clip will be played, but if you rotate your mobile device, or if you put the activity in the background and then resume, the video will restart. In order to prevent this awkward behavior, we are going to insert two methods, that will help us retain the state of the video file, when rotating and resuming our activity. The methods that we are going to use are: onSaveInstanceState() and onRestoreInstanceState().
We will use onSaveInstanceState() in order to store the video playback position:
@Override
public void onSaveInstanceState(Bundle savedInstanceState) {
      super.onSaveInstanceState(savedInstanceState);
      savedInstanceState.putInt("Position", myVideoView.getCurrentPosition());
      myVideoView.pause();
}
And we will use onRestoreInstanceState() in order to play the video playback from the stored position:
@Override
public void onRestoreInstanceState(Bundle savedInstanceState) {
      super.onRestoreInstanceState(savedInstanceState);
      position = savedInstanceState.getInt("Position");
      myVideoView.seekTo(position);
}
4. Android Manifest
In order to make our activity rotetable, we have to add to the activity tag in the AndroidManifest.xml the following line: android:configChanges="orientation"
AndroidManifest.xml
<?xml version="1.0" encoding="utf-8"?>
<manifest xmlns:android="http://schemas.android.com/apk/res/android"
    package="com.example.javacodegeeks.androidvideoviewexample"
    android:versionCode="1"
    android:versionName="1.0" >

    <uses-sdk
        android:minSdkVersion="8"
        android:targetSdkVersion="19" />

    <application
        android:allowBackup="true"
        android:icon="@drawable/ic_launcher"
        android:label="@string/app_name">
        <activity
            android:name="com.example.javacodegeeks.androidvideoviewexample.AndroidVideoViewExample"
            android:label="@string/app_name"
            android:configChanges="orientation">
            <intent-filter>
                <action android:name="android.intent.action.MAIN"/>
                <category android:name="android.intent.category.LAUNCHER"/>
            </intent-filter>
        </activity>
    </application>
</manifest>
5. Build, compile and run
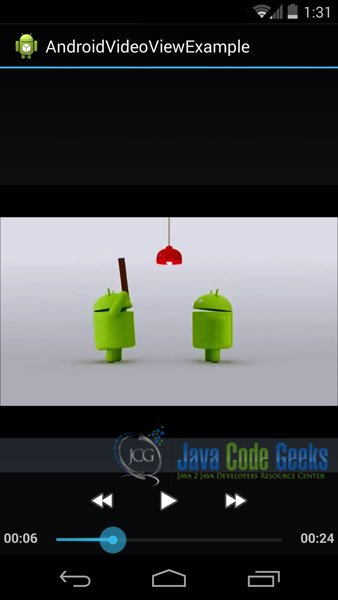
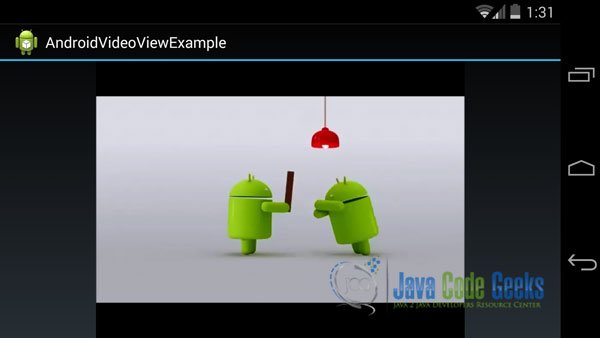
When we build, compile and run our project, the main Activity should look like this:
You should click and play, stop, forward the video clip, and also rotate your mobile device without stopping or restarting the playback. You can also put the activity in the background, and then resume it, without restarting the video!
Download the Eclipse Project
This was an example of Android VideoView.
You can download the full source code of this example here: VideoView.zip




hey may u help me please! i do write exact code as u did but still when user press home button and get back to the application the video disappear and he have to restart it again…. any help about this?