Hi there! Today we ‘re gonna talk about trees’ implementation, according to JSF 2.0. We all know that JSF is here to ease the server-side user interfaces development, but when it comes to trees, things are getting somehow complicated: JSF does not have a default tree component, so we have to “extend” the framework’s functionality/implementation, by combining it with a framework that supports tree visualization. Relative frameworks that support tree visualization are PrimeFaces, RichFaces and IceFaces.
We ‘ll go for PrimeFaces, due to the following pros:
- Easy to use.
- Practical documentation.
- Developers’ trend.
- The fastest library.
What today’s example examines is a simple tree view with three nodes attached (we ‘ll refer to its children details in a next section).
1. Project Environment
This example was implemented using the following tools:
- JSF 2.2
- Maven 3.1
- Eclipse 4.4 (Luna)
- JDK 1.8
- Apache Tomcat 8.0.15
Just like any other of my previous JSF examples, you need to create a Dynamic Web Project with Maven and JSF should be included in it. At any case, if you don’t remember some configurations, consult my very first example according to JSF.
However, there is a specific configuration that needs to be done, in order to get up and running with JSF+PrimeFaces. For those of you, that you ‘re now aware of what’s going on, please consult this post.
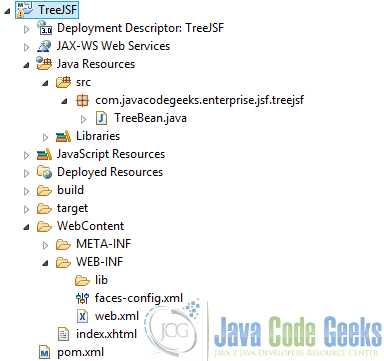
This is the project’s final structure, just to ensure that you won’t get lost anytime:
2. Managed Bean
Let’s first create our tree’s structure programmatically. Suppose our tree looks like below:
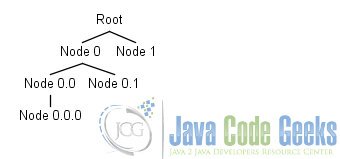
This is translated to the following code:
TreeBean.java
package com.javacodegeeks.enterprise.jsf.treejsf;

import java.io.Serializable;

import javax.annotation.PostConstruct;
import javax.faces.bean.ManagedBean;
import javax.faces.bean.SessionScoped;

import org.primefaces.model.DefaultTreeNode;
import org.primefaces.model.TreeNode;

@ManagedBean(name="treeBean")
@SessionScoped
public class TreeBean implements Serializable {

	private static final long serialVersionUID = 3350653785168926842L;
	private TreeNode root;

    @PostConstruct
    public void init() {
        root = new DefaultTreeNode("Root", null);
        TreeNode node0 = new DefaultTreeNode("Node 0", root);
        TreeNode node00 = new DefaultTreeNode("Node 0.0", node0);

        node00.getChildren().add(new DefaultTreeNode("Node 0.0.0"));
        node0.getChildren().add(new DefaultTreeNode("Node 0.1"));

        root.getChildren().add(new DefaultTreeNode("Node 1"));
    }

    public TreeNode getRoot() {
        return root;
    }
}
First of all, in line 12, we give a name to our bean, in order to easily inject its functionality from the front-end (the corresponding JSF page).
Secondly, we define the tree’s root, in lines 17, 21. Having defined our root, we create the two basic nodes, node 0 (line 22) and node 1 (line 28). For the first one, we have to create a separate TreeNode, as we need to use its reference, in order to create its children. As for the second one (node 1), we just have to add a new node to the root and that’s why we just add a new child reference, with the name of “Node 1”.
Following the fore-mentioned logic, one could easily understand the creation/development of the rest of nodes.

3. JSF Page
index.xhtml
<?xml version="1.0" encoding="UTF-8"?>
<!DOCTYPE html PUBLIC "-//W3C//DTD XHTML 1.0 Transitional//EN"
"http://www.w3.org/TR/xhtml1/DTD/xhtml1-transitional.dtd">
<html xmlns="http://www.w3.org/1999/xhtml"
      xmlns:h="http://java.sun.com/jsf/html"
      xmlns:f="http://java.sun.com/jsf/core"
    xmlns:p="http://primefaces.org/ui">
 	<h:head>
        <title>JSF Tree Example</title>
    </h:head>
    <h:body>
    	<h:form>
    		<h3>JSF 2.2 Tree Example</h3>
		    <p:tree value="#{treeBean.root}" var="node" dynamic="true">
		        <p:treeNode>
		            <h:outputText value="#{node}" />
		        </p:treeNode>
		    </p:tree>
      	</h:form>
    </h:body>
</html>
We here define a PrimeFaces tree (line 14) and assign the root value to our ManagedBean. Actually, this means that we have assigned a TreeNode instance as a backing model.
What the var attribute does, is defining the name of the requested scope variable that will be used to refer each TreeNode data (so, that’s why we chose a prefix of “node” for each node, in the TreeBean.java managed bean). The dynamic attribute specifies the ajax/client toggleMode.
So, having declared our tree’s root, we iterate each tree node, through the scoped variable “node” using an outputText JSF tag (inside a PrimeFaces’ treeNode tag) and let the managed bean decide whether or not it is about a node or a leaf.
4. Demo
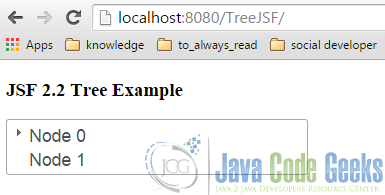
Hitting the url of our newly created project, results to the default structure of our tree:
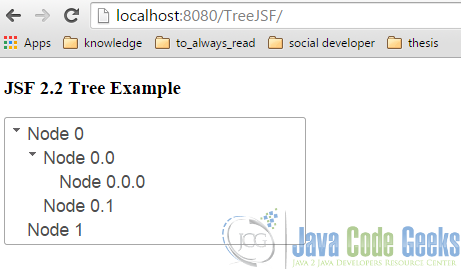
Expanding each node (that is expandable), results to the following view:
5. Download the Eclipse Project
This was an example of JSF Tree.
You can download the full source code of this example here : TreeJSF.zip
