Hello, in the previous example we learned how to create a JSF Bootstrap application. In this tutorial we will implement the CRUD operations and will use bootstrap – a responsive CSS framework to demonstrate the following:
- Student Form
- Database Operations
- Sending and retrieving data to and from a managed bean
This example will show how to develop a simple CRUD (Create, Read, Update, Delete) by using JSF2, Bootstrap, and MySQL.
Table Of Contents
1. Introduction
CRUD means the basic operations to be done in a data repository. It directly handles records or data objects; apart from these operations, the records are passive entities.
We will have following components in our database application:
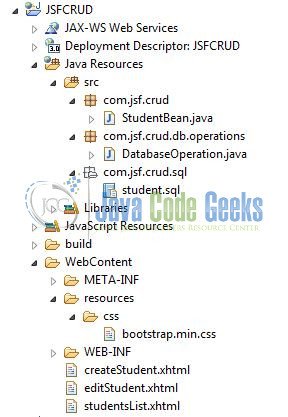
- StudentBean.java – Managed bean class for the students
- DatabaseOperation.java – Class used to connect with database to perform the db related operations
- createStudent.xhtml – Page used to create the new student record
- editStudent.xhtml – Page used for editing / updating the student details
- studentsList.xhtml – Page with a list of all students
This application lets you manage student’s database such as add new student and update/delete student information. But before we create the crud enabled JSF application, let’s take a look at the crud operations.
1.1 CRUD Operations
CRUD stands for Create, Read, Update and Delete. These functions are the user interfaces to databases, as they permit users to create, view, modify and alter data. CRUD works on entities in databases and manipulates these entities.
For instance, a simple student database table adds (creates) new student details, accesses (reads) existing student details, modifies (updates) existing student data, and deletes student details when students leave the school.
The commands corresponding to these operations in SQL are INSERT, SELECT, UPDATE and DELETE. INSERT adds new records, SELECT retrieves or selects existing records based on selection conditions, UPDATE modifies existing records and DELETE removes tables or records in a table.
1.2 CRUD Benefits
Using the database operations in your applications has some advantages i.e.
- Improves data security and data access to users by using host and query languages
- Greater data integrity and independence of applications programs
- Improves application performance by reducing the data redundancy
1.3 Download and Install MySQL
You can watch this video in order to download and install the MySQL database on your windows operations system.
Now, open up the eclipse IDE and let’s start building the application!
2. JSF CRUD Example
2.1 Tools Used
We are using Eclipse Kepler SR2, JDK 8 (1.8.0_131), Tomcat7 application server, MySQL database and MySQL connector jar. Having said that, we have tested the code against JDK 1.7 and it works well.
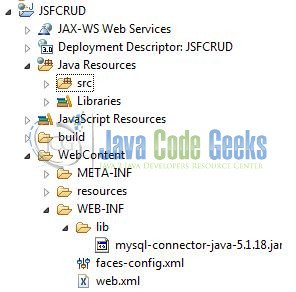
2.2 Project Structure
First, let’s review the final project structure, in case you are confused about where you should create the corresponding files or folder later!
You may skip project creation and jump directly to the beginning of the example below.
2.3 Project Creation
The below example shows how to use database and bootstrap in a sample application. With bootstrap classes, the magic happens where the boring looking student form turns into a beautiful layout with all the CSS classes applied and MySQL db will allow the student details to be saved in a database.
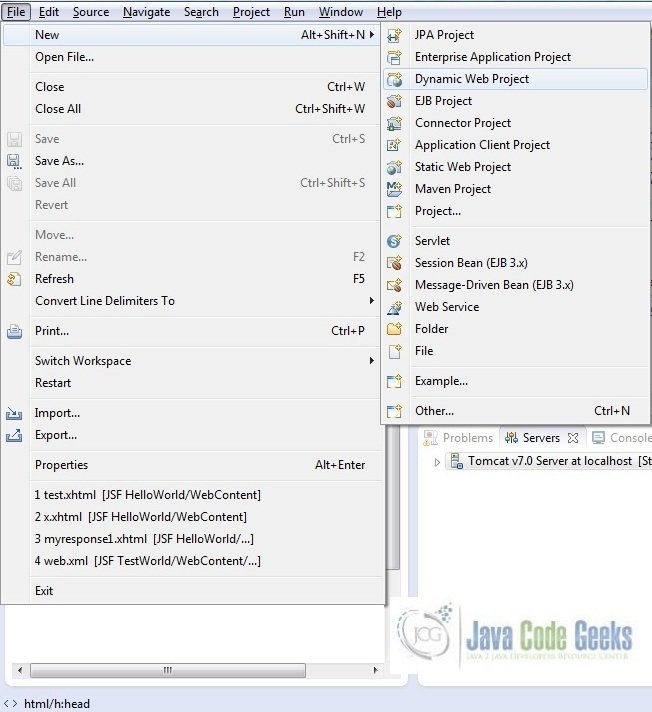
But before proceeding with the application building, let’s understand on how to create a Dynamic Web Java project with Eclipse. In eclipse IDE, go to File -> New -> Dynamic web project
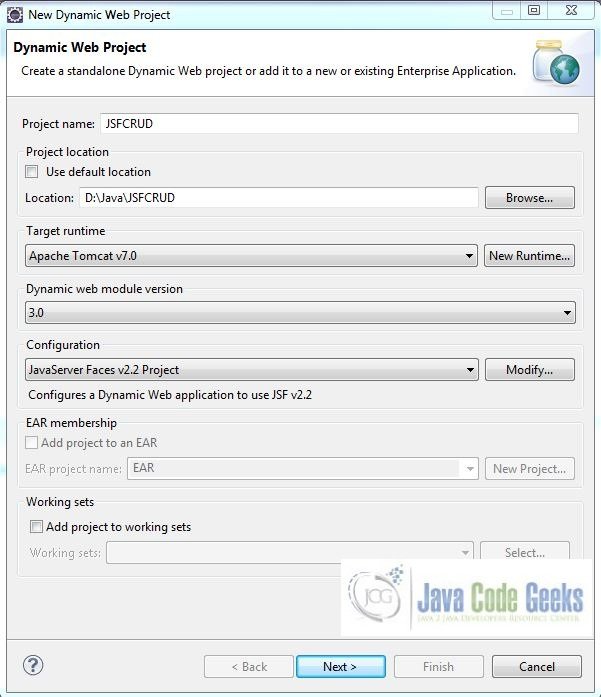
In the New Dynamic Project window fill in the below details and click next
- Enter the project name and project location
- Select Target runtime as Apache Tomcat v7.0 from dropdown
- Select Configuration as JavaServer Faces v.2.2 Project from dropdown (this is required to download the java server faces capabilities in your project)
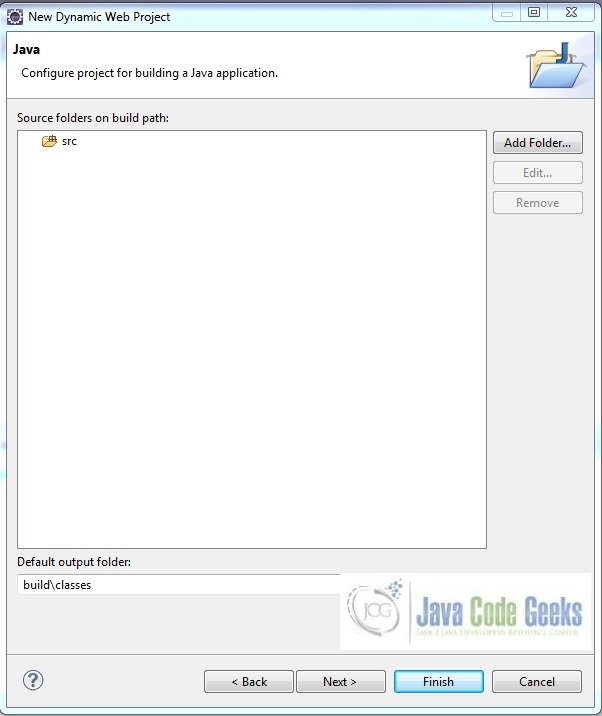
Leave everything as default in this window as we will be making the required java file at a later stage. Simply click next and we will land up on the web-module window
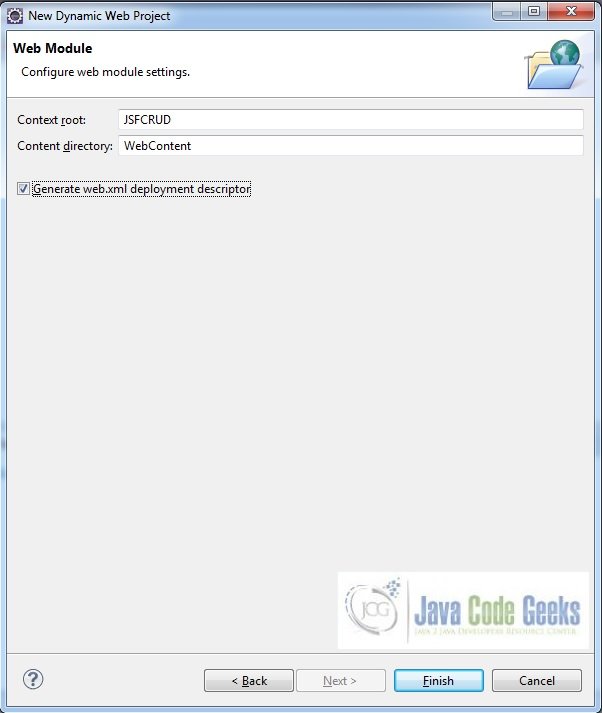
In the Web Module window, leave the context_root and content_directory values as default (however, you can change the context_root but for the first application let’s keep it as a default value). Simply, check Generate web.xml deployment descriptor checkbox and click next
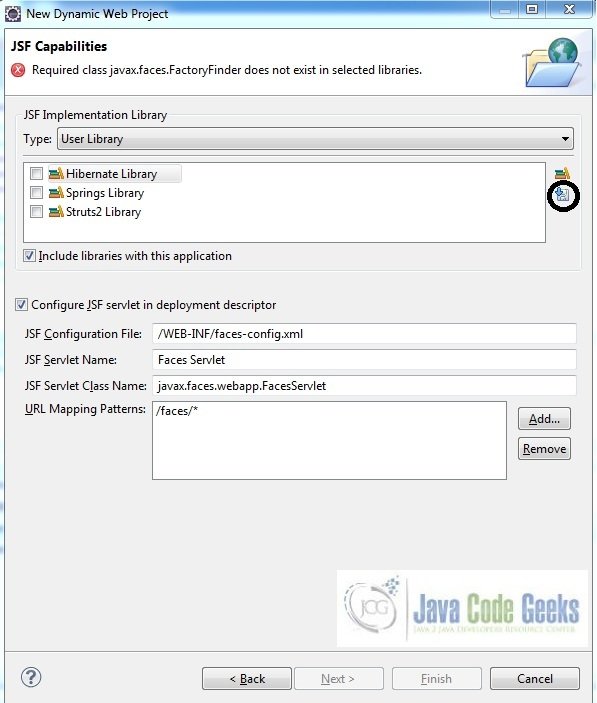
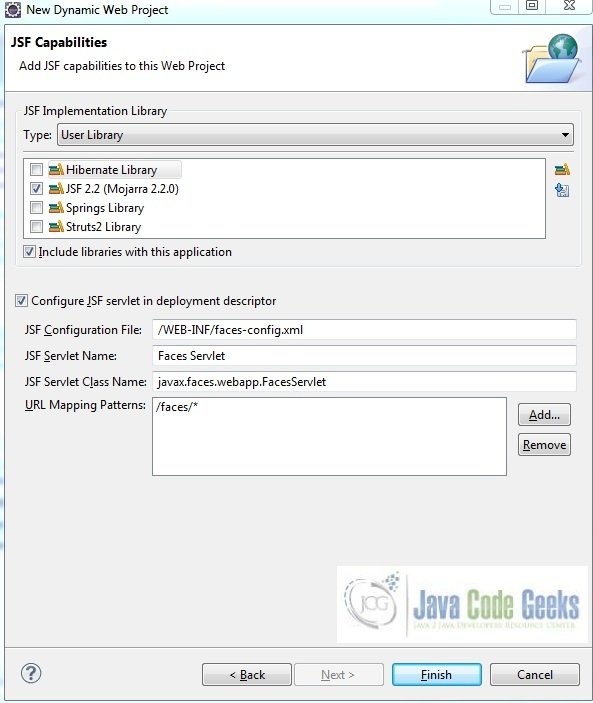
In the JSF Capabilities windows, we will require downloading the dependencies (not available by default) so that our project is configured as a JSF module in Eclipse. Add the JSF capabilities to the web project by clicking on the download icon (encircled in fig. 5) and download the JSF 2.2 mojarra implementation
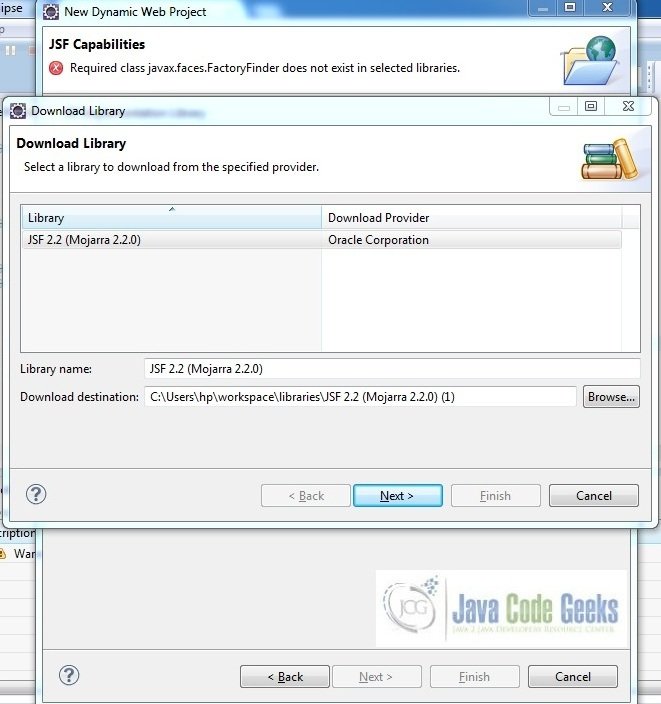
A new pop-up window will open where it will auto lists down the JSF library. Select the JSF 2.2 library and click next (the library name and download destination will be auto populated)
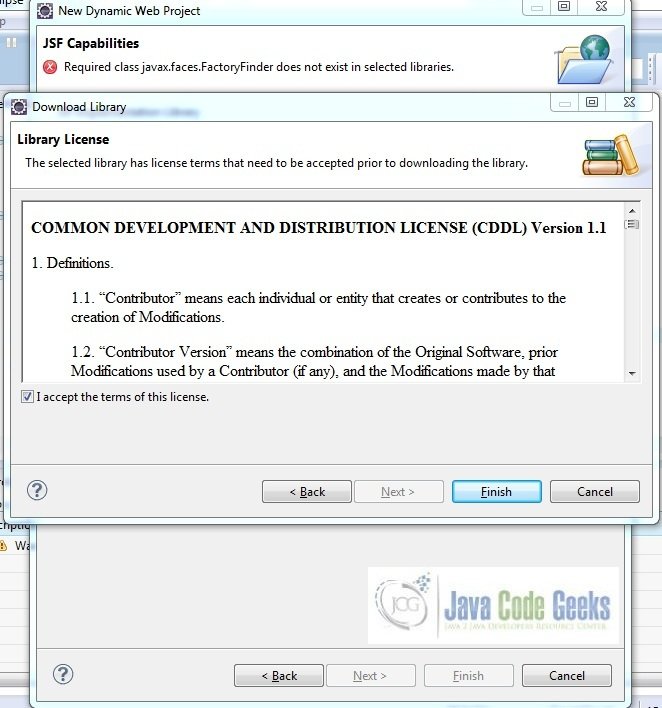
Check the license checkbox and click finish. Eclipse will download the JSF 2.2 library and will display them on the JSF capabilities windows (i.e. Fig. 6)
Now the JSF implementation libraries will be listed down on the capabilities page. Select the checkbox (JSF2.2 (Mojarra 2.2.0)) and leave everything else as default. Click Finish
Eclipse will create the project named JSFCRUD in the workspace and web.xml will be configured for accepting the JSF requests. It will have the following code:
web.xml
<?xml version="1.0" encoding="UTF-8"?>
<web-app xmlns:xsi="http://www.w3.org/2001/XMLSchema-instance" xmlns="http://java.sun.com/xml/ns/javaee" xsi:schemaLocation="http://java.sun.com/xml/ns/javaee http://java.sun.com/xml/ns/javaee/web-app_3_0.xsd" id="WebApp_ID" version="3.0">
  <display-name>JSFCRUD</display-name>
  <welcome-file-list>
    <welcome-file>index.html</welcome-file>
    <welcome-file>index.htm</welcome-file>
    <welcome-file>index.jsp</welcome-file>
    <welcome-file>default.html</welcome-file>
    <welcome-file>default.htm</welcome-file>
    <welcome-file>default.jsp</welcome-file>
  </welcome-file-list>
  <servlet>
    <servlet-name>Faces Servlet</servlet-name>
    <servlet-class>javax.faces.webapp.FacesServlet</servlet-class>
    <load-on-startup>1</load-on-startup>
  </servlet>
  <servlet-mapping>
    <servlet-name>Faces Servlet</servlet-name>
    <url-pattern>/faces/*</url-pattern>
  </servlet-mapping>
  <context-param>
    <description>State saving method: 'client' or 'server' (=default). See JSF Specification 2.5.2</description>
    <param-name>javax.faces.STATE_SAVING_METHOD</param-name>
    <param-value>client</param-value>
  </context-param>
  <context-param>
    <param-name>javax.servlet.jsp.jstl.fmt.localizationContext</param-name>
    <param-value>resources.application</param-value>
  </context-param>
  <listener>
    <listener-class>com.sun.faces.config.ConfigureListener</listener-class>
  </listener>
</web-app>
2.4 Download & Install MySQL Connector Jar
Download the MySQL-connection jar from here and copy it in the project’s WEB-INF lib folder as per below image:
Now let’s start building the application!
3. Application Building
Following are the steps involved in developing this application:
3.1 Database & Table Creation
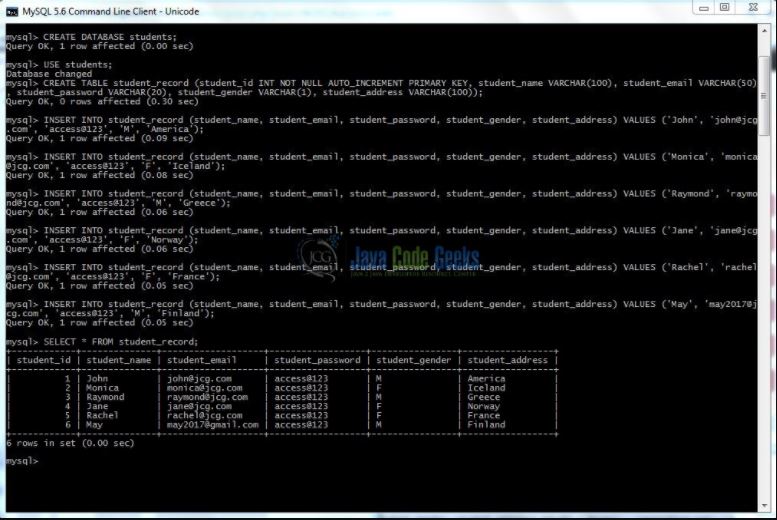
This tutorial uses a database called students. The database is not included when you create the project in eclipse so you need to first create the database to follow this tutorial:
- Create a new database
studentsas:
CREATE DATABASE students;
- Use the created database
studentsto create table as:
USE students;
- Create the table
student_recordas shown below:
CREATE TABLE student_record (
student_id INT NOT NULL AUTO_INCREMENT PRIMARY KEY,
student_name VARCHAR(100),
student_email VARCHAR(50),
student_password VARCHAR(20),
student_gender VARCHAR(1),
student_address VARCHAR(100));
- Now we shall insert some values into the
student_recordtable as:
INSERT INTO student_record (student_name, student_email, student_password, student_gender, student_address) VALUES ('John', 'john@jcg.com', 'access@123', 'M', 'America');

INSERT INTO student_record (student_name, student_email, student_password, student_gender, student_address) VALUES ('Monica', 'monica@jcg.com', 'access@123', 'F', 'Iceland');

INSERT INTO student_record (student_name, student_email, student_password, student_gender, student_address) VALUES ('Raymond', 'raymond@jcg.com', 'access@123', 'M', 'Greece');

INSERT INTO student_record (student_name, student_email, student_password, student_gender, student_address) VALUES ('Jane', 'jane@jcg.com', 'access@123', 'F', 'Norway');

INSERT INTO student_record (student_name, student_email, student_password, student_gender, student_address) VALUES ('Rachel', 'rachel@jcg.com', 'access@123', 'F', 'France');

INSERT INTO student_record (student_name, student_email, student_password, student_gender, student_address) VALUES ('May', 'may2017@gmail.com', 'access@123', 'M', 'Finland');
- View
student_recordtable records as:
SELECT * FROM student_record;
If everything goes well, the records will be shown as below in the MySQL workbench
3.2 Implementation of Bootstrap
In order to use these files, we need to make a little change to the bootstrap.min.css so that the fonts are available to CSS file. This is a little hack which we shall use in case we want to use the glyphicons or the icons on the page
In the bootstrap.min.css file we have to change the reference to the font files from relative path to absolute path of our application, for example we changed:
url(../fonts/ to url(/JSCRUD/resources/fonts/
This will make sure the font files are available no matter how the CSS in included in the web page. We are using the h:outputStylesheet tag of JSF to include the style sheet as you can see in the code below. This is good way to include the stylesheet or script (h:outputScript) in the JSF page
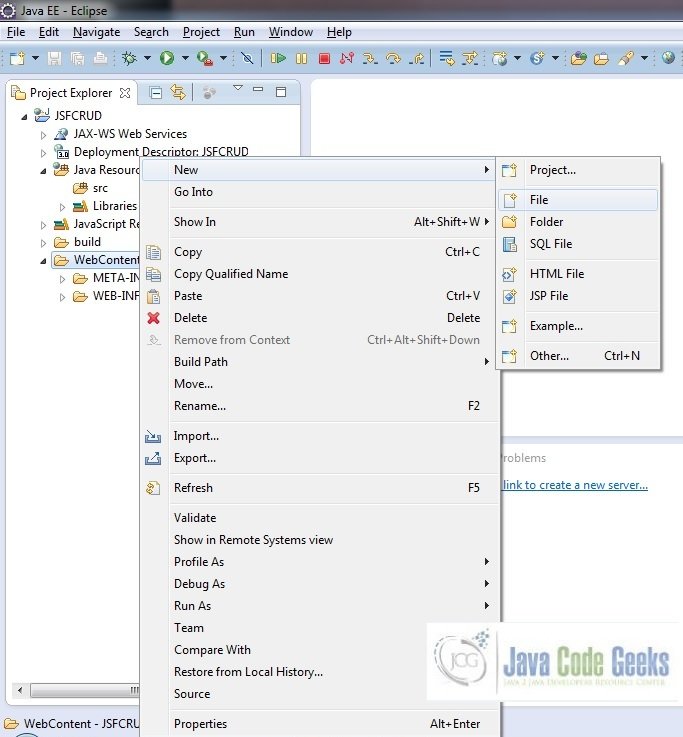
3.3 File Creation
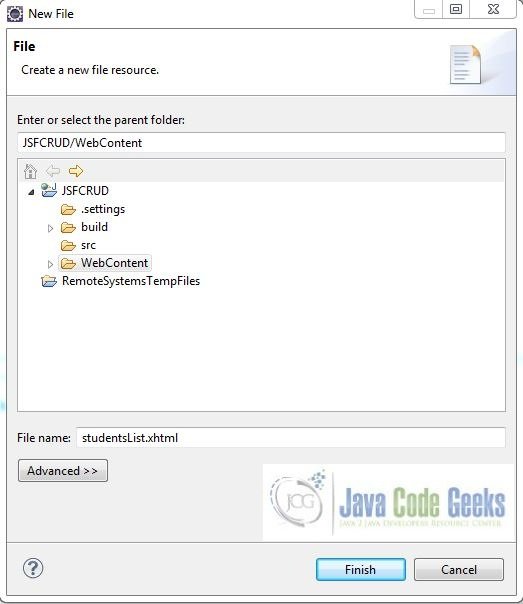
For the demo, we will have an output file displaying the student’s list and the input files for creating, editing and updating a student record. Right click on project WebContent -> New -> File
Note: In JSF 2.0, it’s recommended to create a JSF page in xhtml format, a file format with .xhtml extension
A pop-up window will open, verify the parent folder location as JSFCRUD/WebContent and enter the file name (studentsList.xhtml) and click Finish
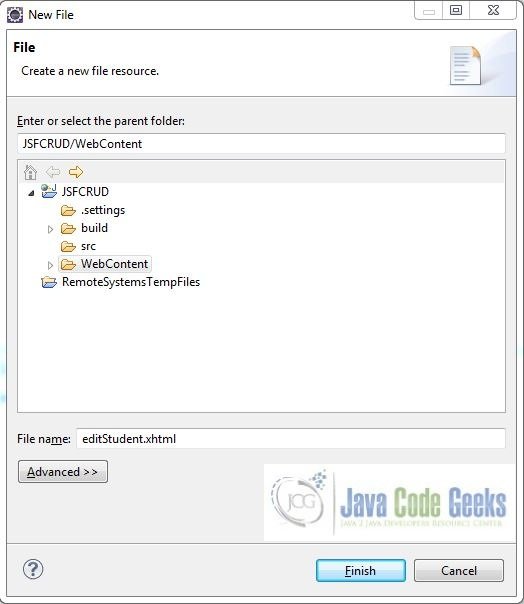
Repeat the step where we need to create the file for our application (i.e. fig. 12). Again, verify the parent folder location as JSFCRUD/WebContent and enter the filename (editStudent.xhtml) and click Finish
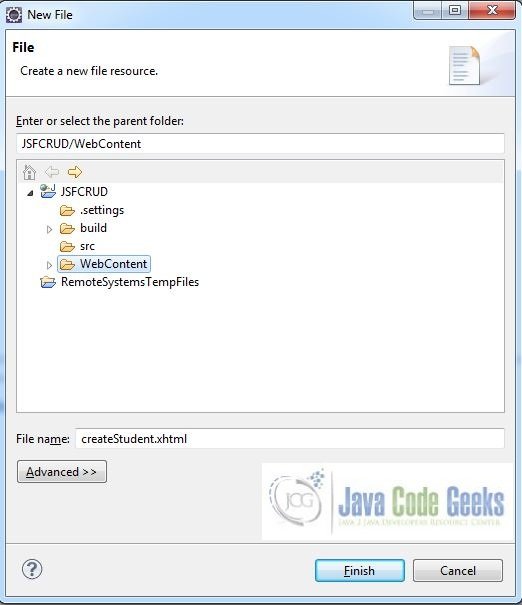
Again repeat the above step and enter the filename as createStudent.xhtml. Click Finish
3.3.1 Implementation of Input & Output files
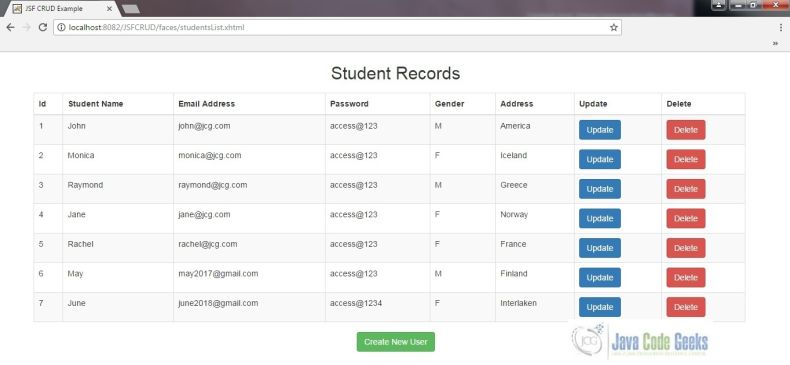
Here in studentsList.xhtml we will have the jsf UI component’s displaying the student’s list, fetched directly from the student_record table in the students database at the application loading. Here the bootstrap components will implement the CSS classes which we will enhance the application interface. The Create, Update and Delete buttons will display the corresponding results based on backend logic written. Add the following code to it:
studentsList.xhtml
<!DOCTYPE HTML>
<html lang="en" xmlns="http://www.w3.org/1999/xhtml"
	xmlns:h="http://java.sun.com/jsf/html"
	xmlns:f="http://xmlns.jcp.org/jsf/core">

<h:head>
    <meta charset="utf-8" name="viewport" content="width=device-width, initial-scale=1" http-equiv="X-UA-Conpatible" />
    <h:outputStylesheet library="css" name="bootstrap.min.css" />
    <title>JSF CRUD Example</title>
    <style type="text/css">
        .tableUpdated {
        	width: 90% !important;
        	margin: 17px 58px 0 !important;
        }
        .btnSpace {
        	margin: 17px;
        }
    </style>
</h:head>
<h:body>
    <center><h2><h:outputText value="Student Records"/></h2></center>
    <h:form id="studentForm">
        <h:dataTable id="studentTable" binding="#{table}" value="#{studentBean.studentsList()}" var="student" class="table table-striped table-hover table-bordered tableUpdated">
            <h:column>
                <f:facet name="header">Id</f:facet>
                <h:outputText value="#{table.rowIndex + 1}" />
            </h:column>
            <h:column>
                <f:facet name="header">Student Name</f:facet>
                <h:outputText value="#{student.name}" />
            </h:column>
            <h:column>
                <f:facet name="header">Email Address</f:facet>
                <h:outputText value="#{student.email}" />
            </h:column>
            <h:column>
                <f:facet name="header">Password</f:facet>
                <h:outputText value="#{student.password}" />
            </h:column>
            <h:column>
                <f:facet name="header">Gender</f:facet>
                <h:outputText value="#{student.gender}" />
            </h:column>
            <h:column>
                <f:facet name="header">Address</f:facet>
                <h:outputText value="#{student.address}" />
            </h:column>
            <h:column>
                <f:facet name="header">Update</f:facet>
                <h:commandButton action="#{studentBean.editStudentRecord(student.id)}" value="Update" class="btn btn-primary" />
            </h:column>
            <h:column>
                <f:facet name="header">Delete</f:facet>
                <h:commandButton action="#{studentBean.deleteStudentRecord(student.id)}" value="Delete" class="btn btn-danger" />
            </h:column>
        </h:dataTable>
        <center>
            <h:commandButton action="createStudent.xhtml?faces-redirect=true" value="Create New User" class="btn btn-success btnSpace" />
        </center>
    </h:form>
</h:body>
</html>
Here in createStudent.xhtml we have a new student creation form wherein the new student details are entered. Upon clicking the Save button on this page, the new student record will be saved in the student_record table and will be displayed on the student list page. Add the following code to it:
createStudent.xhtml
<!DOCTYPE HTML>
<html lang="en" xmlns="http://www.w3.org/1999/xhtml"
	xmlns:h="http://java.sun.com/jsf/html"
	xmlns:f="http://xmlns.jcp.org/jsf/core">

<h:head>
    <meta charset="utf-8" name="viewport" content="width=device-width, initial-scale=1" http-equiv="X-UA-Conpatible" />
    <h:outputStylesheet library="css" name="bootstrap.min.css" />
    <title>JSF CRUD Example</title>
    <style type="text/css">
        .btnWidth {
            width: 80px;
        }
    </style>
</h:head>
<h:body>
    <h:form id="createStudentForm" class="form-horizontal">
        <div class="form-group">
            <div class="col-sm-4"></div>
            <div class="col-sm-4">
                <h2>Create Student Record</h2>
            </div>
        </div>
        <hr/>
        <div class="form-group">
            <h:outputLabel for="username" class="control-label col-sm-4">User Name:</h:outputLabel>
            <div class="col-sm-4">
                <h:inputText id="name-id" value="#{studentBean.name}" class="form-control" validatorMessage="User name is required">
                    <f:validateRequired />
                </h:inputText>
            </div>
        </div>
        <div class="form-group">
            <h:outputLabel for="email" class="control-label col-sm-4">Email:</h:outputLabel>
            <div class="col-sm-4">
                <h:inputText id="email-id" value="#{studentBean.email}" class="form-control" validatorMessage="Email Id is required">
                    <f:validateRequired/>
                </h:inputText>
            </div>
        </div>
        <div class="form-group">
            <h:outputLabel for="password" class="control-label col-sm-4">Password:</h:outputLabel>
            <div class="col-sm-4">
                <h:inputSecret id="password-id" value="#{studentBean.password}" class="form-control" validatorMessage="Password is required">
                    <f:validateRequired/>
                </h:inputSecret>
            </div>
        </div>
        <div class="form-group">
            <h:outputLabel for="gender" class="control-label col-sm-4">Gender:</h:outputLabel>
            <div class="col-sm-4">
                <h:selectOneRadio id="gender-id" value="#{studentBean.gender}" validatorMessage="Gender is required">
                    <f:selectItem itemValue="M" itemLabel="Male" /><f:selectItem itemValue="F" itemLabel="Female" />
                    <f:validateRequired/>
                </h:selectOneRadio>
            </div>
        </div>
        <div class="form-group">
            <h:outputLabel for="address" class="control-label col-sm-4">Address:</h:outputLabel>
            <div class="col-sm-4">
                <h:inputTextarea id="address-id" value="#{studentBean.address}" cols="50" rows="5" class="form-control" validatorMessage="Address is required">
                    <f:validateRequired/>
                </h:inputTextarea>
            </div>
        </div>
        <div class="form-group">
            <div class="col-sm-4"></div>
            <div class="col-sm-4">
                <div class="col-sm-2">
                    <h:commandButton value="Save" action="#{studentBean.saveStudentDetails(studentBean)}" class="btn btn-success btnWidth" />
                </div>
                <div class="col-sm-1">
                </div>
                <div class="col-sm-2">
                    <h:link outcome="studentsList" value="View Students Record List" class="btn btn-primary" />
                </div>
            </div>
        </div>
    </h:form>
</h:body>
</html>
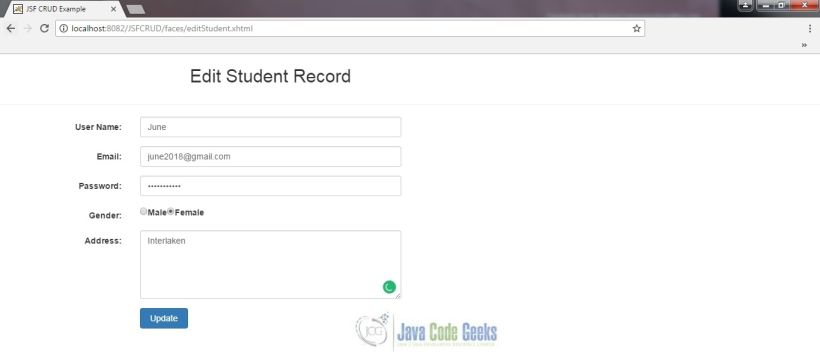
In editStudent.xhtml we will have the details of the student pre-fetched from the database for which the updating’s needs to be done. The user will update the values in this form and update it. Add the following code to it:
editStudent.xhtml
<!DOCTYPE HTML>
<html lang="en" xmlns="http://www.w3.org/1999/xhtml"
	xmlns:h="http://java.sun.com/jsf/html"
	xmlns:f="http://xmlns.jcp.org/jsf/core">

<h:head>
    <meta charset="utf-8" name="viewport" content="width=device-width, initial-scale=1" http-equiv="X-UA-Conpatible" />
    <h:outputStylesheet library="css" name="bootstrap.min.css" />
    <title>JSF CRUD Example</title>
    <style type="text/css">
        .updateBtnStyle {
        	width: 80px !important;
        }
    </style>
</h:head>
<h:body>
        <h:form id="form" class="form-horizontal">
            <div class="form-group">
                <div class="col-sm-2"></div>
                <h2 style="text-align: center" class="col-sm-4">Edit Student Record</h2>
            </div>
            <hr/>
            <div class="form-group">
                <h:outputLabel for="username" class="control-label col-sm-2">User Name:</h:outputLabel>
                <div class="col-sm-4">
                    <h:inputText id="name-id" value="#{editRecordObj.name}" class="form-control"/>
                </div>
            </div>
            <div class="form-group">
                <h:outputLabel for="email" class="control-label col-sm-2">Email:</h:outputLabel>
                <div class="col-sm-4">
                    <h:inputText id="email-id" value="#{editRecordObj.email}" class="form-control"/>
                </div>
            </div>
            <div class="form-group">
                <h:outputLabel for="password" class="control-label col-sm-2">Password:</h:outputLabel>
                <div class="col-sm-4">
                    <h:inputSecret id="password-id" value="#{editRecordObj.password}" class="form-control"/>
                </div>
            </div>
            <div class="form-group">
                <h:outputLabel for="gender" class="control-label col-sm-2">Gender:</h:outputLabel>
                <div class="col-sm-4">
                    <h:selectOneRadio value="#{editRecordObj.gender}">
                        <f:selectItem itemValue="M" itemLabel="Male" /><f:selectItem itemValue="F" itemLabel="Female" />
                    </h:selectOneRadio>
                </div>
            </div>
            <div class="form-group">
                <h:outputLabel for="address" class="control-label col-sm-2">Address:</h:outputLabel>
                <div class="col-sm-4">
                    <h:inputTextarea value="#{editRecordObj.address}" cols="50" rows="5" class="form-control"/>
                </div>
            </div>
            <div class="form-group">
                <div class="col-sm-2"></div>
                <div class="col-sm-4">
                    <h:commandButton value="Update" action="#{studentBean.updateStudentDetails(editRecordObj)}" class="btn btn-primary updateBtnStyle" />
                </div>
            </div>
        </h:form>
    </h:body>
</html>
3.4 Java Class Creation
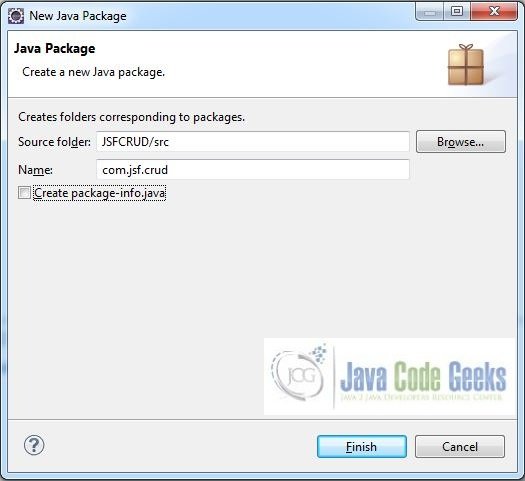
Let’s create the required java files. Right click on src folder New -> Package

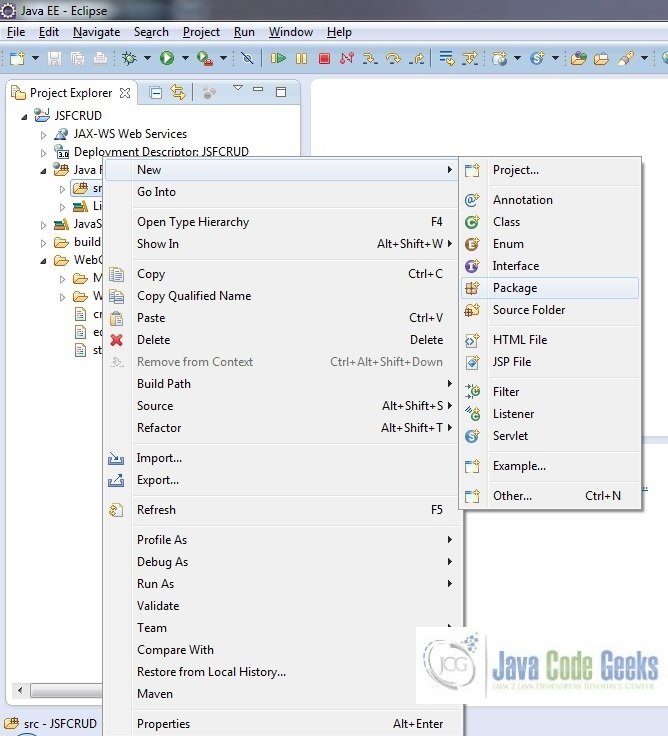
A new pop window will open where we will enter the package name, namely com.jsf.crud
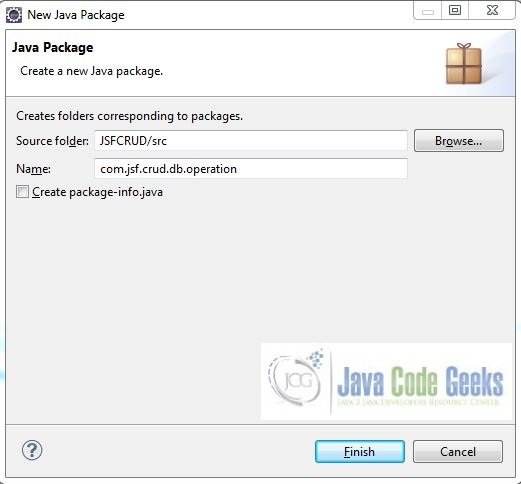
Repeat the above step (i.e. fig. 16) and enter the package name com.jsf.crud.db.operations
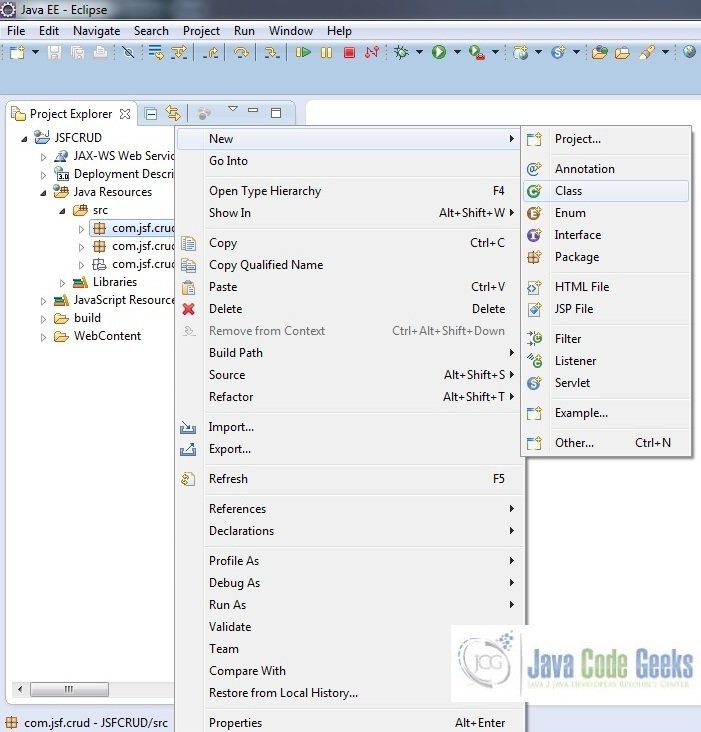
Once the packages are created in the application, we will need to create the managed bean and database operations class. Right-click on the newly created package New -> Class
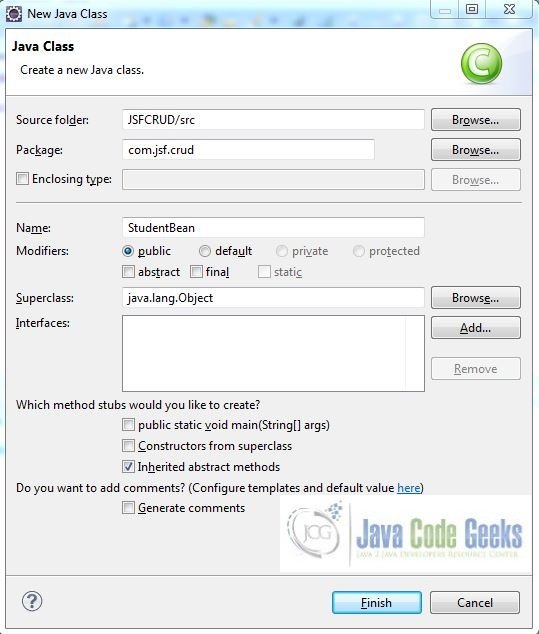
A new pop window will open and enter the file name as StudentBean. The bean class will be created inside the package – com.jsf.crud
Repeat the step (i.e. fig. 19) and enter the filename as DatabaseOperation. The Dao operations class will be created inside the package – com.jsf.crud.db.operations

3.4.1 Implementation of Managed Bean
This class has methods which interact with action events clicked on the user interface pages and display the result on the output page based on the navigation logic returned from the DAO class
StudentBean.java
package com.jsf.crud;

import java.util.ArrayList;

import javax.annotation.PostConstruct;
import javax.faces.bean.ManagedBean;
import javax.faces.bean.RequestScoped;

import com.jsf.crud.db.operations.DatabaseOperation;

@ManagedBean @RequestScoped
public class StudentBean {

	private int id;
	private String name;
	private String email;
	private String password;
	private String gender;
	private String address;

	public ArrayListstudentsListFromDB;

	public int getId() {
		return id;
	}

	public void setId(int id) {
		this.id = id;
	}

	public String getName() {
		return name;
	}

	public void setName(String name) {
		this.name = name;
	}

	public String getEmail() {
		return email;
	}

	public void setEmail(String email) {
		this.email = email;
	}

	public String getPassword() {
		return password;
	}

	public void setPassword(String password) {
		this.password = password;
	}

	public String getGender() {
		return gender;
	}

	public void setGender(String gender) {
		this.gender = gender;
	}

	public String getAddress() {
		return address;
	}

	public void setAddress(String address) {
		this.address = address;
	}

	@PostConstruct
	public void init() {
		studentsListFromDB = DatabaseOperation.getStudentsListFromDB();
	}

	public ArrayList studentsList() {
		return studentsListFromDB;
	}

	public String saveStudentDetails(StudentBean newStudentObj) {
		return DatabaseOperation.saveStudentDetailsInDB(newStudentObj);
	}

	public String editStudentRecord(int studentId) {
		return DatabaseOperation.editStudentRecordInDB(studentId);
	}

	public String updateStudentDetails(StudentBean updateStudentObj) {
		return DatabaseOperation.updateStudentDetailsInDB(updateStudentObj);
	}

	public String deleteStudentRecord(int studentId) {
		return DatabaseOperation.deleteStudentRecordInDB(studentId);
	}
}
3.4.2 Implementation of DAO Class
This class has methods which interact with database for different the different operation i.e. creates a new student record, edit or update the existing student record or delete the record from the database
DatabaseOperation.java
package com.jsf.crud.db.operations;

import java.sql.Connection;
import java.sql.DriverManager;
import java.sql.PreparedStatement;
import java.sql.ResultSet;
import java.sql.Statement;
import java.util.ArrayList;
import java.util.Map;

import javax.faces.context.FacesContext;

import com.jsf.crud.StudentBean;

public class DatabaseOperation {

	public static Statement stmtObj;
	public static Connection connObj;
	public static ResultSet resultSetObj;
	public static PreparedStatement pstmt;

	public static Connection getConnection(){
		try{
			Class.forName("com.mysql.jdbc.Driver");
			String db_url ="jdbc:mysql://localhost:3306/students",
					db_userName = "root",
					db_password = "";
			connObj = DriverManager.getConnection(db_url,db_userName,db_password);
		} catch(Exception sqlException) {
			sqlException.printStackTrace();
		}
		return connObj;
	}

	public static ArrayList getStudentsListFromDB() {
		ArrayList studentsList = new ArrayList();
		try {
			stmtObj = getConnection().createStatement();
			resultSetObj = stmtObj.executeQuery("select * from student_record");
			while(resultSetObj.next()) {
				StudentBean stuObj = new StudentBean();
				stuObj.setId(resultSetObj.getInt("student_id"));
				stuObj.setName(resultSetObj.getString("student_name"));
				stuObj.setEmail(resultSetObj.getString("student_email"));
				stuObj.setPassword(resultSetObj.getString("student_password"));
				stuObj.setGender(resultSetObj.getString("student_gender"));
				stuObj.setAddress(resultSetObj.getString("student_address"));
				studentsList.add(stuObj);
			}
			System.out.println("Total Records Fetched: " + studentsList.size());
			connObj.close();
		} catch(Exception sqlException) {
			sqlException.printStackTrace();
		}
		return studentsList;
	}

	public static String saveStudentDetailsInDB(StudentBean newStudentObj) {
		int saveResult = 0;
		String navigationResult = "";
		try {
			pstmt = getConnection().prepareStatement("insert into student_record (student_name, student_email, student_password, student_gender, student_address) values (?, ?, ?, ?, ?)");
			pstmt.setString(1, newStudentObj.getName());
			pstmt.setString(2, newStudentObj.getEmail());
			pstmt.setString(3, newStudentObj.getPassword());
			pstmt.setString(4, newStudentObj.getGender());
			pstmt.setString(5, newStudentObj.getAddress());
			saveResult = pstmt.executeUpdate();
			connObj.close();
		} catch(Exception sqlException) {
			sqlException.printStackTrace();
		}
		if(saveResult !=0) {
			navigationResult = "studentsList.xhtml?faces-redirect=true";
		} else {
			navigationResult = "createStudent.xhtml?faces-redirect=true";
		}
		return navigationResult;
	}

	public static String editStudentRecordInDB(int studentId) {
		StudentBean editRecord = null;
		System.out.println("editStudentRecordInDB() : Student Id: " + studentId);

		/* Setting The Particular Student Details In Session */
		Map<String,Object> sessionMapObj = FacesContext.getCurrentInstance().getExternalContext().getSessionMap();

		try {
			stmtObj = getConnection().createStatement();
			resultSetObj = stmtObj.executeQuery("select * from student_record where student_id = "+studentId);
			if(resultSetObj != null) {
				resultSetObj.next();
				editRecord = new StudentBean();
				editRecord.setId(resultSetObj.getInt("student_id"));
				editRecord.setName(resultSetObj.getString("student_name"));
				editRecord.setEmail(resultSetObj.getString("student_email"));
				editRecord.setGender(resultSetObj.getString("student_gender"));
				editRecord.setAddress(resultSetObj.getString("student_address"));
				editRecord.setPassword(resultSetObj.getString("student_password"));
			}
			sessionMapObj.put("editRecordObj", editRecord);
			connObj.close();
		} catch(Exception sqlException) {
			sqlException.printStackTrace();
		}
		return "/editStudent.xhtml?faces-redirect=true";
	}

	public static String updateStudentDetailsInDB(StudentBean updateStudentObj) {
		try {
			pstmt = getConnection().prepareStatement("update student_record set student_name=?, student_email=?, student_password=?, student_gender=?, student_address=? where student_id=?");
			pstmt.setString(1,updateStudentObj.getName());
			pstmt.setString(2,updateStudentObj.getEmail());
			pstmt.setString(3,updateStudentObj.getPassword());
			pstmt.setString(4,updateStudentObj.getGender());
			pstmt.setString(5,updateStudentObj.getAddress());
			pstmt.setInt(6,updateStudentObj.getId());
			pstmt.executeUpdate();
			connObj.close();
		} catch(Exception sqlException) {
			sqlException.printStackTrace();
		}
		return "/studentsList.xhtml?faces-redirect=true";
	}

	public static String deleteStudentRecordInDB(int studentId){
		System.out.println("deleteStudentRecordInDB() : Student Id: " + studentId);
		try {
			pstmt = getConnection().prepareStatement("delete from student_record where student_id = "+studentId);
			pstmt.executeUpdate();
			connObj.close();
		} catch(Exception sqlException){
			sqlException.printStackTrace();
		}
		return "/studentsList.xhtml?faces-redirect=true";
	}
}Notes:
- In the
getConnection()method we are establishing a connection to the database viaClass.forNamemethod to execute a query to pull the data from thestudent_recordtable. However, a programmer should use JNDI connection with datasource or create a utility class. But for simplicity, I am not having those extra classes in this article - We have kept the
db_passwordvalue as blank for simplicity, however, it is pure unto user to keep it blank or set it during the MySQL configuration. If the user sets it, we need to provide the same password to this string
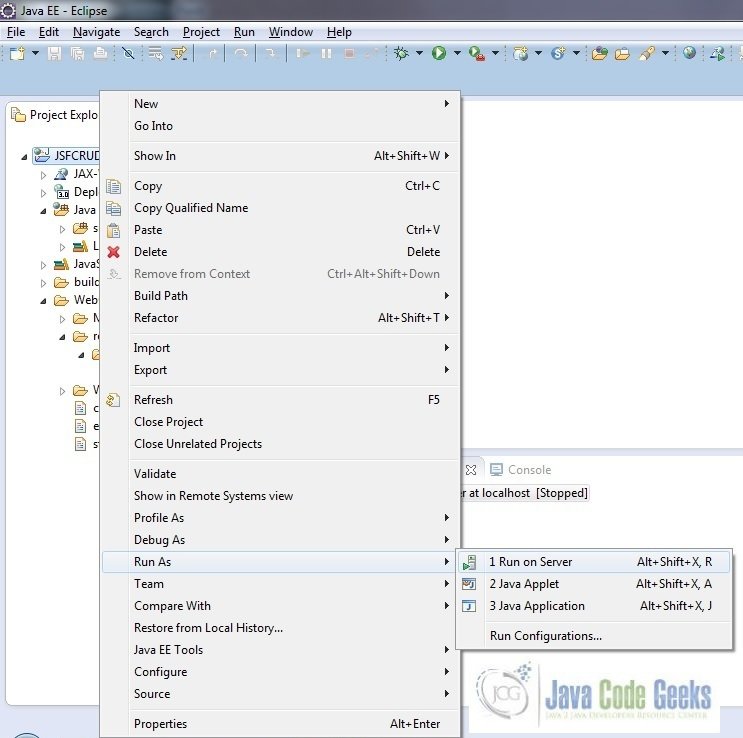
4. Project Deploy
Once we are ready with all the changes done, let us compile and deploy the application on tomcat7 server. In order to deploy the application on tomcat7, right-click on the project and navigate to Run as -> Run on Server
Tomcat will deploy the application in its webapps folder and shall start its execution to deploy the project so that we can go ahead and test it on the browser
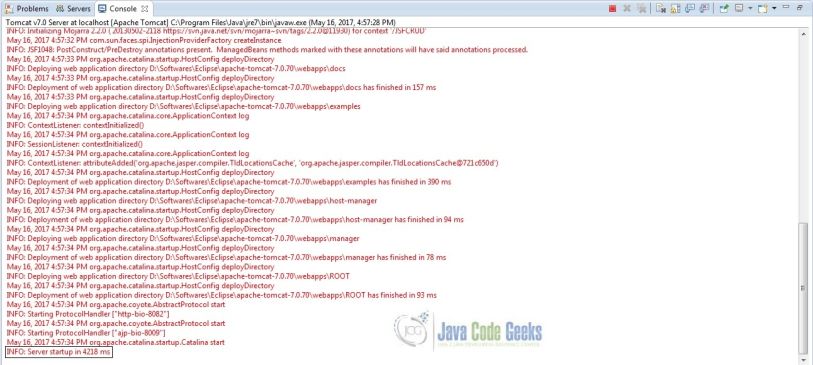
Open your favorite browser and hit the following URL. The output page will be displayed
http://localhost:8082/JSFCRUD/faces/studentsList.xhtml
Server name (localhost) and port (8082) may vary as per your tomcat configuration
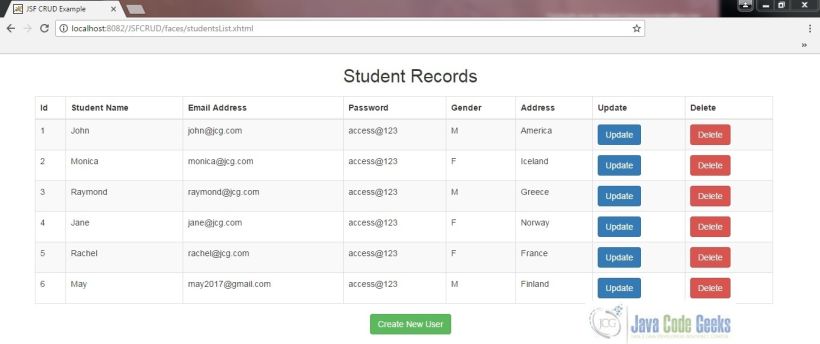
5. Project Demo
Students List
This is index page of the application. After running the project, it populates the result from the MySQL database student_record table
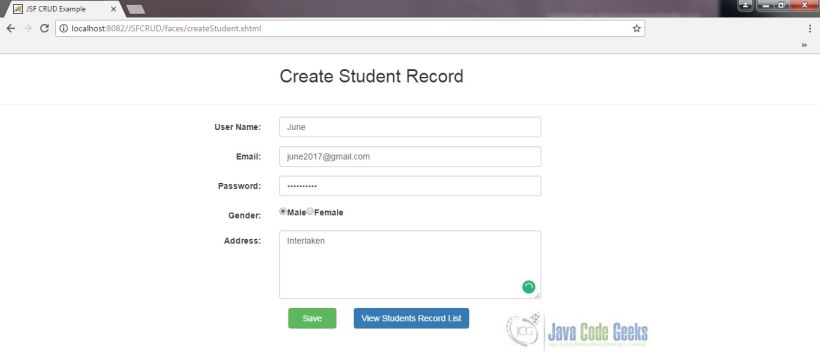
Create Student Page: Add a new student record
You can add new student record in student_record table
Student list page after adding a new record

Update Student Form
Student list page after updating the existing student details
Deleting a Student Record
Student list page before deleting the student’s record

Student list page after deleting the student’s record

Hope this helped :)
6. Conclusion
Through this example, we have learned about the integration of database in JSF and deploy it using the tomcat7 application server
7. Download the Eclipse Project
This was a JSF CRUD example with Eclipse and Tomcat
You can download the full source code of this example here: JSFCRUDExample

In this point, says: “2.4 Download & Install MySQL Connector Jar Download the MySQL-connection jar from here and copy it” Well “here”: https://mvnrepository.com/artifact/mysql/mysql-connector-java/5.1.18.
In that url there are many other links to other url. You click on each of the links and it takes you to another page and this one to another … and to another.. UUUFFFF!!!!!
It is not clear where to download the file mysql-connector-java-5.1.18.jar.
Sorry for my English but it’s not my language.
You can download the jar from this link – http://www.java2s.com/Code/Jar/m/Downloadmysqlconnector5118jar.htm
Thanks a lot Yatin. I just did it!
I have a new question, on line 21. I think ArrayListstudentsListFromDB;
It should be ArrayList ClientsListFromDB;
Separated. Or not ???
Sorry for my English.
Greetings.
Yes, your understanding is absolutely correct!
Hello:
I’m new in JSF. I have tried with the example, but the “Run as..” on JSFCRUD throws a 404 error. Could you help me please.
Thanks a lot,
Javier
Try go to jdk 1.6 and run on tomcat 8.5
You saved my life. Thanks a lot
M glad the article could help! :-) Keep learning! :-)
The system.out.println output is printed where ? I can’t find it on my eclipse console.
?
Thanks for this! Very useful and very much needed piece of info. Layed out in a way that even I can understand.
I don’t but radio button is not working after running the project..It’s showing blank value for gender in my case…any suggestion?
Hm no maybe not gender in the database? it works fine you must defined you build path to i.6
This is so good thank u !
Hi, after run the browser shows me error, i hope anyone could help me :(