Hello, in this tutorial I would like to show the usage of Hibernate framework in a simple jsf application and will demonstrate the following:
- Student form
- Performing database operations
- Sending & retrieving data to & from a managed bean
This example will show how to develop a simple CRUD (Create, Read, Update, Delete) application and lets you manage student’s database such as add new student and update/delete student information in jsf using hibernate as a framework.
Table Of Contents
1. Introduction
CRUD stands for Create, Read, Update and Delete. These functions are the user interfaces to databases, as they permit users to create, view, modify and alter data. CRUD works on entities in databases and manipulates these entities.
For instance, a simple student database table adds (creates) new student details, accesses (reads) existing student details, modifies (updates) existing student data, and deletes student details when students leave the school.
The commands corresponding to these operations in SQL are INSERT, SELECT, UPDATE and DELETE. INSERT adds new records, SELECT retrieves or selects existing records based on selection conditions, UPDATE modifies existing records and DELETE removes tables or records in a table.
We will have following components in our database application:
- Student.java – A jsf managed bean class.
- DatabaseOperation.java – This class is used to perform the Db related operations using hibernate framework.
- HibernateUtil.java – This class helps in creating the SessionFactory object from the hibernate configuration file.
- Student.hbm.xml – A mapping file for the persistent or the POJOclass.
- hibernate.cfg.xml – Hibernate configuration file containing database related information.
- hibernate.reveng.xml – A mapping file to specify the type of mappings and table filtering.
1.1 Hibernate
Hibernate is the Object to Relational Mapping (ORM) tool given to transfer the data between a Java (object) application and a database (relational) in the form of the objects. It is a non-invasive framework meaning it never forces the programmers to extend or implement any class or interface, thus making the database operations lightweight.
It implements JPA interface and in case programmer wish to understand the Hibernate architecture, they might consider this option
1.2 Hibernate Benefits
There are many advantages of using the hibernate framework, for e.g.
- Takes care of mapping Java classes to database tables using XML files and without writing any line of code.
- Provides simple APIs for storing and retrieving Java objects directly to and from the database.
- Provides the facility to create the tables of the database automatically. So, there is no need to create tables in the database manually.
- If there is a change in a database or in any table then the only need to change XML file properties.
- Minimize database access with smart fetching strategies as Hibernate framework internally uses the cache technique.
- Provides simple querying of data.
1.3 How it can be achieved?
Programmers need to implement the 2 XML files (i.e. mapping and configuration files) in a hibernate application to handle the database operations. Let’s take a look at these files.
1.3.1 Mapping File
Every ORM tool needs this mapping file as it’s a mechanism of placing object properties into columns of a table. Mapping is given to an OAM tool either in the form of an XML or in the form of the annotations. The mapping file contains the mapping from a POJO class name to a table name and POJO class variable names to table column names.
Generally, this configuration file contains 3 properties, like:
- Identity (Object name)
- State (Object value)
- Behavior (Object methods)
Let’s take a look and understand the sample Pojo_Table_Mapping_Classname.hbm.xml code:
Sample Pojo_Table_Mapping_Classname.hbm.xml
<hibernate-mapping>
    <class name="POJO class name" table="table name in database">
        <id name="variable name" column="column name in database" type="java/hibernate type" />
        <property name="variable1 name" column="column name in database" type="java/hibernate type" />
        <property name="variable2 name" column="column name in database" type="java/hibernate type" />
    </class>
</hibernate-mapping>
1.3.2 Configuration File
When working with hibernates, the configuration is the file loaded that is into a hibernate application. This configuration file contains 3 types of information:
- Connection properties
- Hibernate properties
- Mapping file name(s)
It is mandatory to place
hibernate.cfg.xml in the project’s src folder.Let’s take a look and understand the sample hibernate.cfg.xml code:
Sample hibernate.cfg.xml
<hibernate-configuration>
    <session-factory>

        <!-- Related to the connection START -->
        <property name="connection.driver_class">Driver Class Name </property>
        <property name="connection.url">URL </property>
        <property name="connection.user">user </property>
        <property name="connection.password">password</property>
        <!-- Related to the connection END -->

        <!-- Related to hibernate properties START -->
        <property name="show_sql">true/false</property>
        <property name="dialet">Database dialet class</property>
        <property name="hbm2ddl.auto">create/update or whatever</property>
        <!-- Related to hibernate properties END-->

        <!-- Related to mapping START-->
        <mapping resource="hbm file 1 name .xml" />
        <mapping resource="hbm file 2 name .xml" />
        <!-- Related to the mapping END -->

    </session-factory>
</hibernate-configuration>
Do note, programmers can use both annotation and XML’s to handle the mapping operations in this framework. But, XML files are always recommended to work.
1.4 Download Hibernate Libraries
For working with hibernate, ensure Java version must be 1.5 or higher and we have the following jar files in the project’s WEB-INF/lib folder.
Note: In this example, we are connecting the application with MySQL database. So, you must add the mysql-connector-java-<version>-bin.jar to the project.
1.5 Download and Install MySQL
You can watch this video in order to download and install the MySQL database on your Windows operations system.
Now, open up the Eclipse IDE and let’s start building the application!
2. JSF Hibernate Crud Example
2.1 Tools Used
We are using Eclipse Kepler SR2, JDK 8 (1.8.0_131), Tomcat7 application server, MySQL database, MySQL connector jar and Hibernate libraries. Having said that, we have tested the code against JDK 1.7 and it works well.
2.2 Project Structure
Firstly, let’s review the final project structure, in case you are confused about where you should create the corresponding files or folder later!
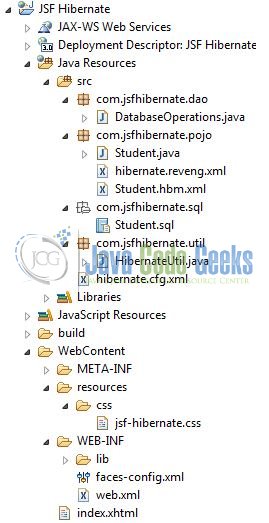
You may skip project creation and jump directly to the beginning of the example below.
2.3 Project Creation
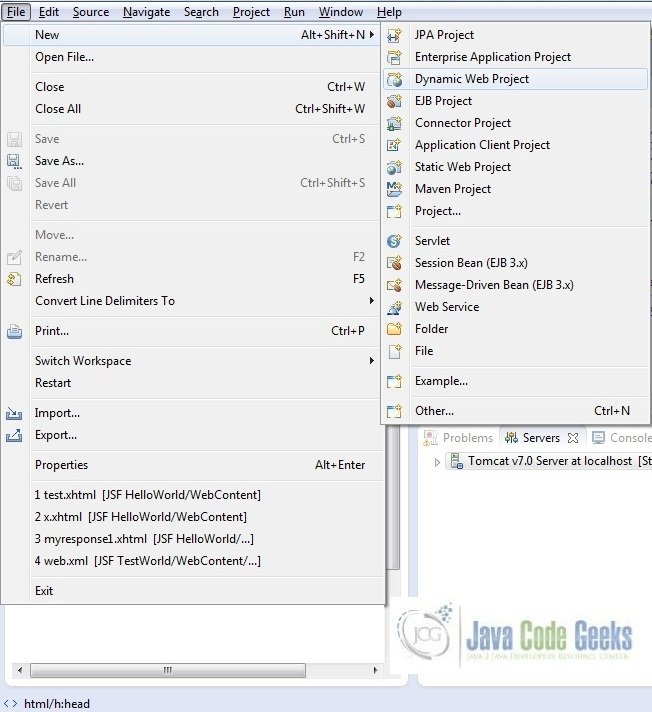
This section will demonstrate on how to create a Dynamic Web Java project with Eclipse. In Eclipse IDE, go to File -> New -> Dynamic web project
In the New Dynamic Project window fill in the below details and click next
- Enter the project name and project location
- Select Target runtime as Apache Tomcat v7.0 from dropdown
- Select Configuration as JavaServer Faces v.2.2 Project from dropdown (this is required to download the java server faces capabilities in your project)
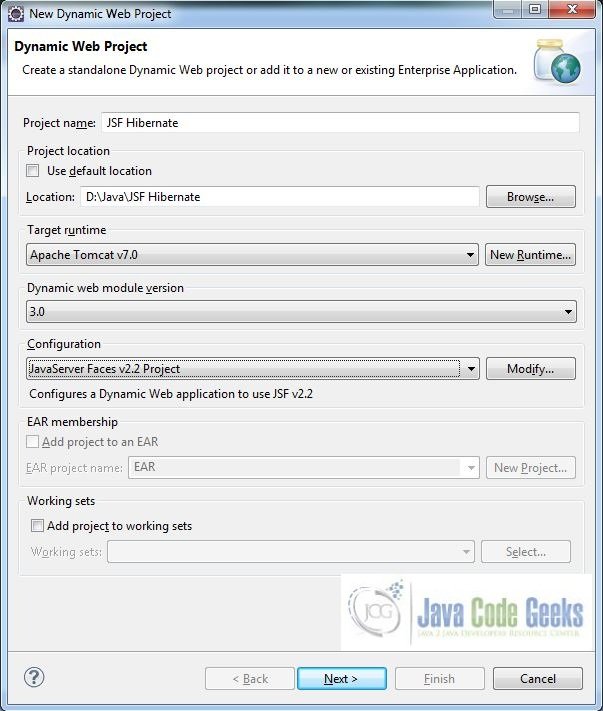
Leave everything as default in this window as we will be making the required java file at a later stage. Simply click next and we will land up on the web-module window

In the Web Module window, leave the context_root and content_directory values as default (however, you can change the context_root but for the first application let’s keep it as a default value). Simply, check Generate web.xml deployment descriptor checkbox and click next

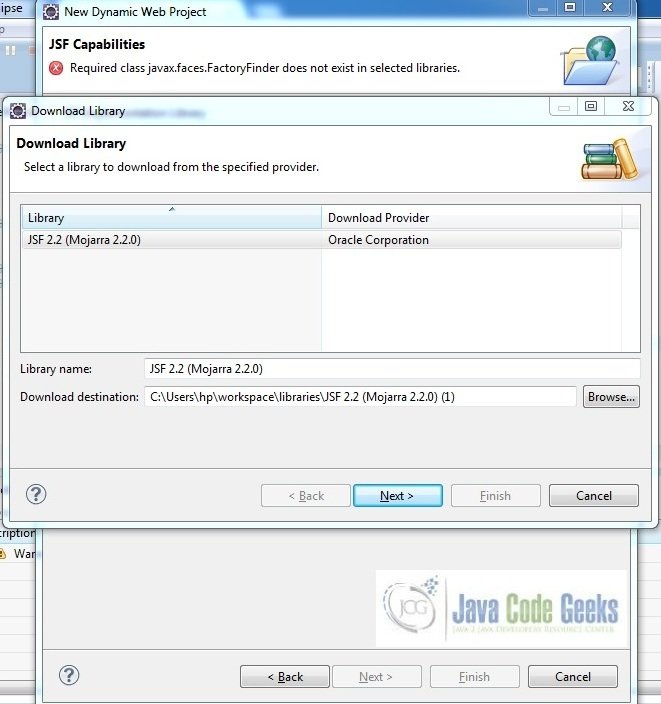
In the JSF Capabilities windows, we will require downloading the dependencies (not available by default) so that our project is configured as a JSF module in Eclipse. Add the JSF capabilities to the web project by clicking on the download icon (encircled in Fig. 6) and download the JSF 2.2 Mojarra implementation
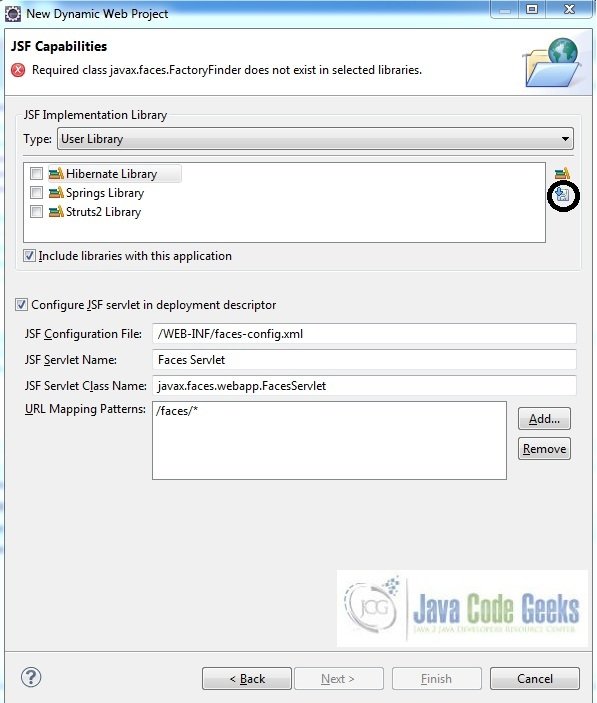
A new pop-up window will open where it will auto lists down the JSF library. Select the JSF 2.2 library and click next (the library name and download destination will be auto populated)
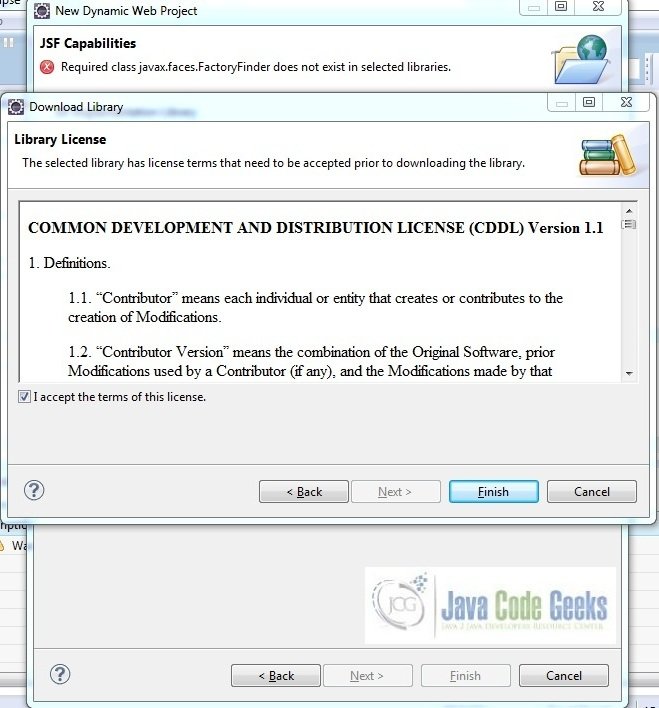
Check the license checkbox and click finish. Eclipse will download the JSF 2.2 library and will display them on the JSF capabilities windows (i.e. Fig. 6)
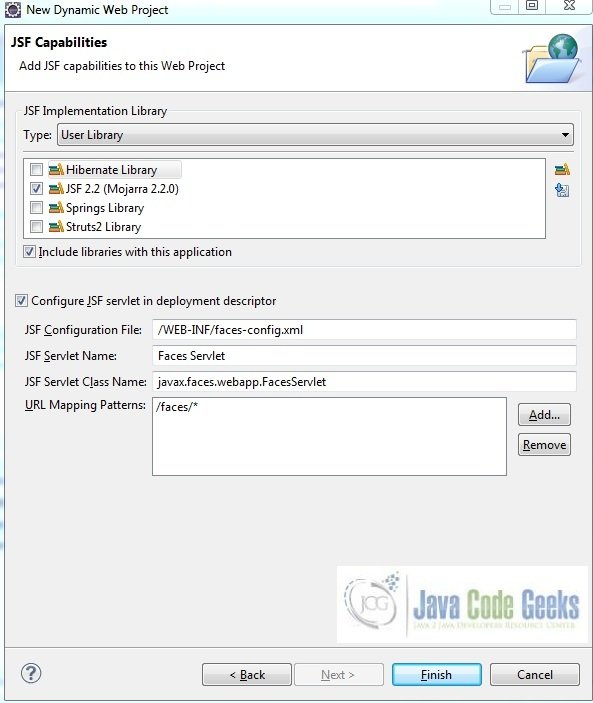
Now the JSF implementation libraries will be listed down on the capabilities page. Select the checkbox (JSF2.2 (Mojarra 2.2.0)) and leave everything else as default. Click Finish
Eclipse will create the project named JSF Hibernate in the workspace and web.xml will be configured for accepting the JSF requests. It will have the following code:
web.xml
<?xml version="1.0" encoding="UTF-8"?>
<web-app xmlns:xsi="http://www.w3.org/2001/XMLSchema-instance" xmlns="http://java.sun.com/xml/ns/javaee" xsi:schemaLocation="http://java.sun.com/xml/ns/javaee http://java.sun.com/xml/ns/javaee/web-app_3_0.xsd" id="WebApp_ID" version="3.0">
    <display-name>JSF Hibernate</display-name>
    <welcome-file-list>
        <welcome-file>index.html</welcome-file>
        <welcome-file>index.htm</welcome-file>
        <welcome-file>index.jsp</welcome-file>
        <welcome-file>default.html</welcome-file>
        <welcome-file>default.htm</welcome-file>
        <welcome-file>default.jsp</welcome-file>
    </welcome-file-list>
    <servlet>
        <servlet-name>Faces Servlet</servlet-name>
        <servlet-class>javax.faces.webapp.FacesServlet</servlet-class>
        <load-on-startup>1</load-on-startup>
    </servlet>
    <servlet-mapping>
        <servlet-name>Faces Servlet</servlet-name>
        <url-pattern>/faces/*</url-pattern>
    </servlet-mapping>
    <context-param>
        <description>State saving method: 'client' or 'server' (=default). See JSF Specification 2.5.2</description>
        <param-name>javax.faces.STATE_SAVING_METHOD</param-name>
        <param-value>client</param-value>
    </context-param>
    <context-param>
        <param-name>javax.servlet.jsp.jstl.fmt.localizationContext</param-name>
        <param-value>resources.application</param-value>
    </context-param>
    <listener>
        <listener-class>com.sun.faces.config.ConfigureListener</listener-class>
    </listener>
</web-app>
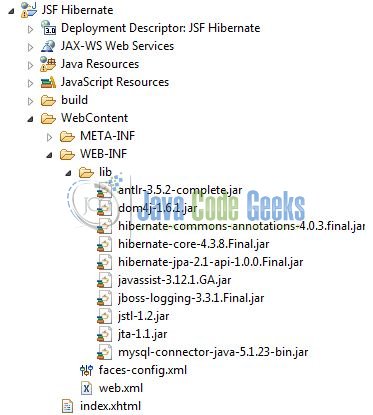
2.4 Install MySQL Connector & Hibernate Libraries Jars
Copy the downloaded jars in the project’s WEB-INF/lib folder as per below image:
Let’s start building the application!
3. Application Building
Below are the steps involved in developing this application:
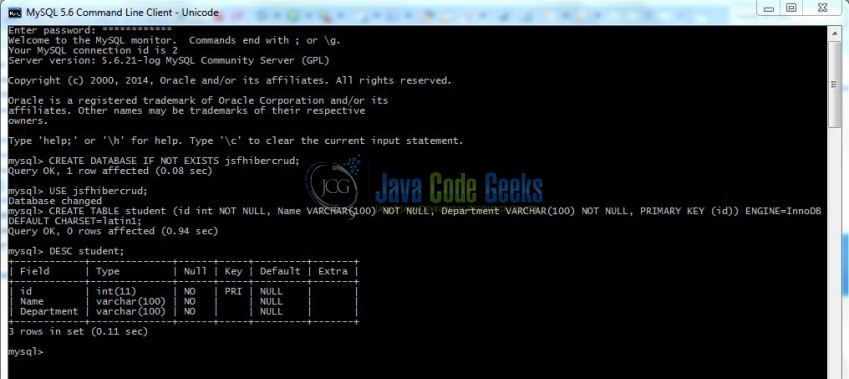
3.1 Database & Table Creation
This tutorial uses a database called jsfhibercrud. The database is not included when you create the project in eclipse so you need to first create the database to follow this tutorial:
- Create a new database
jsfhibercrudas:
CREATE DATABASE IF NOT EXISTS jsfhibercrud;
- Use the created database
jsfhibercrudto create table as:
USE jsfhibercrud;
- Create the table
studentas shown below:
CREATE TABLE student (id int NOT NULL, Name VARCHAR(100) NOT NULL, Department VARCHAR(100) NOT NULL, PRIMARY KEY (id)) ENGINE=InnoDB DEFAULT CHARSET=latin1;
If everything goes fine, the table will be shown as below in the MySQL workbench:
3.2 Source File Creation
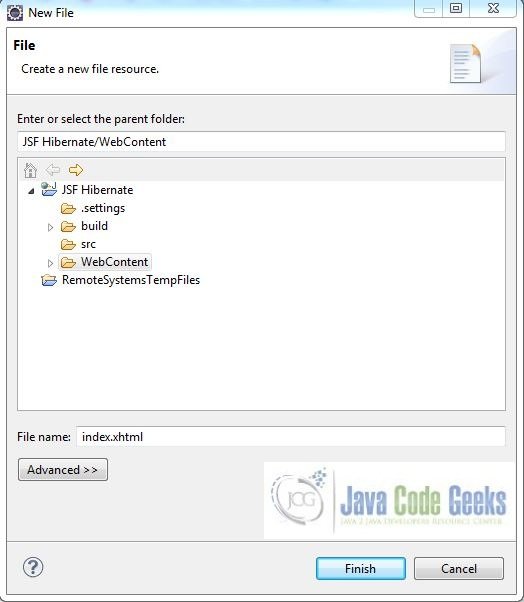
For the demo, we are using a simple form application. Right click on project WebContent -> New -> File
Note: In JSF 2.0, it’s recommended to create a JSF page in xhtml format, a file format with .xhtml extension
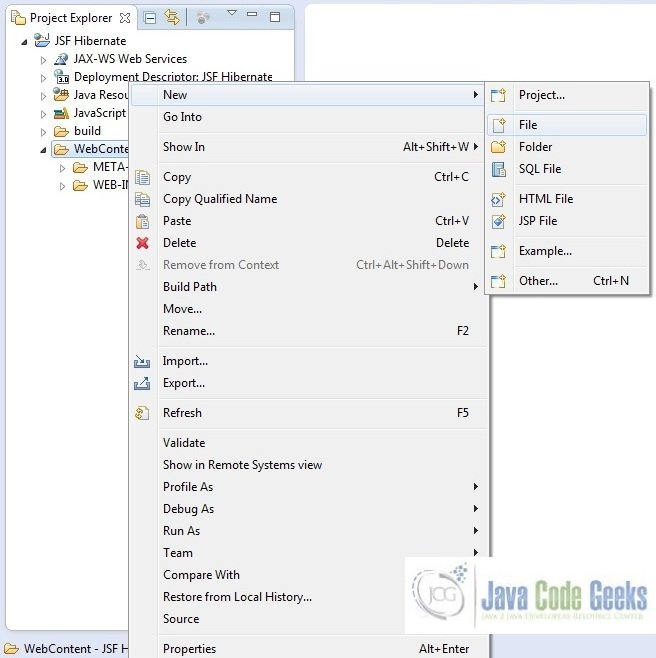
A pop-up window will open. Verify the parent folder location as JSF Hibernate/WebContent and enter the file name as index.xhtml. Click Finish
3.2.1 Implementation of Source file
Here in the index.xhtml, we will have the form based UI components to perform the crud operations. The action attribute on the button will show the corresponding result based on the corresponding logic written in the managed-bean. Add the following code to it:
index.xhtml
<!DOCTYPE HTML>
<html lang="en" xmlns="http://www.w3.org/1999/xhtml" xmlns:f="http://java.sun.com/jsf/core" xmlns:h="http://java.sun.com/jsf/html">
<h:head>
    <meta charset="utf-8" name="viewport" content="width=device-width, initial-scale=1" http-equiv="X-UA-Conpatible" />
    <link rel="stylesheet" href="https://maxcdn.bootstrapcdn.com/bootstrap/3.3.7/css/bootstrap.min.css" />
    <h:outputStylesheet library="css" name="jsf-hibernate.css"  />
    <title>JSF Hibernate</title>
</h:head>
<h:body>
    <center><h2>JSF Hibernate Crud Example</h2></center>
    <!-- New Student Form -->
    <h3 class="marginLeft12">1. New Student Form</h3>
    <h:form id="studentSaveForm" styleClass="form-horizontal">
        <h:panelGrid columns="2">
            <div class="form-group">
                <h:outputLabel value="Id:" styleClass="control-label" />
                <div class="col-xs-10">
                    <h:inputText value="#{student.id}" styleClass="form-control" />
                </div>
            </div>
            <div class="form-group">
                <h:outputLabel value="Name:" styleClass="control-label" />
                <div class="col-xs-10">
                    <h:inputText value="#{student.name}" styleClass="form-control" />
                </div>
            </div>
            <div class="form-group">
                <h:outputLabel value="Department:" styleClass="control-label" />
                <div class="col-xs-10">
                    <h:inputText value="#{student.department}" styleClass="form-control" />
                </div>
            </div>
            <div class="form-group">
                <div class="col-xs-offset-2 col-xs-10">
                    <h:commandButton value="Save Record" action="#{student.saveStudentRecord}" styleClass="btn btn-primary btn-sm btnPos" />
                </div>
            </div>
        </h:panelGrid>
        <h:outputText id="saveResult" rendered="#{not empty createdStudentId}" value="!! Student Record Saved In Database !!" styleClass="successText" />
    </h:form>

    <!-- Form In Order To Delete A Particular Student -->
    <h3 class="marginLeft12">2. Delete Student Record</h3>
    <h:form id="deleteStudentById" styleClass="form-horizontal">
        <h:panelGrid columns="2">
            <div class="form-group">
                <h:outputLabel value="Id:" styleClass="control-label" />
                <div class="col-xs-10">
                    <h:inputText value="#{student.id}" styleClass="form-control" />
                </div>
            </div>
            <div class="form-group">
                <div class="col-xs-offset-2 col-xs-10">
                    <h:commandButton value="Delete Student Record" action="#{student.deleteStudentRecord}" styleClass="btn btn-primary btn-sm btnPos" />
                </div>
            </div>
        </h:panelGrid>
        <h:outputText id="deleteResult" rendered="#{not empty deletedStudentId}" value="!! Student Record Deleted From Database !!" styleClass="successText" />
    </h:form>

    <!-- Form In Order To Show A Particular Student Details -->
    <h3 class="marginLeft12">3. Find Student Record</h3>
    <h:form id="showStudent">
        <h:panelGrid columns="2">
            <div class="form-group">
                <h:outputLabel value="Id:" styleClass="control-label" />
                <div class="col-xs-10">
                    <h:inputText value="#{student.id}" styleClass="form-control" />
                </div>
            </div>
            <div class="form-group">
                <div class="col-xs-offset-2 col-xs-10">
                    <h:commandButton value="Show Student" action="#{student.getStudentDetailsById}" styleClass="btn btn-primary btn-sm btnPos" />
                </div>
            </div>
            <h:dataTable id="findStudentRecordDetails" rendered="#{not empty findStudentById}" value="#{student.studentList}" var="studList" styleClass="stud-table" headerClass="stud-table-header">
                <h:column>
                    <f:facet name="header">Name</f:facet>
                    <h:outputText value="#{studList.name}" styleClass="stud-table-row" />
                </h:column>
                <h:column>
                    <f:facet name="header">Description</f:facet>
                    <h:outputText value="#{studList.department}" styleClass="stud-table-row" />
                </h:column>
            </h:dataTable>
        </h:panelGrid>
    </h:form>

    <!-- Form For Updating Existing Student Details -->
    <h3 class="marginLeft12">4. Update Student Details</h3>
    <h:form id="updateStudentRecord">
        <h:panelGrid columns="2">
            <div class="form-group">
                <h:outputLabel value="Id:" styleClass="control-label" />
                <div class="col-xs-10">
                    <h:inputText value="#{student.id}" styleClass="form-control" />
                </div>
            </div>
            <div class="form-group">
                <div class="col-xs-offset-2 col-xs-10">
                    <h:commandButton value="Show Student" action="#{student.getStudentDetailsById}" styleClass="btn btn-primary btn-sm btnPos" />
                </div>
            </div>
            <div class="form-group">
                <h:outputLabel value="Id:" styleClass="control-label" />
                <div class="col-xs-10">
                    <h:inputText value="#{student.name}" styleClass="form-control" />
                </div>
            </div>
            <div class="form-group">
                <h:outputLabel value="Department:" styleClass="control-label" />
                <div class="col-xs-10">
                    <h:inputText value="#{student.department}" styleClass="form-control" />
                </div>
            </div>
            <div class="form-group">
                <div class="col-xs-offset-2 col-xs-10">
                    <h:commandButton value="Update Record" action="#{student.updateStudentDetails}" styleClass="btn btn-primary btn-sm btnPos" />
                </div>
            </div>
        </h:panelGrid>
        <h:outputText id="updateResult" rendered="#{not empty updatedStudentRecord}" value="!! Student Record Updated In Database !!" styleClass="successText" />
    </h:form>
</h:body>
</html>
3.3 Java Class Creation
Let’s create the required java files. Right click on src folder New -> Package
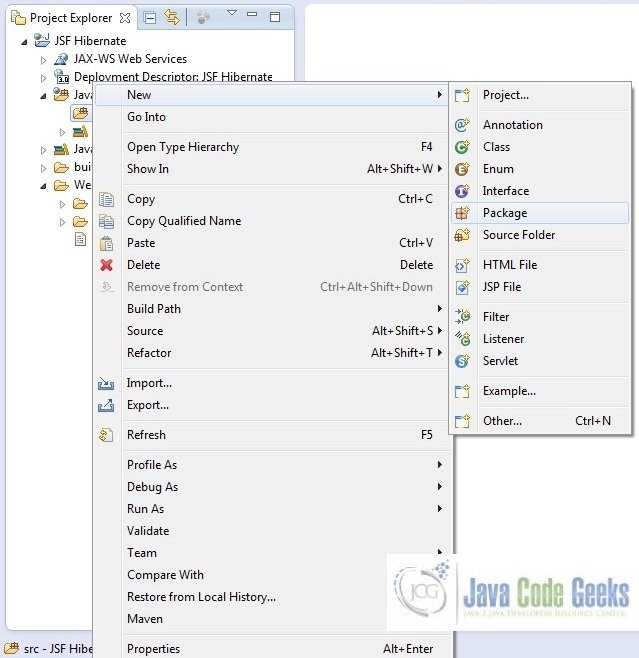
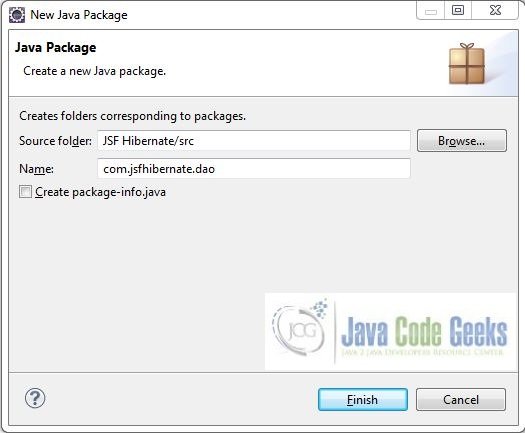
A new pop window will open where we will enter the package name as com.jsfhibernate.dao
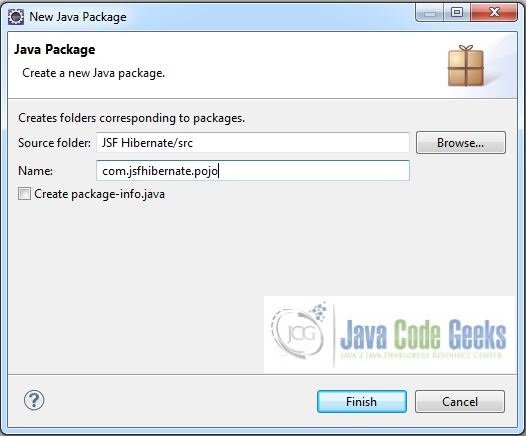
Repeat the above step (i.e. Fig. 14) and enter the package name com.jsfhibernate.pojo
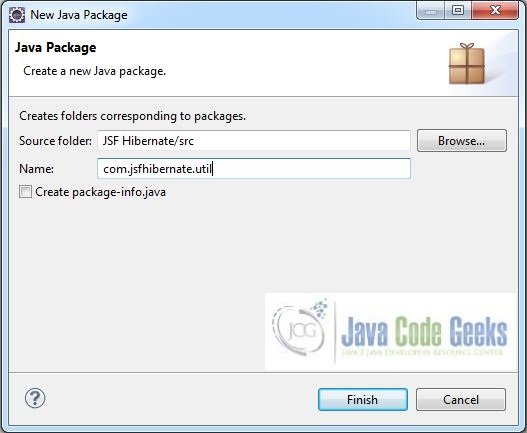
Again, repeat the step listed in Fig. 14 and enter the package name com.jsfhibernate.util

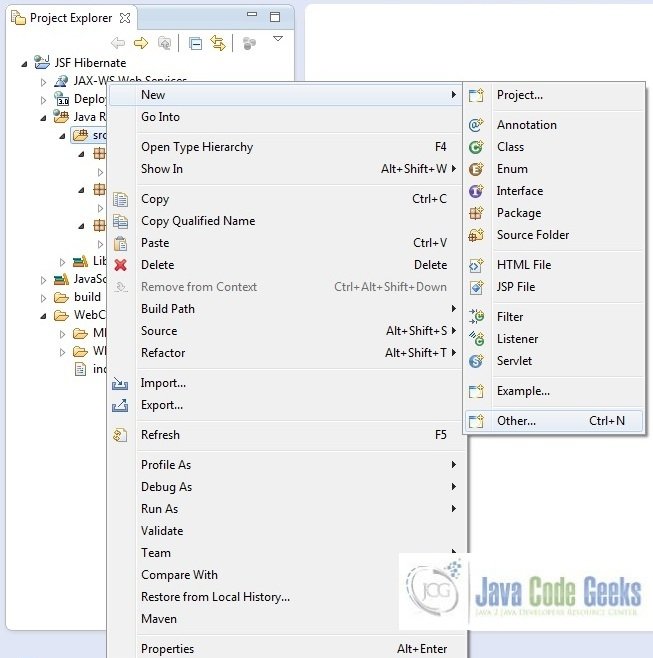
Once the packages are created in the application, we will need to create the required managed bean, session factory and database operations class. Right click on the newly create package New -> Class
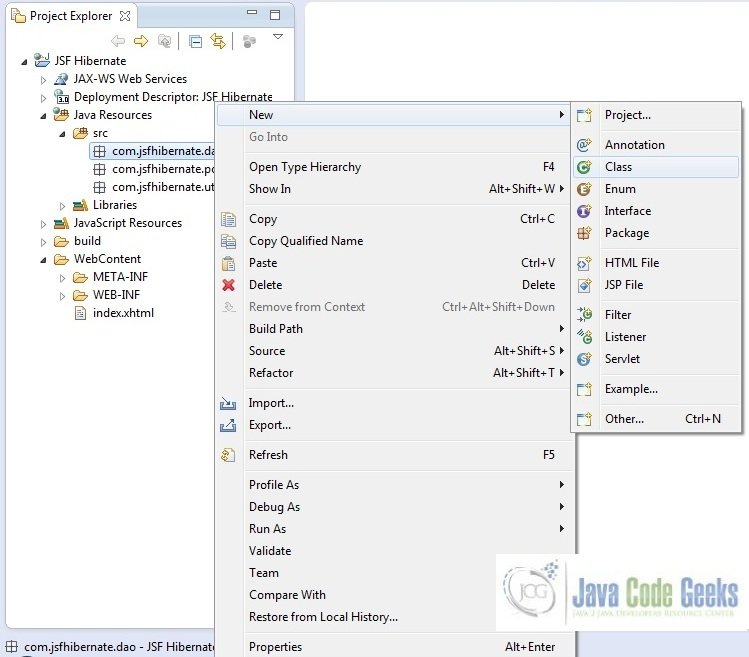
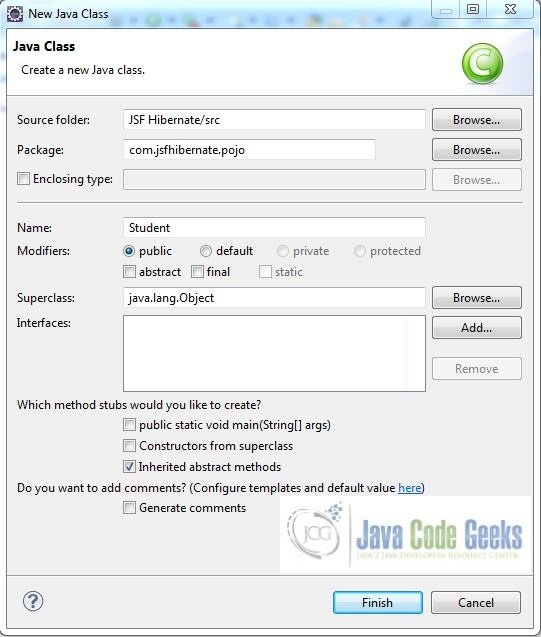
A new pop window will open and enter the file name as Student. The bean class will be created inside the package com.jsfhibernate.pojo
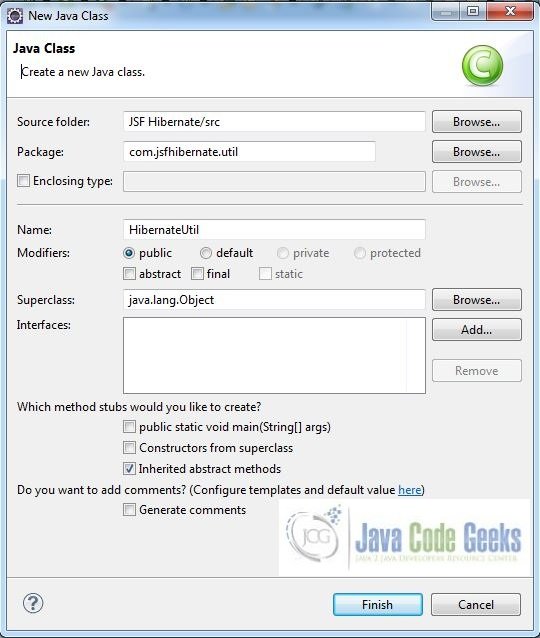
Repeat the step (i.e. Fig. 18) and enter the filename as HibernateUtil. The util class will be created inside the package – com.jsfhibernate.util
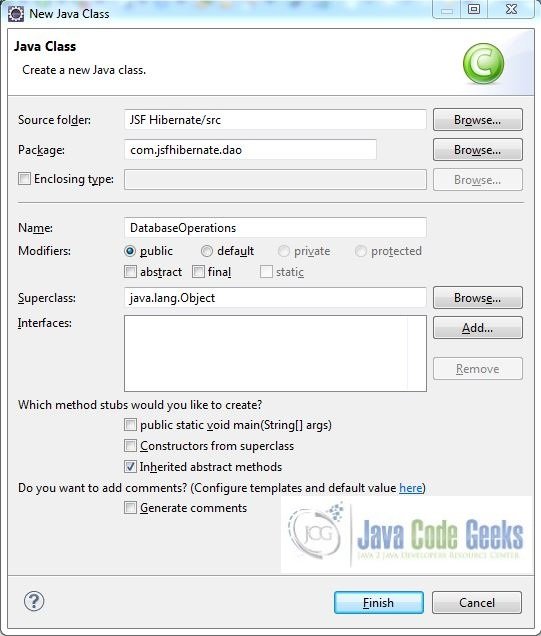
Again, repeat the step listed in Fig. 18 and enter the file name as DatabseOperations. The Dao class will be created inside the package – com.jsfhibernate.dao
3.3.1 Implementation of Managed Bean Class
Below is the managed bean which is used by the application. In this managed bean, we set the default value of the hidden field. Add the following code to it:
Student.java
package com.jsfhibernate.pojo;

import java.util.List;

import javax.faces.bean.ManagedBean;

import com.jsfhibernate.dao.DatabaseOperations;

@ManagedBean
public class Student implements java.io.Serializable {

	private int id;
	private String name;
	private String department;
	private List studentList;
	public static DatabaseOperations dbObj;
	private static final long serialVersionUID = 1L;

	public Student() { }

	public Student(int id) {
		this.id = id;
	}

	public Student(int id, String name, String department) {
		this.id = id;
		this.name = name;
		this.department = department;
	}

	public int getId() {
		return this.id;
	}

	public void setId(int id) {
		this.id = id;
	}

	public String getName() {
		return this.name;
	}

	public void setName(String name) {
		this.name = name;
	}
	public String getDepartment() {
		return this.department;
	}

	public void setDepartment(String department) {
		this.department = department;
	}

	public List getStudentList() {
		return studentList;
	}

	public void setStudentList(List studentList) {
		this.studentList = studentList;
	}

	// Method To Add New Student Details In Database
	public void saveStudentRecord() {
		System.out.println("Calling saveStudentRecord() Method To Save Student Record");
		dbObj = new DatabaseOperations();
		dbObj.addStudentInDb(this);
	}

	// Method To Delete A Particular Student Record From The Database
	public void deleteStudentRecord() {
		System.out.println("Calling deleteStudentRecord() Method To Delete Student Record");
		dbObj = new DatabaseOperations();
		dbObj.deleteStudentInDb(id);
	}

	// Method To Fetch Particular Student Details From The Database
	public List getStudentDetailsById() {
		System.out.println("Calling getStudentDetailsById() Method Details For Student Id?= " + id);
		dbObj = new DatabaseOperations();
		studentList = dbObj.getStudentById(id);
		for(Student selectedStud : studentList) {
			name = selectedStud.getName();
			department = selectedStud.getDepartment();
		}
		System.out.println("Fetched Id? " + id + " Details Are: Name=" + name + ", Department=" + department);
		return studentList;
	}

	// Method To Update Particular Student Details In Database
	public void updateStudentDetails() {
		System.out.println("Calling updateStudentDetails() Method To Update Student Record");
		dbObj = new DatabaseOperations();
		dbObj.updateStudentRecord(this);
	}
}
3.3.2 Implementation of Hibernates Session Factory Class
This class helps in creating the SessionFactory from the hibernate configuration file. The SessionFactory is threadsafe, so it is not necessary to obtain one for each thread. Add the following code to it:
HibernateUtil.java
package com.jsfhibernate.util;

import org.hibernate.SessionFactory;
import org.hibernate.cfg.Configuration;

public class HibernateUtil {

	private static SessionFactory sessionFactoryObj = buildSessionFactoryObj();

	// Create The SessionFactory Object From Standard (Hibernate.cfg.xml) Configuration File
	@SuppressWarnings("deprecation")
	public static SessionFactory buildSessionFactoryObj() {
		try {
			sessionFactoryObj = new Configuration().configure().buildSessionFactory();
		} catch (ExceptionInInitializerError exceptionObj) {
			exceptionObj.printStackTrace();
		}
		return sessionFactoryObj;
	}

	public static SessionFactory getSessionFactory() {
		return sessionFactoryObj;
	}
}
3.3.3 Implementation of DAO Class
This class has methods which interact with database for different operation i.e. creates a new student record, edit or update the existing student record or delete the record from the database. Add the following code to it:
DatabaseOperations
package com.jsfhibernate.dao;

import java.util.ArrayList;
import java.util.List;

import javax.faces.context.FacesContext;

import org.hibernate.Query;
import org.hibernate.Session;
import org.hibernate.Transaction;

import com.jsfhibernate.pojo.Student;
import com.jsfhibernate.util.HibernateUtil;

public class DatabaseOperations {

	private static Transaction transObj;
	private static Session sessionObj = HibernateUtil.getSessionFactory().openSession();

	// Method To Add New Student Details In Database
	public void addStudentInDb(Student studentObj) {
		try {
			transObj = sessionObj.beginTransaction();
			sessionObj.save(studentObj);
			System.out.println("Student Record With Id: " + studentObj.getId() + " Is Successfully Created In Database");

			// XHTML Response Text
			FacesContext.getCurrentInstance().getExternalContext().getSessionMap().put("createdStudentId",  studentObj.getId());
		} catch (Exception exceptionObj) {
			exceptionObj.printStackTrace();
		} finally {
			transObj.commit();
		}
	}

	// Method To Delete A Particular Student Record From The Database
	public void deleteStudentInDb(int delStudentId) {
		try {
			transObj = sessionObj.beginTransaction();
			Student studId = (Student)sessionObj.load(Student.class, new Integer(delStudentId));
			sessionObj.delete(studId);
			System.out.println("Student Record With Id: " + delStudentId + " Is Successfully Deleted From Database");

			// XHTML Response Text
			FacesContext.getCurrentInstance().getExternalContext().getSessionMap().put("deletedStudentId",  delStudentId);
		} catch (Exception exceptionObj) {
			exceptionObj.printStackTrace();
		} finally {
			transObj.commit();
		}
	}

	// Method To Fetch Particular Student Details From The Database
	@SuppressWarnings({ "unchecked", "unused" })
	public List getStudentById(int studentId) {
		Student particularStuDObj = new Student();
		List particularStudentList = new ArrayList();
		try {
			transObj = sessionObj.beginTransaction();
			Query queryObj = sessionObj.createQuery("from Student where id= :student_id").setInteger("student_id", studentId);
			particularStuDObj = (Student)queryObj.uniqueResult();
			particularStudentList = queryObj.list();
			System.out.println("Student Record With Id: " + studentId + " Is Fetched Successfully From Database");

			// XHTML Response Text
			FacesContext.getCurrentInstance().getExternalContext().getSessionMap().put("findStudentById",  studentId);
		} catch(Exception exceptionObj) {
			exceptionObj.printStackTrace();
		} finally {
			transObj.commit();
		}
		return particularStudentList;
	}

	// Method To Update Particular Student Details In The Database
	public void updateStudentRecord(Student updateStudentObj) {
		try {
			transObj = sessionObj.beginTransaction();
			sessionObj.update(updateStudentObj);
			System.out.println("Student Record With Id: " + updateStudentObj.getId() + " Is Successfully Updated In Database");

			// XHTML Response Text
			FacesContext.getCurrentInstance().getExternalContext().getSessionMap().put("updatedStudentRecord",  "Success");
		} catch(Exception exceptionObj){
			exceptionObj.printStackTrace();
		} finally {
			transObj.commit();
		}
	}
}
4. Hibernate Configuration Files
To configure the hibernate framework, we need to implement the following files in our application:
- Configuration File – hibernate.cfg.xml
- Mapping File – Student.hbm.xml
- POJO Mapping File – hibernate.reveng.xml
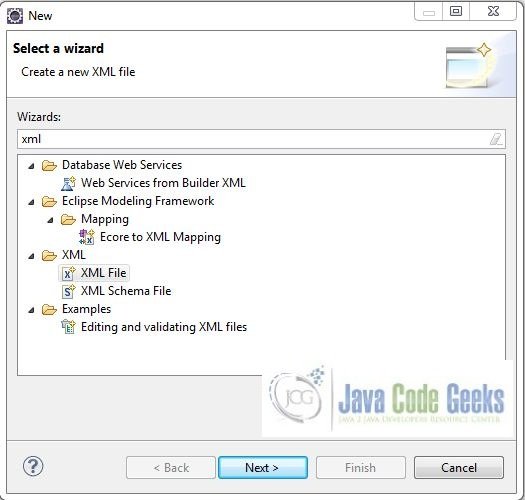
Let’s create the required xml files. Right click on src folder New -> Other
A new pop window will open and select the wizard as XML file
Again, a pop-up window will open. Verify the parent folder location as src and enter the file name as hibernate.cfg.xml. Click Finish

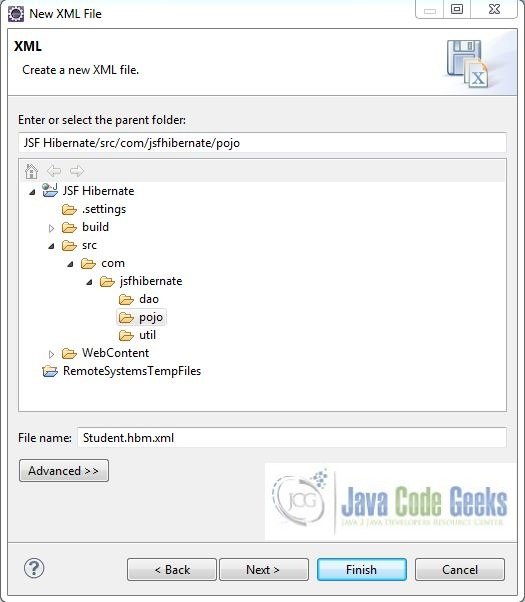
Repeat the step (i.e. Fig. 22) and verify the parent folder location as com.jsfhibernate.pojo. Enter the file name as Student.hbm.xml and click Finish
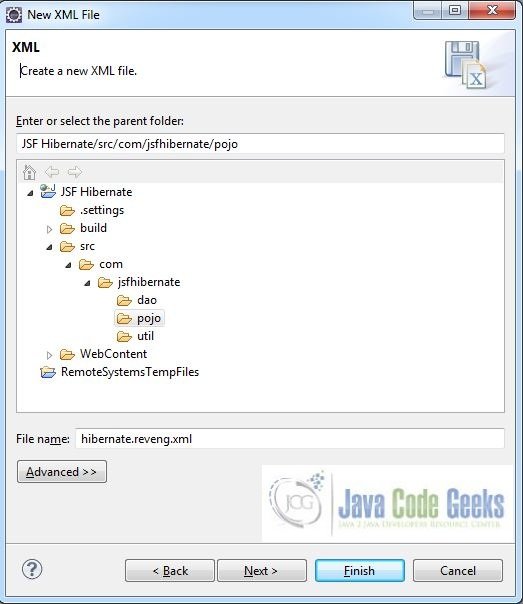
Again, repeat the listed in Fig. 22 and verify the parent folder location as com.jsfhibernate.pojo. Enter the file name as hibernate.reveng.xml and click Finish
4.1 Implementation of Configuration File
Create a file hibernate.cfg.xml in src folder. Add the following code to it:
hibernate.cfg.xml
<?xml version="1.0" encoding="UTF-8"?>
<!DOCTYPE hibernate-configuration PUBLIC "-//Hibernate/Hibernate Configuration DTD 3.0//EN" "http://hibernate.sourceforge.net/hibernate-configuration-3.0.dtd">
<hibernate-configuration>
	<session-factory>
		<property name="hibernate.dialect">org.hibernate.dialect.MySQLDialect</property>
		<property name="hibernate.connection.driver_class">com.mysql.jdbc.Driver</property>
		<property name="hibernate.connection.url">jdbc:mysql://localhost:3306/jsfhibercrud</property>
		<property name="hibernate.connection.username">root</property>
		<property name="hibernate.connection.password"></property>
		<property name="show_sql">true</property>
		<mapping resource="com/jsfhibernate/pojo/Student.hbm.xml"/>
	</session-factory>
</hibernate-configuration>
Note: We have kept the hibernate.connection.password value as blank for simplicity, however, it is pure unto user to keep it blank or set it during the MySQL configuration. If the user sets it, we need to provide the same password to this string.
4.2 Implementation of Mapping File
Create a file Student.hbm.xml in com.jsfhibernate.pojo package under the src folder. Add the following code to it:
Student.hbm.xml
<?xml version="1.0"?>
<!DOCTYPE hibernate-mapping PUBLIC "-//Hibernate/Hibernate Mapping DTD 3.0//EN"
"http://www.hibernate.org/dtd/hibernate-mapping-3.0.dtd">
<hibernate-mapping>
    <class name="com.jsfhibernate.pojo.Student" table="student" catalog="jsfhibercrud" optimistic-lock="version">
        <id name="id" type="java.lang.Integer">
            <column name="id" />
            <generator class="assigned" />
        </id>
        <property name="name" type="string">
            <column name="Name" />
        </property>
        <property name="department" type="string">
            <column name="Department" />
        </property>
    </class>
</hibernate-mapping>
4.3 Implementation of POJO Mapping File
Create a file hibernate.reveng.xml in com.jsfhibernate.pojo package under the srcfolder. Add the following code to it:
hibernate.reveng.xml
<?xml version="1.0" encoding="UTF-8"?>
<!DOCTYPE hibernate-reverse-engineering PUBLIC "-//Hibernate/Hibernate Reverse Engineering DTD 3.0//EN"
	"http://hibernate.sourceforge.net/hibernate-reverse-engineering-3.0.dtd">
<hibernate-reverse-engineering>
   <schema-selection match-catalog="jsfhibercrud" />
   <table-filter match-name="student" />
</hibernate-reverse-engineering>
5. Project Deploy
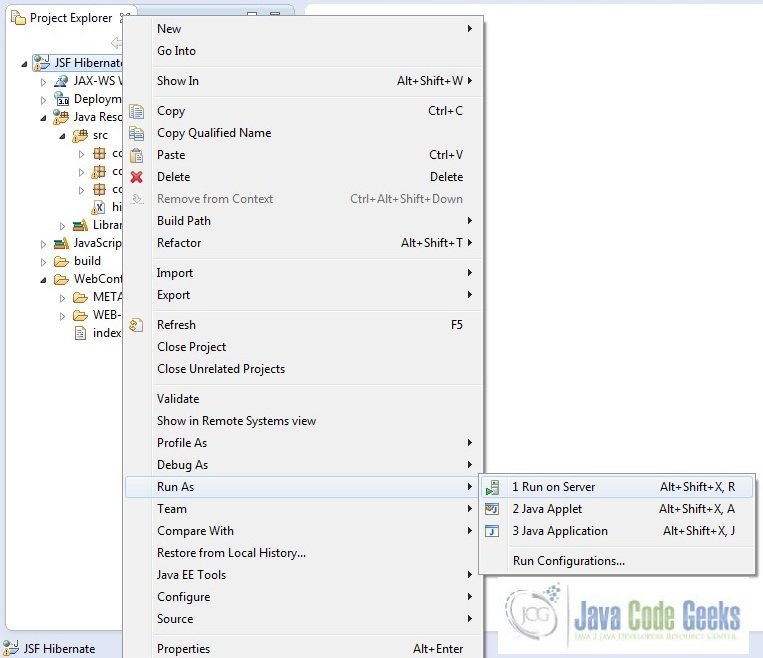
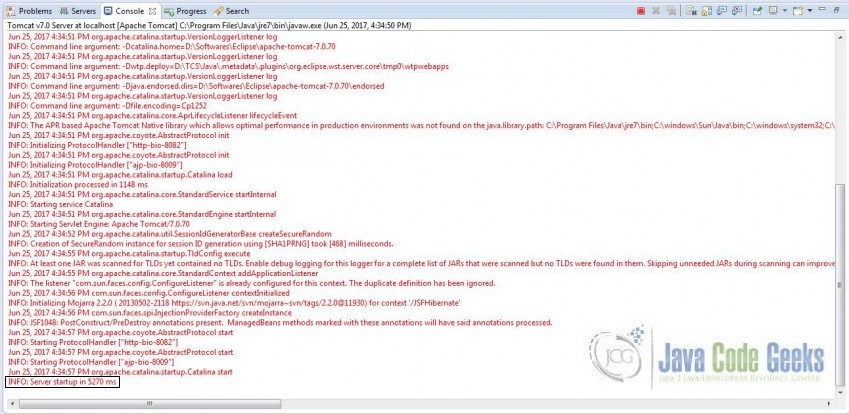
Once we are ready with all the changes done, let us compile and deploy the application on tomcat7 server. In order to deploy the application on tomcat7, right-click on the project and navigate to Run as -> Run on Server
Tomcat will deploy the application in its webapps folder and shall start it’s execution to deploy the project so that we can go ahead and test it on the browser.
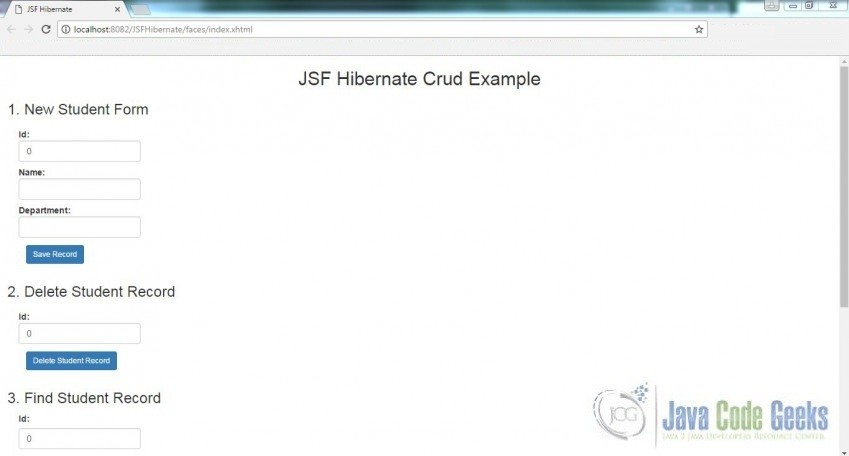
Open your favorite browser and hit the following URL. The output page will be displayed.
http://localhost:8085/JSFHibernate/faces/index.xhtml
Server name (localhost) and port (8085) may vary as per your tomcat configuration
6. Project Demo
Now, we are done with the application creation and it’s time to test out the application. Accessing the page: index.xhtml, we will see the application page.
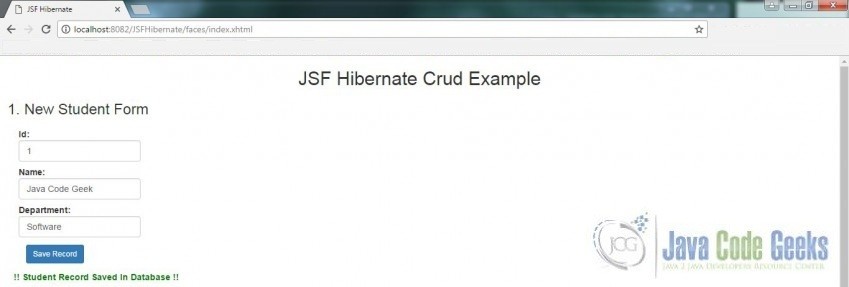
Create Student Page: Add a new student record
You can add new student record in student table
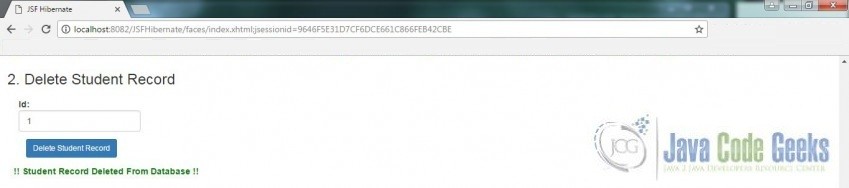
Deleting a Student Record
Find Student Details

Update Student Page

Hope this helped :)
7. Conclusion
Through this example, we learned about the integration of database in JSF using the hibernate framework. All the code for this example was deployed using the Tomcat7 application server.
8. Download the Eclipse Project
This was a JSF Hibernate Crud example with Eclipse, MySQL, and Tomcat
You can download the full source code of this example here: JSF Hibernate

Hello guys, an error occured in code “Student.java”, line 81, the red underline was under “studentList” :
“Type mismatch: cannot convert from element type Object to Student”
any ideas ?
@Ramzi – Just try to specify the type of object the
studentListwill hold and see if this helps!thanks !
what did you do to solve this problem?
We solve the problem by adding Object in (Object selectedStud : studentList)
Hello guys, an error occured in code “Student.java”, line 81, the red underline was under “studentList” :
“Type mismatch: cannot convert from element type Object to Student”
any ideas ?
Hi,
When I click some action on screen, I’m getting exceptioninintializererror. Can anyone help me resolve this please please..I can add more details on error
Thank you for giving such good content
When I run the project, the page only shows 4 titles but not the forms. Should there be some .css files in the source code? The download files don’t have .css files.
.css files are unnecessary to show form