In this example, we will learn how to configure a JSF example with eclipse and tomcat. We will discuss the tools used and steps required to configure your first JSF enabled sample application.
1. Introduction
JSF is an MVC framework that eases the user interfaces for server based applications by reusable UI components. It facilitates Web application development by:
- Providing reusable UI components
- Easy data transfer between UI components
- Manage UI state across multiple server requests
- Enable implementation of custom components
- Wire client side event to server side application code
The application is similar to any other Java based web application. It runs in a Java servlet container and contains:
- JavaBeans components as models
- A custom tag library for representing event handlers, validators and rendering UI components
- Server-side helper classes and controllers to perform the user actions
- Validators, event and navigation handlers
- Application configuration resource file
2. JSF Example with Eclipse and Tomcat
2.1 Tools Used
Our preferred environment is Eclipse. We are using Eclipse Kepler SR2, JDK 8 (1.8.0_131) and Tomcat 7 application server. Having said that, we have tested the code against JDK 1.7 and it works well.
2.2 Project Structure
First, let’s review the final project structure, in case you are confused about where you should create the corresponding files or folder later!

2.3 Project Creation
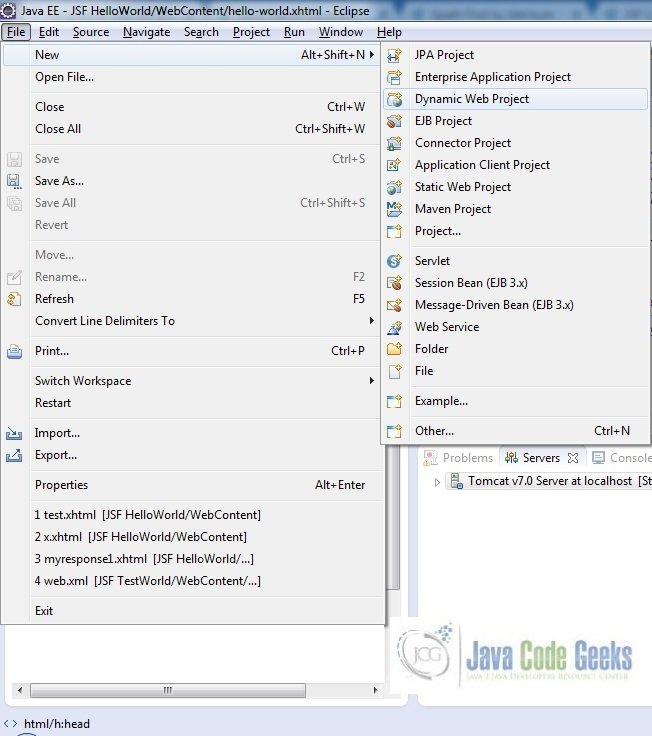
In this section, we will see how to create a Java project with Eclipse. In eclipse IDE, go to File -> New -> Dynamic web project
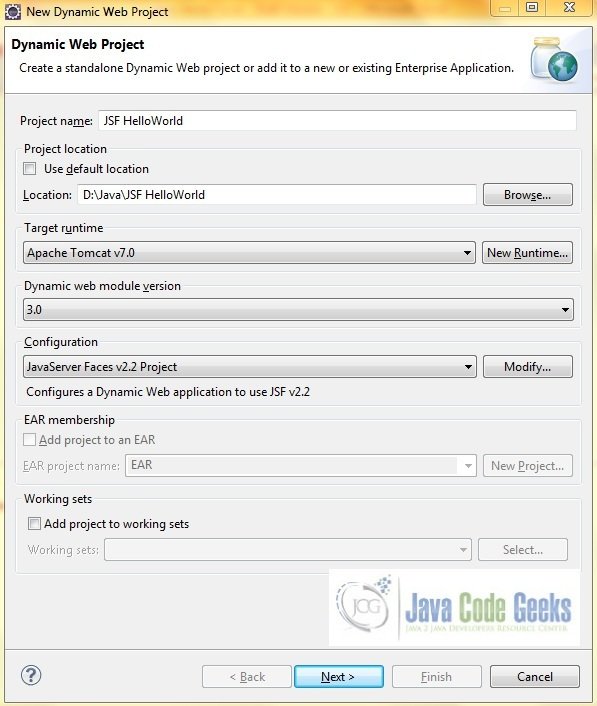
In the “New Dynamic Project” window fill in the below details and click next
- Enter the project name and project location
- Select “Target runtime” as “Apache Tomcat v7.0” from dropdown
- Select “Configuration” as “JavaServer Faces v.2.2 Project“ from dropdown (this is required to download the java server faces capabilities in your project)
Leave everything as default in this window as we are not making any java files for the hello-word application. Simply click next and we will land up on the web-module window

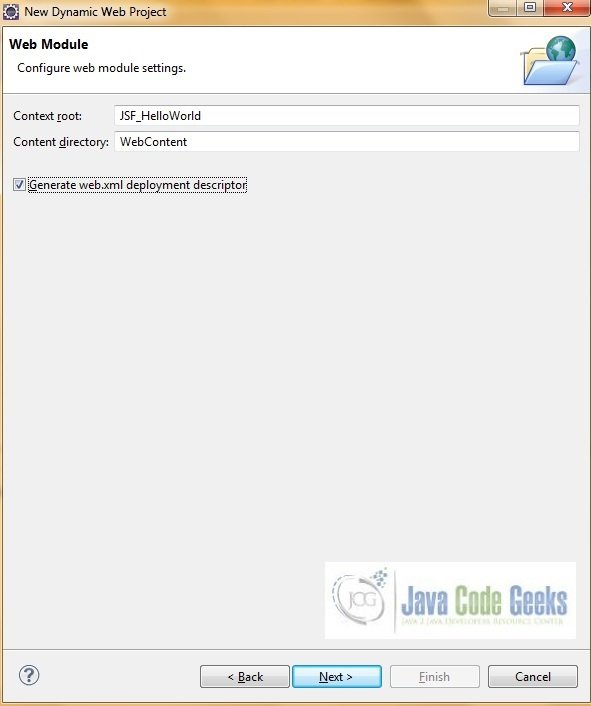
In the Web Module window, leave the context_root and content_directory values as default (however, you can change the context_root but for the first application let’s keep it as a default value). Simply, check “Generate web.xml deployment descriptor” checkbox and click next
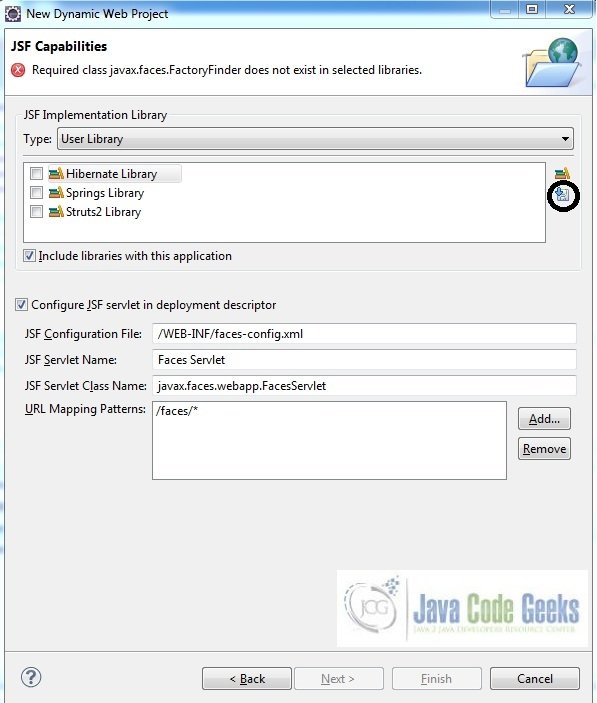
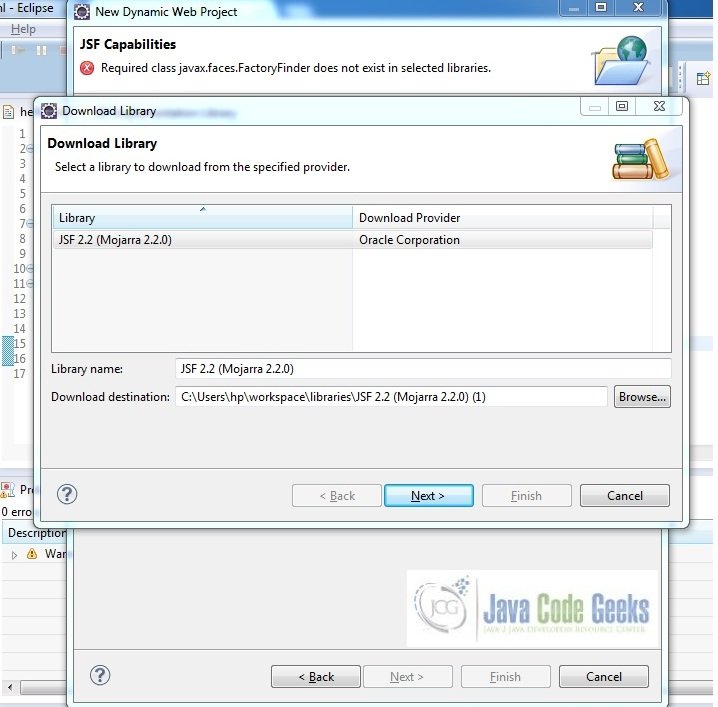
In the JSF Capabilities windows, we will require downloading the dependencies (not available by default) so that our project is configured as a JSF module in Eclipse. Add the JSF capabilities to the web project by clicking on the download icon (encircled in fig. 5) and download the JSF 2.2 mojara implementation.
A new pop-up window will open where it will auto lists down the JSF library. Select the JSF 2.2 library and click next (the library name and download destination will be auto populated).
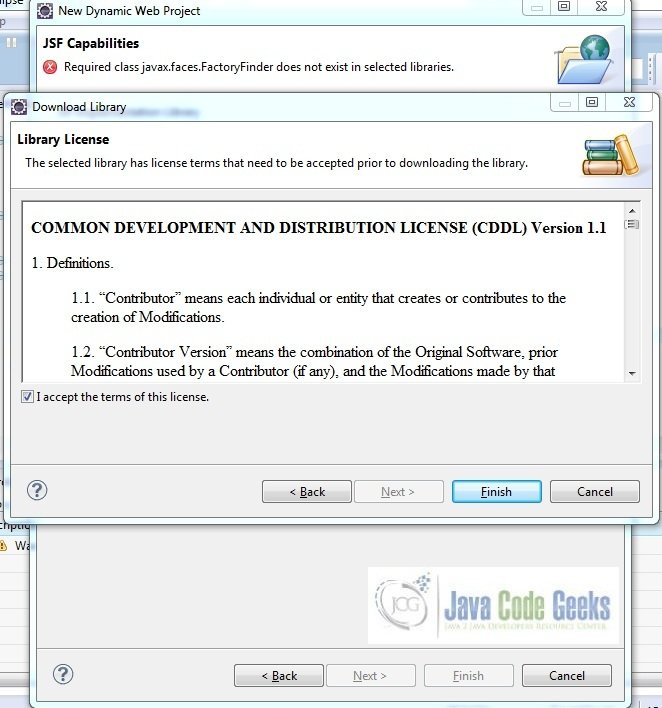
Check the license checkbox and click finish. Eclipse will download the JSF 2.2 library and will display them on the JSF capabilities windows (i.e. Step5)
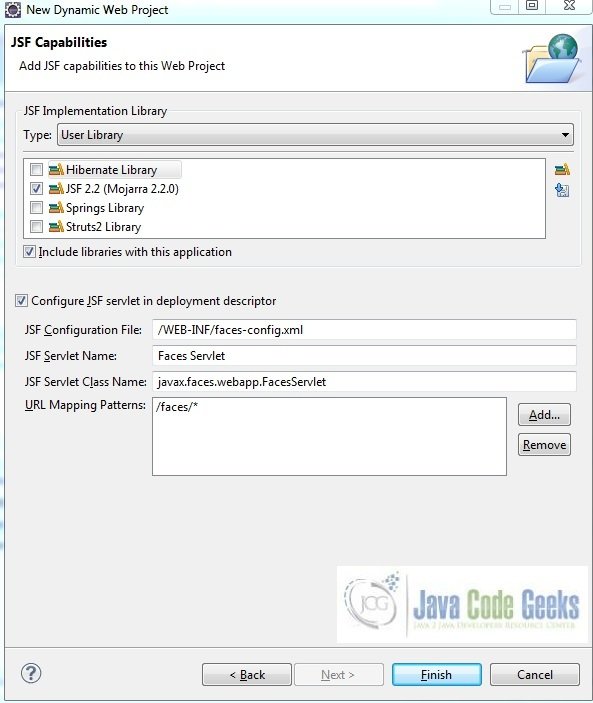
Now the JSF implementation libraries will be listed down on the capabilities page. Select the checkbox (JSF2.2 (Mojarra 2.2.0)) and leave everything else as default. Click finish.
Eclipse will create the project named JSF HelloWorld in the workspace and web.xml will be configured for accepting the JSF requests. It will have the following code
web.xml
<?xml version="1.0" encoding="UTF-8"?>
<web-app xmlns:xsi="http://www.w3.org/2001/XMLSchema-instance"
	xmlns="http://java.sun.com/xml/ns/javaee"
	xsi:schemaLocation="http://java.sun.com/xml/ns/javaee http://java.sun.com/xml/ns/javaee/web-app_3_0.xsd"
	id="WebApp_ID" version="3.0">
	<display-name>JSF HelloWorld</display-name>
	<welcome-file-list>
		<welcome-file>index.html</welcome-file>
		<welcome-file>index.htm</welcome-file>
		<welcome-file>index.jsp</welcome-file>
		<welcome-file>default.html</welcome-file>
		<welcome-file>default.htm</welcome-file>
		<welcome-file>default.jsp</welcome-file>
	</welcome-file-list>
	<servlet>
		<servlet-name>Faces Servlet</servlet-name>
		<servlet-class>javax.faces.webapp.FacesServlet</servlet-class>
		<load-on-startup>1</load-on-startup>
	</servlet>
	<servlet-mapping>
		<servlet-name>Faces Servlet</servlet-name>
		<url-pattern>/faces/*</url-pattern>
	</servlet-mapping>
	<context-param>
		<description>State saving method: 'client' or 'server' (=default). See JSF Specification 2.5.2</description>
		<param-name>javax.faces.STATE_SAVING_METHOD</param-name>
		<param-value>client</param-value>
	</context-param>
	<context-param>
		<param-name>javax.servlet.jsp.jstl.fmt.localizationContext</param-name>
		<param-value>resources.application</param-value>
	</context-param>
	<listener>
		<listener-class>com.sun.faces.config.ConfigureListener</listener-class>
	</listener>
</web-app>
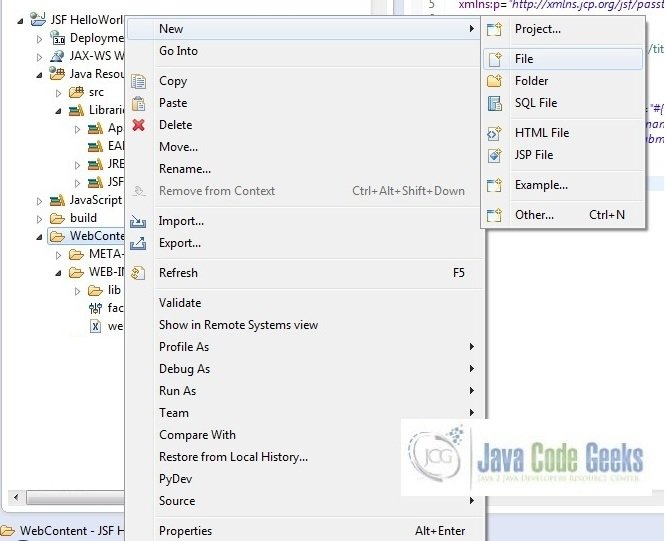
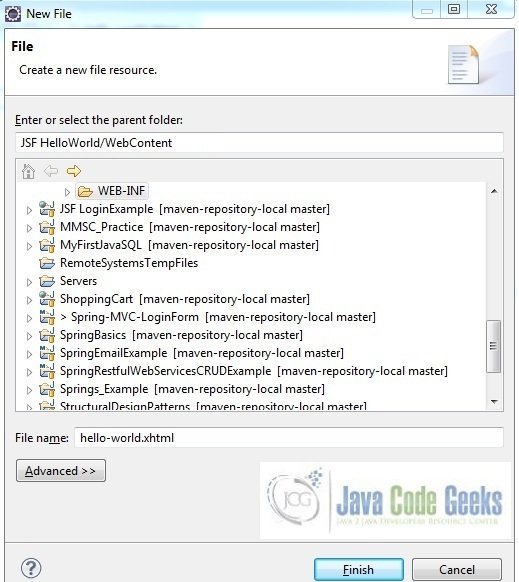
Once the project is created in the eclipse workspace, we can start building our first application. Right click on WebContent -> New -> File
In JSF 2.0, it’s recommended to create a JSF page in XHTML format, a file format with a .xhtml extension
A pop-up window will open, verify the parent folder location as JSF HelloWorld/WebContent and enter the file name (hello-world.xhtml) and click Finish.

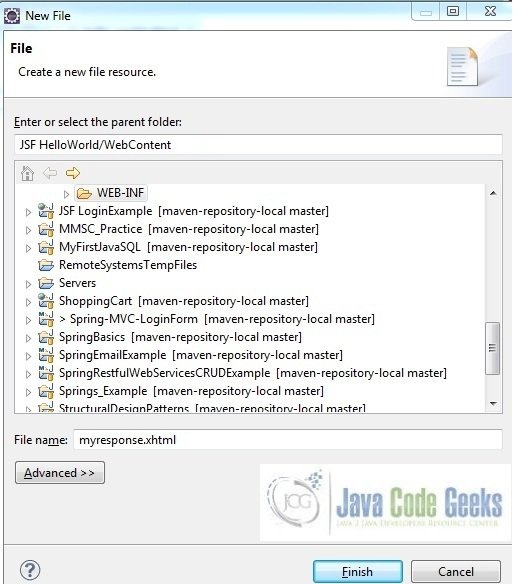
Repeat the where we need to create the file for our application (i.e. fig. 9). Again, verify the parent folder location as JSF HelloWorld/WebContent and enter the filename (myresponse.xhtml) and click Finish.
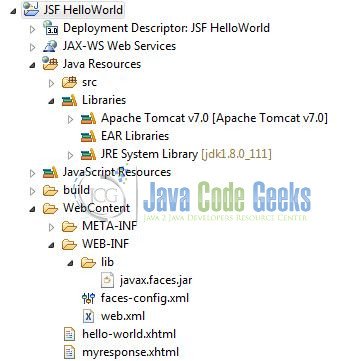
Required files will be created in the WebContent folder of the project and now the project structure will look like as per fig. 12
Now in order to use the JSF component tags, we need to declare the below namespaces at top of the page in the prepared files.
xmlns:c="http://java.sun.com/jsf/core"
xmlns:h="http://java.sun.com/jsf/html"
xmlns:p="http://xmlns.jcp.org/jsf/passthrough"
Here in the input file, #{theUserName} means that the input text will be linked to the name on the response page. The action attribute in the button tag will tell the browser where to navigate for output. Add the following code to it –
hello-world.xhtml
<!DOCTYPE HTML>
<html lang="en" xmlns="http://www.w3.org/1999/xhtml"
	xmlns:c="http://java.sun.com/jsf/core"
	xmlns:h="http://java.sun.com/jsf/html"
	xmlns:p="http://xmlns.jcp.org/jsf/passthrough">
	<h:head>
		<title>Hello World - Input Form</title>
	</h:head>
	<h:body>
		<h:form>
			<h:inputText id="name" value="#{theUserName}"
				p:placeholder="What's your name?" />
			<h:commandButton value="Submit" action="myresponse" />
		</h:form>
	</h:body>
</html>
In this page, JSF will display the #{theUserName} property value which we set in the input page (i.e. hello-world.xhtml). Add the following code to it.
myresponse.xhtml
<!DOCTYPE HTML>
<html lang="en" xmlns="http://www.w3.org/1999/xhtml"
	xmlns:f="http://java.sun.com/jsf/core"
	xmlns:h="http://java.sun.com/jsf/html">
	<h:head>
		<title>Hello World - Response</title>
	</h:head>
	<h:body bgcolor="white">
		<h4>Hello, #{theUserName}</h4>
	</h:body>
</html>
As we have now successfully configured the required code for our application, we are ready to deploy it on the Tomcat7 to test it and understand how the application works.
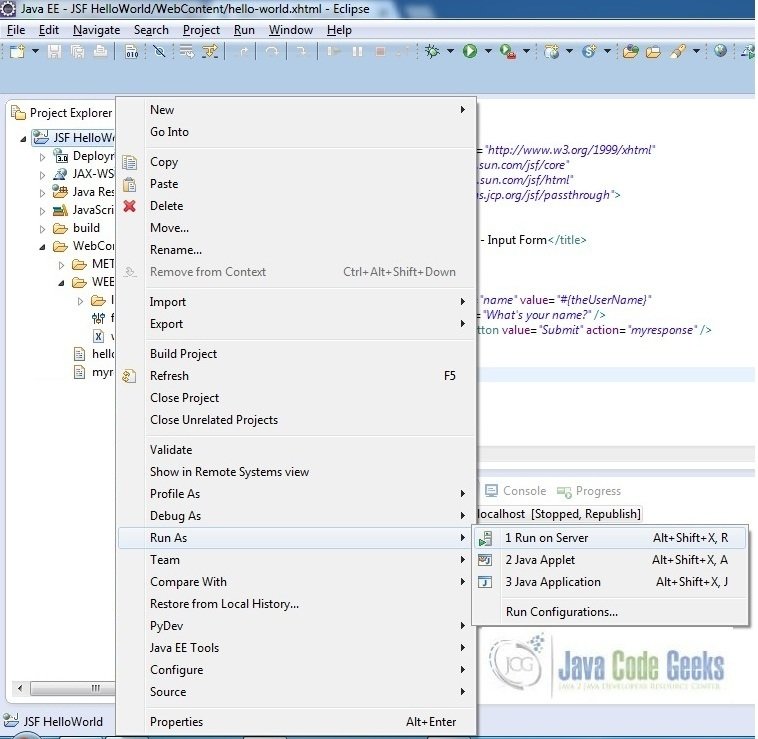
2.4 Project Deploy
Now, let’s deploy the project on tomcat application server. In order to deploy the application on tomcat7, right-click on the project and navigate to Run as -> Run on Server
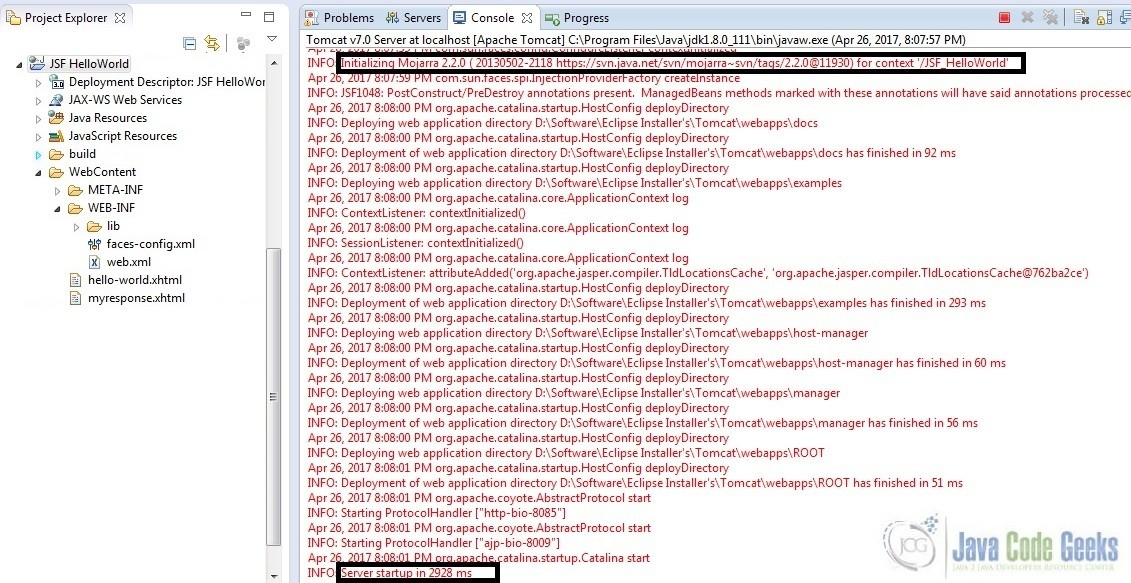
Tomcat will deploy the application in its webapps folder and shall start its execution to deploy the project so that we can go ahead and test it on the browser.
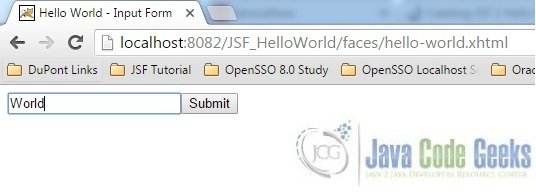
Open your favorite browser and hit the following URL. The output page will be displayed
http://localhost:8082/JSF_HelloWorld/faces/hello-world.xhtml
Server name (localhost) and port (8082) may vary as per your tomcat configuration
2.5 Project Demo
When we will hit the application url, the input page will be displayed where you need to enter text in the textbox.
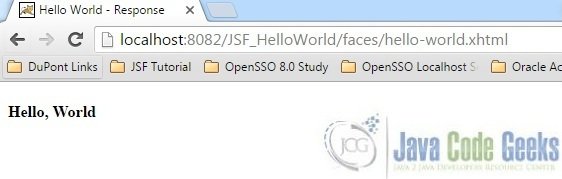
Hit the submit button and that’s it, the page should display hello world message now.
Hope this helped!
3. Conclusion
Through this example, we have learned on how to configure a hello-world JSF application in eclipse and deploy it using the tomcat7 application server.
4. Download the Eclipse Project
This was a JSF Example with Eclipse and Tomcat
You can download the full source code of this example here: JSFHelloWorld

When I try and download the JSF library, my ‘Download Provider’ List is empty. How do we add Oracle as a download provider as shown in your example?
Thank you very much.
It’s working
http://localhost:8080/HelloWorld/faces/hellomsg.xhtml;jsessionid=312B66819D7132B900DBDC3D27CF7E01 getting the jsessionid error for the above program when trying to execute it. I used apache tomacat with jsf2.0