Spring Boot @CrossOrigin Annotation Example
Cross-origin resource sharing (CORS) is a standard protocol that defines the interaction between a browser and a server for safely handling cross-origin HTTP requests.
Simply put, a cross-origin HTTP request is a request to a specific resource, which is located at a different origin, namely a domain, protocol and port, than the one of the client performing the request.
For obvious reasons, browsers can request several cross-origin resources, including images, CSS, JavaScript files and so forth. By default, however, a browser’ security model will deny any cross-origin HTTP request performed by client-side scripts.
While this behavior is desired, for instance, to prevent different types of Ajax-based attacks, sometimes we need to instruct the browser to allow cross-origin HTTP requests from JavaScript clients with CORS.
To better understand why CORS is useful in certain use cases, let’s consider the following example: a JavaScript client running on http://localhost:4200, and a Spring Boot RESTful web service API listening at http://domain.com/someendpoint.
In such a case, the client should be able to consume the REST API, which by default would be forbidden. In order to accomplish this, we can easily enable CORS for these two specific domains on the browser by simply annotating the methods of the RESTful web service API responsible for handling client requests with the @CrossOrigin annotation.
In this article, we’ll learn how to use the @CrossOrigin annotation in the implementation of a RESTful web service in Spring Boot.
1. The Maven Dependencies
Let’s start creating a basic RESTful web service. In this case, the service’s functionality will be limited to just fetching some JPA entities from an in-memory H2 database, and returning them in JSON format to the client in the response body.
The service’s Maven dependencies are fairly standard.
pom.xml
<?xml version="1.0" encoding="UTF-8"?>
<project xmlns="http://maven.apache.org/POM/4.0.0" xmlns:xsi="http://www.w3.org/2001/XMLSchema-instance"
         xsi:schemaLocation="http://maven.apache.org/POM/4.0.0 http://maven.apache.org/xsd/maven-4.0.0.xsd">
    <modelVersion>4.0.0</modelVersion>

    <groupId>com.javacodegeeks.crossorigin</groupId>
    <artifactId>com.javacodegeeks.crossorigin</artifactId>
    <version>0.1.0</version>

    <parent>
        <groupId>org.springframework.boot</groupId>
        <artifactId>spring-boot-starter-parent</artifactId>
        <version>2.1.3.RELEASE</version>
    </parent>

    <dependencies>
        <dependency>
            <groupId>org.springframework.boot</groupId>
            <artifactId>spring-boot-starter-web</artifactId>
        </dependency>
        <dependency>
            <groupId>org.springframework.boot</groupId>
            <artifactId>spring-boot-starter-data-jpa</artifactId>
        </dependency>
        <dependency>
            <groupId>com.h2database</groupId>
            <artifactId>h2</artifactId>
            <scope>runtime</scope>
        </dependency>
    </dependencies>

    <properties>
        <java.version>1.8</java.version>
    </properties>

    <build>
        <plugins>
            <plugin>
                <groupId>org.springframework.boot</groupId>
                <artifactId>spring-boot-maven-plugin</artifactId>
            </plugin>
        </plugins>
    </build>

</project>
As shown above, we included spring-boot-starter-web, as we’ll need it for creating the RESTful service, and spring-boot-starter-jpa, for implementing the persistence layer with minimal overhead.
Finally, the in-memory H2 database will allow us to persist our JPA entities, without having to perform expensive database operations.
2. The Domain Layer
In addition, we’ll implement a thin domain layer, which will include one single User JPA entity class. For simplicity’s sake, the entity will be just an anemic POJO, whose functionality will be limited to modeling users.
User.java
package com.javacodegeeks.crossorigin;

import javax.persistence.Entity;
import javax.persistence.GeneratedValue;
import javax.persistence.GenerationType;
import javax.persistence.Id;

@Entity
public class User {

    @Id
    @GeneratedValue(strategy = GenerationType.AUTO)
    private long id;
    private String name;

    public User(){}

    public User(String name) {
        this.name = name;
    }

    public long getId() {
        return id;
    }

    public String getName() {
        return name;
    }

    @Override
    public String toString() {
        return "User{" + "id=" + id + ", name=" + name + '}';
    }
}
As can be seen, the implementation of the User class is pretty self-explanatory. In fact, the only implementation detail worth noting here is the use of the @Entity annotation.
The annotation marks the class as a JPA entity, which means that a JPA implementation can manage it. Unless we explicitly configure a different implementation, Spring Boot will use Hibernate as the default JPA implementation.
3. The Repository Layer
Spring Boot makes it really easy to implement JPA-based repository layers, without having to roll on from scratch our own DAO implementation.
Therefore, to have minimal CRUD functionality on instances of the User class that we defined before, we just need to extend Spring Boot’s CrudRepository interface.
UserRepository.java
package com.javacodegeeks.crossorigin;

import org.springframework.data.repository.CrudRepository;
import org.springframework.stereotype.Repository;

@Repository
public interface UserRepository extends CrudRepository<User, Long>{}
By just defining an interface that extends Spring Boot’s CrudRepository interface is sufficient for having a fully-working implementation at runtime, which provides basic CRUD functionality on the User JPA entities.
4. The REST Controller
As a matter of fact, the repository layer is functional in isolation. But of course, we need to implement a higher-level layer on top of it, which allows us to define an endpoint that can be used by different remote clients for performing cross-origin HTTP requests to the REST service.
To achieve this, we’ll need to create a REST controller annotated with the @CrossOrigin annotation. Simply put, the controller will act as a middle-tier between the clients and the repository layer.
Here’s the REST controller implementation:
UserController.java
package com.javacodegeeks.crossorigin;

import org.springframework.web.bind.annotation.CrossOrigin;
import org.springframework.web.bind.annotation.GetMapping;
import org.springframework.web.bind.annotation.RestController;

@RestController
@CrossOrigin(origins = "http://localhost:8383")
public class UserController {

    private final UserRepository userRepository;

    public UserController(UserRepository userRepository) {
        this.userRepository = userRepository;
    }

    @GetMapping("/users")
    public Iterable<User> getUsers() {
        return userRepository.findAll();
    }
}
We annotated the UserController class with the @RestController annotation. As a result, Spring Boot will automatically marshall to JSON the entities returned by the getUsers() method, which is annotated with @GetMapping, and send them back to the client in the response body.
Regarding the implementation of the getUsers() method, it simply returns an Iterable<User> implementation for the JPA entities persisted in the H2 database. This makes it easy to iterate over the entities using a for-each loop statement.
Of course, the most relevant detail worth stressing here is the use of the @CrossOrigin(origins = "http://localhost:8383") annotation. This permits the browser to safely handle cross-origin HTTP requests from a client whose origin is http://localhost:8383.
We specified this origin, as it’s the one of our example JavaScript client (more on this later). Of course, feel free to change it to a different one, in order to suit your personal requirements.
Since we placed the @CrossOrigin annotation at class level, it enables CORS in the browser for all the class methods. In this case, the class implements just one method, but it might, of course, implement multiple ones.
5. Using @CrossOrigin with Multiple Origins
In the current implementation of the User class, the @CrossOrigin annotation only allows cross-origin HTTP requests from a single origin. We can take a less restrictive approach and specify multiple origins, on a per-use-case need.
UserController.java (with CORS enabled for multiple origins)
package com.javacodegeeks.crossorigin;

import org.springframework.web.bind.annotation.CrossOrigin;
import org.springframework.web.bind.annotation.GetMapping;
import org.springframework.web.bind.annotation.RestController;

@RestController
@CrossOrigin(origins = {"http://localhost:8383", "http://anotherdomain:4200"})
public class UserController {

    // ...

    @GetMapping("/users")
    public Iterable<User> getUsers() {
        return userRepository.findAll();
    }
}
6. Specifying @CrossOrigin at Method Level
In addition, we can use the @CrossOrigin annotation at method level. This makes it easy to specify more selectively which methods we can call through a cross-origin HTTP request.
UserController.java (with CORS enabled at method level)
package com.javacodegeeks.crossorigin;

import org.springframework.web.bind.annotation.CrossOrigin;
import org.springframework.web.bind.annotation.GetMapping;
import org.springframework.web.bind.annotation.RestController;

@RestController
public class UserController {

    // ...

    @GetMapping("/users")
    @CrossOrigin(origins = "http://localhost:8383")
    public Iterable<User> getUsers() {
        return userRepository.findAll();
    }
}
7. Running the Spring Boot Application
At this point, we should have a pretty clear idea on how to use the @CrossOrigin annotation in the implementation of a REST controller. Even so, we still need to create a typical Spring Boot bootstrapping class and run the REST service.
Application.java
package com.javacodegeeks.crossorigin;

import java.util.stream.Stream;
import org.springframework.boot.CommandLineRunner;
import org.springframework.boot.SpringApplication;
import org.springframework.boot.autoconfigure.SpringBootApplication;
import org.springframework.context.annotation.Bean;

@SpringBootApplication
public class Application {

    public static void main(String[] args) {
        SpringApplication.run(Application.class, args);
    }

    @Bean
    CommandLineRunner initialize(UserRepository userRepository) {
        return args -> {
            Stream.of("Susan", "Robert", "Laura").forEach(name -> {
                User user = new User(name);
                userRepository.save(user);
            });
        };
    }
}
As shown above, the Applicationclass implements the initialize() method, which simply persists a few User entities in the database when the application starts up.
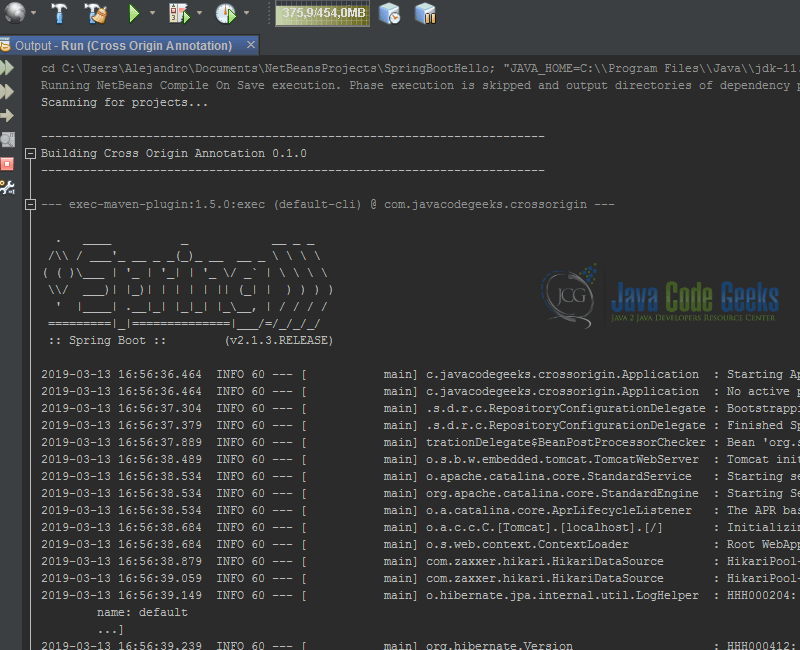
Now, we can either run the application from within our IDE:

Or from the command line, with Maven:
$mvn spring-boot:run
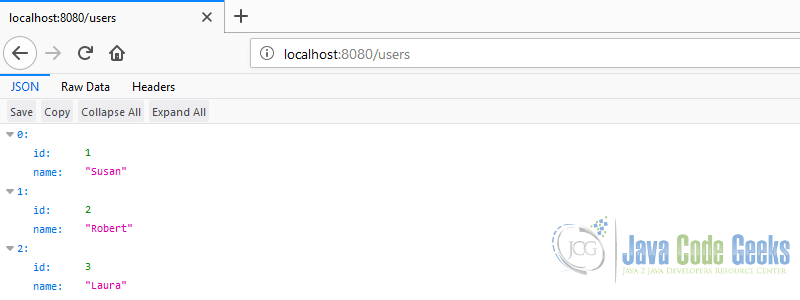
Once that we launched the application, let’s open the browser and point it to http://localhost:8080/users.
Clicking on the JSON tab, we should see the list of User entities persisted in the H2 database. Thus, this means that the RESTful web service works as expected.

In production, we should create an integration test and / or use a free REST API testing tool, such a Postman or Katalon Studio, to exercise the REST controller API. In this case, we’ll omit that step, for brevity’s sake.
8. The JavaScript Client
With the RESTful web service up and running, now we need to implement a basic JavaScript client that performs a cross-origin HTTP request to the http://localhost:8080/users endpoint. Hence, we can see the functionality of the @CrossOrigin annotation.
In fact, there are several ways to accomplish this, ranging from using vanilla JavaScript and jQuery, to more complex approaches, including Angular and React clients. To keep things simple, we’ll just use jQuery.
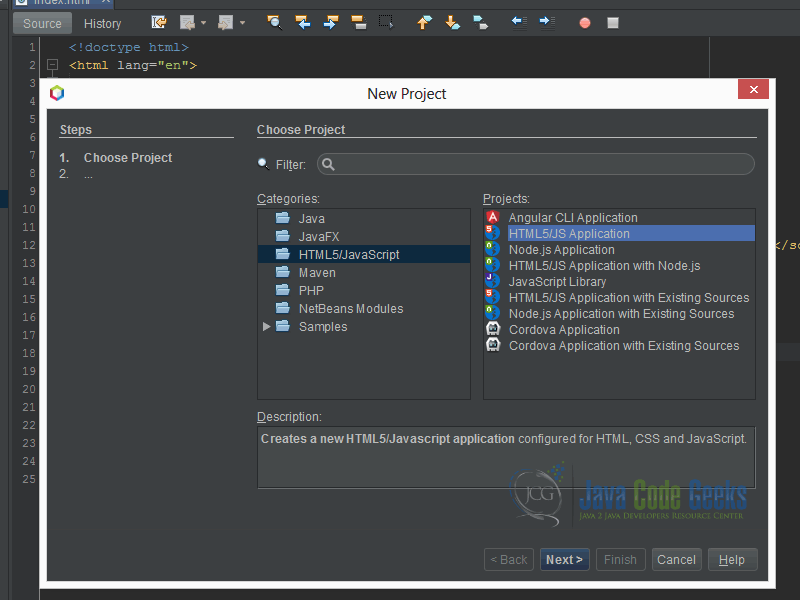
Let’s open Netbeans, and then select New Project -> HTML5/JS Application.

Once that we’ve created the static web project in NetBeans, let’s open the index.html file and edit it, as follows:
<!doctype html>
<html lang="en">
    <head>
        <meta charset="utf-8">
        <title>JavaScript Client</title>
        <meta charset="UTF-8">
        <meta name="viewport" content="width=device-width, initial-scale=1.0">
    </head>
    <body>
        <h1>JavaScript Client</h1>
        <button id="btn">Get Users</button>
        <script src="https://examples.javacodegeeks.com/wp-content/litespeed/localres/aHR0cHM6Ly9jZG5qcy5jbG91ZGZsYXJlLmNvbS8=ajax/libs/jquery/3.3.1/jquery.min.js"></script>
        <script>
            $(document).ready(function () {
                const Url = 'http://localhost:8080/users';
                $("#btn").click(function () {
                    $.get(Url, function (data, status) {
                        console.log(data);
                    });
                });
            });
        </script>
    </body>
</html>
As we can see, each time we click a plain HTML button, the JavaScript client just performs an Ajax HTTP request to the http://localhost:8080/users endpoint using jQuery’s $get() method. If the request is successful, the data is simply printed out to the browser console.
NetBeans uses http://localhost:8383 as the default origin for running HTML5/JS applications. On the other hand, the Spring Boot RESTful web service is listening at http://localhost:8080/users.
What we have here is a typical cross-origin HTTP request triggered from a JavaScript client, which is not allowed by default.
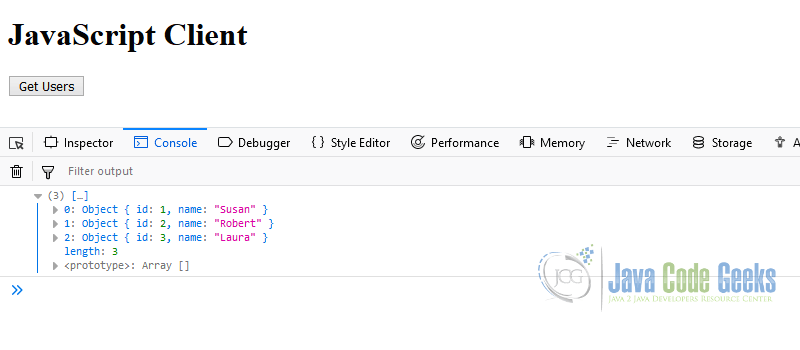
Since we enabled CORS in the RESTful web service for the JavaScript client with the @Crossorigin annotation, each time we click the button, we should see a JSON array of User entities persisted in the database displayed in the console.

9. Spring Boot @CrossOrigin Annotation – Conclusion
In this article, we learned how to use the @CrossOrigin annotation in the implementation of a Spring Boot RESTful Web service.
In addition, we took a dive dive into the key concepts of cross-origin HTTP requests, and explored a concrete use case, where it’s useful to enable them.
10. Download the Source Code
This was an example of using the @CrossOrigin annotation in Spring Boot.
You can download the full source code of this example here: Spring Boot @CrossOrigin Annotation Example


Excellent explanation!
When i tried to create my own application and send a get request to localhost:8080/users from localhost:8081, The @CrossOrigin is not working. String GET_URL = “http://localhost:8080/users”; URL obj = new URL(GET_URL); HttpURLConnection con = (HttpURLConnection) obj.openConnection(); con.setRequestMethod(“GET”); int responseCode = con.getResponseCode(); InputStream inputStream; if (200 <= responseCode && responseCode <= 299) { inputStream = con.getInputStream(); } else { inputStream = con.getErrorStream(); } BufferedReader in = new BufferedReader( new InputStreamReader( inputStream)); StringBuilder response = new StringBuilder(); String currentLine; while ((currentLine = in.readLine()) != null) response.append(currentLine); return response.toString(); with @CrossOrigin(origins = "http://localhost:8383") any request from port which is not 8383 is disabled.… Read more »