In this article, we provide a tutorial about Spring Boot MockMVC.
1. Introduction
As a software developer, you need to validate that your code is working correctly. You accomplish this by testing. There are different types of tests:
- Unit tests target a specific section of code, such as a method
- Integration tests verify that the interactions between your code and other parts of the system work as designed
- Functional tests are end-to-end (E2E) tests and are executed against an application that has been deployed to a DEV, QA, or pre-production environment
In this article, we will limit our discussion to unit testing.
A unit test has limited scope and tests your code separately from other collaborators. Unit tests should not involve any external dependencies directly. Examples of external dependencies are databases, message brokers, and web services.
Since well-written unit tests run in isolation, we require a mechanism for emulating collaborators. This can be achieved by using mock objects.
A mock object implements the interface of the real object but provides only enough code to simulate its behavior. This is acceptable in unit tests since we are not testing the collaborator, only that our code is calling its methods correctly and receiving the expected response.
However, some objects depend on the infrastructure to function. This is especially true of web MVC applications that require a Tomcat or other application server. This can be expensive for unit testing because of the overhead associated with starting and instantiating the various tiers of the infrastructure. For Spring applications, the Spring Test Framework provides us with options to help you write unit tests in these cases.
MockMvc is one such option. MockMvc is a utility class that gives you the ability to send mock HTTP servlet requests in a simulated MVC environment. This gives us the ability to test MVC applications without incurring the cost of instantiating an application server, In this example, we will demonstrate how to write unit tests for a Spring Boot MVC application using MockMVC.
1.1 Technologies Used
- Eclipse IDE for Enterprise Java Developers Version: 2020-09 (4.17.0)Spring Tools 4 – for Spring Boot
- Spring Tools 4 – for Spring Boot
Spring Tools 4 for Spring Boot is a set of plugins for Eclipse that support building and running Spring Boot applications. You can add Spring Tools 4 to your existing Eclipse installation by going to the Eclipse Marketplace and searching for “Spring Tools 4”.
Note: The sample projects were compiled with Java 11.
2. Spring Boot MockMvc Tutorial
2.1 Download the Archive File
We will use a sample Spring Boot project as the basis or our JUnit tests. Begin by downloading the spring-boot-mockmvc.zip archive from the download section and extracting it to a folder of your choice.
2.2 Import the Sample Project
Click File -> Import… and select Projects from Folder or Archive. Click Next.
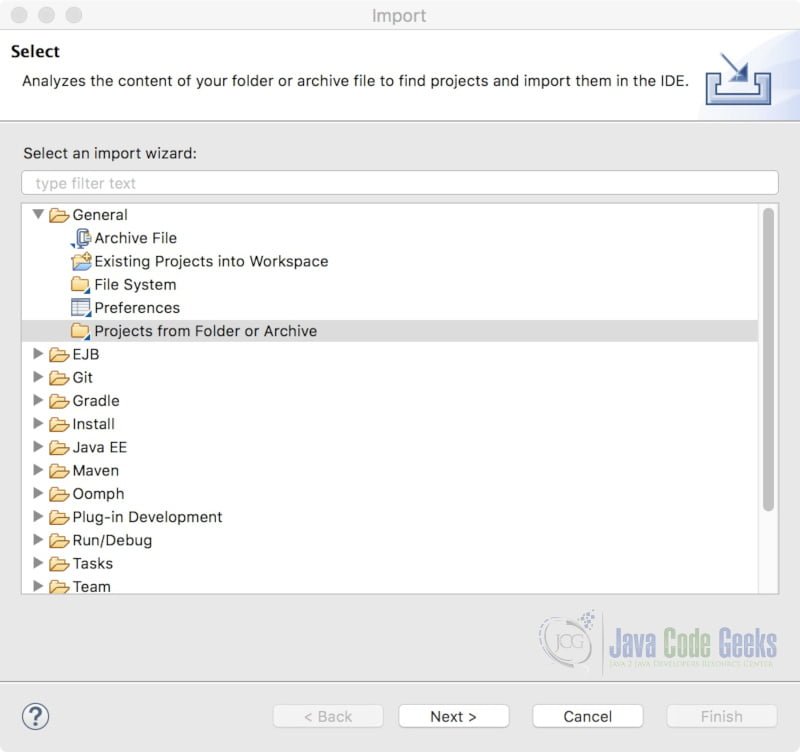
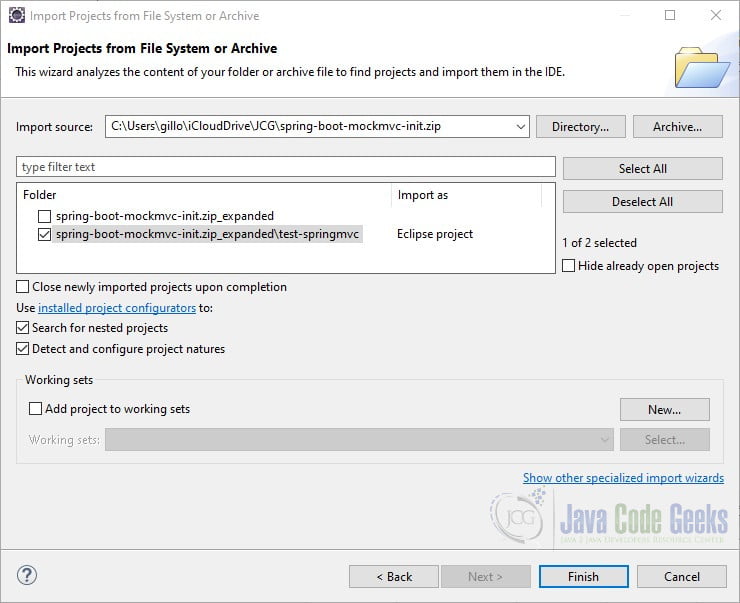
Click on the Archive… button and select the spring-boot-mockmvc-init.zip file from the folder where the archive was extracted. Select the Eclipse project from the list and click Finish.
The sample application has three controllers:
- Hello World controller
- Rest controller that exposes endpoints for CRUD operations
- MVC controller that displays a web page
2.3 Spring Boot Test Starter
When you create a Spring Boot application using the Spring Boot initializer, the Spring Boot Starter Test dependency is automatically added to your classpath. Spring Boot Starter Test contains many useful frameworks/libraries to help you test your application including JUnit, Mockito, Hamcrest, and Spring Boot Test.
The dependency also includes the Spring MVC Test Framework. The framework provides some options for using MockMvc. For example, you can:
- Bootstrap the entire application context. This option adds all beans that have been configured in your application.
- Bootstrap the web layer. This option adds only MVC components to the application context.
- Bootstrap the minimum infrastructure to run your tests. This option gives the developer more control in configuring the MockMvc object.
Let us see how each of these options is implemented.
2.4 Using MockMvc with Entire Application Context
One annotation that you can apply to your test case classes is @SpringBootTest. This annotation uses the SpringBootTestContextBootstrapper class to create the application context. When you use @SpringBootTest, all beans configured in your application are added to the context.
The @AutoConfigureMockMvc annotation will automatically configure the MockMvc object when used in combination with @SpringBootTest. Let us see how this is achieved. Create a JUnit test case (under /src/test/java) with the following boilerplate code:
HelloBootTest.java
import org.springframework.beans.factory.annotation.Autowired;
import org.springframework.boot.test.autoconfigure.web.servlet.AutoConfigureMockMvc;
import org.springframework.boot.test.context.SpringBootTest;
import org.springframework.test.web.servlet.MockMvc;

@SpringBootTest
@AutoConfigureMockMvc
class HelloBootTest {

	@Autowired
	MockMvc mockMvc;
}
We will create two tests to verify the HelloController request handler method. The controller looks like this:
HelloController.java
import org.springframework.web.bind.annotation.GetMapping;
import org.springframework.web.bind.annotation.RequestParam;
import org.springframework.web.bind.annotation.RestController;

@RestController
public class HelloController {

	@GetMapping("hello")
	String hello(@RequestParam(defaultValue = "world!") String name) {
		return "Hello " + name;
	}

}
Let’s add some tests to HelloBootTest:
HelloBootTest.java
import static org.hamcrest.CoreMatchers.containsString;
import static org.springframework.test.web.servlet.request.MockMvcRequestBuilders.get;
import static org.springframework.test.web.servlet.result.MockMvcResultHandlers.print;
import static org.springframework.test.web.servlet.result.MockMvcResultMatchers.content;
import static org.springframework.test.web.servlet.result.MockMvcResultMatchers.status;

import org.junit.jupiter.api.Test;
import org.springframework.beans.factory.annotation.Autowired;
import org.springframework.boot.test.autoconfigure.web.servlet.AutoConfigureMockMvc;
import org.springframework.boot.test.context.SpringBootTest;
import org.springframework.test.web.servlet.MockMvc;

@SpringBootTest
@AutoConfigureMockMvc
class HelloBootTest {

	@Autowired
	MockMvc mockMvc;

	@Test
	void whenNoRequestParam_returnDefault() throws Exception {
		this.mockMvc.perform(get("/hello"))
			.andExpect(status().isOk())
			.andExpect(content().string(containsString("Hello world!")))
			.andDo(print());
	}

	@Test
	void whenRequestParam_returnCustom() throws Exception {
		this.mockMvc.perform(
				get("/hello")
				.queryParam("name", "JCG!")
			)
			.andExpect(status().isOk())
			.andExpect(content().string(containsString("Hello JCG!")))
			.andDo(print());
	}

}
The MockMvc::perform method is used to send mock HTTP servlet requests to the TestDispatcherServlet. It accepts a RequestBuilder as a parameter.
The MockMvcRequestBuilders class has static factory methods used to create a MockMvcRequestBuilder. (MockMvcRequestBuilder is an implementation of RequestBuilder.) This argument is passed to the MockMvc::perform method.
In our example, we use get("/hello") to create a MockHttpServletRequestBuilder for a GET request and set it to be routed to the “/hello” URI. MockMvcRequestBuilders::get returns a MockHttpServletRequestBuilder that we can use to set the properties of the request.
To summarize, MockMvcRequestBuilders static factory methods are used to create a specific type of MockMvcRequestBuilder, such as a GET or POST builder, which can then be used to further shape the MockMvcServletRequest.
MockMvcRequestBuilder can be used to set the content type and content, to add request parameters, query parameters, headers, and more. This is done using a builder pattern. In the second test, for example, we add a query parameter to the request using MockMvcRequestBuilder::queryParam(String name, String …values).
When we are finished preparing the request the MockMvcRequestBuilder::buildRequest (ServletContext servletContext) method is called behind the scenes to create the MockHttpServletRequest. The request is then sent and a ResultsActions object is returned.
We use the ResultsActions object to work with the response. For example, we can assert an expectation (using a ResultMatcher), perform an action (using a ResultHandler), and return a MvcResult (which gives us direct access to the result). We can chain ResultMatchers and ResultHandlers.
There are many types of ResultMatchers, which we typically access through MockMvcResultMatchers static factory methods. In this example, we use a StatusResultMatcher to assert the status code is 200 (status().isOK()) and ContentResultMatchers (content().string(containsString("Hello world!") and content().string(containsString("Hello JCG!")) to assert the content returned in the response matches “Hello World!” and “Hello JCG”, respectively.
If you want to see the result printed to the standard output, you can use a ResultHandler. This we have done with andDo(print().
2.5 Using MockMvc with Web Layer Only
In some cases, you may want to limit your tests to the web layer only. The web layer consists of MVC components like @Controller, @ControllerAdvice, and @JsonComponent beans. The web layer does not include @Component, @Service, or @Repository beans. You can use the @WebMvcTest annotation for this purpose. Let us create a new JUnit test case to demonstrate. Begin by creating a new JUnit test case with the following boilerplate code:
RestWebTest.java
@WebMvcTest(controllers = StudentRestController.class)
class RestWebTest {

	@Autowired
	MockMvc mockMvc;

	@MockBean
	StudentService service;
}
By default, @WebMvcTest adds all @Controller beans to the application context. We can specify a subset of controllers by using the controllers attribute, as we have done here. @WebMvcTest auto-configures the MockMvc object by default. (The @AutoConfigureMockMvc annotation is not required though it can be used for further tweaking.)
We also create a mock StudentService object with @MockBean. This object will used in our tests to mock the behavior of the actual service by using Mockito’s when(service.call).thenReturn(Object) paradigm. This allows us to test our controller without instantiating or injecting any actual collaborators.
Here is an excerpt of the StudentRestController we will exercise in this test case:
StudentRestController.java
@RestController
@RequestMapping("students")
public class StudentRestController {

	private final StudentService service;

	public StudentRestController(StudentService service) {
		this.service = service;
	}

	@GetMapping
	Collection<Student> readStudents(){
		return this.service.findAll();
	}

	@GetMapping("/{id}")
	Student readStudent(@PathVariable Long id) {
		return this.service.findById(id)
				.orElseThrow(StudentNotFoundException::new);
	}

	@PostMapping
	ResponseEntity<?> addStudent(@RequestBody Student student){
		Student result = this.service.save(student);
		URI location = ServletUriComponentsBuilder
				.fromCurrentRequest()
				.path("/{id}")
				.buildAndExpand(result.getId())
				.toUri();

		return ResponseEntity.created(location).build();
	}
}
Let’s add some tests to RestWebTest:
RestWebTest.java
	@Test
	void whenReadStudent_returnJsonContent() throws Exception {
		Student student = new Student("Bill", "Gates", "Freshman");
		student.setId(102L);

		when(service.findById(102L)).thenReturn(Optional.of(student));


		this.mockMvc.perform(get("/students/102"))
			.andExpect(status().isOk())
			.andExpect(content().string(containsString(
				"{\"id\":102,\"firstName\":\"Bill\",\"lastName\":\"Gates\",\"year\":\"Freshman\"}")))
			.andDo(print());
	}

	@Test
	void whenAddStudent_returnCreatedStatus() throws Exception {
		Student newStudent = new Student("Bill", "Gates", "Freshman");
		newStudent.setId(100L);

		when(service.save(newStudent)).thenReturn(newStudent);


		this.mockMvc
			.perform(post("/students")
				.contentType(MediaType.APPLICATION_JSON)
				.content("{\"id\": \"100\",\"firstName\": \"Bill\",\"lastName\": \"Gates\",\"year\": \"Freshman\"}")
				)
			.andExpect(status().isCreated())
			.andExpect(header().exists("Location"))
			.andExpect(header().string("Location", Matchers.containsString(
					"http://localhost/students/100"))).andDo(print());
	}
The first test exercises the StudentRestController::readStudent method. Notice that we are verifying that the student object is returned in JSON format. This is expected since @RestController request handlers return objects in the response body as JSON by default.
In the second test, we use the MockMvcRequestBuilders::post static factory method to create a MockMvcRequestBuilder of type POST. We then set the content type and content to be posted using builder methods.
The MockMvc::perform method returns a ResultsActions object that we can use to test the response. We use static factory methods from MockMvcResultMatchers to:
- check that the returned status response is 201 (created)
- check that a location header was set in the response
- check that the location is set correctly, based on the dummy student we set in the mocked service
We can also use MockMvc to test traditional web applications, i.e. those that display views. Let us write a test for the StudentMvcController controller, which looks like this:
StudentMvcController.java
import org.springframework.stereotype.Controller;
import org.springframework.ui.Model;
import org.springframework.web.bind.annotation.GetMapping;
import org.springframework.web.bind.annotation.RequestMapping;

import com.javacodegeeks.service.StudentService;

@Controller
@RequestMapping("mvc")
public class StudentMvcController {

	private final StudentService service;

	public StudentMvcController(StudentService service) {
		this.service = service;
	}

	@GetMapping("students")
	public String getStudents(Model model) {
		model.addAttribute("students", service.findAll());
		return "student-list";
	}

}
Create a new test case with the following code:
MvcWebTest.java
import static org.mockito.Mockito.when;
import static org.springframework.test.web.servlet.request.MockMvcRequestBuilders.get;
import static org.springframework.test.web.servlet.result.MockMvcResultHandlers.print;
import static org.springframework.test.web.servlet.result.MockMvcResultMatchers.model;
import static org.springframework.test.web.servlet.result.MockMvcResultMatchers.status;
import static org.springframework.test.web.servlet.result.MockMvcResultMatchers.view;

import java.util.List;

import org.hamcrest.Matchers;
import org.junit.jupiter.api.Test;
import org.springframework.beans.factory.annotation.Autowired;
import org.springframework.boot.test.autoconfigure.web.servlet.WebMvcTest;
import org.springframework.boot.test.mock.mockito.MockBean;
import org.springframework.test.web.servlet.MockMvc;

import com.javacodegeeks.domain.Student;
import com.javacodegeeks.service.StudentService;

@WebMvcTest(controllers = StudentMvcController.class)
class MvcWebTest {

	@Autowired
	MockMvc mockMvc;

	@MockBean
	StudentService service;

	@Test
	void shouldReturnStudentListView() throws Exception {
		Student s1 = new Student("Jane", "Doe", "Junior");
		Student s2 = new Student("Martin", "Fowler", "Senior");
		Student s3 = new Student("Roy", "Fielding", "Freshman");
		List<Student> studentList = List.of(s1, s2, s3);

		when(service.findAll()).thenReturn(studentList);

		this.mockMvc.perform(get("/mvc/students"))
			.andExpect(status().isOk())
			.andExpect(view().name("student-list"))
			.andExpect(model().attribute("students", studentList))
			.andExpect(model().attribute("students", Matchers.hasSize(3)))
			.andDo(print());
	}

}
Here we use a ViewResultMatcher to assert the name of the view and ModelResultMatchers to assert different characteristics of the model.
2.6 Using MockMvc with Minimal Infrastructure
In some cases, you may not even want to test with the entire web layer but only want to use the bare minimum infrastructure required by the TestDispatcherServlet. You can use the MockMvcBuilders class for this purpose.
MockMvcBuilders.standaloneSetup(Object… controllers).build();
This creates a StandaloneMockMvcBuilder, which allows for full customization of your web controllers. For instance, you can register ControllerAdvice beans, ViewResolver beans, and add interceptors for incoming requests.
With this option, a MockServletContext is used to initialize the TestServletDispatcher. The MockServletContext has a smaller footprint than the ApplicationContext. Consequently, the tests run faster. Here is a sample test case:
HelloControllerTest.java
import static org.hamcrest.CoreMatchers.containsString;
import static org.springframework.test.web.servlet.request.MockMvcRequestBuilders.get;
import static org.springframework.test.web.servlet.result.MockMvcResultHandlers.print;
import static org.springframework.test.web.servlet.result.MockMvcResultMatchers.content;
import static org.springframework.test.web.servlet.result.MockMvcResultMatchers.status;

import org.junit.jupiter.api.BeforeEach;
import org.junit.jupiter.api.Test;
import org.springframework.test.web.servlet.MockMvc;
import org.springframework.test.web.servlet.setup.MockMvcBuilders;

class HelloControllerTest {

	MockMvc mockMvc;

	@BeforeEach
	void setUp() throws Exception {
		this.mockMvc = MockMvcBuilders.standaloneSetup(new HelloController()).build();
	}

	@Test
	void whenNoRequestParam_returnDefault() throws Exception {
		this.mockMvc.perform(get("/hello"))
			.andExpect(status().isOk())
			.andExpect(content().string(containsString("Hello world!")))
			.andDo(print());
	}
}
MockMvcBuilders can also be used to create a DefaultMockMvcBuilder.
MockMvcBuilders.webAppContextSetup(WebApplicationContext context)
The DefaultMockMvcBuilder is an option if you want to apply to one or more ResultMatchers (for your expectations) or a ResultHandler (e.g. print result actions to system output) across all responses. Here is an example.
RestControllerTest.java
@WebMvcTest(controllers = StudentRestController.class)
class RestControllerTest {

	MockMvc mockMvc;

	@MockBean
	StudentService service;

	@BeforeEach
	void setUp(WebApplicationContext wac) throws Exception {
		this.mockMvc = MockMvcBuilders.webAppContextSetup(wac)
						.alwaysExpect(status().isOk())
						.alwaysExpect(content().contentType(MediaType.APPLICATION_JSON))
						.alwaysDo(print())
						.build();
	}

	@Test
	void whenReadStudent_returnJsonContent() throws Exception {
		Student student = new Student("Bill", "Gates", "Freshman");
		student.setId(102L);
		when(service.findById(102L)).thenReturn(Optional.of(student));

		this.mockMvc.perform(get("/students/102"));
	}

	@Test
	void whenReadStudents_returnList() throws Exception {
		Student s1 = new Student("Jane", "Doe", "Junior");
		Student s2 = new Student("Martin", "Fowler", "Senior");
		Student s3 = new Student("Roy", "Fielding", "Freshman");
		List<Student> studentList = List.of(s1, s2, s3);

		when(service.findAll()).thenReturn(studentList);

		this.mockMvc.perform(get("/students"));
	}
}
The DefaultMockMvcBuilder requires a WebApplicationContext so it is not as light as the StandaloneMockMvcBuilder.
3. Spring Boot MockMVC – Summary
In this article, we showed how to test Spring Boot web applications with MockMvc. We explored the different options available to bootstrap the test environment.
We also demonstrated how to build a MockMvcServletRequest and how to use ResultMatchers to verify the code being tested.
If you want to find more Spring boot tutorials, follow this link.
4. Download the Source Code
This was a Spring Boot MockMvc Tutorial.

Excellent explanation. Thank You!!