With this example, we are going to demonstrate how to use Backing Bean in JavaServer Faces (JSF) to develop a Web Application by using three programs.
1. What is JavaServer Faces (JSF)?
JavaServer Faces (JSF) is used as a Component-based web framework that implements a Model-View-Controller design pattern for developing web applications.
2. Overview of JavaServer Faces (JSF)
- It uses Facelets as its default templating System
- It implements the MVC Design Pattern.
- It uses Expression Language that allows JSF Pages to access and manipulate Managed Beans and bind them to UI components.
- It has Navigation Model explains when and how JSF Page navigation should happen in a web application.
- It supports HTML 5 and Ajax.
- It is easy and can be used for rapid web development.
- It supports Internationalization to create web applications in different languages and regions.
- It provides Managed Bean and Backing Bean to offer Inversion of Control (IoC) or Dependency Injection.
- It handles Data Conversion using Faces Converter System and Validation using Faces validation System.
- It provides Event-based Programming model.
- It can be integrated with Spring Framework and JDBC.
- It can use other User Interface Component library (Primefaces) for creating User Interface Screens
- It uses Core Component Tags Library for validations, converting input values, and loading resource bundles.
- It uses an HTML Component Tags Library to create and render HTML components.
3. What are Managed Beans?
- Managed Beans are Java Bean Classes which
contains Getter/Setter Methods, Business logic and a Backing Bean. They are
loosely coupled to Server Side Java POJOs. - It can be declared either in a
facesconfig.xml
file or through Annotations. - They are “Lazily Initialized” by the
Container at runtime only when the application needs them. - It has various Scopes like Request, Session and
Application Scopes.
4. What are Backing Beans?
- Backing Beans are Java Beans Components
associated with User Interface Components in a JSF Page. - It contains Action methods, Action Listeners and
Value Change listeners that correspond to the UI components that initiate
action events. - It defines a set of methods that perform the
functions such as validates the component’s data, handle events, manages form
data and navigation. - There will be one Backing Bean for a JSF Page.
- It is registered in the
faces-config.xmlfile
with “_Backing” added to their names to know which beans are backing beans. - It participates in the View layer of MVC Design Pattern.
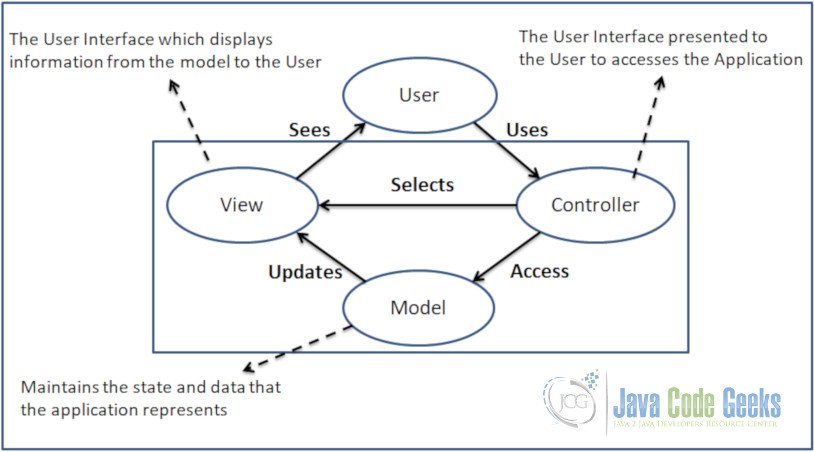
5. Model View Controller (MVC) Architecture
An MVC
application is segmented into three distinct application components:
- The Model, which contains the business logic
- The View, which contains all the code necessary to present a User Interface to the user
- The Controller, which handles the user’s requests and dispatches the appropriate view as a response to the User.
6. JavaServer Faces MVC Architecture
JavaServer Faces (JSF) strictly adheres to the MVC Architectural design principles by separating presentation (View) code from the back-end business logic (Model) code. It also provides a front-end (Controller) servlet that handles all Faces requests from the Users. It also dispatches the responses back to the users.
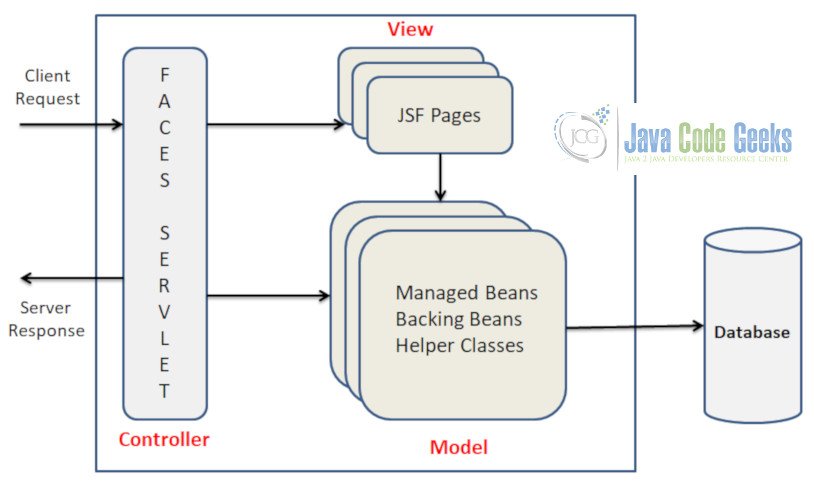
- Model – The Model contains methods and properties in managed beans specified either in the
faces-config.xmlfile or in annotations on the managed bean classes. - View – The View segment of a JSF application is created using
.xhtmlfiles with UI components. - Controller – The Faces Controller is implemented as a servlet that responds to all requests conforming to a certain URL pattern, such as /faces/* as defined in the
web.xmlfile. The FacesServlet is provided by the implementation, So, We need not have to write it by ourselves.
7. Software Requirements
- Java
SE 8 - Eclipse
Java EE IDE for Web Developers (Version: 2018-09 (4.9.0)) - Apache-tomcat-9.0.13
- JSF
2.0
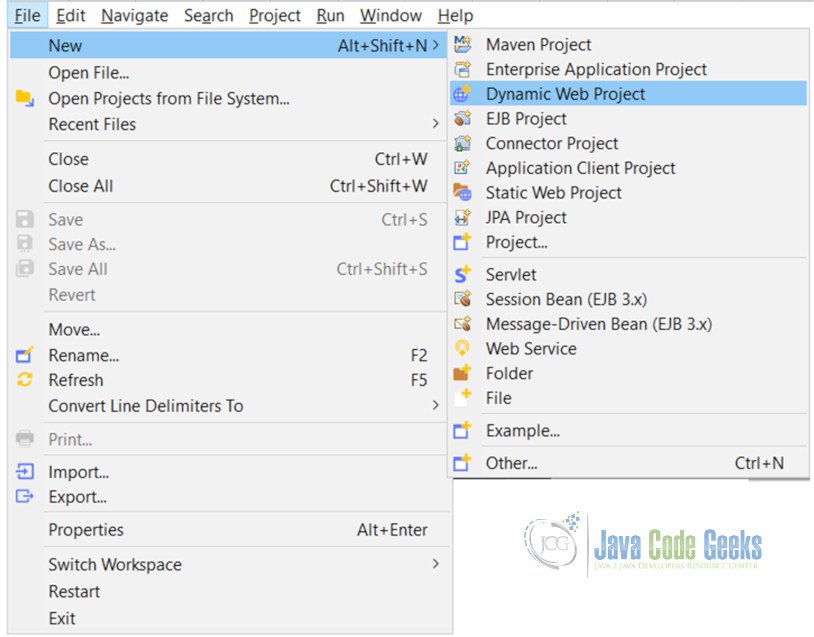
8. How to create a Project?
Open Eclipse, Click File > New > Dynamic Web Project as shown below:
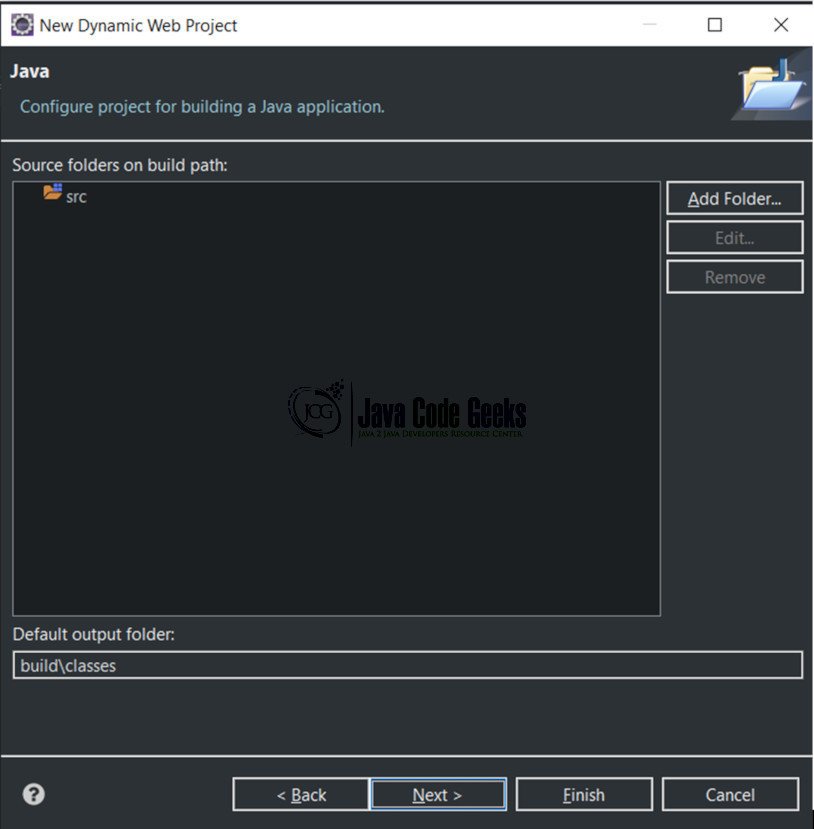
Enter Project Name and Select “Apache Tomcat v9.0” as Target Runtime, as shown below and then Click Next Button.

Click Next Button as shown below:
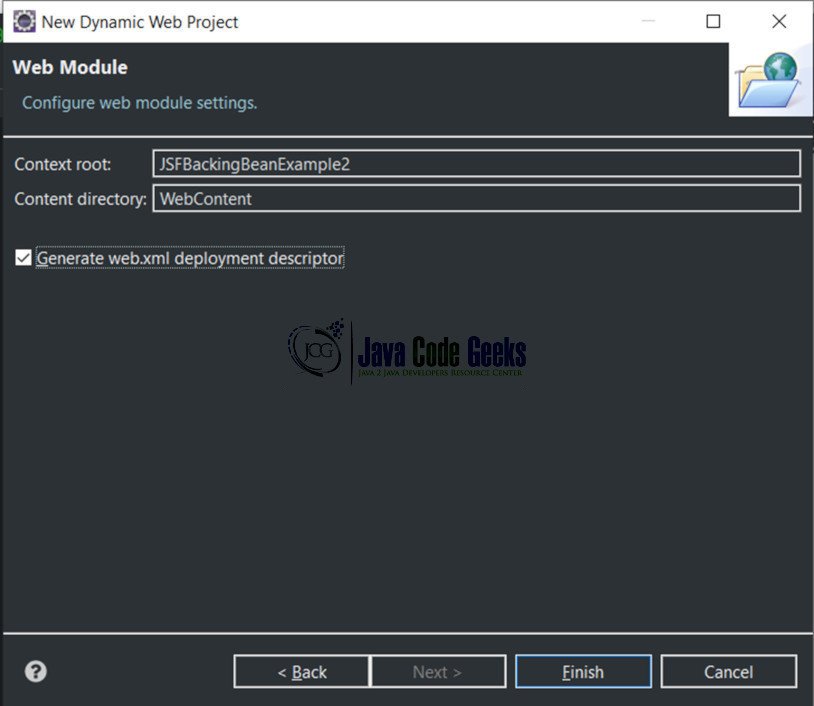
Select the Checkbox (Generate web.xml deployment descriptor and then Click Finish Button
9. Project Folder Structure
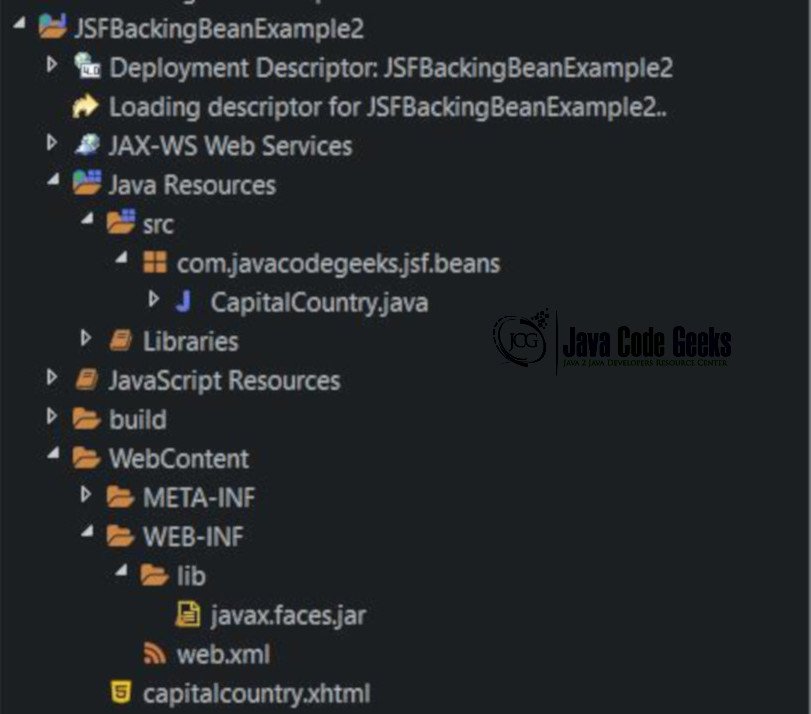
The following Project Folder Structure will be generated :
10. How to create a .xhtml page?
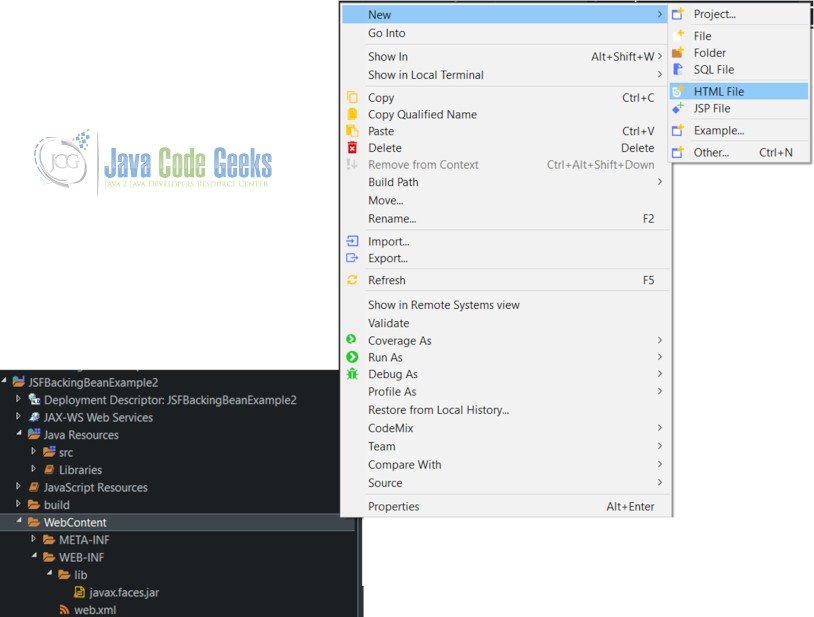
Select Web Content folder in the Project Folder Structure, Right Click on it, Select New > HTML File as shown below:
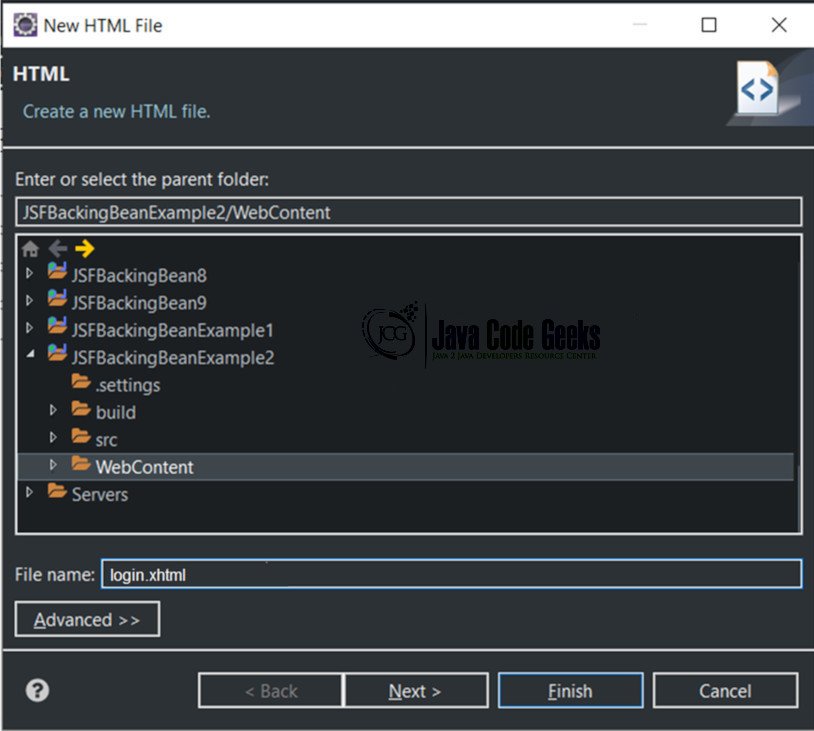
Enter File Name (example: login.xhtml) Click Next Button as shown below:
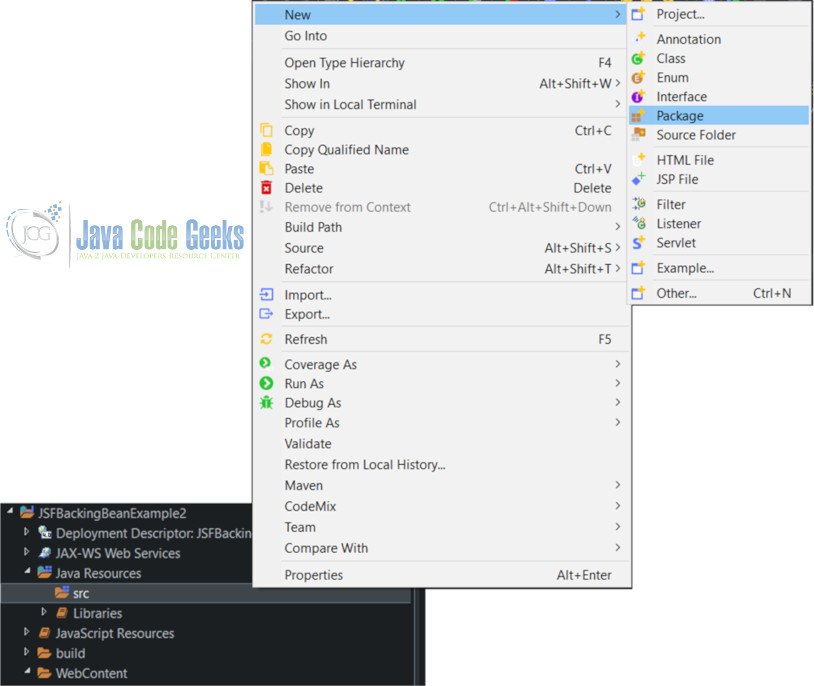
11. How to create a Package?
Select src folder in the Project Folder Structure, Right Click on it, Select New > Package as shown below:
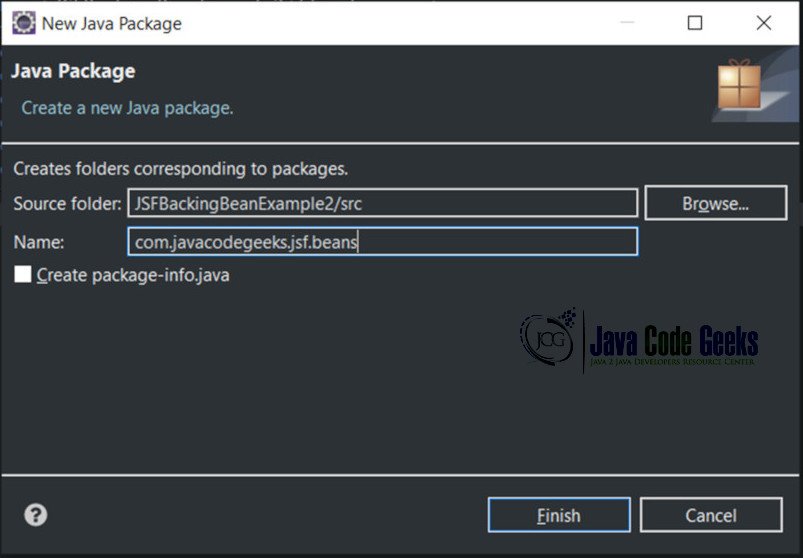
Enter the Name of the Package as “com.javacodegeeks.jsf.beans” and click Finish button as shown below:
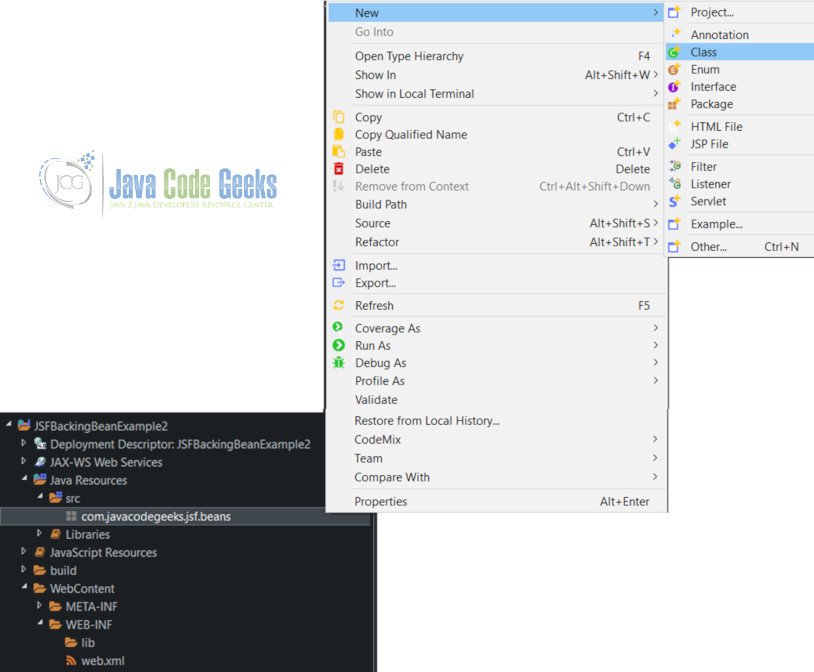
12. How to create a Bean Class in a Package?
Select the Package under src Folder, Right Click on it. Select New > Class as shown below:
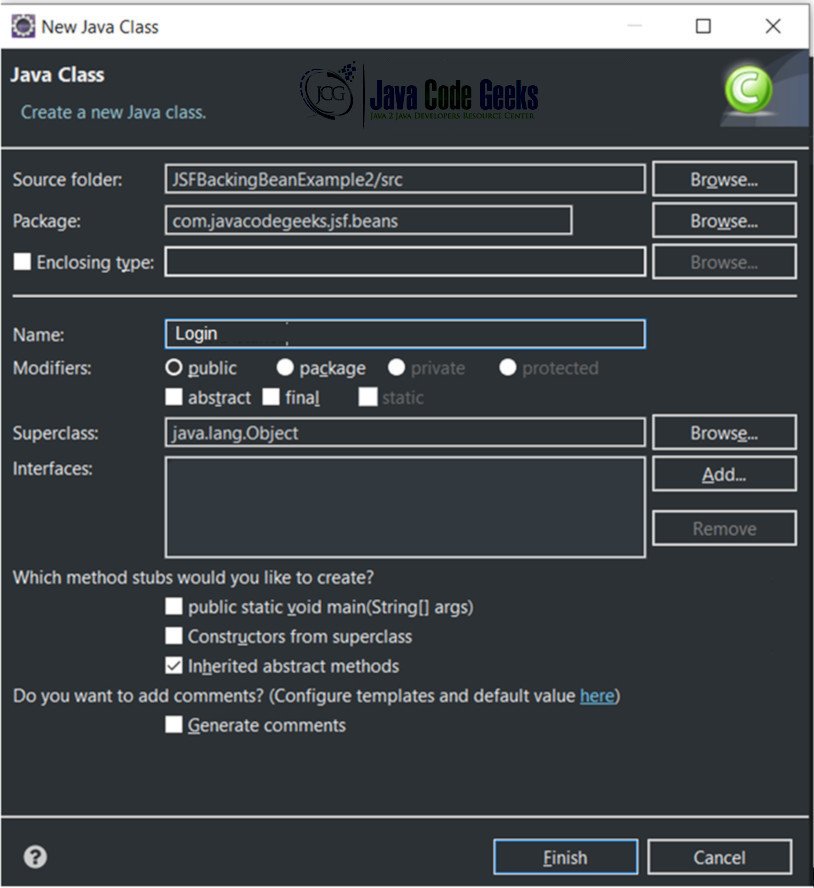
Enter the Name as “Login” as shown below:
13. Backing Bean Example – User Authentication
To implement a backing bean, you can create a Java class for each JSF page and register it as a managed bean. It is recommended that backing beans should be declared to be in request scope. It is preferred to have a single backing bean per page. For example, login JSF page (UI component) would have an associated Login.java (backing bean component). It serves as the layer of abstraction between the JSF page and the back-end business logic.
The backing bean holds the following artifacts for a JSF page:
- Properties corresponding to input fields on a page, such as string properties for User Id and password.
- Action methods and action listeners that correspond to UI components.
- Declarations of UI component instances that can be directly bound to the UI components used on the page.
13.1 Brief Description
This User Authentication Backing Bean example will have the following files: login.java, login.xhtml, success.xhtml, failure.xhtml, checkemail.xhtml, web.xml, and faces-config.xml.
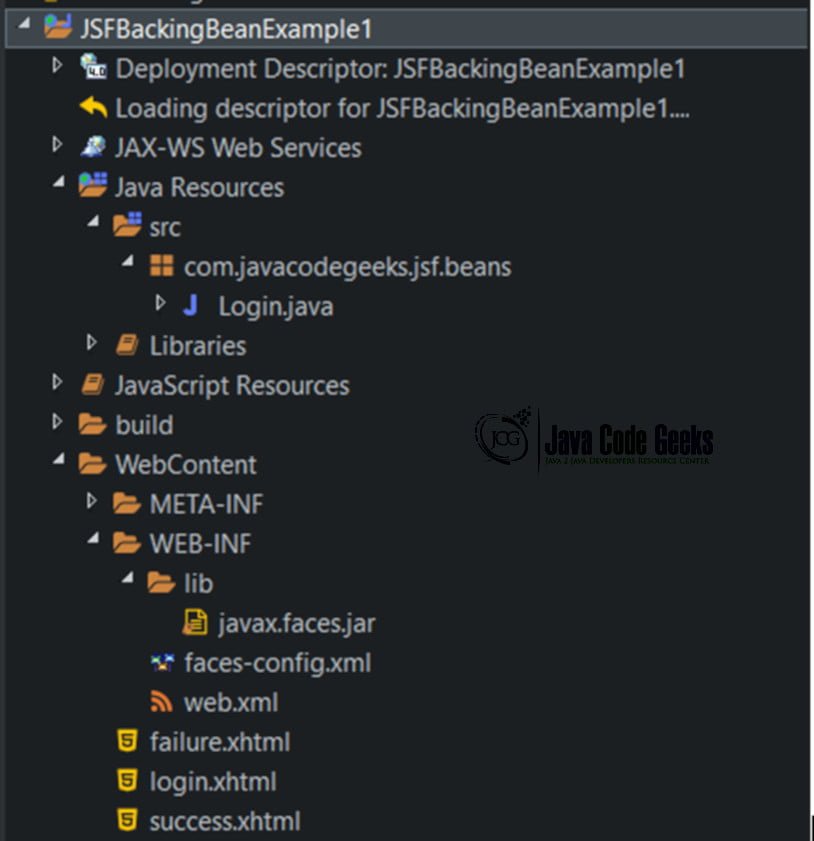
13.2 Project Folder Structure
This User Authentication Backing Example will have the following Project Folder Structure as shown below:
13.3 Output
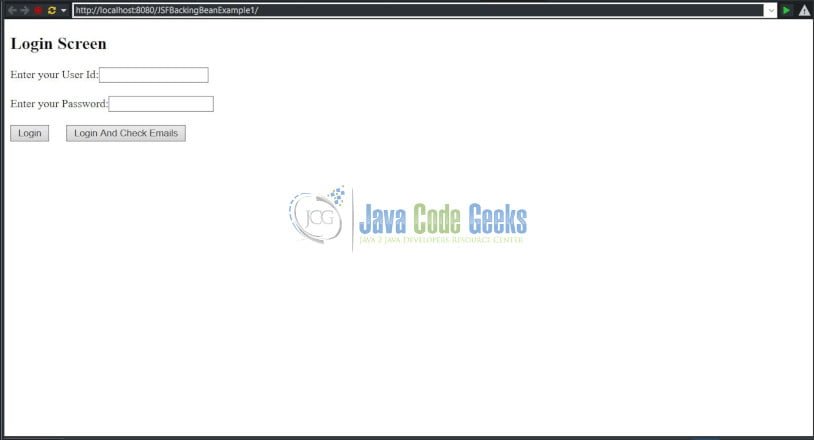
The output of the User Authentication Backing Bean Example will have the following output as shown below:
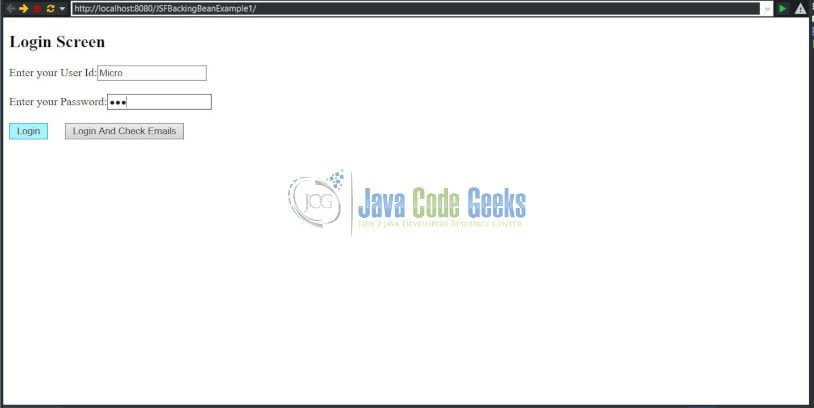
The below screen shows the User to enter User Id and Password, It also allows the User to click the “Login” or “Login and Check Emails” button.
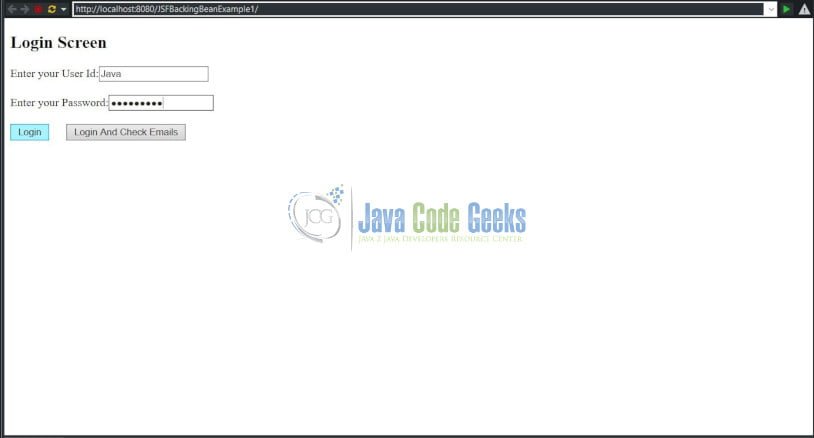
The below screen shows that the User entered the valid User Id as “Java” and Password as “CodeGeeks”. The User is clicking Login button.
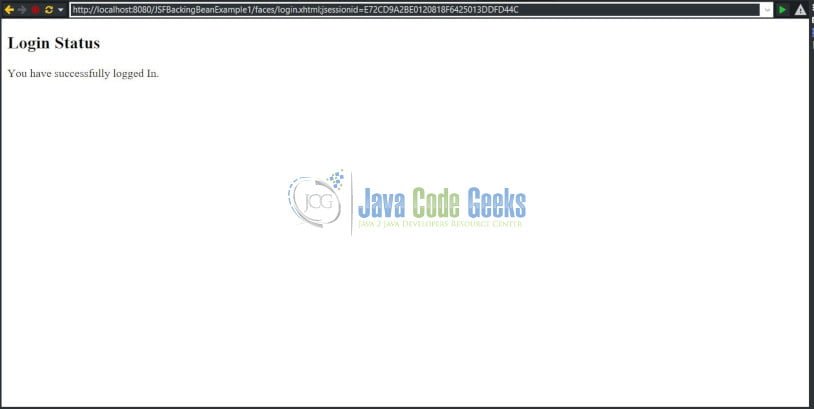
The below screen displays a message to the User that the User has successfully logged into the application by entering the valid User Credentials (User Id: Java and Password: CodeGeeks)
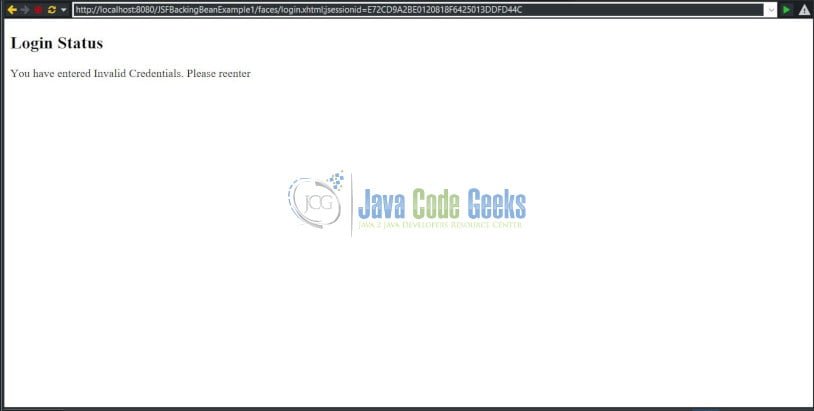
The below screens shows that User has entered invalid User Id and Password and clicking login button:
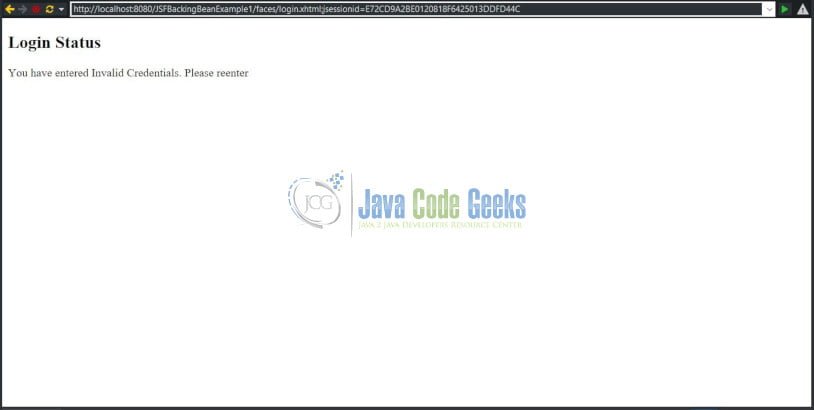
The below screen shows that the User has not successfully logged into the application due to Invalid Credentials been entered by the User.
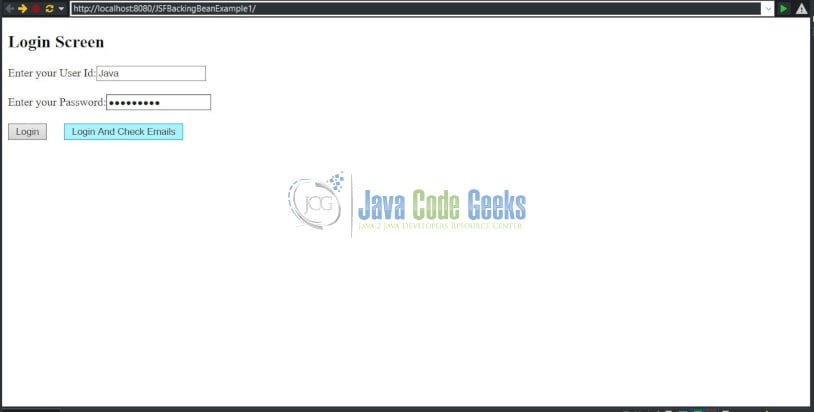
The below Screen shows that the User entered valid credentials (User Id: Java and Password: CodeGeeks) and clicking “Login and Check Emails” button.
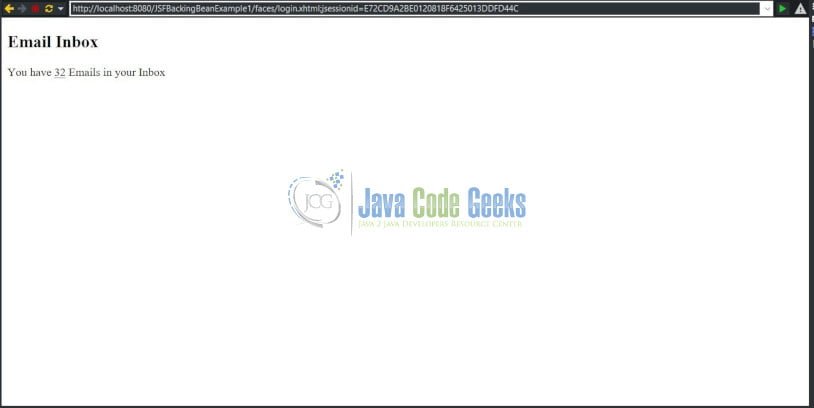
The below screen shows that the user has successfully logged into the application and displays a message ” You have 32 Emails in your Inbox”.
The below screen shows that the User has entered Invalid Credentials and clicking “Login and Check Emails” button.

The below screen displays a message to the User that the User has not successfully logged into the application.
13.4 Source Code
The following are the Source Code used for this User Authentication Backing Bean example:
Login.java
package com.javacodegeeks.jsf.beans;

import javax.faces.bean.ManagedBean;
import javax.faces.bean.RequestScoped;

@ManagedBean
@RequestScoped
public class Login {
	// Member Variables
	String userid;
	String password;

	// Getter and Setter Methods
	public String getUserid() {
		return userid;
	}

	public void setUserid(String userid) {
		this.userid = userid;
	}

	public String getPassword() {
		return password;
	}

	public void setPassword(String password) {
		this.password = password;
	}

	// Action Methods
	public String loginAction() {
		if (userid.equals("Java") && password.equals("CodeGeeks")) {
			// Return Success if the User enters valid Credentials
			return "SUCCESS";
		} else {
			// Return Failure if the User enters Invalid Credentials
			return "FAILURE";
		}
	}

	public String loginCheckEmailAction() {
		if (userid.equals("Java") && password.equals("CodeGeeks")) {
			// Return Success if the User enters valid Credentials
			return "SUCCESS";
		} else {
			// Return Failure if the User enters Invalid Credentials
			return "FAILURE";
		}
	}

}
Login.java is a backing bean which is registered as a Managed Bean. The Login bean Component is used to temporarily store the User ID and Password. Login bean will also contain the action methods (LoginAction and LoginCheckEmailAction) that will validate the submitted user ID and password values to determine the navigation outcome (Success or Failure).
login.xhtml
<?xml version="1.0" encoding="ISO-8859-1" ?>
<!DOCTYPE html PUBLIC "-//W3C//DTD XHTML 1.0 Strict//EN" "http://www.w3.org/TR/xhtml1/DTD/xhtml1-strict.dtd">
<html xmlns="http://www.w3.org/1999/xhtml"
	xmlns:f="http://xmlns.jcp.org/jsf/core"
	xmlns:h="http://xmlns.jcp.org/jsf/html">
<h:head>
	<title>User Login</title>
</h:head>
<h:body>
	<h:form>
		<h2>Login Screen</h2>
		<h:outputText value="Enter your  User Id:" />
		<h:inputText id="userid" value="#{login.userid}" />
		<br />
		<br />
		<h:outputText value="Enter your Password:" />
		<h:inputSecret id="password" value="#{login.password}" />
		<br />
		<br />
		<h:commandButton value="Login" action="#{login.loginAction}" />
		<h:commandButton value="Login And Check Emails"
			action="#{login.loginCheckEmailAction}" />
	</h:form>
</h:body>
</html>
login.xhtml file have components InputText, InputSecret and CommandButtons. The action methods will be invoked when the commandButtons (Login or Login and Check Emails) are clicked. It will return a “SUCCESS” String value if user id and password equals “Java” and “CodeGeeks” respectively. Otherwise, it will return “FAILURE”.
success.xhtml
<?xml version="1.0" encoding="ISO-8859-1" ?>
<!DOCTYPE html PUBLIC "-//W3C//DTD XHTML 1.0 Strict//EN" "http://www.w3.org/TR/xhtml1/DTD/xhtml1-strict.dtd">
<html xmlns="http://www.w3.org/1999/xhtml"
	xmlns:f="http://xmlns.jcp.org/jsf/core"
	xmlns:h="http://xmlns.jcp.org/jsf/html">
<head>
<title>Login Success</title>
<h2>Login Status</h2>
</head>
<body>
	<p>You have successfully logged In.</p>
</body>
</html>
success.xhtml file will display a message as “You have Successfully logged In” only if the user enters valid credentials and on clicking “Login” Command button.
failure.xhtml
<?xml version="1.0" encoding="ISO-8859-1" ?>
<!DOCTYPE html PUBLIC "-//W3C//DTD XHTML 1.0 Strict//EN" "http://www.w3.org/TR/xhtml1/DTD/xhtml1-strict.dtd">
<html xmlns="http://www.w3.org/1999/xhtml"
	xmlns:f="http://xmlns.jcp.org/jsf/core"
	xmlns:h="http://xmlns.jcp.org/jsf/html">
<head>
<title>User Login Failure</title>
<h2>Login Status</h2>
</head>
<body>
	<p>You have entered Invalid Credentials. Please reenter</p>
</body>
</html>
failure.xhtml file will display a message to the User as “You have entered Invalid Credentials. Please reenter”, if the User enters Invalid Credentials and on clicking Login button.
checkemail.xhtml
<?xml version="1.0" encoding="ISO-8859-1" ?>
<!DOCTYPE html PUBLIC "-//W3C//DTD XHTML 1.0 Strict//EN" "http://www.w3.org/TR/xhtml1/DTD/xhtml1-strict.dtd">
<html xmlns="http://www.w3.org/1999/xhtml" xmlns:f="http://xmlns.jcp.org/jsf/core" xmlns:h="http://xmlns.jcp.org/jsf/html">

<head>
    <title>Login Success</title>
    <h2>Email Inbox </h2>
</head>

<body>
    <p>You have <u>32</u> Emails in your Inbox</p>
</body>

</html>
checkemail.xhtml file will display a screen containing a message as “You have 32 emails in your Inbox” only if the user enters valid credentials and on clicking “Login and Check Emails” Command button.
web.xml
<?xml version="1.0" encoding="UTF-8"?>
<web-app xmlns:xsi="http://www.w3.org/2001/XMLSchema-instance"
         xmlns="http://xmlns.jcp.org/xml/ns/javaee"
         xsi:schemaLocation="http://xmlns.jcp.org/xml/ns/javaee http://xmlns.jcp.org/xml/ns/javaee/web-app_4_0.xsd"
         id="WebApp_ID" version="4.0">

  <display-name>JSFBackingBeanExample1</display-name>
  <description>Login Application</description>
  <!-- Change to "Production" when you are ready to deploy -->
  <context-param>
    <param-name>javax.faces.PROJECT_STAGE</param-name>
    <param-value>Development</param-value>
  </context-param>

 <!-- Welcome page -->
  <welcome-file-list>
    <welcome-file>faces/login.xhtml</welcome-file>
  </welcome-file-list>

  <!-- JSF Faces Servlet Mapping -->
  <servlet>
    <servlet-name>Faces Servlet</servlet-name>
    <servlet-class>javax.faces.webapp.FacesServlet</servlet-class>
    <load-on-startup>1</load-on-startup>
  </servlet>
  <servlet-mapping>
    <servlet-name>Faces Servlet</servlet-name>
    <url-pattern>/faces/*</url-pattern>
  </servlet-mapping>
  <servlet-mapping>
    <servlet-name>Faces Servlet</servlet-name>
    <url-pattern>*.jsf</url-pattern>
  </servlet-mapping>
  <servlet-mapping>
    <servlet-name>Faces Servlet</servlet-name>
    <url-pattern>*.faces</url-pattern>
  </servlet-mapping>
  <servlet-mapping>
    <servlet-name>Faces Servlet</servlet-name>
    <url-pattern>*.xhtml</url-pattern>
  </servlet-mapping>
 </web-app>
web.xml – The Faces Controller is implemented as a servlet that responds to all the User requests conforming to a specified URL pattern, such as /faces/*, as defined in the web.xml file.
A request from the User that uses the appropriate Faces URL pattern can be considered a “Faces request,” and when received by the Faces Controller, it processes the request by preparing an object known as the JSF context, which contains all the application data and routes the User to the appropriate View component (JSF page).
The context param whose name is javax.faces.PROJECT_STAGE. The value shown here is Development. This setting causes the JSF runtime to generate additional page aids when common developer mistakes are detected. Other values are Production, SystemTest, and UnitTest.
The welcome-file url-pattern for the Faces Servlet, any request to the root of the application, such as http://localhost:8080/JSFBackingBeanExample1/ will automatically take the user to the front page of the application, which is http://localhost:8080/JSFBackingBeanExample1/faces/login.xhtml.
faces-config.xml
<?xml version="1.0" encoding="UTF-8"?>
<faces-config xmlns="http://xmlns.jcp.org/xml/ns/javaee"
	xmlns:xsi="http://www.w3.org/2001/XMLSchema-instance"
	xsi:schemaLocation="http://xmlns.jcp.org/xml/ns/javaee http://xmlns.jcp.org/xml/ns/javaee/web-facesconfig_2_2.xsd"
	version="2.2">
	<navigation-rule>
		<from-view-id>/login.xhtml</from-view-id>
		<navigation-case>
			<from-action>#{login.loginAction}</from-action>
			<from-outcome>SUCCESS</from-outcome>
			<to-view-id>/success.xhtml</to-view-id>
		</navigation-case>
		<navigation-case>
			<from-action>#{login.loginAction}</from-action>
			<from-outcome>FAILURE</from-outcome>
			<to-view-id>/failure.xhtml</to-view-id>
		</navigation-case>
		<navigation-case>
			<from-action>#{login.loginCheckEmailAction}</from-action>
			<from-outcome>SUCCESS</from-outcome>
			<to-view-id>/checkemail.xhtml</to-view-id>
		</navigation-case>
		<navigation-case>
			<from-action>#{login.loginCheckEmailAction}</from-action>
			<from-outcome>FAILURE</from-outcome>
			<to-view-id>/failure.xhtml</to-view-id>
		</navigation-case>
	</navigation-rule>
</faces-config>
The Navigation rule for Login Button and Login and Check Email Button have been defined in the faces-config.xml file.
14. JSF Backing Bean Example – Find Capital of Countries
14.1 Brief Description
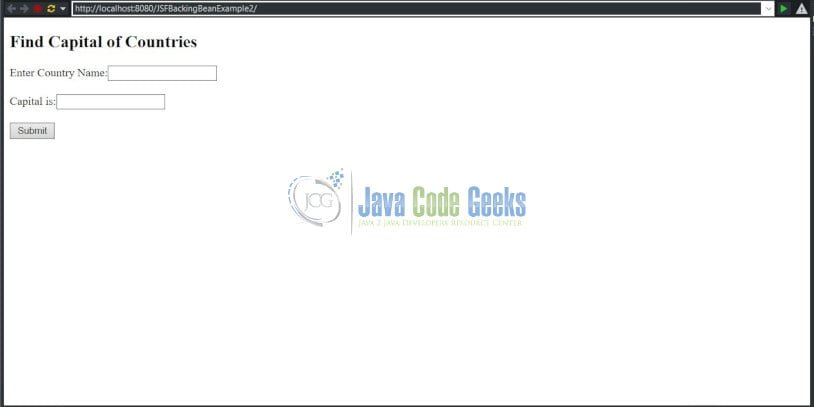
It displays a Capital Name in a Text Box Component after the user enters Name of the Country in a Text Box Component and on clicking Submit button Component.
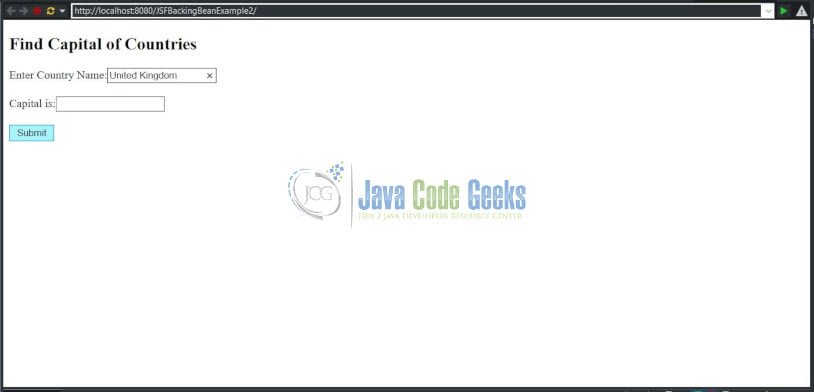
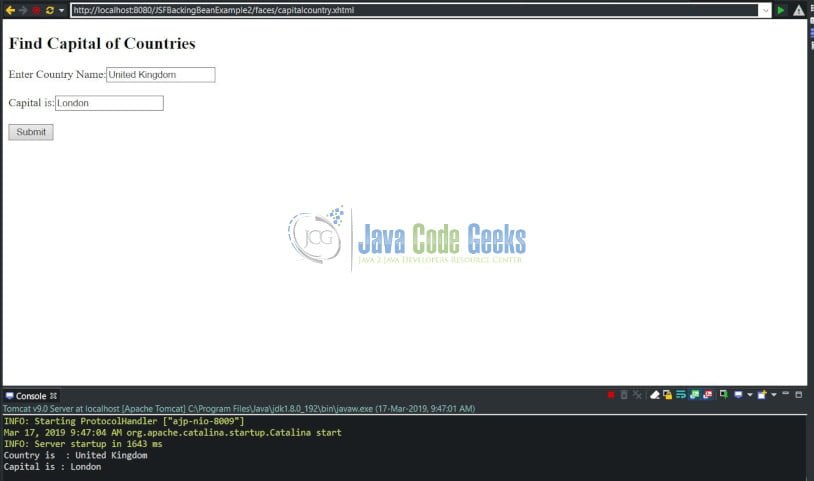
When the User enters “United Kingdom” as a Country Name and on clicking Submit button, It displays “London” as a Capital in the Capital Text Box Component.
When the User enters “India” as a Country Name and on clicking Submit button, It displays “New Delhi” as a Capital in the Capital Text Box Component.
When the User enters “Spain” as a Country Name and on clicking Submit button, It displays “Madrid” as a Capital in the Capital Text Box Component .
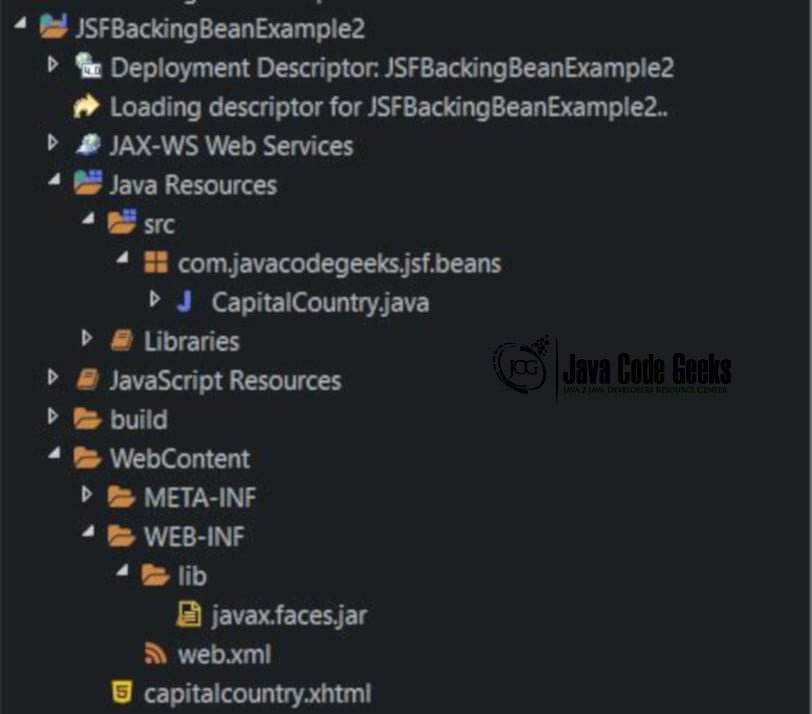
14.2 Project Folder Structure
This Find Capital of Countries Backing Bean Example contains the following Project Folder Structure:
14.3 Output
This Find Capital of Countries Backing Bean Example will display the following screens as Output:
The below screen allows the user to enter Country Name and view the Capital for that country on clicking Submit button.
The below screen accepts the Country Name entered by the User and allows the user to click submit button.
The below screen displays the Capital name on clicking submit button for the Country name entered by the user and also display the Country and Capital Name on console screen.
The below screen shows that User entered a Invalid Country Name and trying to click Submit Button.
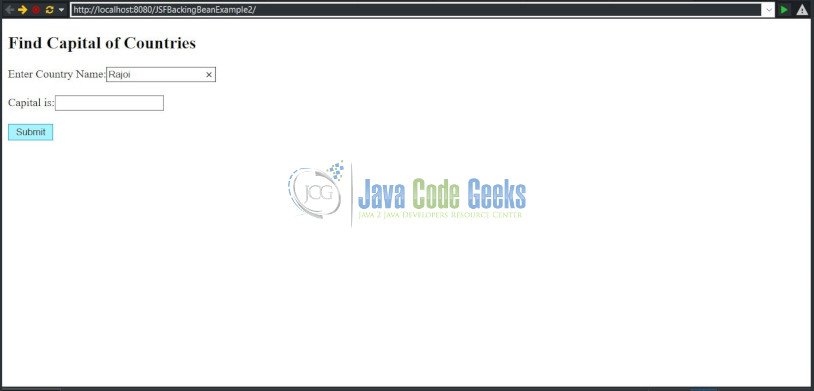
The below screen displays an error message in the Capital textbox as “Unknown Country” on clicking submit button because the user entered an Invalid Country Name.

14.4 Source Code
This Capital of Countries Backing Bean example will have the following files: CapitalCountry.java, capitalcountry.xhtmland web.xml.
CapitalCountry.java
package com.javacodegeeks.jsf.beans;

import javax.faces.bean.ManagedBean;
import javax.faces.bean.RequestScoped;
import javax.faces.component.html.HtmlInputText;
import javax.faces.event.ValueChangeEvent;

@ManagedBean(name = "findCapital")
@RequestScoped
public class CapitalCountry {
	private HtmlInputText country, capital;

	// Getter and Setter Methods
	public HtmlInputText getCountry() {
		return country;
	}

	public void setCountry(HtmlInputText country) {
		this.country = country;
	}

	public HtmlInputText getCapital() {
		return capital;
	}

	public void setCapital(HtmlInputText capital) {
		this.capital = capital;
	}

	// Listener Methods
	public void findCapitalListener(ValueChangeEvent cdl) {
		String country = cdl.getNewValue().toString();
		System.out.println("Country is  : " + country);
		StringBuilder capitalCountry = new StringBuilder();
		findCapital(country, capitalCountry);
		capital.setValue(capitalCountry.toString());
		System.out.println("Capital is : " + capital.getValue());
	}

	private void findCapital(String country, StringBuilder capitalCountry) {
		if (country.equals("United Kingdom")) {
			capitalCountry.append("London");
		} else if (country.equals("India")) {
			capitalCountry.append("New Delhi");
		} else if (country.equals("Spain")) {
			capitalCountry.append("Madrid");
		} else {
			capitalCountry.append("Unknown Country");
		}
	}
}
CapitalCountry.java – It is a backing bean component that contains listener methods and business logic methods.
CapitalCountry.java is a backing bean which is registered as a Managed Bean.
The CapitalCountry bean is used to temporarily store the values of Country Name and Capital Name. CapitalCountry bean will also contain the actionlistener and methods (findCapitalListener and findCapital) that will validate the submitted Country Name and display the Capital for that Country in the Textbox Component.

capitalcountry.xhtml
<?xml version="1.0" encoding="ISO-8859-1" ?>
<!DOCTYPE html PUBLIC "-//W3C//DTD XHTML 1.0 Transitional//EN" "http://www.w3.org/TR/xhtml1/DTD/xhtml1-transitional.dtd">
<html xmlns="http://www.w3.org/1999/xhtml"
	xmlns:h="http://java.sun.com/jsf/html"
	xmlns:f="http://java.sun.com/jsf/core">
<h:head>
	<title>Find Capital of Countries</title>
</h:head>
<h:body>
	<h2>Find Capital of Countries</h2>
	<h:form>
		<h:outputLabel value="Enter Country Name:" />
		<h:inputText id="country" binding="#{findCapital.country}"
			valueChangeListener="#{findCapital.findCapitalListener}"
			immediate="true"
			onchange="document.getElementById('findcapital').click();" />
		<br />
		<br />
		<h:outputLabel value="Capital is:" />
		<h:inputText id="capital" binding="#{findCapital.capital}"
			immediate="true" />
		<br />
		<br />
		<h:commandButton value="Submit" />
		<div style="visibility: hidden">
			<h:commandButton id="findcapital" value="findcapital"
				immediate="true" />
		</div>
	</h:form>
</h:body>
</html>
capitalcountry.xhtml has two InputText components and one Command Button Component capitalcountry.xhtml – It contains User Interface components such as Text Components (Country Name and Capital) and one Submit Button. It has event listener methods. It accepts Country Name and displays Capital for the Country after clicking the Submit Button.
web.xml
<?xml version="1.0" encoding="UTF-8"?>
<web-app xmlns:xsi="http://www.w3.org/2001/XMLSchema-instance"
         xmlns="http://xmlns.jcp.org/xml/ns/javaee"
         xsi:schemaLocation="http://xmlns.jcp.org/xml/ns/javaee http://xmlns.jcp.org/xml/ns/javaee/web-app_4_0.xsd"
         id="WebApp_ID" version="4.0">
  <display-name>JSFBackingBeanExample2</display-name>
  <description>Find Capital for a Country Application</description>

  <!-- Change to "Production" when you are ready to deploy -->
  <context-param>
    <param-name>javax.faces.PROJECT_STAGE</param-name>
    <param-value>Development</param-value>
  </context-param>

  <!-- Welcome page -->
  <welcome-file-list>
    <welcome-file>faces/capitalcountry.xhtml</welcome-file>
  </welcome-file-list>

  <!-- JSF Faces Servlet Mapping -->
  <servlet>
    <servlet-name>Faces Servlet</servlet-name>
    <servlet-class>javax.faces.webapp.FacesServlet</servlet-class>
    <load-on-startup>1</load-on-startup>
  </servlet>
  <servlet-mapping>
    <servlet-name>Faces Servlet</servlet-name>
    <url-pattern>/faces/*</url-pattern>
  </servlet-mapping>
  <servlet-mapping>
    <servlet-name>Faces Servlet</servlet-name>
    <url-pattern>*.jsf</url-pattern>
  </servlet-mapping>
  <servlet-mapping>
    <servlet-name>Faces Servlet</servlet-name>
    <url-pattern>*.faces</url-pattern>
  </servlet-mapping>
  <servlet-mapping>
    <servlet-name>Faces Servlet</servlet-name>
    <url-pattern>*.xhtml</url-pattern>
  </servlet-mapping>
</web-app
web.xml – The Faces Controller is implemented as a servlet that responds to all the User requests conforming to a specified URL pattern, such as /faces/*, as defined in the web.xml file.
A request from the User that uses the appropriate Faces URL pattern can be considered a “Faces request,” and when received by the Faces Controller, it processes the request by preparing an object known as the JSF context, which contains all the application data and routes the User to the appropriate View component (JSF page).
15. Backing Bean Example – Calculator Application
15.1 Brief Description
This Calculator Backing Bean example will accept the two numbers (first number and second number). It will add, subtract or multiply these two numbers based on the buttons (Add, Subtract or Multiply) clicked by the User.
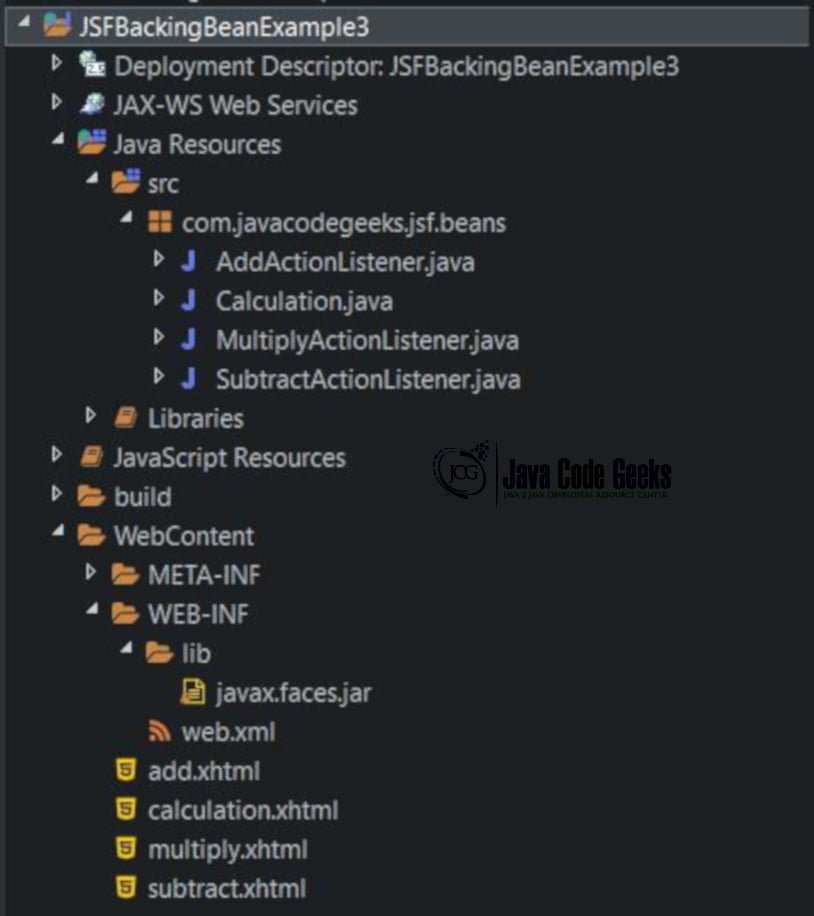
This Calculator Backing Bean example will have the following files: Calculation.java, AddActionListener.java, MultiplyActionListener.java, SubtractActionListener.java, calculation.xhtml, add.xhtml, multiply.xhtml, subtract.xhtml and web.xml.
15.2 Project Folder Structure
The Calculator Backing Bean example will have the following Project Folder Structure as shown below:
15.3 Output
The Calculator backing bean example will have the following outputs:
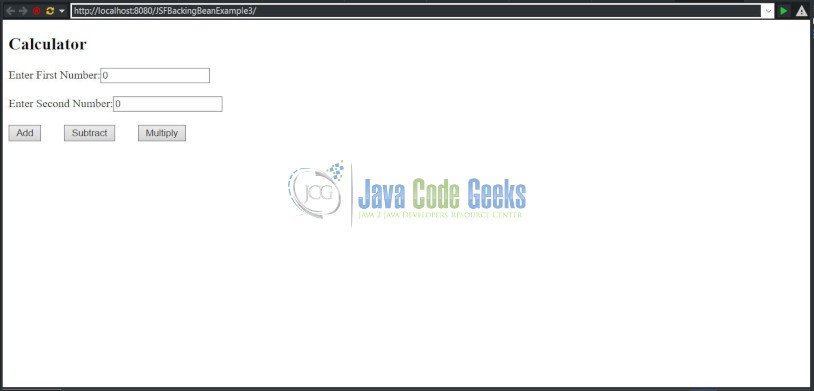
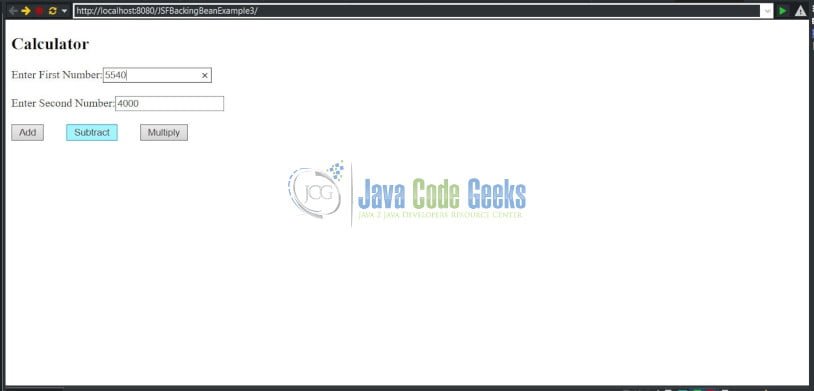
The below screen displays the User to enter First Number and Second Number and also allows the user to do any calculation (Add, Modify or Subtract) with the entered first and second number by the User.
The below screen accepts the First Number and Second Number from the User and the user is clicking the Add button.

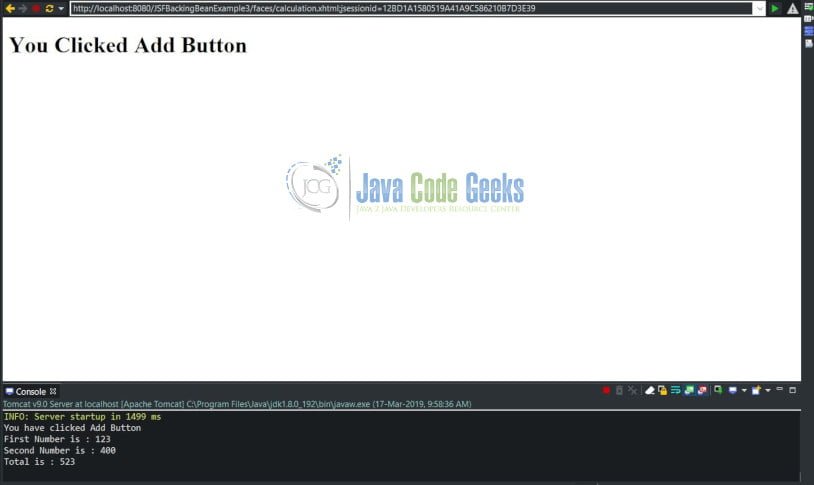
The below screen displays a Screen containing a message “You clicked Add button” and also displaying the total on the console output by summing the first and second number entered by the User.
The below screen accepts the first and second number and the User is trying to click the Subtract button.
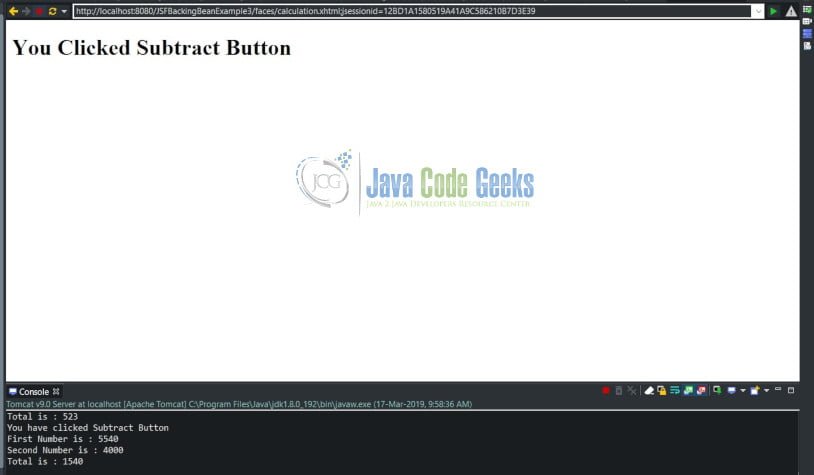
The below screen displays a screen containing a message to the User that “You clicked Subtract Button” and displays a console output showing the subtraction by subtracting the first number with second number entered by the User.
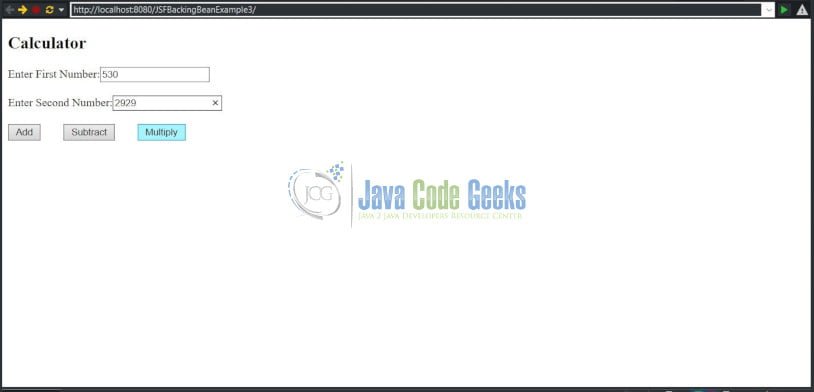
The below screen accepts the first and second number from the User and the User is clicking the Multiply button.
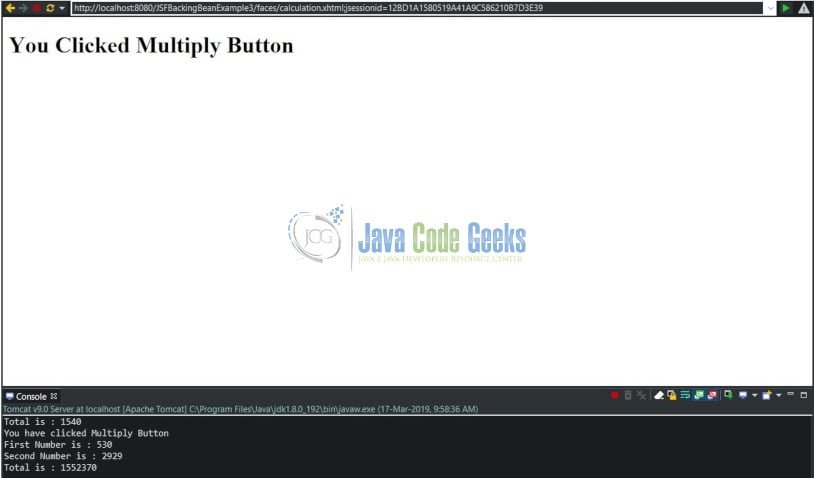
The below screen shows that it displays screen containing a message to the User that “You clicked Multiply button” and also displays a console output showing the multiplication of the first number with the second number.
15.4 Source Code
The Calculator Backing Bean example will have the following source code:
Calculation.java
package com.javacodegeeks.jsf.beans;

import javax.faces.bean.ManagedBean;
import javax.faces.bean.RequestScoped;
import javax.faces.event.ActionEvent;

@ManagedBean(name = "calc")
@RequestScoped
public class Calculation {
	// Member Variables
	protected int firstNo;
	protected int secondNo;
	protected String buttonId;

	// Getter and Setter Methods

	public int getFirstNo() {
		return firstNo;
	}

	public void setFirstNo(int firstNo) {
		this.firstNo = firstNo;
	}

	public int getSecondNo() {
		return secondNo;
	}

	public void setSecondNo(int secondNo) {
		this.secondNo = secondNo;
	}

	public String getButtonId() {
		return buttonId;
	}

	public void setButtonId(String buttonId) {
		this.buttonId = buttonId;
	}

	public void printIt(ActionEvent event) {

		// Get submit button id
		buttonId = event.getComponent().getClientId();

	}

	public String calcAdd() {
		System.out.println("First Number is : " + getFirstNo());
		System.out.println("Second Number is : " + getSecondNo());

		int total = Math.addExact(getFirstNo(), getSecondNo());
		System.out.println("Total is : " + total);
		return "add";
	}

	public String calcSubtract() {
		System.out.println("First Number is : " + getFirstNo());
		System.out.println("Second Number is : " + getSecondNo());

		int total = Math.subtractExact(getFirstNo(), getSecondNo());
		System.out.println("Total is : " + total);
		return "subtract";
	}

	public String calcMultiply() {
		System.out.println("First Number is : " + getFirstNo());
		System.out.println("Second Number is : " + getSecondNo());

		int total = Math.multiplyExact(getFirstNo(), getSecondNo());
		System.out.println("Total is : " + total);
		return "multiply";
	}

}
Calculation.java is a backing bean which is registered as a Managed Bean.
The Calculation backing bean is used to temporarily store the two Values (first Number and Second Number). It will also contain the methods (calcAdd, calcSubtract, calcMultiply). It also contains AddActionListener, MultiplyActionListener and SubtractActionListener classes.
AddActionListener.java
package com.javacodegeeks.jsf.beans;

import javax.faces.event.AbortProcessingException;
import javax.faces.event.ActionEvent;
import javax.faces.event.ActionListener;

public class AddActionListener implements ActionListener {

	@Override
	public void processAction(ActionEvent event) throws AbortProcessingException {

		System.out.println("You have clicked Add Button");

	}

}
AddActionListener.java will be invoked when the User Clicks on Add Button. It will display a message as “You have clicked Add Button” on the console.
MultiplyActionListener.java
package com.javacodegeeks.jsf.beans;

import javax.faces.event.AbortProcessingException;
import javax.faces.event.ActionEvent;
import javax.faces.event.ActionListener;

public class MultiplyActionListener implements ActionListener {

	@Override
	public void processAction(ActionEvent event) throws AbortProcessingException {

		System.out.println("You have clicked Multiply Button");

	}

}
ModifyActionListener.java will be invoked when the User Clicks on Modify Button. It will display a message as “You have clicked Multiply Button” on the console.
SubtractActionListener.java
package com.javacodegeeks.jsf.beans;

import javax.faces.event.AbortProcessingException;
import javax.faces.event.ActionEvent;
import javax.faces.event.ActionListener;

public class SubtractActionListener implements ActionListener {

	@Override
	public void processAction(ActionEvent event) throws AbortProcessingException {

		System.out.println("You have clicked Subtract Button");

	}

}
SubtractActionListener.java will be invoked when the User Clicks on Subtract Button. It will display a message as “You have clicked Subtract Button” on the console.
calculation.xhtml
<?xml version="1.0" encoding="ISO-8859-1" ?>
<!DOCTYPE html PUBLIC "-//W3C//DTD XHTML 1.0 Transitional//EN" "http://www.w3.org/TR/xhtml1/DTD/xhtml1-transitional.dtd">
<html xmlns="http://www.w3.org/1999/xhtml"
	xmlns:h="http://java.sun.com/jsf/html"
	xmlns:f="http://java.sun.com/jsf/core">
<h:head>
	<title>Calculation</title>
</h:head>
<h:body>
	<h:form id="form">
		<h2>Calculator</h2>
		<h:outputText value="Enter First Number:" />
		<h:inputText id="firstNo" value="#{calc.firstNo}" />
		<br />
		<br />
		<h:outputText value="Enter Second Number:" />
		<h:inputText id="secondNo" value="#{calc.secondNo}" />
		<br />
		<br />
		<h:commandButton id="addButton" value="Add" action="#{calc.calcAdd}">
			<f:actionListener
				type="com.javacodegeeks.jsf.beans.AddActionListener" />
		</h:commandButton>

           <h:commandButton id="subtractButton" value="Subtract"
			action="#{calc.calcSubtract}">
			<f:actionListener
				type="com.javacodegeeks.jsf.beans.SubtractActionListener" />
		</h:commandButton>

			 <h:commandButton id="multiplyButton" value="Multiply"
			action="#{calc.calcMultiply}">
			<f:actionListener
				type="com.javacodegeeks.jsf.beans.MultiplyActionListener" />
		</h:commandButton>
	</h:form>
</h:body>
</html>
calculation.xhtml file has two InputText and three Command Button (Add, Multiply and Subtract) Components. It will call the Add or Modify or Subtract Action listeners based on the buttons (Add, Multiply or Subtract) clicked by the User.
add.xhtml
<?xml version="1.0" encoding="ISO-8859-1" ?>
<!DOCTYPE html PUBLIC "-//W3C//DTD XHTML 1.0 Transitional//EN" "http://www.w3.org/TR/xhtml1/DTD/xhtml1-transitional.dtd">
<html xmlns="http://www.w3.org/1999/xhtml"
	xmlns:h="http://java.sun.com/jsf/html"
	xmlns:f="http://java.sun.com/jsf/core">
<h:head>
	<title>Calculation - Add</title>
</h:head>
<h:body>
	<h1>You Clicked Add Button</h1>
</h:body>
</html>
add.xhtml – It is used to display the message “You clicked Add Button” after the user clicks the Add Button.
subtract.xhtml
<?xml version="1.0" encoding="ISO-8859-1" ?>
<!DOCTYPE html PUBLIC "-//W3C//DTD XHTML 1.0 Transitional//EN" "http://www.w3.org/TR/xhtml1/DTD/xhtml1-transitional.dtd">
<html xmlns="http://www.w3.org/1999/xhtml"
	xmlns:h="http://java.sun.com/jsf/html"
	xmlns:f="http://java.sun.com/jsf/core">
<h:head>
	<title>Calculation - Subtract</title>
</h:head>
<h:body>
	<h1>You Clicked Subtract Button</h1>
</h:body>
</html>
subtract.xhtml – It is used to display the message “You clicked Subtract Button” after the user clicks the Subtract Button.
multiply.xhtml
<?xml version="1.0" encoding="ISO-8859-1" ?>
<!DOCTYPE html PUBLIC "-//W3C//DTD XHTML 1.0 Transitional//EN" "http://www.w3.org/TR/xhtml1/DTD/xhtml1-transitional.dtd">
<html xmlns="http://www.w3.org/1999/xhtml"
	xmlns:h="http://java.sun.com/jsf/html"
	xmlns:f="http://java.sun.com/jsf/core">
<h:head>
	<title>Calculation - Multiply</title>
</h:head>
<h:body>
	<h1>You Clicked Multiply Button</h1>
</h:body>
</html>
multiply.xhtml – It is used to display the message “You clicked Multiply Button” after the user clicks the Multiply Button.
web.xml
<?xml version="1.0" encoding="UTF-8"?>
<web-app xmlns:xsi="http://www.w3.org/2001/XMLSchema-instance"
	xmlns="http://java.sun.com/xml/ns/javaee"
	xmlns:web="http://java.sun.com/xml/ns/javaee/web-app_2_5.xsd"
	xsi:schemaLocation="http://java.sun.com/xml/ns/javaee
	http://java.sun.com/xml/ns/javaee/web-app_2_5.xsd"
	id="WebApp_ID" version="2.5">

  <display-name>JSFBackingBeanExample3</display-name>
 <description>Calculator Application</description>
  <!-- Change to "Production" when you are ready to deploy -->
  <context-param>
    <param-name>javax.faces.PROJECT_STAGE</param-name>
    <param-value>Development</param-value>
  </context-param>

  <!-- Welcome page -->
  <welcome-file-list>
    <welcome-file>faces/calculation.xhtml</welcome-file>
  </welcome-file-list>

  <!-- JSF Faces Servlet Mapping -->
  <servlet>
    <servlet-name>Faces Servlet</servlet-name>
    <servlet-class>javax.faces.webapp.FacesServlet</servlet-class>
    <load-on-startup>1</load-on-startup>
  </servlet>

  <servlet-mapping>
    <servlet-name>Faces Servlet</servlet-name>
    <url-pattern>/faces/*</url-pattern>
  </servlet-mapping>
  <servlet-mapping>
    <servlet-name>Faces Servlet</servlet-name>
    <url-pattern>*.jsf</url-pattern>
  </servlet-mapping>
  <servlet-mapping>
    <servlet-name>Faces Servlet</servlet-name>
    <url-pattern>*.faces</url-pattern>
  </servlet-mapping>
  <servlet-mapping>
    <servlet-name>Faces Servlet</servlet-name>
    <url-pattern>*.xhtml</url-pattern>
  </servlet-mapping>

</web-app>
web.xml – The Faces Controller is implemented as a servlet that responds to all the User requests conforming to a specified URL pattern, such as /faces/*, as defined in the web.xml file.
A request from the User that uses the appropriate Faces URL pattern can be considered a “Faces request,” and when received by the Faces Controller, it processes the request by preparing an object known as the JSF context, which contains all the application data and routes the User to the appropriate View component (JSF page).
16. Download the Complete Source Code
You can download the full source code of this example here: JSF Backing Bean Example
