JSF 2 and Log4j Integration Example
Log4j is a popular and widely-used logging framework for the Java development. It’s pretty easy to setup and use the Log4j mechanism in a JSF application. In this tutorial, I will show you how to implement the logging functionality with the JSF framework.
1. Introduction
1.1 JSF Framework
JSF is an Mvc framework that eases the user interfaces for server-based applications with reusable UI components. It facilitates Web application development by:
- Providing reusable UI components
- Easy data transfer between UI components
- Manage UI state across multiple server requests
- Enable implementation of custom components
- Wire client-side event to server-side application code
The application is similar to any other Java-based web application. It runs in a Java servlet container and contains:
- JavaBeans components as models
- A custom tag library for representing event handlers, validators and rendering UI components
- Server-side helper classes and controllers to perform the user actions
- Validators, event and navigation handlers
- Application configuration resource file
1.2 What is Log4j?
Log4j is a simple, flexible, and fast Java-based logging framework. It is thread-safe and supports internationalization. We mainly have 3 components to work with Log4j:
- Logger: It is used to log the messages
- Appender: It is used to publish the logging information to the destination like file, database, console etc
- Layout: It is used to format logging information in different styles
1.2.1 Log4j Logger Class
Logger class provides the methods for the logging process. We can use the getLogger() method to get the Logger object. The syntax is given below:
static Logger log = Logger.getLogger(YourClassName.class);
Logger class has 5 logging methods which are used to print the status of an application:
| Description | Method Syntax | |
|---|---|---|
| debug(Object message) | It is used to print the message with the level org.apache.log4j.Level.DEBUG. | public void debug(Object message) |
| error(Object message) | It is used to print the message with the level org.apache.log4j.Level.ERROR. | public void error(Object message) |
| info(Object message) | It is used to print the message with the level org.apache.log4j.Level.INFO. | public void info(Object message) |
| fatal(Object message) | It is used to print the message with the level org.apache.log4j.Level.FATAL. | public void fatal(Object message) |
| warn(Object message) | It is used to print the message with the level org.apache.log4j.Level.WARN. | public void warn(Object message) |
| trace(Object message) | It is used to print the message with the level org.apache.log4j.Level.TRACE. | public void trace(Object message) |
To summarize, the priority level is given below.
Trace < Debug < Info < Warn < Error < Fatal
Where org.apache.log4j.Level.FATAL has the highest priority and org.apache.log4j.Level.Trace the lowest.
1.2.2 Log4j Appender Interface
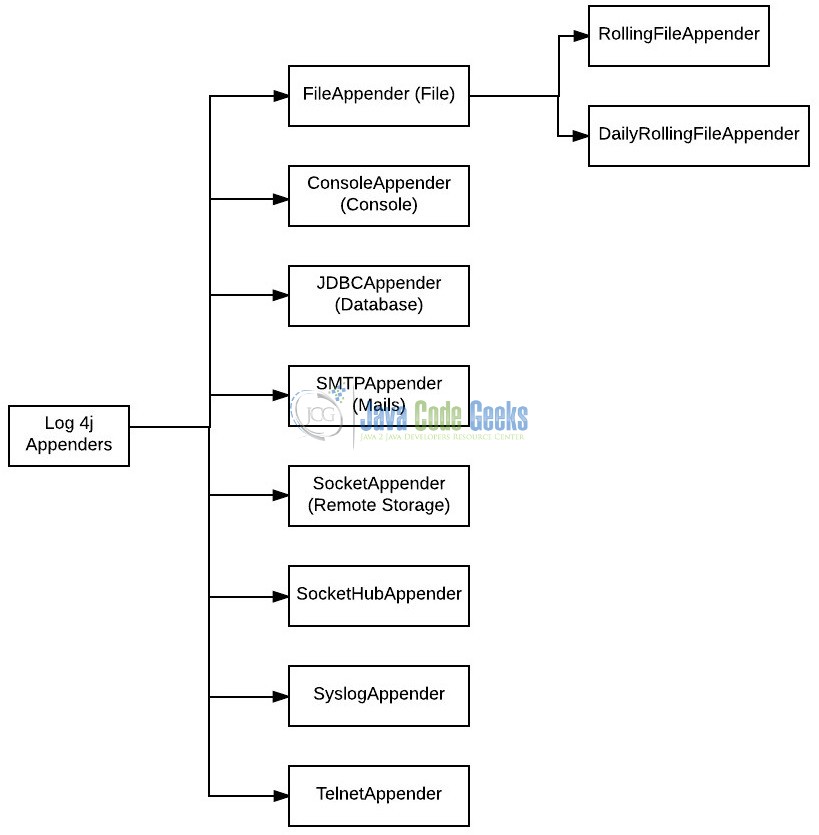
Appender is an interface which is primarily responsible for printing the logging messages to the different destinations such as console, files, sockets, database etc. In Log4j we have different types of Appender implementation classes.
1.2.3 Log4j Layout Class
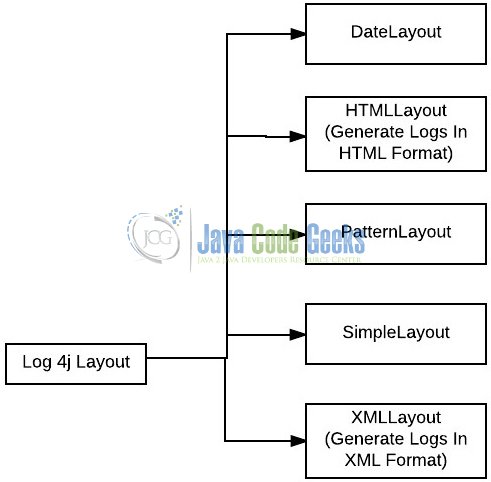
Layout component specifies the format in which the log statements are written into the destination repository by the Appender. In Log4j we have different types of Layout implementation classes.
Now, open up the Eclipse Ide and let’s start building the application!
2. JSF2 and Log4j Integration Example
Below are the steps involved in developing this application.
2.1 Tools Used
We are using Eclipse Kepler SR2, JDK 8 and Maven. Having said that, we have tested the code against JDK 1.7 and it works well.
2.2 Project Structure
Firstly, let’s review the final project structure, in case you are confused about where you should create the corresponding files or folder later!
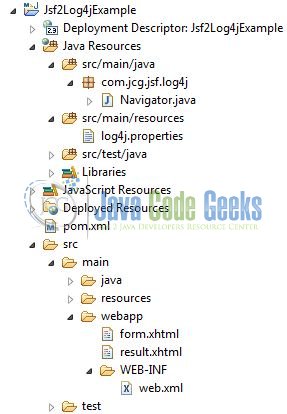
2.3 Project Creation
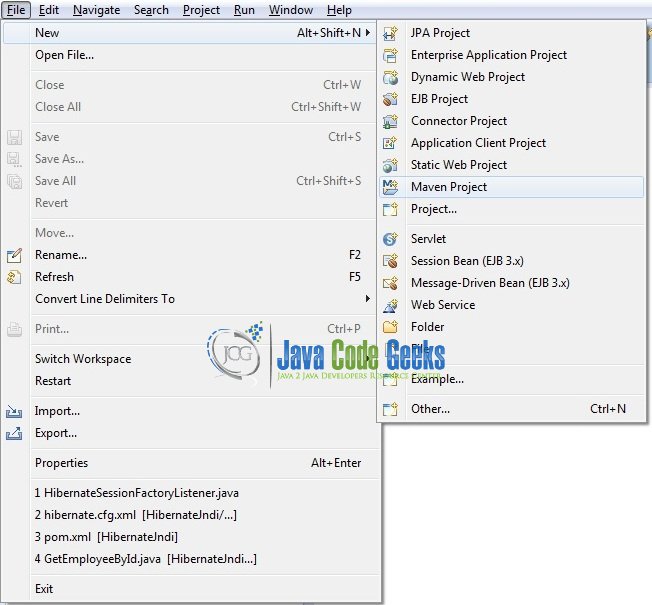
This section will demonstrate on how to create a Java-based Maven project with Eclipse. In Eclipse Ide, go to File -> New -> Maven Project.
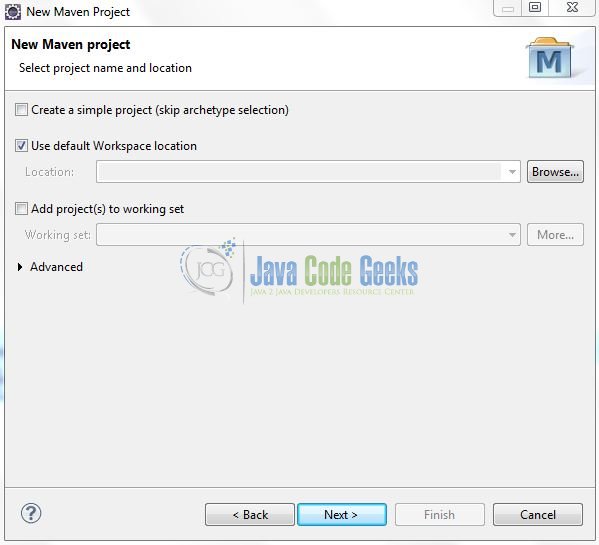
In the New Maven Project window, it will ask you to select project location. By default, ‘Use default workspace location’ will be selected. Just click on next button to proceed.
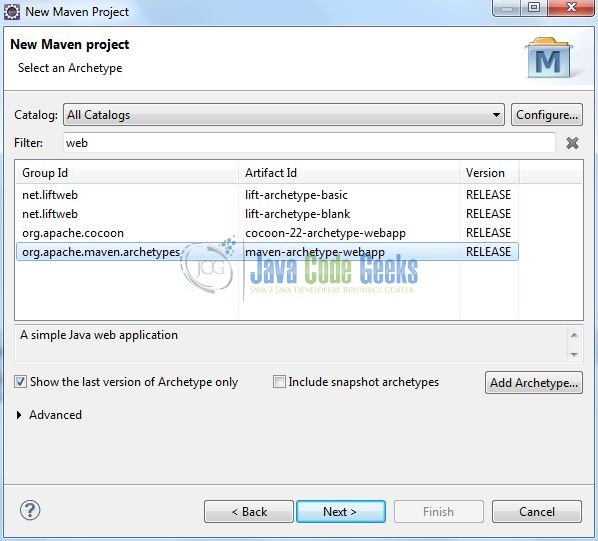
Select the Maven Web App Archetype from the list of options and click next.
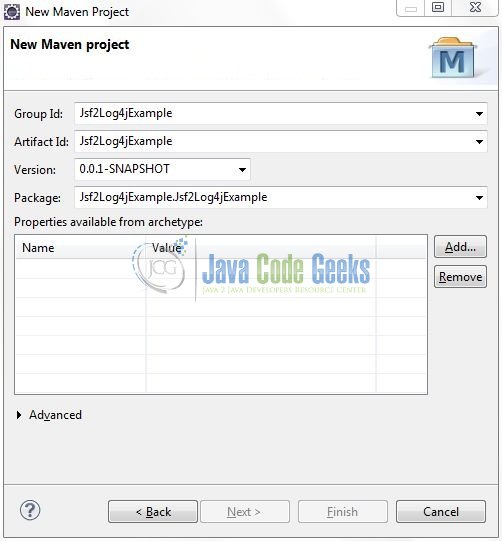
It will ask you to ‘Enter the group and the artifact id for the project’. We will input the details as shown in the below image. The version number will be by default: 0.0.1-SNAPSHOT.
Click on Finish and the creation of a maven project is completed. If you observe, it has downloaded the maven dependencies and a pom.xml file will be created. It will have the following code:
pom.xml
<project xmlns="http://maven.apache.org/POM/4.0.0" xmlns:xsi="http://www.w3.org/2001/XMLSchema-instance" xsi:schemaLocation="http://maven.apache.org/POM/4.0.0 http://maven.apache.org/xsd/maven-4.0.0.xsd">
	<modelVersion>4.0.0</modelVersion>
	<groupId>Jsf2Log4jExample</groupId>
	<artifactId>Jsf2Log4jExample</artifactId>
	<version>0.0.1-SNAPSHOT</version>
	<packaging>war</packaging>
</project>
We can start adding the dependencies that developers want like Log4j, Junit etc. Let’s start building the application!
3. Application Building
Below are the steps involved in developing this application.
3.1 Maven Dependencies
In this example, we are using the most stable JSF and Log4j version in order to set-up the JSF and the logging framework. The updated file will have the following code:
pom.xml
<project xmlns="http://maven.apache.org/POM/4.0.0" xmlns:xsi="http://www.w3.org/2001/XMLSchema-instance"
	xsi:schemaLocation="http://maven.apache.org/POM/4.0.0 http://maven.apache.org/maven-v4_0_0.xsd">
	<modelVersion>4.0.0</modelVersion>
	<groupId>Jsf2Log4jExample</groupId>
	<artifactId>Jsf2Log4jExample</artifactId>
	<packaging>war</packaging>
	<version>0.0.1-SNAPSHOT</version>
	<name>Jsf2Log4jExample Maven Webapp</name>
	<url>http://maven.apache.org</url>
	<dependencies>
		<!-- https://mvnrepository.com/artifact/com.sun.faces/jsf-api -->
		<dependency>
			<groupId>com.sun.faces</groupId>
			<artifactId>jsf-api</artifactId>
			<version>2.2.15</version>
		</dependency>
		<!-- https://mvnrepository.com/artifact/com.sun.faces/jsf-impl -->
		<dependency>
			<groupId>com.sun.faces</groupId>
			<artifactId>jsf-impl</artifactId>
			<version>2.2.15</version>
		</dependency>
		<!-- Servlet API Dependency -->
		<dependency>
			<groupId>javax.servlet</groupId>
			<artifactId>servlet-api</artifactId>
			<version>3.0-alpha-1</version>
		</dependency>
		<dependency>
			<groupId>javax.servlet</groupId>
			<artifactId>jstl</artifactId>
			<version>1.2</version>
		</dependency>
		<dependency>
			<groupId>javax.servlet.jsp</groupId>
			<artifactId>jsp-api</artifactId>
			<version>2.1</version>
		</dependency>
		<!-- Log4J Dependency -->
		<dependency>
			<groupId>log4j</groupId>
			<artifactId>log4j</artifactId>
			<version>1.2.17</version>
		</dependency>
	</dependencies>
	<build>
		<finalName>${project.artifactId}</finalName>
	</build>
</project>
3.2 Java Class Creation
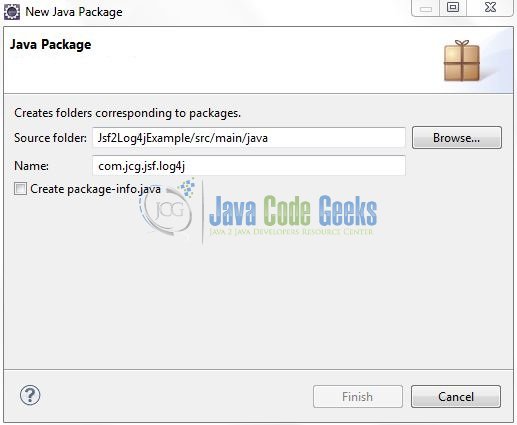
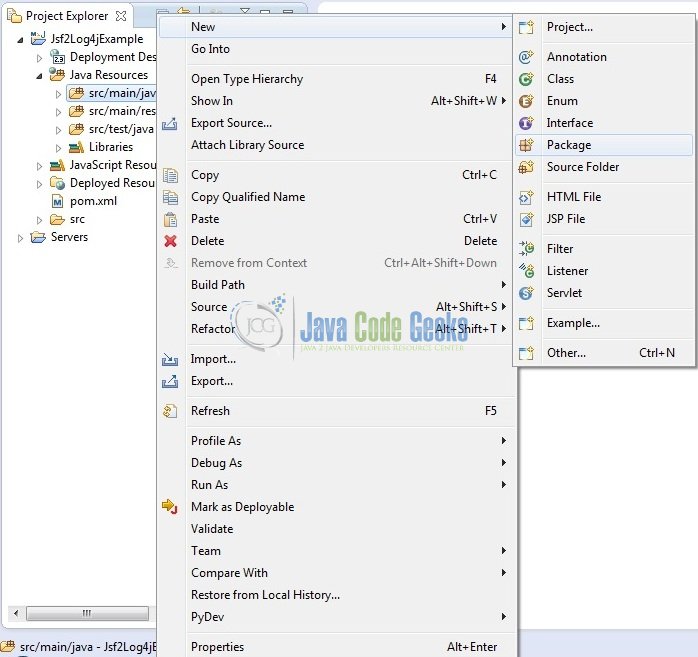
Let’s create the required Java files. Right-click on src/main/java folder, New -> Package.
A new pop window will open where we will enter the package name as: com.jcg.jsf.log4j.
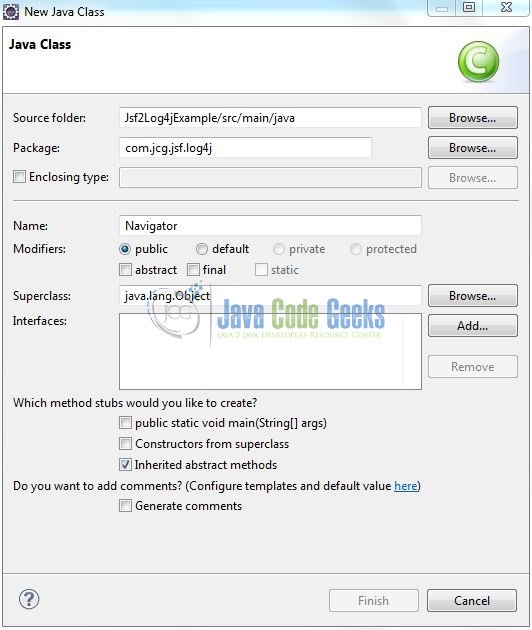
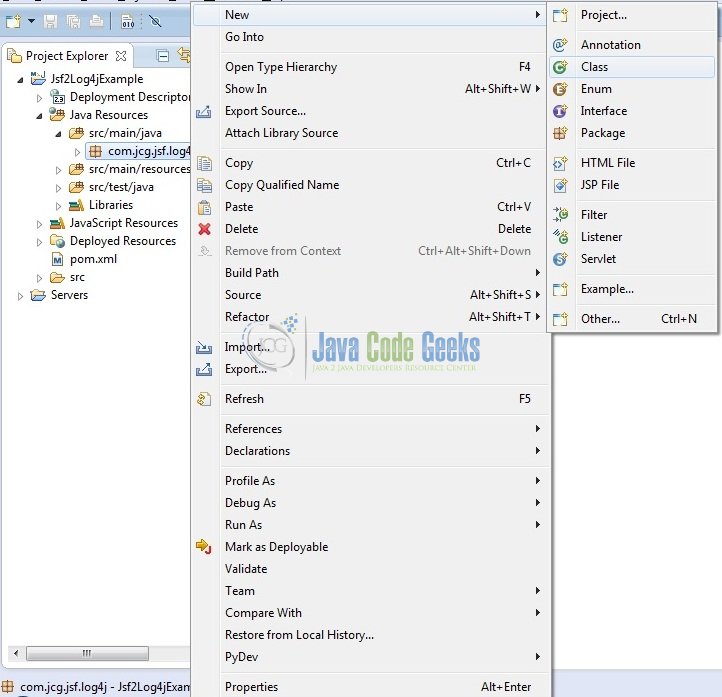
Once the package is created, we will need to create the implementation class. Right-click on the newly created package, New -> Class.
A new pop window will open and enter the file name as: Navigator. The implementation class will be created inside the package: com.jcg.jsf.log4j.
3.2.1 Implementation of Utility Class
Let’s write a quick Java program in the JSF controller class to use the Log4j framework. Add the following code to it.
Navigator.java
package com.jcg.jsf.log4j;

import java.io.Serializable;

import javax.faces.bean.ManagedBean;
import javax.faces.bean.SessionScoped;

import org.apache.log4j.Logger;

@ManagedBean
@SessionScoped
public class Navigator implements Serializable {

	private static final long serialVersionUID = 1L;
	private static Logger logger = Logger.getLogger(Navigator.class);

	private String name;

	public String getName() {
		return name;
	}

	public void setName(String name) {
		this.name = name;
	}

	public String validate() {
		String navResult = "";
		logger.info("Username is?= " + name);
		if (name.equalsIgnoreCase("jcg")) {
			navResult = "result";
		} else {
			name = "test user";
			navResult = "result";
		}
		return navResult;
	}
}
3.3 Configuration Files
Let’s write all the configuration files involved in this application.
3.3.1 Log4j Configuration File
Log4j will be usually configured using a properties file or an XML file. So once the log statements are in place developers can easily control them using the external configuration file without modifying the source code. The log4j.properties file is a Log4j configuration file which keeps properties in key-value pairs. By default, the LogManager looks for a file named log4j.properties in the CLASSPATH.
To configure the logging framework, we need to implement a configuration file i.e. log4j.properties and put it into the src/main/resources folder. Add the following code to it:
log4j.properties
# Root Logger Option
log4j.rootLogger=INFO, console

# Enable JSF Logging
log4j.logger.javax.faces=DEBUG
log4j.logger.com.sun.faces=DEBUG

# Redirect Log Messages To Console
log4j.appender.console=org.apache.log4j.ConsoleAppender
log4j.appender.console.Target=System.out
log4j.appender.console.layout=org.apache.log4j.PatternLayout
log4j.appender.console.layout.ConversionPattern=%-5p | %d{yyyy-MM-dd HH:mm:ss} | [%t] %C{2} (%F:%L) - %m%n
3.3.2 Web Deployment Descriptor
The web.xml file declares the servlet to receive all kind of the requests and specifies the default page when accessing the application. Add the following code to it:
web.xml
<?xml version="1.0" encoding="UTF-8"?>
<web-app xmlns="http://java.sun.com/xml/ns/j2ee" xmlns:javaee="http://java.sun.com/xml/ns/javaee" xmlns:web="http://java.sun.com/xml/ns/javaee/web-app_2_5.xsd" xmlns:xsi="http://www.w3.org/2001/XMLSchema-instance" xsi:schemaLocation="http://java.sun.com/xml/ns/j2ee http://java.sun.com/xml/ns/j2ee/web-app_2_4.xsd" id="JSF2HelloWorldUsingMaven_ID" version="2.4">
   <display-name>Jsf2Log4jExample</display-name>

   <!-- JSF Mapping -->
   <servlet>
      <servlet-name>JSF Servlet</servlet-name>
      <servlet-class>javax.faces.webapp.FacesServlet</servlet-class>
      <load-on-startup>1</load-on-startup>
   </servlet>

   <!-- Map These Ffiles With JSF -->
   <servlet-mapping>
      <servlet-name>JSF Servlet</servlet-name>
      <url-pattern>*.xhtml</url-pattern>
   </servlet-mapping>
   <servlet-mapping>
      <servlet-name>JSF Servlet</servlet-name>
      <url-pattern>*.jsf</url-pattern>
   </servlet-mapping>

   <!-- Welcome Page -->
   <welcome-file-list>
      <welcome-file>form.xhtml</welcome-file>
   </welcome-file-list>
</web-app>
3.5 Creating JSP Views
Let us write a simple view in the Jsf2Log4jExample/src/main/webapp/WEB-INF/views folder. This page simply shows the #{navigator.name} property whose value will be set on the input page. Add the following code to it:
form.xhtml
<!DOCTYPE HTML>
<html xmlns="http://www.w3.org/1999/xhtml" xmlns:h="http://java.sun.com/jsf/html">
	<h:head>
	    <title>JSF Log4j Example</title>
	    <style type="text/css">
	       .textPlacement {
	           margin: 12px;
	       }
	   </style>
	</h:head>
	<h:body>
	    <center><h2>JSF Log4j Example</h2></center>
	    <h:form id="loginForm">
	        <div id="username" class="textPlacement">
	            <h:outputLabel value="Username: " /><h:inputText value="#{navigator.name}" />
	        </div>
	        <div id="submit" class="textPlacement">
	            <h:commandButton value="Say Hello" action="#{navigator.validate}" />
	        </div>
	    </h:form>
	</h:body>
</html>
4. Run the Application
As we are ready for all the changes, let us compile the project and deploy the application on the Tomcat7 server. To deploy the application on Tomat7, right-click on the project and navigate to Run as -> Run on Server.
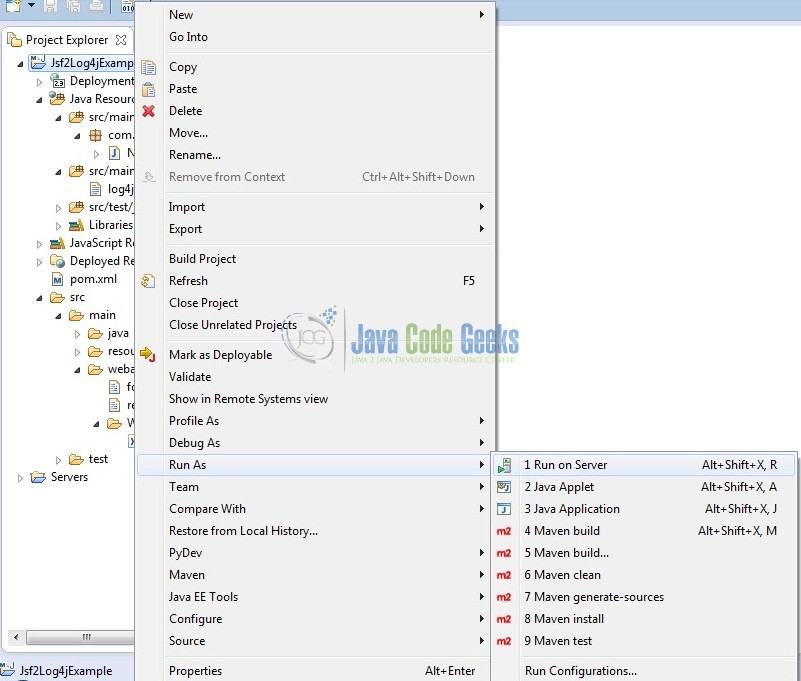
Tomcat will deploy the application in its web-apps folder and shall start its execution to deploy the project so that we can go ahead and test it in the browser.
5. Project Demo
Open your favorite browser and hit the following URL. The output page will be displayed.
http://localhost:8085/Jsf2Log4jExample/
Server name (localhost) and port (8085) may vary as per your tomcat configuration. Developers can debug the example and see what happens after every step. Enjoy!
Submit the form details and notice that some log entries are appended to the server’s console as follows:
INFO | 2017-11-26 15:04:07 | [http-bio-8085-exec-7] log4j.Navigator (Navigator.java:30) - Username is?= jcg
That’s all for this post. Happy Learning!!
6. Conclusion
That’s all for getting the developers started with the Log4j functionality in the JSF framework. I hope this article served you whatever you were looking for. Developers can download the sample application as an Eclipse project in the Downloads section.
7. Download the Eclipse Project
This was an example of Log4j functionality with the JSF framework.
You can download the full source code of this example here: Jsf2Log4jExample



Thank you for clear information.