Ajax Example with JSF 2.0
Hi there, you do remember right from my last example, today we ‘re gonna talk about integrating JSF together with Ajax. Ajax stands for Asynchronous Javascript and XML and is also a helpful technique for creating web pages with dynamic content (i.e. when you want to update a single component in your web page, instead of updating the whole page). This is implemented asynchronously by exchanging small amounts of data with the server, in the back-end. For further details about today’s example, refer here.
Everything is set up as is, in the previous two JSF examples, so we ‘ll dive quickly, into the technical part of the example.
1. JSF Page
Here is our JSF page that supports Ajax.
helloAjax.xhtml
<?xml version="1.0" encoding="UTF-8"?>
<!DOCTYPE html PUBLIC "-//W3C//DTD XHTML 1.0 Transitional//EN"
"http://www.w3.org/TR/xhtml1/DTD/xhtml1-transitional.dtd">
<html xmlns="http://www.w3.org/1999/xhtml"
      xmlns:f="http://java.sun.com/jsf/core"
      xmlns:h="http://java.sun.com/jsf/html">

    <h:head>
        <title>Ajax JSF Example</title>
    </h:head>
    <h:body>
    	<h3>JSF 2.2 Hello Ajax Example</h3>

    	<h:form>
    	   <h:inputText id="name" value="#{helloBean.name}"></h:inputText>
    	   <h:commandButton value="Welcome Me">
    	   		<f:ajax execute="name" render="output"/>
    	   </h:commandButton>
           <h2><h:outputText id="output" value="#{helloBean.sayWelcome}" /></h2>
    	</h:form>
    </h:body>
</html>
We ‘ll keep the same base with the previous example, so what will make our site Ajaxable, is the button. Thus, when in clicked, it will send a request to the server, instead of submitting the whole form.
The key code branch of the above snippet is this:
           <h:commandButton value="Welcome Me">
    	   		<f:ajax execute="name" render="output"/>
    	   </h:commandButton>
    	   <h2><h:outputText id="output" value="#{helloBean.sayWelcome}" /></h2>
What enables Ajax features of our page is the tag f:ajax. There are two processes that take part there:
- The
execute="name"property indicated that a component, which id is equal toname, will be sent to server for processing. That is, the server is going to search the form component that matches the required id. In our case, we ‘re talking about the value of ourinputTextKeep in mind, that if we had more that one components that we might want to send to server for processing, we could just split them with a space character; for example,execute="id1 id2 id3". - What comes after a request (in normal circumstances)? A response, of course, so our
render="output"means that the server’s response will be rendered to a component, which id isoutput. Thus, in our case, the response will be displayed in theoutputTextcomponent.
2. Managed Bean
Before reading the code for HelloBean.java, a small quote for the fore-mentioned key code snippet: the action that will make the outputText take the inputText‘s value, is its property of value="#{helloBean.sayWelcome}". If something isn’t clear till here, you have to refer to the previous example.
All right, here’s the structure of HelloBean.java.
HelloBean.java
import java.io.Serializable;
import javax.faces.bean.ManagedBean;
import javax.faces.bean.SessionScoped;

@ManagedBean
@SessionScoped
public class HelloBean implements Serializable{

	private static final long serialVersionUID = 1L;

	private String name;

	public String getName()
	{
		return name;
	}

	public void setName(String name)
	{
		this.name = name;
	}

	public String getSayWelcome()
	{
		if("".equals(name) || name == null)
		{	return "" ; }
		else{
			return "Ajax message : Welcome " + name ;
			}
	}

}
3. Demo
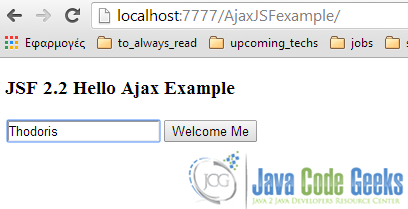
You can test you application by simply hitting Run in your IDE, or by accessing the following URL: http://localhost:8080/AjaxJSFexample/:
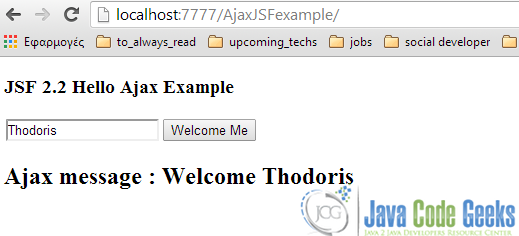
What are we waiting for, after the button is clicked? The server’s response, which is implemeted from the getSayWelcome() method, without having the whole page refreshed:
This was an example of integrating Ajax together with JSF. You can also download the source code: AjaxJSFexample


