Hello, in this tutorial we will study about EntityManager in a jsf application and we will demonstrate the following:
- Login Form
- Performing database operation’s & validating the user credentials
- Sending & receiving data to & from a managed bean
This example will show the implementation of JPA EntityManager in JSF with EclipseLink & MySQL.
Table Of Contents
1. Introduction
Java Persistence API (JPA), is a standard interface which wraps different Object Relational Mapping (ORM) tools such as Hibernate, EclipseLink, OpenJPA etc. By using JPA, we can do CRUD database operations (i.e. Create, Read, Update & Delete) with very little code. In this standalone JPA example, we are using EclipseLink with MySQL Database.
EclipseLink is a popular open source ORM (Object Relation Mapping) tool for Java platform used for mapping an entity to a traditional relational database like Oracle, MySQL etc.
Developers can check the below table for the different databases which are available with Hibernate and EclipseLink examples:
| Database | Driver class | Jar name |
|---|---|---|
| MySQL | com.mysql.jdbc.Driver | mysql-connector-java-5.1.25-bin.jar (exact name depends on version) http://www.mysql.com/downloads/connector/j/ |
| HSQLDB | org.hsqldb.jdbcDriver | hsqldb.jar http://hsqldb.sourceforge.net |
| Sybase | com.sybase.jdbc3.jdbc.SybDriver | jconnect.jar http://www.sybase.com/products/allproductsa-z/softwaredeveloperkit/jconnect |
| Apache Derby | org.apache.derby.jdbc.EmbeddedDriver | derby.jar http://db.apache.org/derby/ |
| IBM DB2 | com.ibm.db2.jcc.DB2Driver | db2jcc4.jar http://www-01.ibm.com/software/data/db2/linux-unix-windows/download.html |
| PostgreSQL | org.postgresql.Driver | postgresql-8.4-701.jdbc4.jar (exact name depends on PostgreSQL version) http://jdbc.postgresql.org |
| SQL Server (Microsoft driver) | com.microsoft.sqlserver.jdbc.SQLServerDriver | sqljdbc4.jar http://msdn.microsoft.com/en-gb/data/aa937724%28en-us%29.aspx |
In the below tutorial, we will have the following components:
- login.xhtml – A jsf page having the login form
- success.xhtml – A jsf page which will display user’s name in case of successful authentication
- LoginBean.java – Managed bean class for user
- UserEntityManager.java – A class that has all the getters & setters for the users table created in the database
- web.xml – Web application configuration file
This application will validate the user’s authentication, wherein the credentials are already stored in the database. But before we create the application let’s take a look at the EntityManager in jsf.
1.1 JPA Entity Manager
Java Persistence API (JPA) provides javax.persistence.EntityManager interface which is used to interact with the database. The instance of EntityManager plays around the persistence context and EntityManagerFactory interacts with entity manager factory.
Persistence context is the set of entity instances where for any persistence entity identity, there is a unique entity instance. The lifecycle of entity instances are managed within the persistence context using EntityManager. We can detach and merge the entity instances within a persistence context.
EntityManager is a model borrowed from traditional JDBC frameworks, making it easy for the developers to perform the basic database operations (i.e. Create, Read, Update & Delete) with very little code.
If a developer wishes to read the tag documentation, they might consider this option
1.2 JPA Benefits
The benefit of using the JPA over any specific Object Relational Model (ORM) related libraries like Hibernate, iBatis etc. is that we need not change the code when we change the vendor. The code is loosely coupled with the underlying ORM framework.
1.3 How it can be achieved?
Programmers can achieve persistence in their application by introducing persistence.xml in their code. This module plays a crucial role in the concept of JPA as in this xml file we will register the database and specify the entity class. Let’s take a look and understand the sample persistence.xml code:
Sample persistence.xml
<?xml version="1.0" encoding="UTF-8"?>
<persistence version="2.1"
	xmlns="http://xmlns.jcp.org/xml/ns/persistence" xmlns:xsi="http://www.w3.org/2001/XMLSchema-instance"
	xsi:schemaLocation="http://xmlns.jcp.org/xml/ns/persistence http://xmlns.jcp.org/xml/ns/persistence/persistence_2_1.xsd">
	<persistence-unit name="TestPersistence" transaction-type="RESOURCE_LOCAL">
		<class><!-- Entity Manager Class Name --></class>
		<properties>
			<property name="javax.persistence.jdbc.driver" value="Database Driver Name" />
			<property name="javax.persistence.jdbc.url" value="Database Url" />
			<property name="javax.persistence.jdbc.user" value="Database Username" />
			<property name="javax.persistence.jdbc.password" value="Database Password" />
		</properties>
	</persistence-unit>
</persistence>
It is mandatory to place
persistence.xml in the project’s src/META-INF folder.The persistence.xml file indicates that there is only one Persistence Unit is mapped with the name TestPersistence and the transaction type for this Persistence Unit is RESOURCE_LOCAL. There are two types of transactions:
- JTA
- RESOURCE_LOCAL
If you select RESOURCE_LOCAL then the transaction will be managed by the JPA Provider Implementation in use. If JTA is specified, then the transactions will be managed by the Application Server.
Do note, if a developer only wants to have JPA transactions, then RESOURCE_LOCAL is a good choice. But, if a developer would like the transactions to contain resources other than JPA, like EJBs, JMS then JTA is the correct choice.
1.4 Download & Install EclipseLink
You can watch this video in order to download and install the JPA in Eclipse via the EclipseLink.
Now, open up the Eclipse IDE and let’s start building the application!
2. JSF EntityManager Example
2.1 Tools Used
We are using Eclipse Kepler SR2, JDK 8 (1.8.0_131), Tomcat7 application server and MySQL database. Having said that, we have tested the code against JDK 1.7 and it works well.
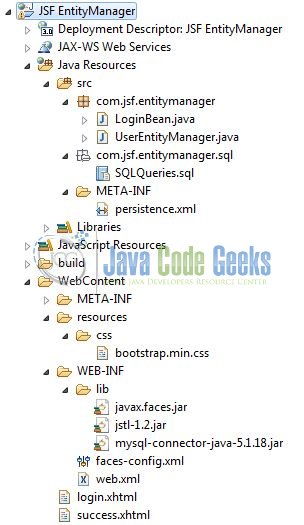
2.2 Project Structure
Firstly, let’s review the final project structure, in case you are confused about where you should create the corresponding files or folder later!
2.3 Project Creation
The below example shows how to implement the event queue using a method binding technique in an application.
This section will demonstrate on how to create a Dynamic Web Java project with Eclipse. In Eclipse IDE, go to File -> New -> Dynamic web project

In the New Dynamic Project window fill in the below details and click next
- Enter the project name and project location
- Select Target runtime as Apache Tomcat v7.0 from dropdown
- Select Configuration as JavaServer Faces v.2.2 Project from dropdown (this is required to download the java server faces capabilities in your project)
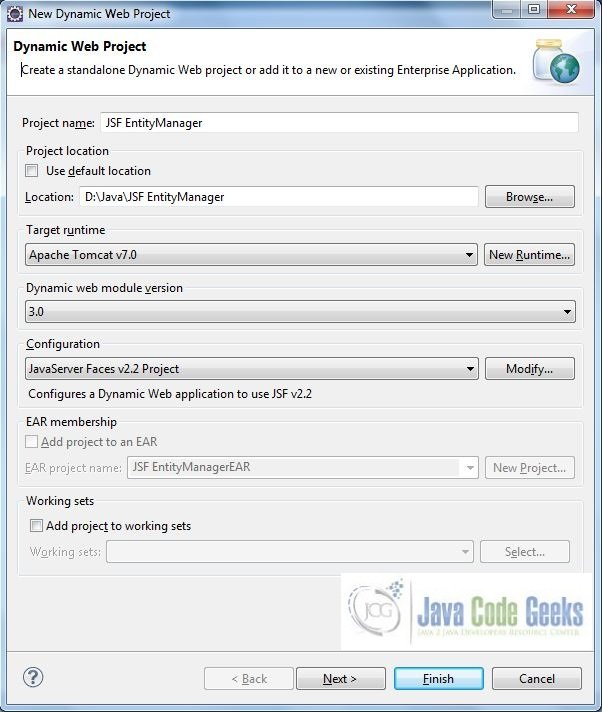
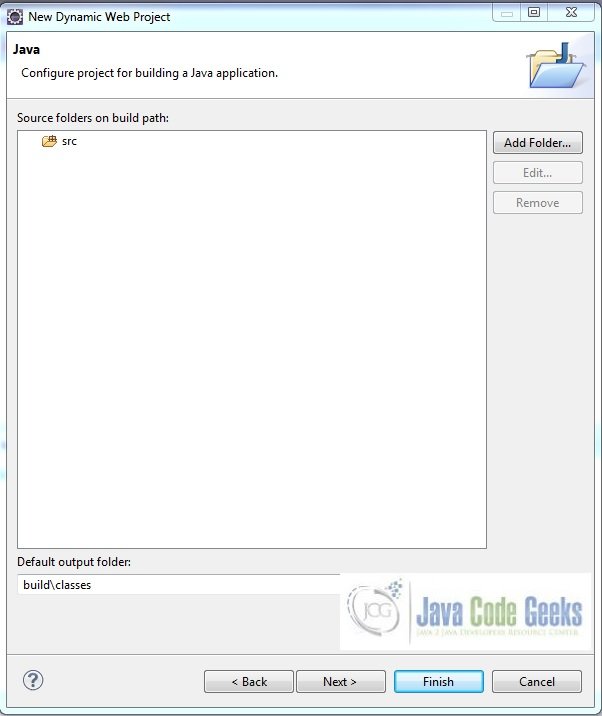
Leave everything as default in this window as we will be making the required java file at a later stage. Simply click next and we will land up on the web-module window
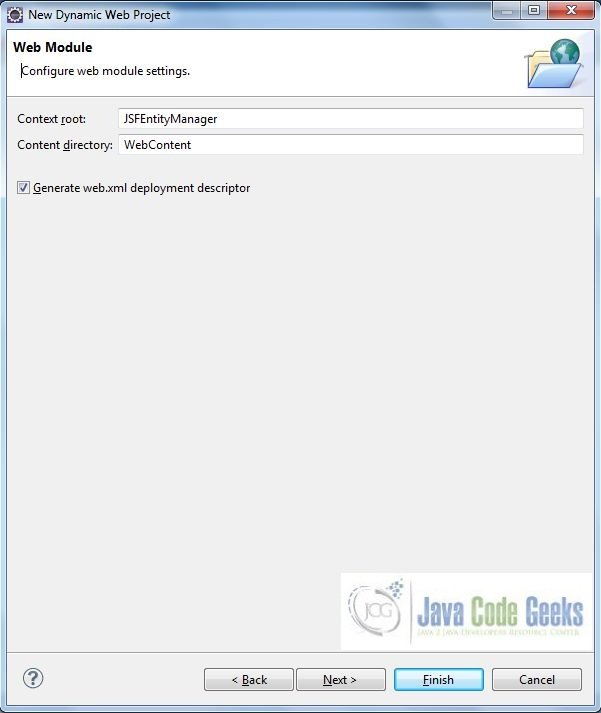
In the Web Module window, leave the context_root and content_directory values as default (however, you can change the context_root but for the first application let’s keep it as a default value). Simply, check Generate web.xml deployment descriptor checkbox and click next
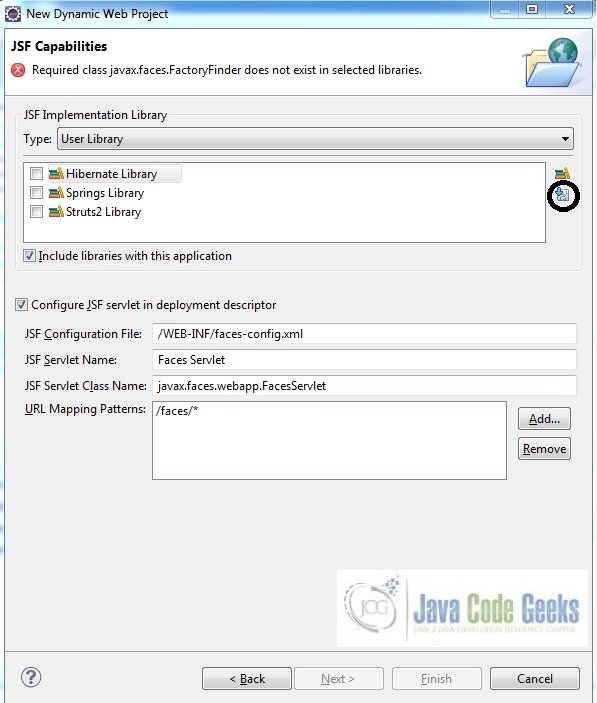
In the JSF Capabilities windows, we will require downloading the dependencies (not available by default) so that our project is configured as a JSF module in Eclipse. Add the JSF capabilities to the web project by clicking on the download icon (encircled in Fig. 6) and download the JSF 2.2 Mojarra implementation
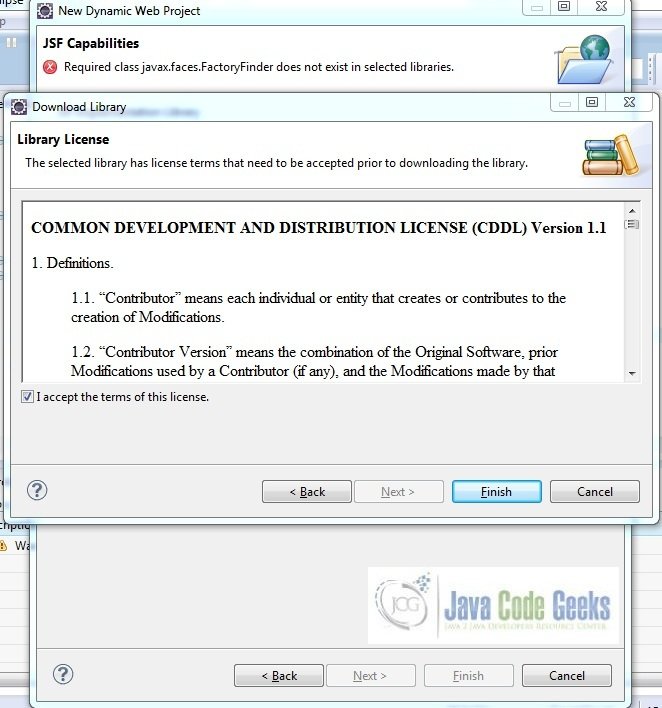
A new pop-up window will open where it will auto lists down the JSF library. Select the JSF 2.2 library and click next (the library name and download destination will be auto populated)

Check the license checkbox and click finish. Eclipse will download the JSF 2.2 library and will display them on the JSF capabilities windows (i.e. Fig. 6)
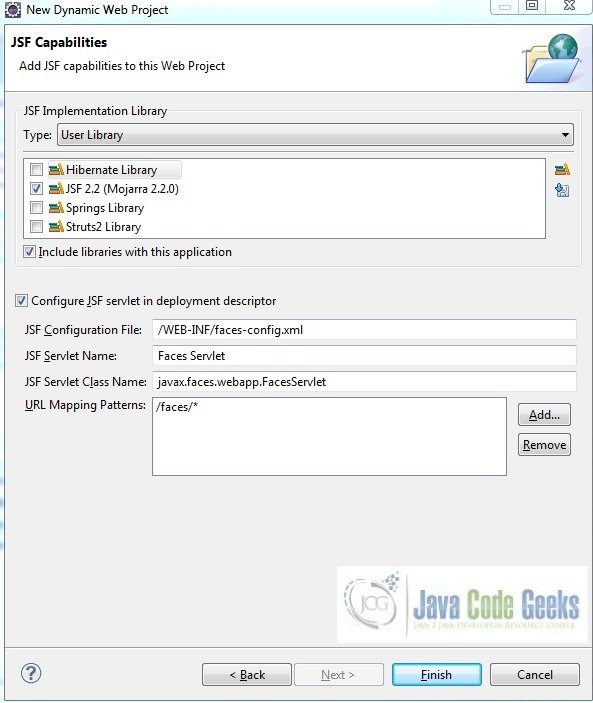
Now the JSF implementation libraries will be listed down on the capabilities page. Select the checkbox (JSF2.2 (Mojarra 2.2.0)) and leave everything else as default. Click Finish
Eclipse will create the project named JSF EntityManager in the workspace and web.xml will be configured for accepting the JSF requests. It will have the following code:
web.xml
<?xml version="1.0" encoding="UTF-8"?>
<web-app xmlns="http://java.sun.com/xml/ns/javaee" xmlns:xsi="http://www.w3.org/2001/XMLSchema-instance" xsi:schemaLocation="http://java.sun.com/xml/ns/javaee http://java.sun.com/xml/ns/javaee/web-app_3_0.xsd" id="WebApp_ID" version="3.0">
   <display-name>JSF EntityManager</display-name>
   <welcome-file-list>
      <welcome-file>index.html</welcome-file>
      <welcome-file>index.htm</welcome-file>
      <welcome-file>index.jsp</welcome-file>
      <welcome-file>default.html</welcome-file>
      <welcome-file>default.htm</welcome-file>
      <welcome-file>default.jsp</welcome-file>
   </welcome-file-list>
   <servlet>
      <servlet-name>Faces Servlet</servlet-name>
      <servlet-class>javax.faces.webapp.FacesServlet</servlet-class>
      <load-on-startup>1</load-on-startup>
   </servlet>
   <servlet-mapping>
      <servlet-name>Faces Servlet</servlet-name>
      <url-pattern>/faces/*</url-pattern>
   </servlet-mapping>
   <context-param>
      <description>State saving method: 'client' or 'server' (=default). See JSF Specification 2.5.2</description>
      <param-name>javax.faces.STATE_SAVING_METHOD</param-name>
      <param-value>client</param-value>
   </context-param>
   <context-param>
      <param-name>javax.servlet.jsp.jstl.fmt.localizationContext</param-name>
      <param-value>resources.application</param-value>
   </context-param>
   <listener>
      <listener-class>com.sun.faces.config.ConfigureListener</listener-class>
   </listener>
</web-app>
2.4 Persistence.xml Configuration
Create a directory META-INF in src folder and create the file persistence.xml inside it. Add the following code to it:
persistence.xml
<?xml version="1.0" encoding="UTF-8"?>
<persistence version="2.1"
	xmlns="http://xmlns.jcp.org/xml/ns/persistence" xmlns:xsi="http://www.w3.org/2001/XMLSchema-instance"
	xsi:schemaLocation="http://xmlns.jcp.org/xml/ns/persistence http://xmlns.jcp.org/xml/ns/persistence/persistence_2_1.xsd">
	<persistence-unit name="JSFEntityManager">
		<class>com.jsf.entitymanager.UserEntityManager</class>
		<!-- Configuring JDBC Connection -->
		<properties>
			<property name="javax.persistence.jdbc.driver" value="com.mysql.jdbc.Driver" />
			<property name="javax.persistence.jdbc.url" value="jdbc:mysql://localhost:3306/sample" />
			<property name="javax.persistence.jdbc.user" value="root" />
			<property name="javax.persistence.jdbc.password" value="" />
		</properties>
	</persistence-unit>
</persistence>
Note: We have kept the javax.persistence.jdbc.password value as blank for simplicity, however, it is pure unto user to keep it blank or set it during the MySQL configuration. If the user sets it, we need to provide the same password to this string.
2.5 Download & Install MySQL Connector Jar
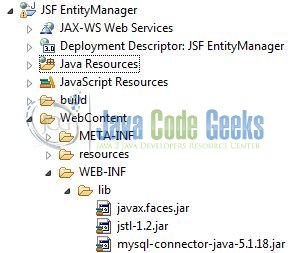
Download the MySQL-connection jar from here and copy in the project’s WEB-INF lib folder as per below image
Let’s start building the application!
3. Application Building
Below are the steps involved in developing this application:
3.1 Database & Table Creation
This tutorial uses a database called sample. The database is not included when you create the project in eclipse so you need to first create the database to follow this tutorial.
- Create a new database
sampleas:
CREATE DATABASE sample;
- Use the created database
sampleto create table as:
USE sample;
- Create the table
usersas shown below:
CREATE TABLE users (
  id INTEGER auto_increment,
  name VARCHAR(120),
  login VARCHAR(75) NOT NULL,
  password VARCHAR(75) NOT NULL,
  PRIMARY KEY(id)
);
- Now we shall insert some values into the
userstable as:
INSERT INTO users (name, login, password) VALUES ("Java Code Geek", "javageek", "access123");

INSERT INTO users (name, login, password) VALUES ("Test User", "test", "access123");

INSERT INTO users (name, login, password) VALUES ("April", "april", "access123");
- View
student_recordtable records as:
SELECT * FROM users;
If everything goes fine, the records will be shown as below in the MySQL workbench.

3.2 Source File Creation
For the demo, we are using a sample login page application. Right click on project WebContent -> New -> File
Note: In JSF 2.0, it’s recommended to create a JSF page in xhtml format, a file format with .xhtml extension
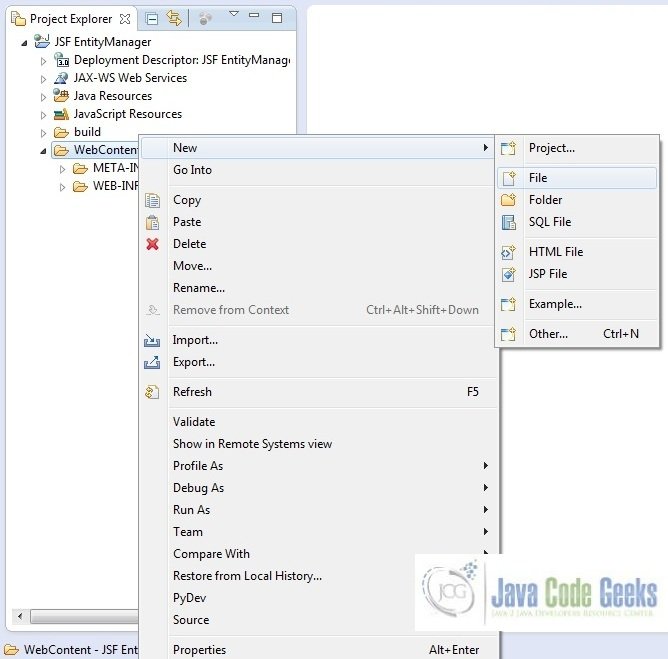

A pop-up window will open. Verify the parent folder location as JSF EntityManager/WebContent and enter the file name as login.xhtml. Click Finish

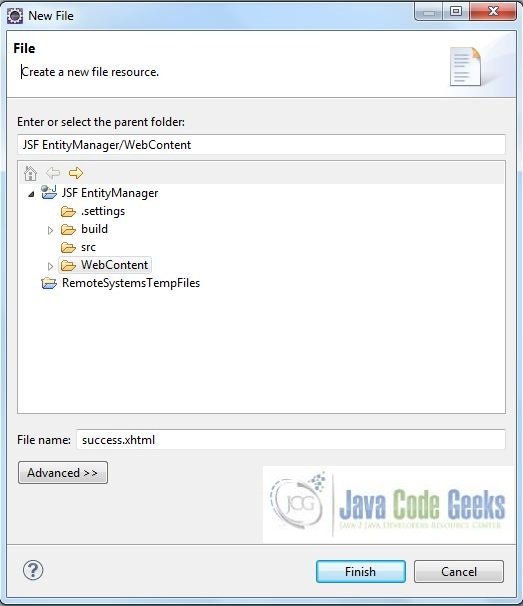
Repeat the step listed in Fig. 12. Verify the parent folder location as JSF EntityManager/WebContent and enter the file name as success.xhtml and click Finish
3.2.1 Implementation of Input & Output file
Here in the login.xhtml, we will have the form based UI components. The action attribute on the button will show the corresponding result based on the corresponding logic written in the managed-bean. Add the following code to it:
login.xhtml
<!DOCTYPE HTML>
<html lang="en" xmlns="http://www.w3.org/1999/xhtml" xmlns:h="http://java.sun.com/jsf/html" xmlns:f="http://xmlns.jcp.org/jsf/core">
<h:head>
    <meta charset="utf-8" name="viewport" content="width=device-width, initial-scale=1" http-equiv="X-UA-Conpatible" />
    <h:outputStylesheet library="css" name="bootstrap.min.css" />
    <title>JSF Entitymanager</title>
    <style type="text/css">
    	.formPosition {
    		width: 40%;
    		margin: 24px;
    	}
    	.errorMsg {
    		color: red;
    		padding-top: 16px;
    	}
    </style>
</h:head>
<h:body>
    <center><h2>JSF Entitymanager Example</h2></center>
    <div class="container">
        <div class="row">
            <div class="form_bg">
                <h:form id="loginForm" styleClass="formPosition">
                    <div class="form-group">
                        <h:outputLabel value="Username " />
                        <h:inputText id="loginName" value="#{loginBean.userName}" styleClass="form-control" />
                    </div>
                    <div class="form-group">
                        <h:outputLabel value="password" />
                        <h:inputSecret id="loginPassword" value="#{loginBean.password}" styleClass="form-control" />
                    </div>
                    <div>
                    	<h:commandButton value="Login" action="#{loginBean.validateLoginCredentials}" styleClass="btn btn-primary" />
                    </div>
                    <div class="errorMsg"><h:message for="loginName" /></div>
                </h:form>
            </div>
        </div>
    </div>
</h:body>
</html>
In the output page, JSF will display the output based on the authentication result. Add the following code to it:
success.xhtml
<!DOCTYPE HTML>
<html xmlns="http://www.w3.org/1999/xhtml"
	xmlns:h="http://java.sun.com/jsf/html">
<h:head>
	<title>JSF Entitymanager</title>
	<style type="text/css">
		.successText {
			color: green;
			margin: 12px;
			font-weight: bold;
		}
	</style>
</h:head>
<h:body>
	<center><h2>JSF Entitymanager Example</h2></center>
	<div id="result">
		Welcome, <span id="userName"><h:outputLabel class="successText" value="#{loginBean.name}" /></span>
	</div>
</h:body>
</html>
3.3 Java Class Creation
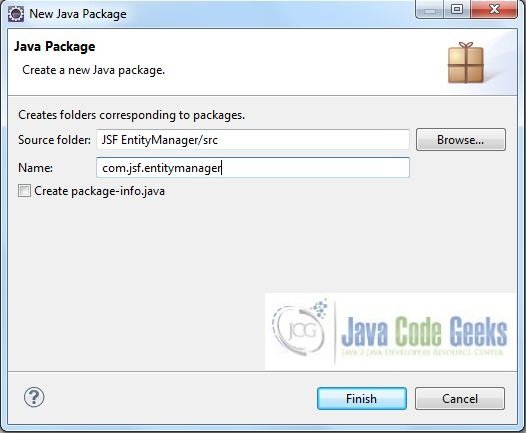
Let’s create the required java files. Right click on src folder New -> Package

A new pop window will open where we will enter the package name as com.jsf.entitymanager
Once the package is created in the application, we will need to create the required managed bean. Right click on the newly create package New -> Class
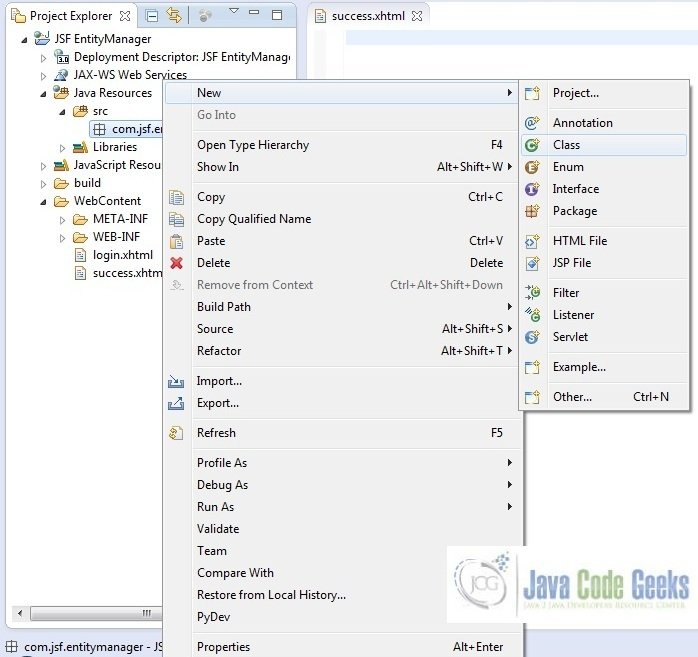
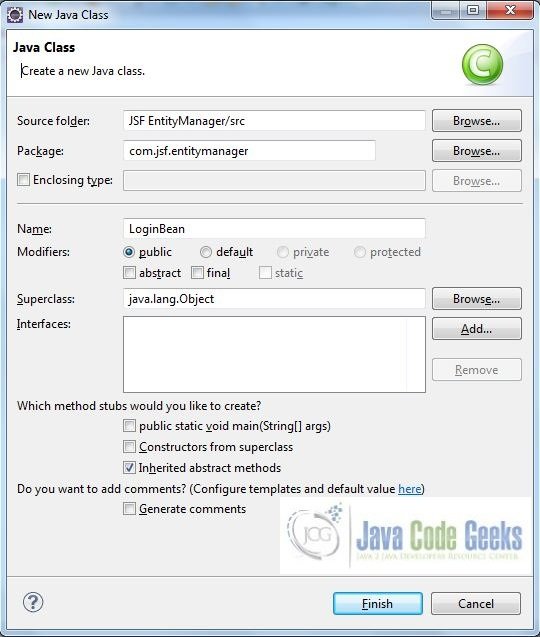
A new pop window will open and enter the file name as LoginBean. The managed bean class will be created inside the package com.jsf.entitymanager
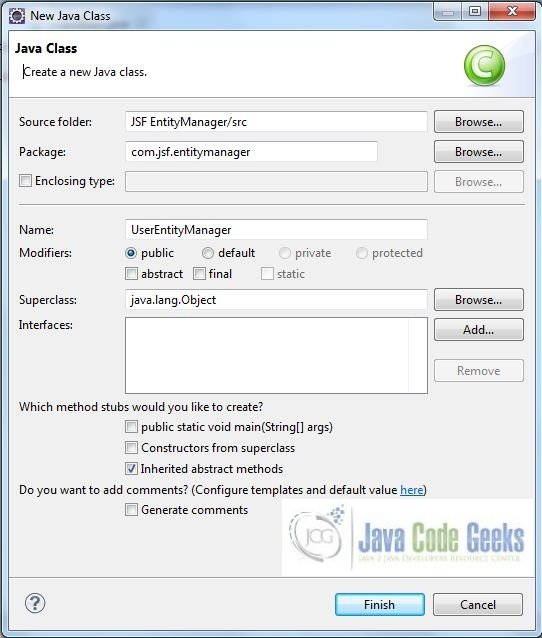
Repeat the step listed in Fig. 17. Again, a new pop window will open and enter the file name as UserEntityManager. The managed bean class will be created inside the package com.jsf.entitymanager
3.3.1 Implementation of Managed Bean
This class has a method validateLoginCredentials() which interacts with login action event and does the user authentication based on the entered credentials. If the credentials match with the already defined credentials in the database, the user will be granted access else the failure page will be displayed. Add the following code to it:
LoginBean.java
package com.jsf.entitymanager;

import javax.faces.application.FacesMessage;
import javax.faces.bean.ManagedBean;
import javax.faces.bean.SessionScoped;
import javax.faces.context.FacesContext;
import javax.persistence.EntityManager;
import javax.persistence.Persistence;
import javax.persistence.Query;

@ManagedBean @SessionScoped
public class LoginBean {

	private String name;
	private String password;
	private String userName;
	private static final String PERSISTENCE_UNIT_NAME = "JSFEntityManager";

	public LoginBean() {}

	public String getName() {
		return name;
	}

	public void setName(String name) {
		this.name = name;
	}

	public String getPassword() {
		return password;
	}

	public void setPassword(String password) {
		this.password = password;
	}

	public String getUserName() {
		return userName;
	}

	public void setUserName(String userName) {
		this.userName = userName;
	}

	// Method To Check User's Authentication Credentials
	public String validateLoginCredentials() {
		String validationResult = "";
		EntityManager entityMgrObj = Persistence.createEntityManagerFactory(PERSISTENCE_UNIT_NAME).createEntityManager();
		Query queryObj = entityMgrObj.createQuery("SELECT u FROM UserEntityManager u WHERE u.login = :login AND u.password = :password");
		queryObj.setParameter("login", userName);
		queryObj.setParameter("password", password);
		try {
			UserEntityManager userResultSetObj = (UserEntityManager) queryObj.getSingleResult();
			if ((userResultSetObj != null) && (userName.equalsIgnoreCase(userResultSetObj.getLogin()) && password.equals(userResultSetObj.getPassword()))) {
				validationResult ="success";
				name = userResultSetObj.getName();
			}
		} catch(Exception exObj) {
			validationResult = "login";
			FacesContext.getCurrentInstance().addMessage("loginForm:loginName", new FacesMessage("Username Or Password Is Incorrect"));
		}
		return validationResult;
	}
}
3.3.2 Implementation of EntityManager Class
The UserEntityManager class has all the getters/setters for the users table. At the top this class, we tell the compiler that the table name is users. We declare the class an Entity by using the @Entity annotation and then we use the @Id annotation to generate an ID for the id column of the table. Add the following code to it:
UserEntityManager.java
package com.jsf.entitymanager;

import javax.persistence.Entity;
import javax.persistence.GeneratedValue;
import javax.persistence.GenerationType;
import javax.persistence.Id;
import javax.persistence.Table;

@Entity
@Table(name="users")
public class UserEntityManager {

	@Id
	@GeneratedValue(strategy = GenerationType.IDENTITY)
	private int id;
	private String login;
	private String name;
	private String password;

	public int getId() {
		return id;
	}

	public void setId(int id) {
		this.id = id;
	}

	public String getLogin() {
		return login;
	}

	public void setLogin(String login) {
		this.login = login;
	}

	public String getName() {
		return name;
	}

	public void setName(String name) {
		this.name = name;
	}

	public String getPassword() {
		return password;
	}

	public void setPassword(String password) {
		this.password = password;
	}
}
4. Project Deploy
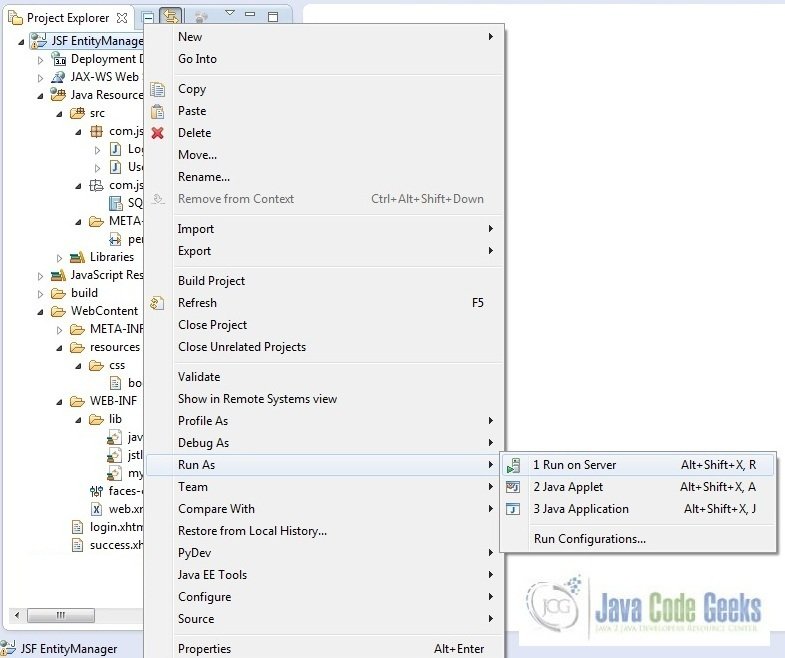
Once we are ready with all the changes done, let us compile and deploy the application on tomcat7 server. In order to deploy the application on tomcat7, right-click on the project and navigate to Run as -> Run on Server
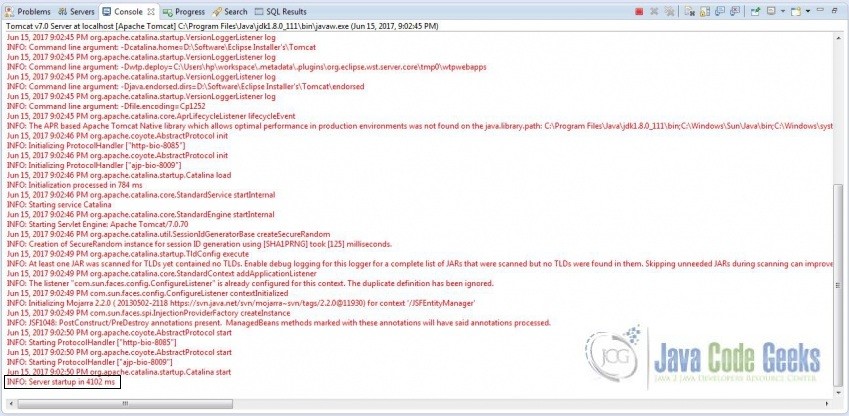
Tomcat will deploy the application in its webapps folder and shall start it’s execution to deploy the project so that we can go ahead and test it on the browser
Open your favorite browser and hit the following URL. The output page will be displayed.
http://localhost:8085/JSFEntityManager/faces/login.xhtml
Server name (localhost) and port (8085) may vary as per your tomcat configuration
5. Project Demo
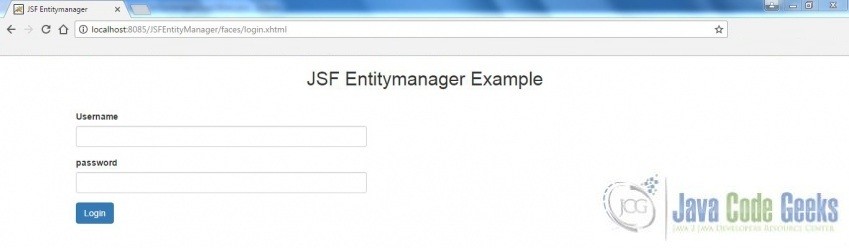
Now, we are done with the application and it’s time to test out the application. Accessing this page: login.xhtml, we will see the login form page.
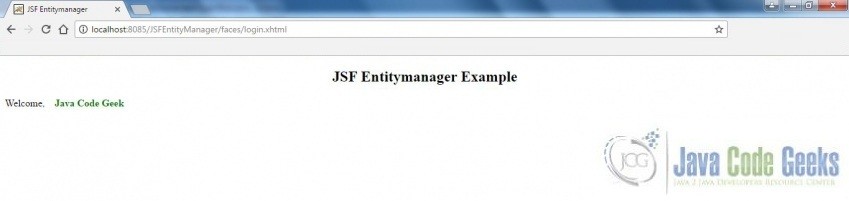
Enter the credentials javageek/access123 as username/password and press the login button. If the username and password are correct, the following success message will appear.
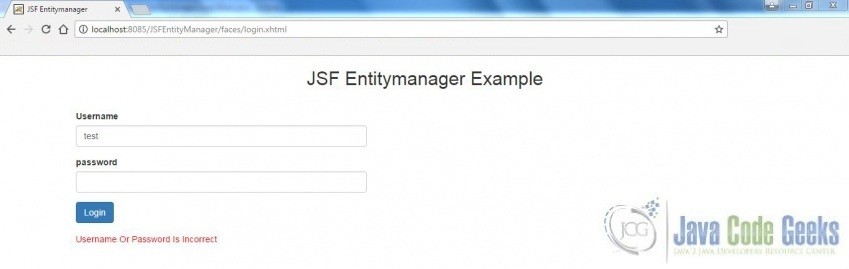
If the username and password are incorrect, the error message will be displayed.
Hope this helped :)
6. Conclusion
Through this example, we have learned about the Entitymanager implementation in jsf. We have also deployed it using the Tomcat7 application server.
7. Download the Eclipse Project
This was a JSF EntityManager example with Eclipse and Tomcat
You can download the full source code of this example here: JSF EntityManager
