Android Dropbox Implementation Example
1. Creating a Dropbox Application
Visit https://www.dropbox.com/developers/apps and after signing-in with an existing account, click on the “Create app” button, on the top right corner.
Configure the app like below and click on “Create App”:
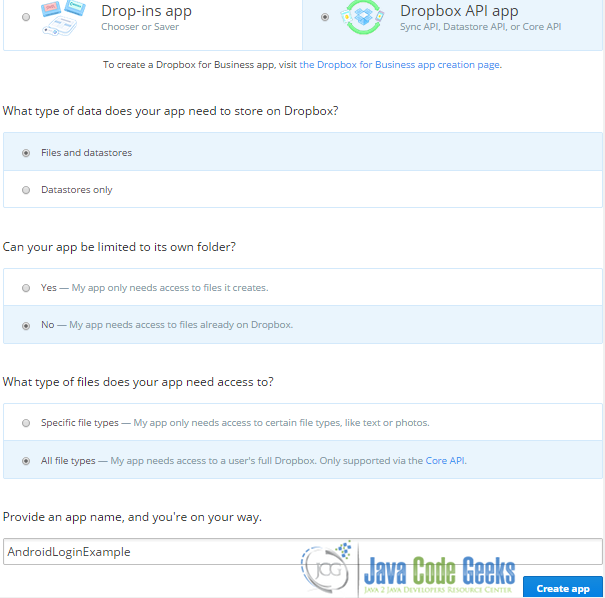
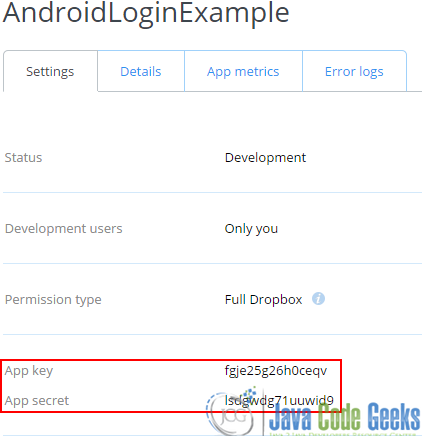
Once the app is created, you will be redirected to its dashboard, where you can find all the useful parameters. In order to access a dropbox account from an android app, what is needed, is the App key and App secret of a dropbox app (like the one that we just created) ; both of them are auto-generated from the dropbox service, while creating the app:
2. The Example
For the need of this example, we will use the following tools in a Windows 64-bit platform:
- JDK 1.7
- Eclipse 4.4 Luna
- Android SDK 4.4
You may skip project creation and jump directly to the beginning of the example below.
2.1 Creating a New Android Application Project
Open Eclipse IDE and go to File → New → Project → Android Application Project.
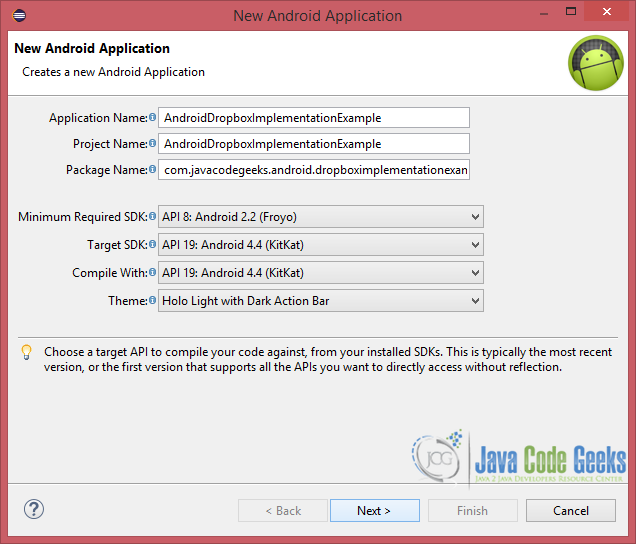
Fill in the name of the application, the project and the package in the appropriate fields and then click Next.
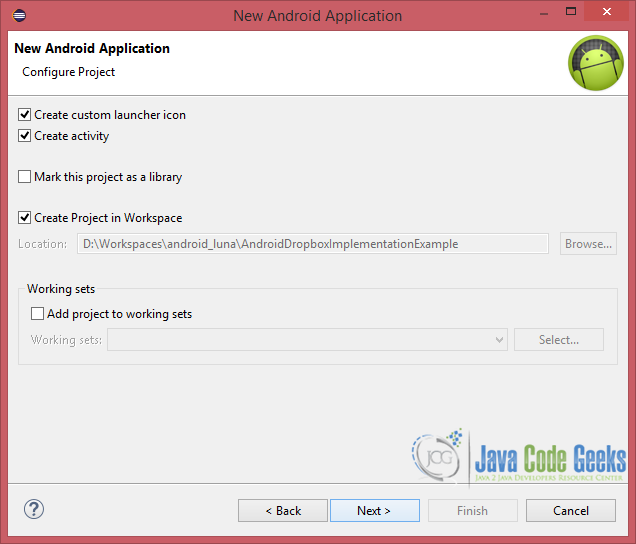
In the next window, the “Create Activity” option should be checked. The new created activity will be the main activity of your project. Then press Next button.
In “Configure Launcher Icon” window you should choose the icon you want to have in your app. We will use the default icon of android, so click Next.
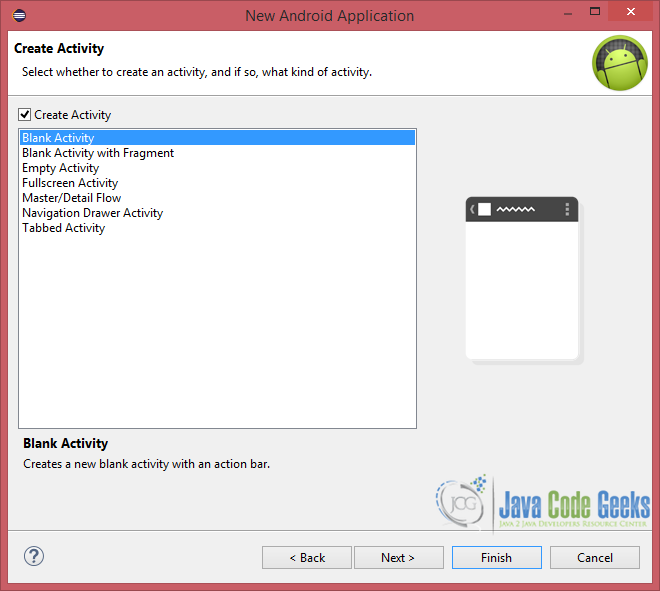
Select the “Blank Activity” option and press Next.
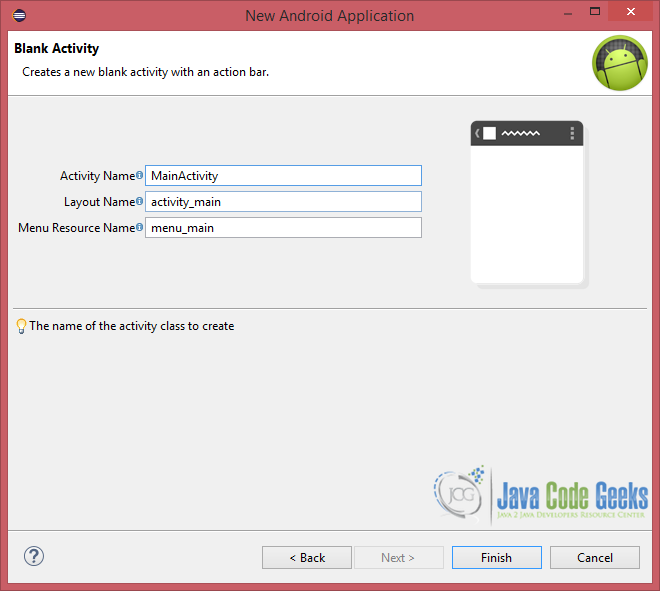
You then have to specify a name for the new Activity and a name for the layout description of your app. The .xml files for the layout will automatically be created in the res/layout folder. Finally, press Finish.
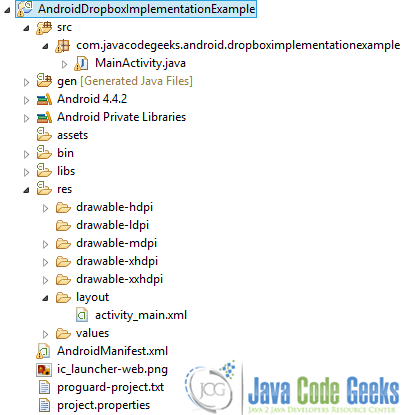
Here is the very final structure of the project, just in case you ‘ll miss something, while developing:
2.2 Downloading and using dropbox-android-sdk
Download and extract the latest version of dropbox-android-sdk from the official page.
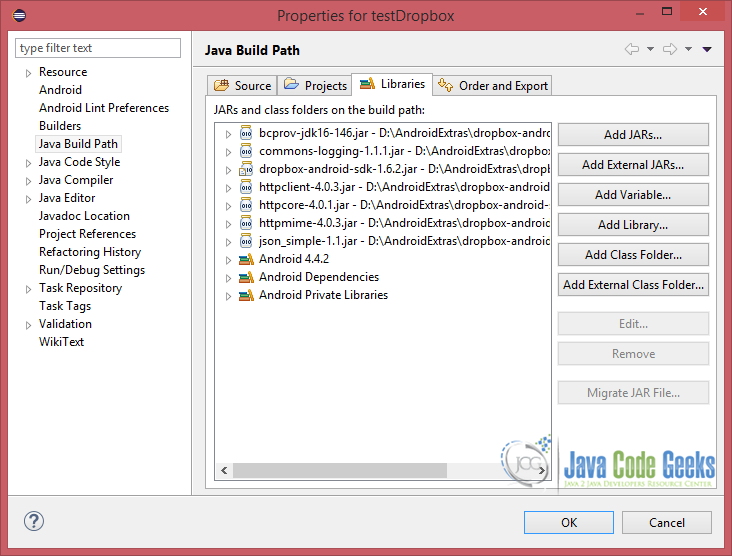
You then have to import all the dropbox libraries in your project’s libs folder. To do so, follow the next steps:
- Right click on your project and select Properties.
- Click Java Build Path from the sidebar.
- Select the Libraries tab.
- Add External JARs and add the libraries.
Figure 8 displays the fore-mentioned process:
2.3 Configuring AndroidManifest
What needs to be configured here is:
- Internet permission.
- Definition of a Dropbox activity.
It should finally look like this:
AndroidManifest.xml
<?xml version="1.0" encoding="utf-8"?>
<manifest xmlns:android="http://schemas.android.com/apk/res/android"
    package="com.example.testdropbox"
    android:versionCode="1"
    android:versionName="1.0" >

    <uses-sdk
        android:minSdkVersion="8"
        android:targetSdkVersion="19" />
    <uses-permission android:name="android.permission.INTERNET" />

    <application
        android:allowBackup="true"
        android:icon="@drawable/ic_launcher"
        android:label="@string/app_name"
         >
        <activity
            android:name=".MainActivity"
            android:label="@string/app_name" >
            <intent-filter>
                <action android:name="android.intent.action.MAIN" />

                <category android:name="android.intent.category.LAUNCHER" />
            </intent-filter>
        </activity>

        <activity
            android:name="com.dropbox.client2.android.AuthActivity"
            android:configChanges="orientation|keyboard"
            android:launchMode="singleTask" >
            <intent-filter>

                <!-- Change this to be db- followed by your app key -->
                <data android:scheme="db-io0tquh35obwlka" />

                <action android:name="android.intent.action.VIEW" />

                <category android:name="android.intent.category.BROWSABLE" />
                <category android:name="android.intent.category.DEFAULT" />
            </intent-filter>
        </activity>
    </application>

</manifest>
2.4 Creating the layout of the Main Activity
activity_main.xml
<?xml version="1.0" encoding="utf-8"?>
<LinearLayout xmlns:android="http://schemas.android.com/apk/res/android"
    android:layout_width="match_parent"
    android:layout_height="match_parent"
    android:layout_marginTop="40dp"
    android:gravity="center_horizontal"
    android:orientation="vertical" >

    <Button
        android:id="@+id/loginBtn"
        android:layout_width="match_parent"
        android:layout_height="wrap_content"
        android:layout_margin="15dp"
        android:textAppearance="?android:attr/textAppearanceLarge"
        android:textColor="#fff"
        android:textStyle="bold"
        android:text="Connect with Dropbox" />

    <Button
        android:id="@+id/uploadFileBtn"
        android:layout_width="match_parent"
        android:layout_height="wrap_content"
        android:layout_margin="15dp"
        android:textAppearance="?android:attr/textAppearanceLarge"
        android:textColor="#fff"
        android:textStyle="bold"
    	android:text="File Upload"  />

    <Button
        android:id="@+id/listFilesBtn"
        android:layout_width="match_parent"
        android:layout_height="wrap_content"
        android:layout_margin="15dp"
        android:textAppearance="?android:attr/textAppearanceLarge"
        android:textColor="#fff"
        android:textStyle="bold"
        android:text="List Files"/>

    <ScrollView
        android:layout_width="fill_parent"
        android:layout_height="match_parent"
        android:layout_margin="10dp" >

        <LinearLayout
            android:id="@+id/container_files"
            android:layout_width="match_parent"
            android:layout_height="wrap_content"
            android:orientation="vertical" >
        </LinearLayout>
    </ScrollView>

</LinearLayout>
Not much to explain here. Three buttons to login, upload and list files and a scrollable view to display the uploaded files.
2.5 Coding the Main Activity
Let’s first navigate to com.javacodegeeks.android.dropboximplementationexample/MainActivity.java. Then, complete the class like below:
MainActivity.java
package com.javacodegeeks.android.dropboximplementationexample;

import java.util.ArrayList;

import android.app.Activity;
import android.content.SharedPreferences;
import android.content.SharedPreferences.Editor;
import android.graphics.Color;
import android.os.Bundle;
import android.os.Handler;
import android.os.Message;
import android.view.View;
import android.view.View.OnClickListener;
import android.widget.Button;
import android.widget.LinearLayout;
import android.widget.TextView;
import android.widget.Toast;

import com.dropbox.client2.DropboxAPI;
import com.dropbox.client2.android.AndroidAuthSession;
import com.dropbox.client2.session.AccessTokenPair;
import com.dropbox.client2.session.AppKeyPair;
import com.dropbox.client2.session.Session.AccessType;
import com.dropbox.client2.session.TokenPair;

public class MainActivity extends Activity implements OnClickListener {

	private LinearLayout container;
	private DropboxAPI dropboxApi;
	private boolean isUserLoggedIn;
	private Button loginBtn;
	private Button uploadFileBtn;
	private Button listFilesBtn;

	private final static String DROPBOX_FILE_DIR = "/AndroidDropboxImplementationExample/";
	private final static String DROPBOX_NAME = "dropbox_prefs";
	private final static String ACCESS_KEY = "io0tquh35obwlka";
	private final static String ACCESS_SECRET = "mfmq5bgjjuqll0d";
	private final static AccessType ACCESS_TYPE = AccessType.DROPBOX;

	@Override
	public void onCreate(Bundle savedInstanceState) {
		super.onCreate(savedInstanceState);
		setContentView(R.layout.activity_main);

		loginBtn = (Button) findViewById(R.id.loginBtn);
		loginBtn.setOnClickListener(this);
		uploadFileBtn = (Button) findViewById(R.id.uploadFileBtn);
		uploadFileBtn.setOnClickListener(this);
		listFilesBtn = (Button) findViewById(R.id.listFilesBtn);
		listFilesBtn.setOnClickListener(this);
		container = (LinearLayout) findViewById(R.id.container_files);

		loggedIn(false);

		AppKeyPair appKeyPair = new AppKeyPair(ACCESS_KEY, ACCESS_SECRET);
		AndroidAuthSession session;

		SharedPreferences prefs = getSharedPreferences(DROPBOX_NAME, 0);
		String key = prefs.getString(ACCESS_KEY, null);
		String secret = prefs.getString(ACCESS_SECRET, null);

		if (key != null && secret != null) {
			AccessTokenPair token = new AccessTokenPair(key, secret);
			session = new AndroidAuthSession(appKeyPair, ACCESS_TYPE, token);
		} else {
			session = new AndroidAuthSession(appKeyPair, ACCESS_TYPE);
		}

		dropboxApi = new DropboxAPI(session);
	}

	@Override
	protected void onResume() {
		super.onResume();

		AndroidAuthSession session = dropboxApi.getSession();
		if (session.authenticationSuccessful()) {
			try {
				session.finishAuthentication();

				TokenPair tokens = session.getAccessTokenPair();
				SharedPreferences prefs = getSharedPreferences(DROPBOX_NAME, 0);
				Editor editor = prefs.edit();
				editor.putString(ACCESS_KEY, tokens.key);
				editor.putString(ACCESS_SECRET, tokens.secret);
				editor.commit();

				loggedIn(true);
			} catch (IllegalStateException e) {
				Toast.makeText(this, "Error during Dropbox authentication",
						Toast.LENGTH_SHORT).show();
			}
		}
	}

	private final Handler handler = new Handler() {
		public void handleMessage(Message message) {
			ArrayList result = message.getData().getStringArrayList("data");

			for (String fileName : result) {
				TextView textView = new TextView(MainActivity.this);
				textView.setText(fileName);
				container.addView(textView);
			}
		}
	};

	@Override
	public void onClick(View v) {
		switch (v.getId()) {
		case R.id.loginBtn:
			if (isUserLoggedIn) {
				dropboxApi.getSession().unlink();
				loggedIn(false);
			} else {
				dropboxApi.getSession().startAuthentication(MainActivity.this);
			}
			break;
		case R.id.uploadFileBtn:
			UploadFile uploadFile = new UploadFile(this, dropboxApi,
					DROPBOX_FILE_DIR);
			uploadFile.execute();
			break;
		case R.id.listFilesBtn:
			ListFiles listFiles = new ListFiles(dropboxApi, DROPBOX_FILE_DIR,
					handler);
			listFiles.execute();
			break;
		default:
			break;
		}
	}

	public void loggedIn(boolean userLoggedIn) {
		isUserLoggedIn = userLoggedIn;
		uploadFileBtn.setEnabled(userLoggedIn);
		uploadFileBtn.setBackgroundColor(userLoggedIn ? Color.BLUE : Color.GRAY);
		listFilesBtn.setEnabled(userLoggedIn);
		listFilesBtn.setBackgroundColor(userLoggedIn ? Color.BLUE : Color.GRAY);
		loginBtn.setText(userLoggedIn ? "Logout" : "Log in");
	}
}
You first have to define the app key and app secret, generated from the dropbox developer console. In addition, for full dropbox interaction, you should provide DROPBOX AccessType (line 39). Moreover, in line 35, we define the folder that we ‘ll use from our app to interact with our dropbox account (upload/list files); if the provided name doesn’t correspond to an existing folder, a new folder will automatically be created.
Furthermore, for better UI interaction, session handling and user authentication, we created the private, loggedIn function (lines 135-142).
Our activity class implements the OnClickListener interface, because there is a corresponding button for each one of the three fore-mentioned, available in our app, actions.
On the very first access to our app, we want the user to be unable to press any other, except the login button. Thus, in line 54, we call the loggedIn function with a false value.
Lines 56-70 describe the authentication process, either if the user has selected to save his credentials or not. Especially, if not, we create a new session with the existing app key, app secret and access type (line 67); otherwise, we retrieve his credentials with the help of SharedPreferences and create a session using them (lines 59-65).
We override the onResume method to continue a valid session in case of pausing the app. Again, this happens with the help og SharedPreferences. Obviously, we here pass a true value to our loggedIn function.
2.6 Coding the UploadFile Activity
While in the same package, create a new class called “UploadFile.java”, with the following code:
UploadFile.java
package com.javacodegeeks.android.dropboximplementationexample;

import java.io.File;
import java.io.FileInputStream;
import java.io.FileWriter;
import java.io.IOException;

import android.content.Context;
import android.os.AsyncTask;
import android.widget.Toast;

import com.dropbox.client2.DropboxAPI;
import com.dropbox.client2.exception.DropboxException;

public class UploadFile extends AsyncTask {

	private DropboxAPI dropboxApi;
	private String path;
	private Context context;

	public UploadFile(Context context, DropboxAPI dropboxApi,
			String path) {
		this.context = context.getApplicationContext();
		this.dropboxApi = dropboxApi;
		this.path = path;
	}

	@Override
	protected Boolean doInBackground(Void... params) {
		final File tempDropboxDirectory = context.getCacheDir();
		File tempFileToUploadToDropbox;
		FileWriter fileWriter = null;

		try {
			// Creating a temporal file.
			tempFileToUploadToDropbox = File.createTempFile("file", ".txt", tempDropboxDirectory);
			fileWriter = new FileWriter(tempFileToUploadToDropbox);
			fileWriter.write("Hello World drom Android Dropbox Implementation Example!");
			fileWriter.close();

			// Uploading the newly created file to Dropbox.
			FileInputStream fileInputStream = new FileInputStream(tempFileToUploadToDropbox);
			dropboxApi.putFile(path + "hello_world.txt", fileInputStream,
					tempFileToUploadToDropbox.length(), null, null);
			tempFileToUploadToDropbox.delete();

			return true;
		} catch (IOException e) {
			e.printStackTrace();
		} catch (DropboxException e) {
			e.printStackTrace();
		}

		return false;
	}

	@Override
	protected void onPostExecute(Boolean result) {
		if (result) {
			Toast.makeText(context, "File has been successfully uploaded!",
					Toast.LENGTH_LONG).show();
		} else {
			Toast.makeText(context, "An error occured while processing the upload request.",
					Toast.LENGTH_LONG).show();
		}
	}
}
The purpose of this class is to create a temporal file and upload it to the dropbox account that our android app is connected to. In order to implement this job effectively, we have to to extends the AsyncTask class.
2.7 Coding the ListFiles Activity
ListFiles.java
package com.javacodegeeks.android.dropboximplementationexample;

import java.util.ArrayList;

import android.os.AsyncTask;
import android.os.Bundle;
import android.os.Handler;
import android.os.Message;
import com.dropbox.client2.DropboxAPI;
import com.dropbox.client2.DropboxAPI.Entry;
import com.dropbox.client2.exception.DropboxException;

public class ListFiles extends AsyncTask<Void, Void, ArrayList> {

	private DropboxAPI dropboxApi;
	private String path;
	private Handler handler;

	public ListFiles(DropboxAPI dropboxApi, String path, Handler handler) {
		this.dropboxApi = dropboxApi;
		this.path = path;
		this.handler = handler;
	}

	@Override
	protected ArrayList doInBackground(Void... params) {
		ArrayList files = new ArrayList();
		try {
			Entry directory = dropboxApi.metadata(path, 1000, null, true, null);
			for (Entry entry : directory.contents) {
				files.add(entry.fileName());
			}
		} catch (DropboxException e) {
			e.printStackTrace();
		}
		return files;
	}

	@Override
	protected void onPostExecute(ArrayList result) {
		Message message = handler.obtainMessage();
		Bundle bundle = new Bundle();
		bundle.putStringArrayList("data", result);
		message.setData(bundle);
		handler.sendMessage(message);
	}
}
We follow a similar concept here, like in UploadFile.java. The important point is that we need to obtain the available, in the specified dropbox directory, files . This is implemented by the Handler object that is being passed from MainActivity.java to ListFiles.java as a constructor argument.
In detail, lines 97-107 from MainActivity.java display each file in a TextView; These files are obtained from a Message object, created in onPostExecute of ListFiles.java.
2.8 Running the application
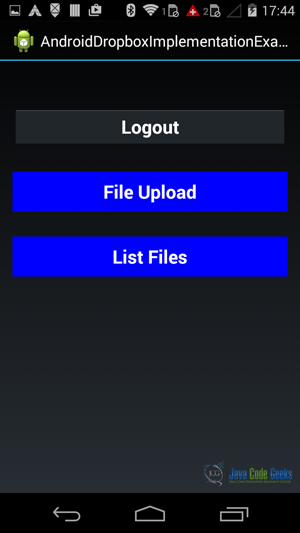
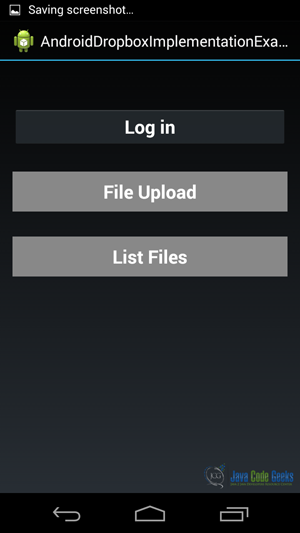
This is the initial screen of our app:
After hitting the login button, a credentials screen is poped up. Having provided our credentials, a dropbox access permission is required, so tap on the “Allow” button and this is the app screen of a successful authentication:
Let’s upload a file, just to validate our app’s functionality:
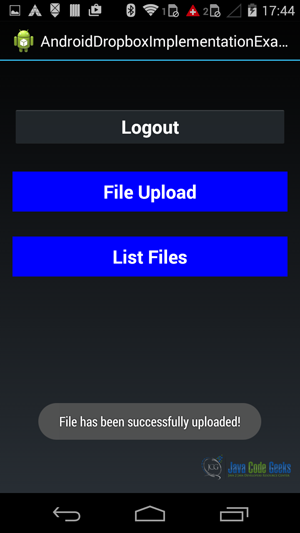
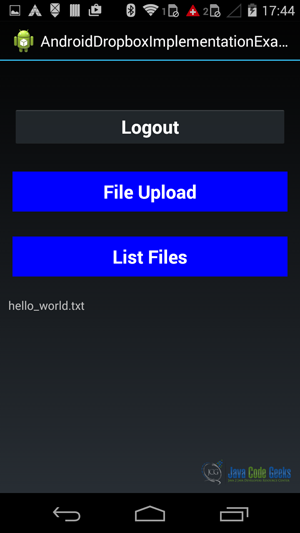
Having received the successful notification, let’s now tap the “List Files” button:
You can also check the update in your dropbox account, from a web browser, under the folder AndroidDropboxImplementationExample (this should be placed the root directory):

3. Download the Eclipse Project
This was an example on how to create an Android Dropbox Application.
You can download the full source code of this example here: AndroidDropboxImplementationExample.zip


