In this example, we are going to configure SSL on Jetty Server. We are first generate SSL key and certificates using OpenSSL. Then we will configure our Jetty to use the generated certificate. Thereafter we will deploy a sample web application using SSL. Finally, we will configure an Embedded Jetty Server programmatically in order to facilitate access to secured resources connection over SSL and HTTPS.
1. Prerequisites
In this example we have used the following environment:
- Java 8 ( Java 6 and 7 are OK as well)
- OpenSSL (Open SSL has to be installed and added to PATH)
- Jetty v9.x.y
- Eclipse Luna (as the IDE)
- Maven (for creating a sample Java and projects)
Please note that, we have utilized OpenSSL for certificate generation however there are other ways to create (or obtain) certificates. These alternatives include keytool of Java and KeyMan of IBM.
2. Creating Certificate File with OpenSSL
As we have mentioned above, we will create our SSL certificates using OpenSSL. Mac OS and many Linux distributions have OpenSSL installed by default. In case your operating system does not have it you can obtain it from OpenSSL website. For Windows, you can download binaries from OpenSSL binaries page.
Once OpenSSL is ready in your computer, first create an empty directory in your file system for key and certificate generation. After creating the empty directory, we are ready to create key and certificate.
The steps to be followed in order to create SSL key are as follows:
- Run the following command:
openssl genrsa -des3 -out jcg.key
- The key file in this example will be named as jcg.key. You can name it as you like
- Enter a passphrase: javacodegeeks (or any password you like with at least 4 characters)
Enter the same passphrase again : javacodegeeks
Our key file jcg.key is generated. The key file seems as follows:
-----BEGIN RSA PRIVATE KEY-----
Proc-Type: 4,ENCRYPTED
DEK-Info: DES-EDE3-CBC,1505A36E37F030DF

2bU29uUjTdUk3EtRq1lcY+pDv8u5O9O5TOA+p7onoDtMRXOYS4R1j65jrkwuwcN/
SKa86n+tqSXnF+8Zz+Fi59U0yk8jzMrmpAJVB9RUjNOFzMwc8nKK/5Gh0xFOPkeN
vdBXkWyRp/bxrptksM+yGlaxIJA3aCsahaAYi9Qzu+alzoI5anT3vkndrlVqyeYQ
H3xxtwXb7lvsrqUSWew574fuu4O0+50Pd0lroPMl0QiT3wVS/bnzzXgSmbxBETmV
6ziU23L1JUTdGdhB7zUGM3nHHRxcOvo8M7YvOYfQ/9XYs2h+/DJO9lJ5TYkhvrjF
J0TgRsazUtCKgjfoURw+qEhqiAPkotnUHMGbE6vlRaW6JAWgVJdPnefsiY8MaUY2
KLjq+uWswVSFOot9hgF49Jm5lEBf6HyMJQJTZunDJ58=
-----END RSA PRIVATE KEY-----
Now we are going to create the certificate file. We will name the file as jcg.crt.
Here are the steps needed:
- Run the command: openssl req -new -x509 -key jcg.key -out jcg.crt
- Enter the pass phrase you have defined for the key file: javacodegeeks.
- Provide a two characters country code( press ENTER to skip ): for example TR for Turkey.
- Provide a State or province name( press ENTER to skip : Ankara for example
- Provide a city name( press ENTER to skip ): Ankara.
- Provide organization name (press ENTER to skip): JCG.
- Provide organizational unit name (press ENTER to skip): JCG.
- Provide common name (press ENTER to skip): JCG.
- Provide an e-mail address (press ENTER to skip): ssl@javacodegeeks.com
Now our certificate jcg.crt is generated. The crt file seems as follows:
-----BEGIN CERTIFICATE-----
MIIC3jCCAoigAwIBAgIJAOs31ith/wKQMA0GCSqGSIb3DQEBBQUAMH8xCzAJBgNV
BAYTAlRSMQ8wDQYDVQQIEwZBbmthcmExDzANBgNVBAcTBkFua2FyYTEMMAoGA1UE
ChMDSkNHMQwwCgYDVQQLEwNKQ0cxDDAKBgNVBAMTA0pDRzEkMCIGCSqGSIb3DQEJ
ARYVc3NsQGphdmFjb2RlZ2Vla3MuY29tMB4XDTE1MDYyMDIxMzgxNVoXDTE1MDcy
MDIxMzgxNVowfzELMAkGA1UEBhMCVFIxDzANBgNVBAgTBkFua2FyYTEPMA0GA1UE
BxMGQW5rYXJhMQwwCgYDVQQKEwNKQ0cxDDAKBgNVBAsTA0pDRzEMMAoGA1UEAxMD
SkNHMSQwIgYJKoZIhvcNAQkBFhVzc2xAamF2YWNvZGVnZWVrcy5jb20wXDANBgkq
hkiG9w0BAQEFAANLADBIAkEA1NS99ZiZKBuohf+0hBbRnN5rq3D0QYMfcssqwZgr
pXboCseKKjLxKbE4s43Ieo1aGPHX6CuCSW70eFb2Fz1ZxQIDAQABo4HmMIHjMB0G
A1UdDgQWBBToYu+lcKmGljCNkTmYu0TsaKXo7DCBswYDVR0jBIGrMIGogBToYu+l
cKmGljCNkTmYu0TsaKXo7KGBhKSBgTB/MQswCQYDVQQGEwJUUjEPMA0GA1UECBMG
QW5rYXJhMQ8wDQYDVQQHEwZBbmthcmExDDAKBgNVBAoTA0pDRzEMMAoGA1UECxMD
SkNHMQwwCgYDVQQDEwNKQ0cxJDAiBgkqhkiG9w0BCQEWFXNzbEBqYXZhY29kZWdl
ZWtzLmNvbYIJAOs31ith/wKQMAwGA1UdEwQFMAMBAf8wDQYJKoZIhvcNAQEFBQAD
QQC00KSjBJx4aDYVxr1LHvMmNjhuo07vyu6AFjlpt9YfiMYJZWSCGT1jroOOR6gh
6PPRoaY8EjA1AJthtkjIGmWQ
-----END CERTIFICATE-----
We need to convert the crt file to PKCS12 format. This can be done with the following steps:
- Run the following command:
openssl pkcs12 -inkey jcg.key -in jcg.crt -export -out jcg.pkcs12
- Enter the pass phrase you have defined : javacodegeeks.
- Define an export password.(We have used javacodegeeks again; but you are free to alter it.)
- Enter the export password again: javacodegeeks.
Now we have jcg.pkcs12 file in our directory.
3. Importing the PKCS12 file in your Jetty keystore
Up to now we had created the key files and certificates for our SSL configuration. Now we are going to import the PKCS12 file in the keystore of Jetty.
The steps are listed below:
- Copy the jcg.pkcs12 file to the directory JETTY_HOME/etc.
- Delete the existing keystore file.
- Execute the keytool import command:
keytool -importkeystore -srckeystore jcg.pkcs12 -srcstoretype PKCS12 -destkeystore keystore
- Enter a password for the keystore (javacodegeeks in this example).
- Re-type the password.
- Enter the password you have defined before for the PKCS12 file (javacodegeeks).
Now we have created a new keystore and imported our PKCS12 file.
4. Enabling SSL and HTTPS for Jetty
Until this point, we have generated our certificate and imported it to the keystore of Jetty. Now we are going to enable HTTPS connector and SSL for our jetty. Jetty 9 has a modular architecture, which means that you can (and have to) enable different modules through the configuration files. Thus, we have to enable SSL and HTTPS modules manually. Unfortunately this is not clearly specified in the SSL configuration part of the Jetty documentation and it is easy to miss.
In order to enable HTTPS and Jetty, we have to follow these steps:
- Open start.ini file which is in your JETTY_HOME directory.
- Add following lines:
--module=ssl
--module=https
Jetty modules are configured through the XML files under JETTY_HOME/etc folder. By enabling these modules, we are activating jetty-ssl.xml and jetty-https.xml files. We can alter various settings(such as HTTPS port, keystore location, ciphering etc.) through these files. For the scope of this example, we do not need to make any modifications.
The last step before starting our SSL enabled Jetty is defining the keystore passwords that we have set in the previous section for the Jetty configuration. Passwords in Jetty configuration files are stored in an obfuscated form. This obfuscation is reversible and protects the passwords only from casual peeking.
We have defined the password javacodegeeks both for keystore and our certificate. Now we are going to obfuscate this password with the following steps:
- Navigate to the JETTY_HOME/lib folder.
- Run following Java command (the lib version depends on your Jetty version):java -cp jetty-util-9.2.11.v20150529.jar org.eclipse.jetty.util.security.Password javacodegeeks
- Copy the generated password, which is the line starting with OBFto your clipboard (in this example OBF:1wty1th11wgg1saj1t2z1v2h1sov1v1x1t371sar1wfi1thl1wug).
Now we are going to set this password in our SSL configuration:
- Navigate to JETTY_HOME/modules directory.
- Open the file ssl.mod with your text editor.
- Set the jetty.keystore.password, jetty.keymanager.password, jetty.truststorepassword properties to the OBF expression you have generated.
- Save and close the file.
The modified lines should look like:
jetty.keystore.password=OBF:1wty1th11wgg1saj1t2z1v2h1sov1v1x1t371sar1wfi1thl1wug
jetty.keymanager.password=OBF:1wty1th11wgg1saj1t2z1v2h1sov1v1x1t371sar1wfi1thl1wug
jetty.truststore.password=OBF:1wty1th11wgg1saj1t2z1v2h1sov1v1x1t371sar1wfi1thl1wug
Now we are done with the Jetty configuration. Now we can start our Jetty:
- Navigate to JETTY_HOME directory
- Run the java command: java -jar start.jar
Now our jetty Server started with SSL enabled. The output log is similar to the following:
2015-06-23 23:04:52.940:INFO:oejs.ServerConnector:main: Started ServerConnector@376b4233{HTTP/1.1}{0.0.0.0:8080}
2015-06-23 23:04:53.127:INFO:oejs.ServerConnector:main: Started ServerConnector@4ddced80{SSL-http/1.1}{0.0.0.0:8443}
2015-06-23 23:04:53.127:INFO:oejs.Server:main: Started @1180ms
We have enabled HTTP on port 8080 and HTTPS on 8443 successfully.
5. Securing your Web Application
We have enabled SSL and HTTPS on our Jetty. Now we are going to secure a simple web application with HTTPS.
In this simple web application, we have used following environment:
- Java 8 (Java 6 and 7 are also fine.)
- Apache Maven 3.x.y
- Maven WAR plugin.
- Eclipse Luna (4.4) as the IDE
Now we are going to create the maven project in Eclipse as follows:
- Go to File -> New ->Other -> Maven Project
- Tick Create a simple project and press “Next”.
- Enter groupId as : com.javacodegeeks.snippets.enterprise
- Enter artifactId as : jetty-ssl-example
- Select packaging as “war”.
- Press “Finish”.
We have created initial project, now we are going to add the Maven WAR plugin.
- Open pom.xml.
- Add following lines to your pom.xml.
     <build>
		<plugins>
			<plugin>
				<groupId>org.apache.maven.plugins</groupId>
				<artifactId>maven-war-plugin</artifactId>
				<version>2.6</version>
				<configuration>
					<warName>jetty-ssl-example</warName>
				</configuration>
			</plugin>
		</plugins>
	</build>
The web application configuration is simply performed through web.xml file:
- Create src/main/webapp directory if not exists.
- Create WEB-INF directory under src/main/webapp.
- Create a web.xml under WEB-INF directory with the following configuration.
web.xml
<web-app xmlns="http://java.sun.com/xml/ns/javaee" xmlns:xsi="http://www.w3.org/2001/XMLSchema-instance"
	xsi:schemaLocation="http://java.sun.com/xml/ns/javaee
	      http://java.sun.com/xml/ns/javaee/web-app_3_0.xsd"
	version="3.0">

	<display-name>Jetty SSL Example</display-name>

	<security-constraint>
		<web-resource-collection>
			<web-resource-name>Secure resources</web-resource-name>
			<url-pattern>/secure/*</url-pattern>
		</web-resource-collection>
		<user-data-constraint>
			<transport-guarantee>CONFIDENTIAL</transport-guarantee>
		</user-data-constraint>
	</security-constraint>
</web-app>
With this configuration, we have defined that the resources under the directory secure will be CONFIDENTIAL. Access to these resources has to be through SSL on the HTTPS port. The other resources will be accessed through HTTP. At this point we can create nonsecure and secure resources under src/main/webapp and src/main/webapp/secure directories respectively.

Now we are going to execute the maven command in order to create jetty-ssl-example.war:
mvn clean package
After creating the WAR, we have to drop it to the webapps directory under our JETTY_HOME. The web application is then deployed in our Jetty Server automatically.
When we access an nonsecure resource (http://localhost:8080/jetty-ssl-example/index.html for example), there will be no difference accessing the resources.
However when we try to access a secure resource ( https://localhost:8443/jetty-ssl-example/secure/secure.html for example), we will see a warning message like this:
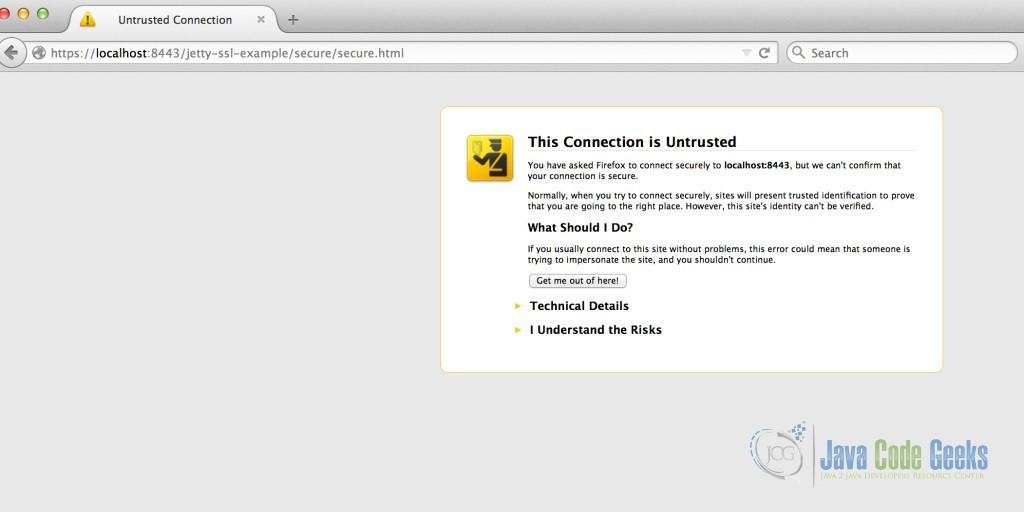
At this point, we can proceed the warning and view the SSL certificate that we have created.

As we confirm the Security Exception, we can access the secure page, which can be viewed below:
Note that, the protocol is HTTPS instead of HTTP and port is 8443 instead of 8080.
6. Enabling SSL and HTTPS with Embedded Jetty
We have successfully configured a Standalone Jetty and deployed a secure web application on it. Now we are to going to configure SSL and HTTPS for an Embedded Jetty Server programmatically. We are going to utilize the same project and programming environment we have created in the previous section.
At this point we have to add following dependencies to pom.xml:
- jetty-server
- jetty-webapp
The dependency section of our pom.xml looks as follows:
	<dependencies>

		<!--Jetty dependencies start here -->
		<dependency>
			<groupId>org.eclipse.jetty</groupId>
			<artifactId>jetty-server</artifactId>
			<version>9.2.11.v20150529</version>
		</dependency>


		<dependency>
			<groupId>org.eclipse.jetty</groupId>
			<artifactId>jetty-webapp</artifactId>
			<version>9.2.11.v20150529</version>
		</dependency>

		<!--Jetty dependencies end here -->

	</dependencies>
In addition to this, we have to create a keystore as we did in the standalone example. You can simply copy the keystore in the standalone example to your classpath.
In order to keep things simple, we will create Embedded Jetty server in our Main class of the application. Example code with necessary comments can be viewed below:
EmbeddedJettyMain.java
package com.javacodegeeks.snippets.enterprise.embeddedjetty;

import org.eclipse.jetty.server.Connector;
import org.eclipse.jetty.server.HttpConfiguration;
import org.eclipse.jetty.server.HttpConnectionFactory;
import org.eclipse.jetty.server.SecureRequestCustomizer;
import org.eclipse.jetty.server.Server;
import org.eclipse.jetty.server.ServerConnector;
import org.eclipse.jetty.server.SslConnectionFactory;
import org.eclipse.jetty.util.ssl.SslContextFactory;
import org.eclipse.jetty.webapp.WebAppContext;

public class EmbeddedJettyMain {

	public static void main(String[] args) throws Exception {

		Server server = new Server();

		// Creating the web application context
		WebAppContext webapp = new WebAppContext();
		webapp.setResourceBase("src/main/webapp");
		server.setHandler(webapp);

		// HTTP Configuration
		HttpConfiguration http = new HttpConfiguration();
		http.addCustomizer(new SecureRequestCustomizer());

		// Configuration for HTTPS redirect
		http.setSecurePort(8443);
		http.setSecureScheme("https");
		ServerConnector connector = new ServerConnector(server);
		connector.addConnectionFactory(new HttpConnectionFactory(http));
		// Setting HTTP port
		connector.setPort(8080);

		// HTTPS configuration
		HttpConfiguration https = new HttpConfiguration();
		https.addCustomizer(new SecureRequestCustomizer());

		// Configuring SSL
		SslContextFactory sslContextFactory = new SslContextFactory();

		// Defining keystore path and passwords
		sslContextFactory.setKeyStorePath(EmbeddedJettyMain.class.getResource("keystore").toExternalForm());
		sslContextFactory.setKeyStorePassword("javacodegeeks");
		sslContextFactory.setKeyManagerPassword("javacodegeeks");

		// Configuring the connector
		ServerConnector sslConnector = new ServerConnector(server, new SslConnectionFactory(sslContextFactory, "http/1.1"), new HttpConnectionFactory(https));
		sslConnector.setPort(8443);

		// Setting HTTP and HTTPS connectors
		server.setConnectors(new Connector[]{connector, sslConnector});

		// Starting the Server
		server.start();
		server.join();

	}
}
In this code, we have first created a web application context. Then we have created HTTP configuration on port 8080. and we have defined the protocol (HTTPS) and port (8443) for secure resources. Thereafter, we have created a HTTPS connector on port 8443 and performed SSL and keystore configuration. This programmatic configuration is parallel with the xml configuration in jetty-ssl.xml and jetty-https.xml files of the standalone Jetty.
When we run this class, our Jetty will start on 8080 and 8443 ports. Access to the secure and nonsecure resources would yield to similar outcomes with the standalone example.
7. Conclusion
In this example we have created SSL keys for Jetty and deployed a webapp with secured resources on our Jetty. In addition to these, we have created an Embedded Jetty server with SSL configuration.
Jetty provides a very flexible mechanism for SSL configuration. Jetty documentation and configuration files can be visited on this purpose.

Thank you for this. I keep getting ” Keystore was tampered with, or password was incorrect” error. I have re-done it like 5 times and made sure the password I put in is the same every time. Anything to look out for?
how u solve it?
We also get same issue.
Anyone got the solution to this issue ? Getting the same issue.
Getting same error. Any one solved this error?