In this example, we will configure Jetty web applications through deployment descriptor files. Typically in a Java web application, the deployment descriptor file is named as web.xml, which includes application-wide configuration. In addition to this, a common deployment descriptor can be defined for a Jetty. This common descriptor is container-wide and includes configuration which is applicable to all of the web applications deployed in Jetty. Typically, this common file is named as webdefault.xml, however it is possible to rename and relocate this file.
In this post, we are going to discuss some fundamental elements (but not all of them) of the deployment descriptors and apply these elements to our Jetty web applications both for container-wide and application specific configurations.
Unlike our previous Jetty examples, this time we will mainly utilize Embedded Jetty; however at the end of the example we will show how relevant configuration can be applied in Standalone Jetty container.
1. Deployment Descriptor file (a.k.a web.xml)
Deployment Descriptor is an XML file that contains the configuration of a Java Web Application. In Java web applications, it should be in the WEB-INF directory of the web application(or WAR file) and it should be named as “web.xml”. Root element of this XML is named as web-app. Below you can see a simple web.xml file.
<web-app xmlns="http://java.sun.com/xml/ns/javaee" xmlns:xsi="http://www.w3.org/2001/XMLSchema-instance"
	xsi:schemaLocation="http://java.sun.com/xml/ns/javaee
	      http://java.sun.com/xml/ns/javaee/web-app_3_0.xsd"
	version="3.0">
	<display-name>Webapp2</display-name>
</web-app>
The element display-name is optional too and serves as an informative field for some GUI tools.
There are a number of elements available in a deployment descriptor file. Full list of available elements can be viewed here. In this example we will skim through the following:
- welcome-file-list
- servlet/ servlet-mapping
- filter/ filter-mapping
- listener
As we have mentioned above, web.xml file stores configurations per application. However, it is possible to specify a common deployment descriptor that holds configuration for multiple web applications. In Jetty, this file is named as webdefault.xml, however this file can be renamed and its location can be configured. Structure of webdefault.xml is no different from a web.xml file.
Another remark is necessary at this point. After Java Servlet Spec 3.0, web.xml is not necessary for a web application and the same configuration can be performed through Java classes and annotations. However, in this example, we will configure our applications with XML files.
2. Structure of the Example
In this example we will create two simple web applications (named as webapp1 and webapp2) with their web.xml files, in an embedded Jetty container and provide a common deployment descriptor(webdefault.xml) for them. Thereafter we will configure these applications through webdefault.xml and web.xml files. For common configurations, we are going to modify webdefault.xml and we will observe that both webapp1 and webapp2 are affected from this modifications. In order to demonstrate application specific configurations, we are going to modify the web.xml of webapp1 and we will keep webapp2 configuration as it is. We will see that our application specific configuration only applies to webapp1.
3. Environment in the Example
In this example, following programming environment will be used:
- Java 7
- Maven 3.x.y
- Eclipse Luna(as the IDE)
- Jetty v9.2.11 (In Embedded Jetty examples, we will add Jetty libraries through Maven)
4. Creating the Maven Project
We will create the Maven project in Eclipse, applying the steps below:
- Go to File -> New ->Other -> Maven Project
- Tick Create a simple project and press “Next”.
- Enter groupId as : com.javacodegeeks.snippets.enterprise
- Enter artifactId as : jetty-webxml-example
- Press “Finish”.
5. Creating Embedded Jetty Server and Sample Web Applications
5.1 Web Application Configuration
We will configure two simple applications in this example namely webapp1 and webapp2 which are identical initially.
In order to create webapp1, following steps should be followed:
- Create folder webapp1 under the directory /src/main. (src/main/webapp1).
- Create a folder named WEB-INF under src/main/webapp1.
- Create an initial web.xml file under src/main/webapp1/WEB-XML. Content of this web.xml is given below.
- Create a simple html file named jcgindex.html under src/main/webapp1.
The initial web.xml is as follows:
<web-app xmlns="http://java.sun.com/xml/ns/javaee" xmlns:xsi="http://www.w3.org/2001/XMLSchema-instance"
	xsi:schemaLocation="http://java.sun.com/xml/ns/javaee
	      http://java.sun.com/xml/ns/javaee/web-app_3_0.xsd"
	version="3.0">
	<display-name>Webapp1</display-name>
</web-app>
jcgindex.html is a simple html file with following content:
<html>
Jetty Webapp 1 Index Page
</html>
Now webapp1 is ready to deploy. Our second application, webapp2, can be prepared repeating the same steps described above.(Replacing webapp1 expressions with webapp2 of course).
We will also place a webdefault.xml in our project. In order to do this, following steps should be followed:
- Create webdefault folder under src/main.
- Place a webdefault.xml file under src/main/webdefault.
The file webdefault.xml can be obtained from a standalone Jetty installation. The location is JETTY_HOME/etc/webdefault.xml.
5.2 Creating Embedded Jetty
As mentioned above, we are going to run our web applications on Embedded Jetty. For the sake of simplicity, our Embedded Jetty will run through the main class.
EmbeddedJettyWebXmlConfigurationMain code, with descriptive comments is as follows:
EmbeddedJettyWebXmlConfigurationMain.java
package com.javacodegeeks.snippets.enterprise.embeddedjetty;

import org.eclipse.jetty.server.Server;
import org.eclipse.jetty.server.handler.HandlerCollection;
import org.eclipse.jetty.webapp.WebAppContext;

public class EmbeddedJettyWebXmlConfigurationMain {

	public static void main(String[] args) throws Exception {

		Server server = new Server(8080);

		// Handler for multiple web apps
		HandlerCollection handlers = new HandlerCollection();

		// Creating the first web application context
		WebAppContext webapp1 = new WebAppContext();
		webapp1.setResourceBase("src/main/webapp1");
		webapp1.setContextPath("/webapp1");
		webapp1.setDefaultsDescriptor("src/main/webdefault/webdefault.xml");
		handlers.addHandler(webapp1);

		// Creating the second web application context
		WebAppContext webapp2 = new WebAppContext();
		webapp2.setResourceBase("src/main/webapp2");
		webapp2.setContextPath("/webapp2");
		webapp2.setDefaultsDescriptor("src/main/webdefault/webdefault.xml");
		handlers.addHandler(webapp2);

		// Adding the handlers to the server
		server.setHandler(handlers);

		// Starting the Server
		server.start();
		System.out.println("Started!");
		server.join();

	}
}
First we create a Server on port 8080. Then we initialize a HandlerCollection, which allows to create multiple web application contexts on a single Server. Thereafter we set the context path and resource base(src/main/webappX) for both web applications. In addition to these, we set default deployment descriptor path (src/main/webdefault/webdefault.xml). After we configure web application contexts we attach these to the HandlerCollections. Lastly we start our embedded server.
When we run our main class, our server starts on port 8080. We can access the two web applications via http://localhost:8080/webapp1 and http://localhost:8080/webapp2.
6. Configuring welcome-file-list
welcome-file-list is an element in deployment descriptor which defines a set of lookup files that are automatically looked up upon a request on context root(for example http://localhost:8080/webapp1). Typically in a web application, a welcome file is index.html( or index.htm, index.jsp etc.). When an HTTP request hits the context root, one of the files defined in this list is retrieved to the user. The initial welcome file list in the webdefault.xml is initially as follows:
<welcome-file-list>
		<welcome-file>index.html</welcome-file>
		<welcome-file>index.htm</welcome-file>
		<welcome-file>index.jsp</welcome-file>
</welcome-file-list>
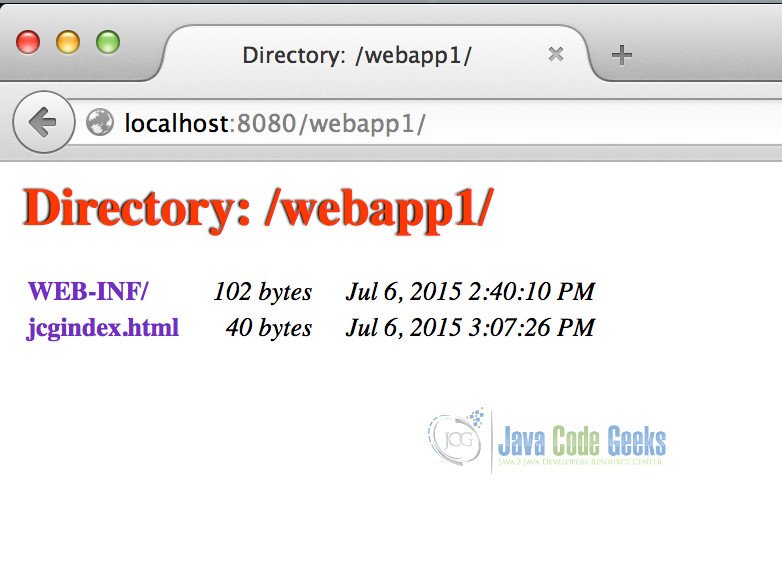
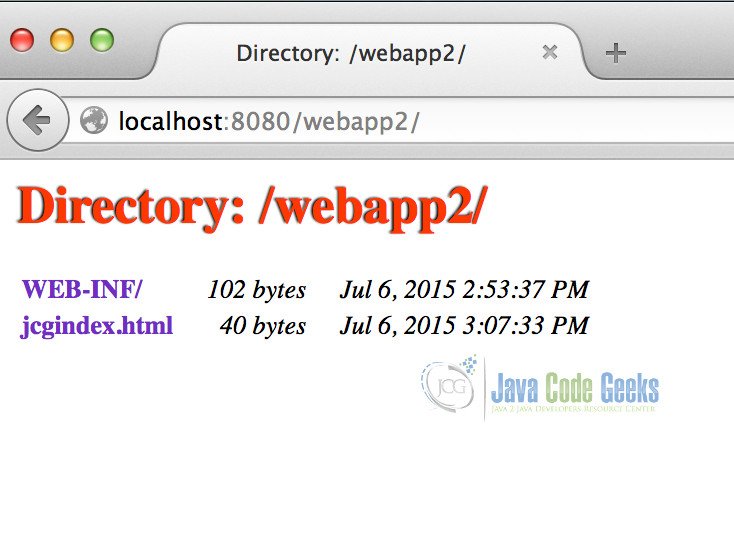
None of our sample applications have one of the files listed above. As a result, we obtain a directory listing, when we try to access the context root. (Directory listing can also be disabled by setting dirAllowed parameter of Default Servlet to false in the webdefault.xml). When we add jcgindex.html to the welcome file list, our welcome file list looks as follows:
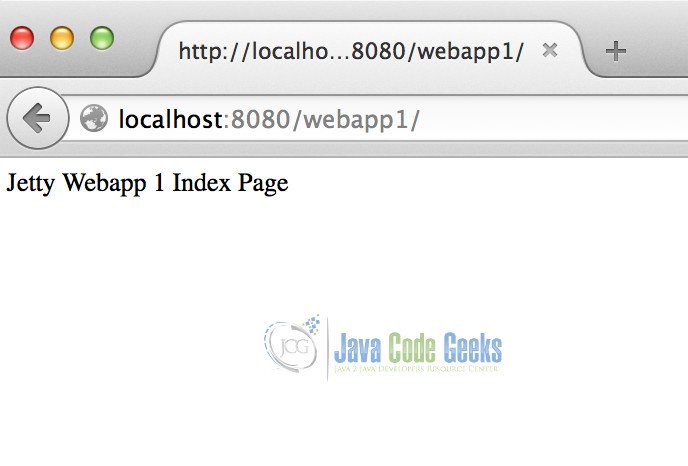
<welcome-file-list>
		<welcome-file>index.html</welcome-file>
		<welcome-file>jcgindex.html</welcome-file>
		<welcome-file>index.htm</welcome-file>
		<welcome-file>index.jsp</welcome-file>
</welcome-file-list>
Now when we try to access context roots( http://localhost:8080/webapp1 or http://localhost:8080/webapp2), the outcome is the content of jcgindex.html. A sample response page can be viewed below:
Here we have configured welcome-file-list through webdefault.xml. It is possible to do it through the web.xml also.
7. Configuring Servlets
Servlet is a Java class extending server capabilities through HTTP request-response model. Servlets form the backbone of Java Web applications. Deployment descriptors are utilized to configure Servlets in a web application.
A servlet configuration has two main parts:
- Servlet Definition
- Servlet Mapping
Servlet definition defines the class of the Servlet along with a unique name defined by the developer. A Servlet class is a Java class implementing javax.servlet.Servlet interface. Typically, extending javax.servlet.http.HttpServlet is a common practice in servlet implementation.
A servlet definition in deployment descriptor looks like as follows:
<servlet>
		<servlet-name>myServlet</servlet-name>
		<servlet-class>org.example.MyServlet</servlet-class>
</servlet>
Servlet mapping, defines the URL pattern that is going to be handled by the specified servlet. Multiple URL patterns can be assigned to a single servlet by defining multiple mappings. Here we reference the Servlet by the unique name we decided in the Servlet definition part. The example below defines a servlet mapping that assigns the URLS (/somepath) to our servlet (myServlet):
<servlet-mapping>
		<servlet-name>myServlet</servlet-name>
		<url-pattern>/somePath/*</url-pattern>
</servlet-mapping>
Having this definition in webdefault.xml, the servlet definition and mapping will be effective for all applications deployed in our Jetty container.
To sum up, following steps have to be applied in order to create and map a servlet.
- Create a servlet definition in deployment descriptor (webdefault.xml for container-wide or web.xml of the desired webapp for the application specific configuration ).
- Create a servlet mappings for this servlet.
- Implement the Servlet class.
An XML configuration in webdefault.xml that defines a CommonServlet and maps it to /common pattern both of the web applications is as follows:
<servlet>
	<servlet-name>commonServlet</servlet-name>
	<servlet-class> com.javacodegeeks.snippets.enterprise.embeddedjetty.servlet.CommonServlet </servlet-class>
</servlet>

<servlet-mapping>
	<servlet-name>commonServlet</servlet-name>
	<url-pattern>/common/*</url-pattern>
</servlet-mapping>
The implementation of the Common Servlet is as follows:
CommonServlet.java
package com.javacodegeeks.snippets.enterprise.embeddedjetty.servlet;

import java.io.IOException;

import javax.servlet.ServletException;
import javax.servlet.ServletRequest;
import javax.servlet.ServletResponse;
import javax.servlet.http.HttpServlet;

public class CommonServlet extends HttpServlet {

	@Override
	public void service(ServletRequest req, ServletResponse res) throws ServletException, IOException {

		res.getOutputStream().print("Common Servlet Response");
	}
}
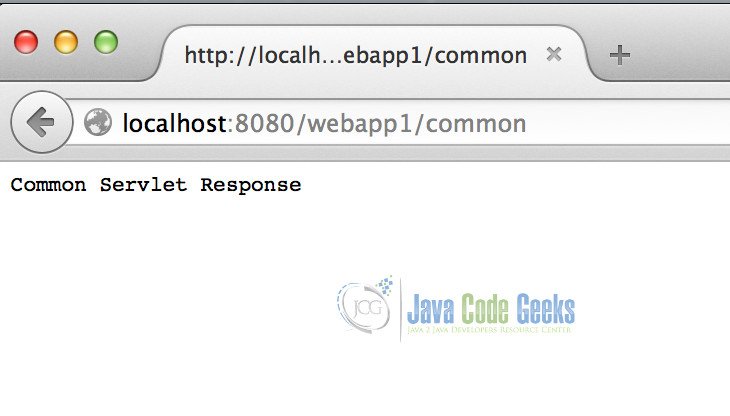
The CommonServlet simply returns a String as the response. When we run the example, we will get the response below from both applications through http://localhost:8080/webapp1/common and http://localhost:8080/webapp2/common.
The configuration above is valid for both applications since it is defined in webdefault.xml. In order to be specific for a single application, we should define the servlet and its mappings in web.xml of the relevant application.
We can add the following servlet configuration to the web.xml of webapp1.
<servlet>
	<servlet-name>specificServlet</servlet-name>
	<servlet-class>com.javacodegeeks.snippets.enterprise.embeddedjetty.servlet.SpecificServlet</servlet-class>
</servlet>

<servlet-mapping>
	<servlet-name>specificServlet</servlet-name>
	<url-pattern>/specific/*</url-pattern>
</servlet-mapping>
The SpecificServlet implementation is as follows:
SpecificServlet.java
package com.javacodegeeks.snippets.enterprise.embeddedjetty.servlet;

import java.io.IOException;

import javax.servlet.ServletException;
import javax.servlet.ServletRequest;
import javax.servlet.ServletResponse;
import javax.servlet.http.HttpServlet;

public class SpecificServlet extends HttpServlet {

	@Override
	public void service(ServletRequest req, ServletResponse res) throws ServletException, IOException {

		res.getOutputStream().print("Application Specific Servlet Response");
	}
}
When we run our example and try to access the URL http://localhost:8080/webapp1/specific/ we will get the following response:

This configuration is webapp1 specific. When we try to access webapp2 with the same URL pattern (http://localhost:8080/webapp2/specific/); we will get a 404 Error immediately.
There are a lot to mention on the Servlet subject and configuration; however they are beyond the scope of this example.
8. Configuring Servlet Filters
Servlet Filter is one of the key building blocks in a Java Web Application. Servlet filters intercept HTTP requests/response before and after Servlet invocation. They have many uses: Decorating requests and responses, logging or blocking them for security reasons are among those. Servlet Filter mechanism follows the Chain of Responsibility design pattern. A simple Servlet Filter is as follows:
CommonFilter.java
package com.javacodegeeks.snippets.enterprise.embeddedjetty.filter;

import java.io.IOException;

import javax.servlet.Filter;
import javax.servlet.FilterChain;
import javax.servlet.FilterConfig;
import javax.servlet.ServletException;
import javax.servlet.ServletRequest;
import javax.servlet.ServletResponse;

public class CommonFilter implements Filter {

	FilterConfig filterConfig = null;

	public void init(FilterConfig filterConfig) throws ServletException {
		this.filterConfig = filterConfig;
	}

	public void destroy() {
	}

	public void doFilter(ServletRequest servletRequest, ServletResponse servletResponse, FilterChain filterChain)
			throws IOException, ServletException {

		System.out.println("Common first!");
		filterChain.doFilter(servletRequest, servletResponse);
		System.out.println("Common last!");


	}

}
The first print line is invoked when the request is intercepted. The control is delegated to the next filter in the responsibility chain. The last print line is invoked after the rest of the chain completes its work.
Definition of the Servlet filters is very similar to the Servlet: We have to define the filter and map URLs to this filter. We can configure the CommonFilter in webdefault.xml as follows:
<filter>
	<filter-name>CommonFilter</filter-name>
	<filter-class>com.javacodegeeks.snippets.enterprise.embeddedjetty.filter.CommonFilter</filter-class>

</filter>
<filter-mapping>
	<filter-name>CommonFilter</filter-name>
	<url-pattern>/*</url-pattern>
</filter-mapping>
Here we have mapped this filter to the all URLs under our both web applications. When we run the example and try to access any URL of these applications, We observe the following lines in the server output:
Common first!
Common last!
As in the servlets, the configuration in webdefault.xml is valid for both applications. In order to be application specific, you can define another filter in the web.xml of webapp1 and implement is as follows:
<filter>
		<filter-name>SpecificFilter</filter-name>
		<filter-class>com.javacodegeeks.snippets.enterprise.embeddedjetty.filter.SpecificFilter</filter-class>

	</filter>
	<filter-mapping>
		<filter-name>SpecificFilter</filter-name>
		<url-pattern>/*</url-pattern>
	</filter-mapping>
SpecificFilter.java
package com.javacodegeeks.snippets.enterprise.embeddedjetty.filter;

import java.io.IOException;

import javax.servlet.Filter;
import javax.servlet.FilterChain;
import javax.servlet.FilterConfig;
import javax.servlet.ServletException;
import javax.servlet.ServletRequest;
import javax.servlet.ServletResponse;

public class SpecificFilter implements Filter {

	FilterConfig filterConfig = null;

	public void init(FilterConfig filterConfig) throws ServletException {
		this.filterConfig = filterConfig;
	}

	public void destroy() {
	}

	public void doFilter(ServletRequest servletRequest, ServletResponse servletResponse, FilterChain filterChain)
			throws IOException, ServletException {

		System.out.println("Specific Filter first!");
		filterChain.doFilter(servletRequest, servletResponse);
		System.out.println("Specific Filter last!");


	}

}
When we run the server and try to access a URL in webapp1, we will observe the following server output:
Common first!
Specific Filter first!
Specific Filter last!
Common last!
Here you can see, first line is the first print line of the CommonFilter; that is followed by the first and last print lines of the SpecificFilter. The output is finalized with the last print line of the CommonFilter. This output sequence summarizes the mechanism of filter chain of Java web apps.
Since the SpecificFilter is configured only for webapp1; when we try to access webapp2; we will only observe the outputs of the CommonFilter.
9. Configuring Servlet Context Listeners
ServletContextListener is another core block in Java Web applications. It is an interface whose implementations are invoked upon web application context creation and and destruction events.
A concrete ServletContextListener has to implement two methods:
- contextInitialized
- contextDestroyed
A sample implementation, printing the context path of the implementation is as follows:
CommonListener.java
package com.javacodegeeks.snippets.enterprise.embeddedjetty.listener;

import javax.servlet.ServletContextEvent;
import javax.servlet.ServletContextListener;

public class CommonListener implements ServletContextListener {

	public void contextInitialized(ServletContextEvent sce) {
		System.out.println("Context initialized:"+sce.getServletContext().getContextPath());

	}

	public void contextDestroyed(ServletContextEvent sce) {


	}

}
In webdefault.xml, listener configuration is below:
<listener>
		<listener-class>com.javacodegeeks.snippets.enterprise.embeddedjetty.listener.CommonListener</listener-class>
</listener>
When we start the server, the listener will be invoked for both webapp1 and webapp2. We will obtain the following server output:
2015-07-07 16:01:18.648:INFO::main: Logging initialized @295ms
2015-07-07 16:01:18.736:INFO:oejs.Server:main: jetty-9.2.11.v20150529
2015-07-07 16:01:18.857:INFO:oejw.StandardDescriptorProcessor:main: NO JSP Support for /webapp1, did not find org.eclipse.jetty.jsp.JettyJspServlet
Context initialized:/webapp1
2015-07-07 16:01:18.884:INFO:oejsh.ContextHandler:main: Started o.e.j.w.WebAppContext@58134517{/webapp1,file:/Users/ibrahim/Documents/workspace_jcg/jetty-webxml-example/src/main/webapp1/,AVAILABLE}
2015-07-07 16:01:18.900:INFO:oejw.StandardDescriptorProcessor:main: NO JSP Support for /webapp2, did not find org.eclipse.jetty.jsp.JettyJspServlet
Context initialized:/webapp2
2015-07-07 16:01:18.902:INFO:oejsh.ContextHandler:main: Started o.e.j.w.WebAppContext@226a82c4{/webapp2,file:/Users/ibrahim/Documents/workspace_jcg/jetty-webxml-example/src/main/webapp2/,AVAILABLE}
2015-07-07 16:01:18.919:INFO:oejs.ServerConnector:main: Started ServerConnector@691a7f8f{HTTP/1.1}{0.0.0.0:8080}
2015-07-07 16:01:18.920:INFO:oejs.Server:main: Started @569ms
Started!
Again, we may wish to configure a listener for a single web application. Then we should define our listener configuration in the related web.xml with the required implementation.
<listener>
		<listener-class>com.javacodegeeks.snippets.enterprise.embeddedjetty.listener.SpecificListener</listener-class>
</listener>
SpecificListener.java
package com.javacodegeeks.snippets.enterprise.embeddedjetty.listener;

import javax.servlet.ServletContextEvent;
import javax.servlet.ServletContextListener;

public class SpecificListener implements ServletContextListener {

	public void contextInitialized(ServletContextEvent sce) {
		System.out.println("Specific Context initialized:"+sce.getServletContext().getContextPath());

	}

	public void contextDestroyed(ServletContextEvent sce) {
		// TODO Auto-generated method stub

	}

}
When we start the server, we will see that SpecificListener is invoked upon creation of webapp1 context. The output is as follows:
2015-07-07 16:20:33.634:INFO::main: Logging initialized @210ms
2015-07-07 16:20:33.740:INFO:oejs.Server:main: jetty-9.2.11.v20150529
2015-07-07 16:20:33.864:INFO:oejw.StandardDescriptorProcessor:main: NO JSP Support for /webapp1, did not find org.eclipse.jetty.jsp.JettyJspServlet
Context initialized:/webapp1
Specific Context initialized:/webapp1
2015-07-07 16:20:33.895:INFO:oejsh.ContextHandler:main: Started o.e.j.w.WebAppContext@4450d156{/webapp1,file:/Users/ibrahim/Documents/workspace_jcg/jetty-webxml-example/src/main/webapp1/,AVAILABLE}
2015-07-07 16:20:33.907:INFO:oejw.StandardDescriptorProcessor:main: NO JSP Support for /webapp2, did not find org.eclipse.jetty.jsp.JettyJspServlet
Context initialized:/webapp2
2015-07-07 16:20:33.908:INFO:oejsh.ContextHandler:main: Started o.e.j.w.WebAppContext@731f8236{/webapp2,file:/Users/ibrahim/Documents/workspace_jcg/jetty-webxml-example/src/main/webapp2/,AVAILABLE}
2015-07-07 16:20:33.926:INFO:oejs.ServerConnector:main: Started ServerConnector@50a7bc6e{HTTP/1.1}{0.0.0.0:8080}
2015-07-07 16:20:33.926:INFO:oejs.Server:main: Started @506ms
Started!
Note that, the common configuration elements are invoked before application specific ones.
10. Configuration in Standalone Jetty Server
In this example, we have performed deployment descriptor configuration in an Embedded Jetty container. For the standalone Jetty(v9.2.11), the the path of default configuration (webdefault.xml) is under JETTY_HOME/etc. If you want to change location of the default configuration path, then you have to alter the defaultsDescriptor element of JETTY_HOME/etc/jetty-deploy.xml.
11. Conclusion
In this post, we have provided information on Web application configuration in Jetty through the deployment descriptor files. We have skimmed through configuration of main building blocks of a web application configuration(Servlets, Servlet Filters and Listeners). While providing examples, we have emphasized that Jetty allows both container-wide and application specific configuration.
You can download the full source code of this example here : JettyWebXmlExample
