In this example we will learn how to use Tables in GWT. Google Web Toolkit is a development framework for creating Ajax-enabled web applications in Java. A CellTable represents a tabular view that supports paging and columns. A FlexTable on the other hand allows user to create cell on demand. It can be jagged (that is, each row can contain a different number of cells) and individual cells can be set to span multiple rows or columns. Tools and technologies used in this example are Java 1.8, Eclipse Luna 4.4.2, Eclipse GWT Plugin 2.6
1. Introduction
A cell table (data presentation table) provides high-performance rendering of large data sets in a tabular view. A CellTable is used to represent a data in tabular format. The Column class defines the Cell used to render a column. ImplementColumn.getValue(Object) to retrieve the field value from the row object that will be rendered in the Cell. A Header can be placed at the top (header) or bottom (footer) of the CellTable. You can specify a header as text using AbstractCellTable.addColumn(Column, String), or you can create a custom Header that can change with the value of the cells, such as a column total. The Header will be rendered every time the row data changes or the table is redrawn. If you pass the same header instance (==) into adjacent columns, the header will span the columns.
The FlexTable class extends the HTMLTable.
public class FlexTable extends HTMLTable
2. Creating GWT project
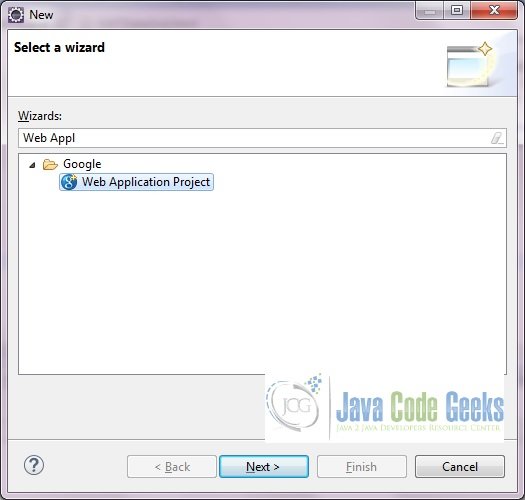
To create a new GWT project go to File->New->Other, then type ‘Web App’. Choose ‘Web Application Project’ under ‘Google’.
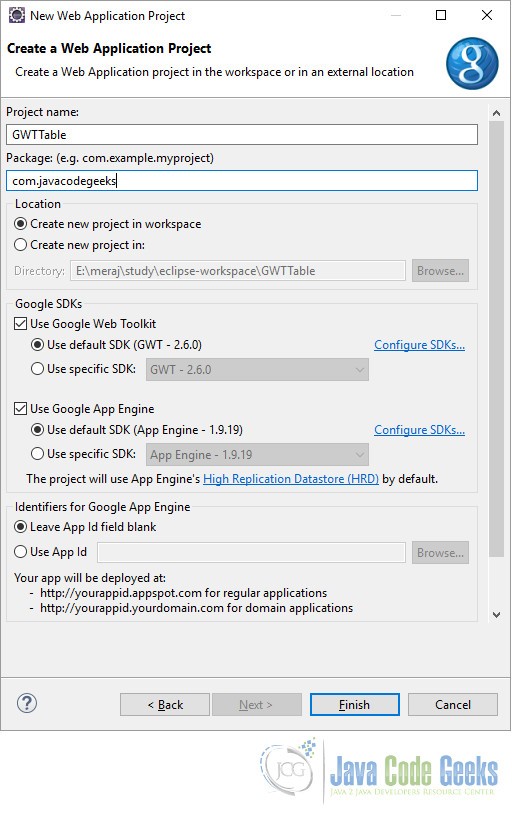
On the next window enter the Project name (‘GWTTable’) and the Package (com.javacodegeeks). Leave the other details as it is and click on ‘Finish’. Eclipse will generate some files automatically for you.
For this example we don’t need to change the GWT configuration file. We only need to change the Entry point class – ‘GWTTable.java’.
3. Java classes
First we show the model class which we are using for populating the data in the CellTable. It’s a simple POJO representation of address data.
Address.java
package com.javacodegeeks.client;

public class Address {

  private String firstLine;
  private String secondLine;
  private String town;
  private String country;

  public Address(String firstLine, String secondLine, String town, String country) {
    this.firstLine = firstLine;
    this.secondLine = secondLine;
    this.town = town;
    this.country = country;
}

  public String getFirstLineOfAddress() {
    return this.firstLine;
  }

  public String getSecondLineOfAddress() {
    return this.secondLine;
  }

  public String getTown() {
    return this.town;
  }

  public String getCountry() {
    return this.country;
  }
}
Now we will see the Entry point class.
GWTTable.java
package com.javacodegeeks.client;
import java.util.ArrayList;
import java.util.List;
import com.google.gwt.core.client.EntryPoint;
import com.google.gwt.user.cellview.client.CellTable;
import com.google.gwt.user.cellview.client.HasKeyboardSelectionPolicy.KeyboardSelectionPolicy;
import com.google.gwt.user.cellview.client.TextColumn;
import com.google.gwt.user.client.Window;
import com.google.gwt.user.client.ui.FlexTable;
import com.google.gwt.user.client.ui.RootPanel;
import com.google.gwt.user.client.ui.VerticalPanel;
import com.google.gwt.view.client.SelectionChangeEvent;
import com.google.gwt.view.client.SingleSelectionModel;
/**
* Entry point classes define <code>onModuleLoad()</code>.
*/
public class GWTTable implements EntryPoint {
/**
* This is the entry point method.
*/
public void onModuleLoad() {
FlexTable flexTable = createFlexTable();
CellTable<Address> cellTableOfAddress = new CellTable<Address>();
// The policy that determines how keyboard selection will work. Keyboard
// selection is enabled.
cellTableOfAddress.setKeyboardSelectionPolicy(KeyboardSelectionPolicy.ENABLED);
// Add a text columns to show the details.
TextColumn<Address> columnFirstLine = new TextColumn<Address>() {
@Override
public String getValue(Address object) {
return object.getFirstLineOfAddress();
}
};
cellTableOfAddress.addColumn(columnFirstLine, "First line");
TextColumn<Address> columnSecondLine = new TextColumn<Address>() {
@Override
public String getValue(Address object) {
return object.getSecondLineOfAddress();
}
};
cellTableOfAddress.addColumn(columnSecondLine, "Second line");
TextColumn<Address> townColumn = new TextColumn<Address>() {
@Override
public String getValue(Address object) {
return object.getTown();
}
};
cellTableOfAddress.addColumn(townColumn, "Town");
TextColumn<Address> countryColumn = new TextColumn<Address>() {
@Override
public String getValue(Address object) {
return object.getCountry();
}
};
cellTableOfAddress.addColumn(countryColumn, "Country");
final SingleSelectionModel<Address> selectionModel = new SingleSelectionModel<Address>();
cellTableOfAddress.setSelectionModel(selectionModel);
selectionModel.addSelectionChangeHandler(new SelectionChangeEvent.Handler() {
public void onSelectionChange(SelectionChangeEvent event) {
Address selectedAddress = selectionModel.getSelectedObject();
if (selectedAddress != null) {
Window.alert("Selected: First line: " + selectedAddress.getFirstLineOfAddress() + ", Second line: " + selectedAddress.getSecondLineOfAddress());
}
}
});
List<Address> addresses = new ArrayList<Address>() {
{
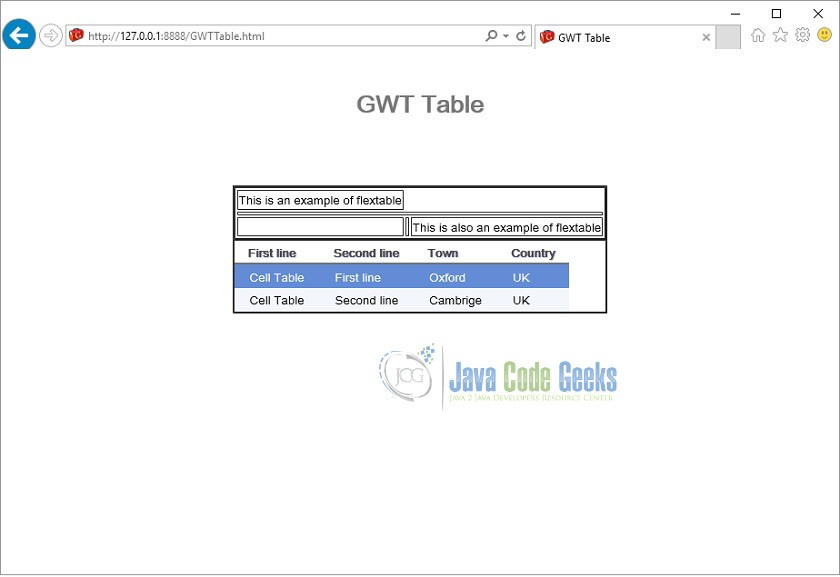
add(new Address("Cell Table", "First line", "Oxford", "UK"));
add(new Address("Cell Table", "Second line", "Cambrige", "UK"));
}
};
cellTableOfAddress.setRowCount(addresses.size(), true);
cellTableOfAddress.setRowData(0, addresses);
VerticalPanel vp = new VerticalPanel();
vp.setBorderWidth(1);
vp.add(flexTable);
vp.add(cellTableOfAddress);
RootPanel.get("container").add(vp);
}
private FlexTable createFlexTable() {
FlexTable flexTable = new FlexTable();
flexTable.setBorderWidth(1);
flexTable.setText(0, 0, "This is an example of flextable");
flexTable.setText(2, 2, "This is also an example of flextable");
flexTable.getFlexCellFormatter().setColSpan(1, 0, 3);
return flexTable;
}
}4. Difference
Here we will discuss the differences between these two GWT table types.

CellTable always has the same number of rows and/or columns while a FlexTable can have different rows per column and different columns per row (This is made possible due to the html properties rowspan and colspan). Thus when you need flexibale rows or columns you can use FlexTable and otherwise CellTable. However, FlexTable is extremely slow in Internet Explorer, due to slow DOM methods that are used to create a the table. Therefore, avoid FlexTable if you can or only use it create a simple layout (although in that case the DockPanel might be somewhat easier to use).
5. Compile
To compile the application right click on the project and select ‘Google’ ==> ‘GWT Compile’. A popu-up will be displayed. Click the ‘Compile’ button. GWT will start compiling your projects for different permutations. Below is the result of compilation which you see in the ‘Console’ window.
Compiling module com.javacodegeeks.GWTTable
  Compiling 5 permutations
    Compiling permutation 0...
    Compiling permutation 1...
    Compiling permutation 2...
    Compiling permutation 3...
    Compiling permutation 4...
  Compile of permutations succeeded
Linking into E:\meraj\study\eclipse-workspace\GWTTable\war\gwttable
  Link succeeded
  Compilation succeeded -- 95.073s
6. Running the application
To run the application right click on the project and select ‘Run As’ ==> ‘Web Application (Classic Dev Mode)’. Eclipse will display a URL in the ‘Development Mode’ tab. Copy this URL and paste it on you favourite browser. Remove the part after ‘.html’ and click enter.
7. Download the source file
This was an example of GWT Tables.
You can download the full source code of this example here: GWT Table. Please note that to save space the jar files from the lib directly have been removed.
