In this example, we will learn how to package a WAR File and how to deploy it on Tomcat server, using Gradle War Plugin and Gradle Tomcat Plugin.
1. Introduction to Gradle War Plugin
This is a basic Gradle plugin that allows packaging web applications in WAR files. This plugin adds a war task for us that we can invoke instead of creating a war task ourselves. Basically, it’s a copy file task, that maintains the project’s structure on WAR file, but it follows some configurations.
src/main/javadefault directory where java source files are. We can customize this with sourcesets.src/main/webappdefault web sources directory for the content of the WAR file. We can change the value with thewebAppDirNameproperty.- Adds 2 dependency configurations, providedCompile and providedRuntime, any dependencies added to these configurations are not packaged in WAR file, so are not copied to the WEB-INF/lib directory. Tipically libraries declared in these dependecy configurations reside on the container.
2. What we need to start?
- As IDE: Eclipse Luna 4.4
- Java JDK 1.7
- Gradle 2.3 or higher, already installed and configured.
But the main idea is to edit a build.gradle script and you can do this with only a plain text editor, also you should have a java web project ready to work on it.
3. Environment Configuration
Please set your Gradle environment variables and install the Gradle plugin on your IDE. To avoid to be repetitive, visit this previous posts that show how to configure your Gradle Environment. Gradle Hello World Tutorial
4. Create Java Web Application
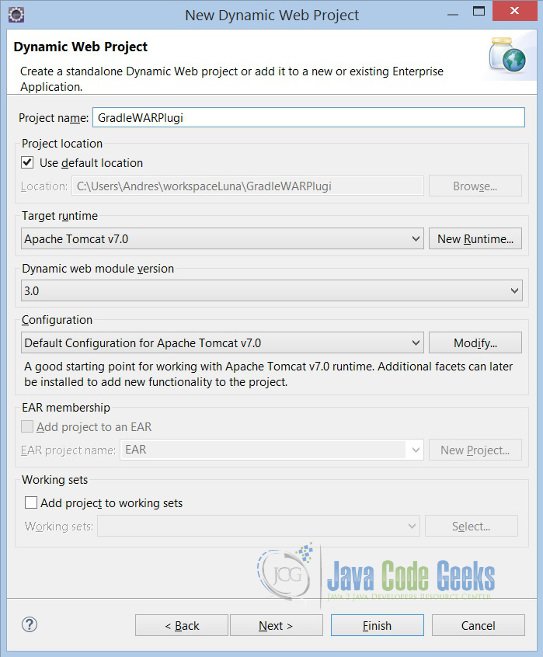
On eclipse create a new Dynamic Web Project, go to File > New > Dynamic Web Project, choose your tomcat container and servlet version (in this example is servlet 3.0).
Then, create a JSP index file to test the web application. On WebContent folder root create a new index.jsp and edit it with a hello world message.
index.jsp
<%@ page language="java" contentType="text/html; charset=ISO-8859-1"
	pageEncoding="ISO-8859-1"%>
<!DOCTYPE html PUBLIC "-//W3C//DTD HTML 4.01 Transitional//EN" "http://www.w3.org/TR/html4/loose.dtd">
<html>
<head>
<meta http-equiv="Content-Type" content="text/html; charset=ISO-8859-1">
<title>JCG Gradle War Project</title>
</head>
<body>I'm deployed with Gradle on JCG War tutorial!
</body>
</html>
So the web.xml file of the project may looks like that:
web.xml
<?xml version="1.0" encoding="UTF-8"?>
<web-app xmlns:xsi="http://www.w3.org/2001/XMLSchema-instance" xmlns="http://java.sun.com/xml/ns/javaee" xsi:schemaLocation="http://java.sun.com/xml/ns/javaee http://java.sun.com/xml/ns/javaee/web-app_3_0.xsd" id="WebApp_ID" version="3.0">
  <display-name>GradleWarPlugin</display-name>
  <welcome-file-list>
    <welcome-file>index.jsp</welcome-file>
  </welcome-file-list>
</web-app>
The last step is to test the dynamic web application running on Tomcat server, so make right click to the project and Run As “Run On Server” to check the application is on a valid state, hereafter we will use Gradle to do all tasks.
5. Using Gradle WAR Plugin
Create a build.gradle file on project’s root and so let’s configure it.
build.gradle
buildscript {
    repositories {
        jcenter()
    }

    dependencies {
        classpath 'com.bmuschko:gradle-tomcat-plugin:2.0'
    }
}

apply plugin: 'java'
apply plugin: 'war'
apply plugin: 'com.bmuschko.tomcat'

// JDK version source compatibility
sourceCompatibility = 1.7
// project version
version = '1.0'
// War file name
war.baseName = 'jcg-gradle-war-example'
// Web directory, this overrides the default value "webapp"
project.webAppDirName = 'WebContent'

repositories {
    mavenLocal()
    mavenCentral()
}

// Set source directory
sourceSets {
        main {
            java {
                srcDir 'src'
            }
        }
    }

// dependencies to run on tomcat, are mandatory for tomcat plugin
dependencies {
    def tomcatVersion = '7.0.57'
    tomcat "org.apache.tomcat.embed:tomcat-embed-core:${tomcatVersion}",
            "org.apache.tomcat.embed:tomcat-embed-logging-juli:${tomcatVersion}"
    tomcat("org.apache.tomcat.embed:tomcat-embed-jasper:${tomcatVersion}") {
        exclude group: 'org.eclipse.jdt.core.compiler', module: 'ecj'
    }
}

// context where tomcat is deployed, by defautl localhost:8080/
tomcatRun.contextPath = '/'
tomcatRunWar.contextPath = '/'
Look at the previous file line by line, in the first part we define the repositories to download all libraries and dependencies. Then we must apply plugins to perform all necessary tasks, java plugin is to compile and copy java files, war plugin is to package all files and resources into WAR file and tomcat Benjamin Muschko plugin is to deploy the generated war on Tomcat server.
In line 22, we customize the webapp directory value that by default point to webapp folder. Repositories task is to define where it’s all dependencies and libraries will be downloaded.
The last 2 parts are, sourcesets to set the custom directory of which classes are provided, by default is src/main/java. And for last, dependencies is to define the tomcat dependencies that are needed by the tomcat plugin.
6. Running Example
To test all our job, we will perform these 2 tasks.
First, execute this task gradle war command on shell console. This task will perform all compiling and packaging required jobs, after that a WAR file will be created ready to deploy on tomcat.
C:\Users\Andres\workspaceLuna\GradleWarPlugin>gradle war
:GradleWarPlugin:compileJava UP-TO-DATE
:GradleWarPlugin:processResources UP-TO-DATE
:GradleWarPlugin:classes UP-TO-DATE
:GradleWarPlugin:war UP-TO-DATE

BUILD SUCCESSFUL

Total time: 5.838 secs
C:\Users\Andres\workspaceLuna\GradleWarPlugin>

7. Deploying WAR File
The last task is to deploy the WAR file on tomcat server so with all previous job only we need to execute this Gradle command, gradle tomcatRun or gradle tR as abbreviated form on command shell. This will be the output:
C:\Users\Andres\workspaceLuna\GradleWarPlugin>gradle tomcatRun
:GradleWarPlugin:compileJava UP-TO-DATE
:GradleWarPlugin:processResources UP-TO-DATE
:GradleWarPlugin:classes UP-TO-DATE
:GradleWarPlugin:tomcatRun
Started Tomcat Server
The Server is running at http://localhost:8080
> Building 75% > :GradleWarPlugin:tomcatRun
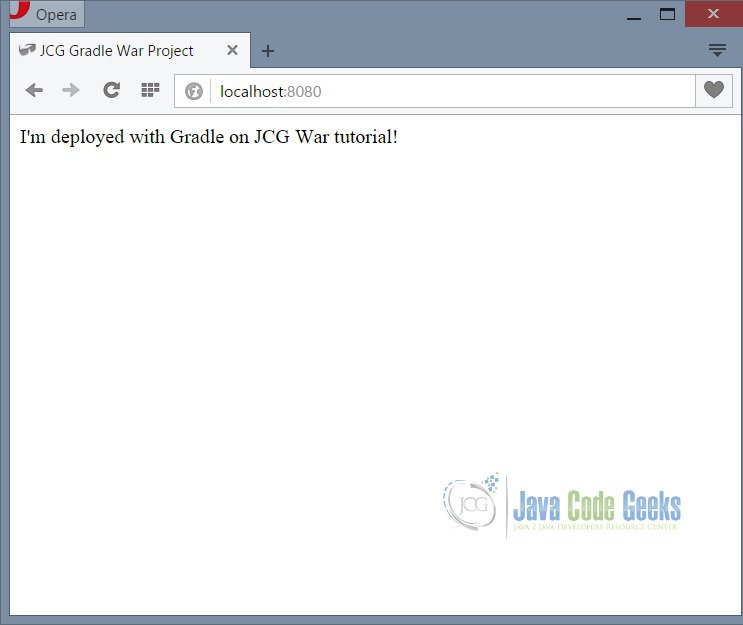
Only need to access to the deployed URL http://localhost:8080
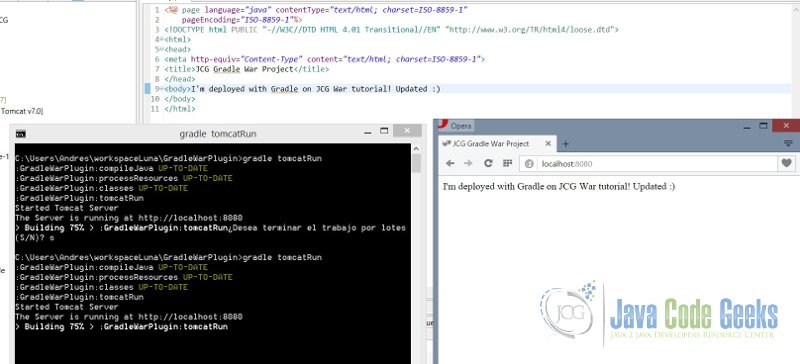
Check that WAR and Tomcat Plugins are powerful, if we update any resource (java files, resources, views) in this case the JSP, only with execute gradle tomcatRun task all resources will be updated and packaged, making this task a “one button to production” deploy process.
8. Key Points
Tips
- Gradle WAR plugin provides a clean tool to package web applications, that isn’t IDE dependent.
- It’s necessary to set our custom webapp diretory and sourceset values to ensure that WAR packaging works.
- Tomcat Plugin has an embedded Tomcat server that allows to test WAR files. If you want to deploy WAR on remote or external server you need to use another plugin. See cargo plugin.
- With both plugins WAR and Tomcat, the deployment process it becomes a one-button production mode process.
9. Download the Eclipse Project
This was an example of Gradle WAR Plugin and how to deploy it using Gradle Tomcat Plugin.
You can download the full source code of this example here: Gradle WAR and Tomcat Plugin Project
