In this example, we will explain how to integrate Gradle with NetBeans IDE and how to perform basic Gradle tasks.
1. Why use Gradle in NetBeans IDE?
Gradle is a powerful tool for building and automation. It has many advantages, enabling the development of build scripts that are cross-platform and cross-IDE. You should have no problems migrating your Gradle-based applications to a different IDE or Continuous Integration server.
2. Requirements
- NetBeans IDE 8.0.2
- JDK 1.7.0_67 (or higher)
- Gradle 2.3 (or higher)
3. Installing the Gradle Plugin in NetBeans IDE
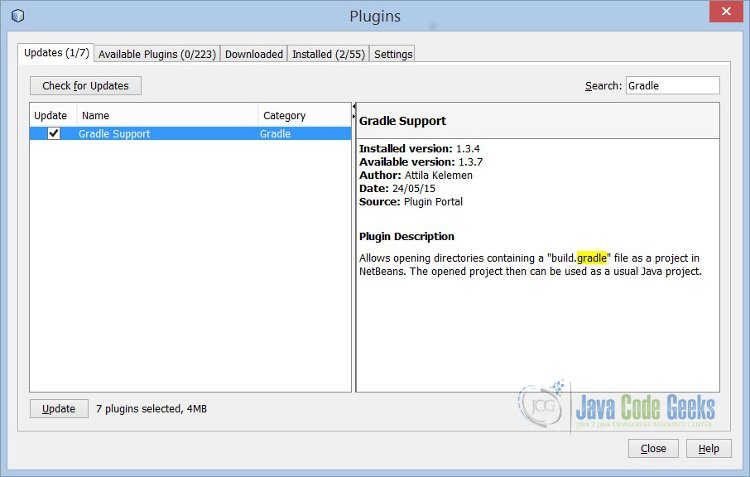
The tasks that we will perform in this post are simple. To install Gradle in NetBeans IDE, go to Tools > Plugins > Available Plugins.
Then, type “Gradle” and choose “Gradle Support” plugin, of which the author is Attila Kelemen, and click Install.
4. How to Start using Gradle in NetBeans?
We will assume that you have installed Gradle in your computer if you didn’t have yet, take a look here.
In this step we have to set the default configuration for Gradle’s environment.
Then, go to Menu Tools > Options > Miscellaneous > Gradle.
Here we need to set 2 important and critical configurations in the Gradle Installation category.
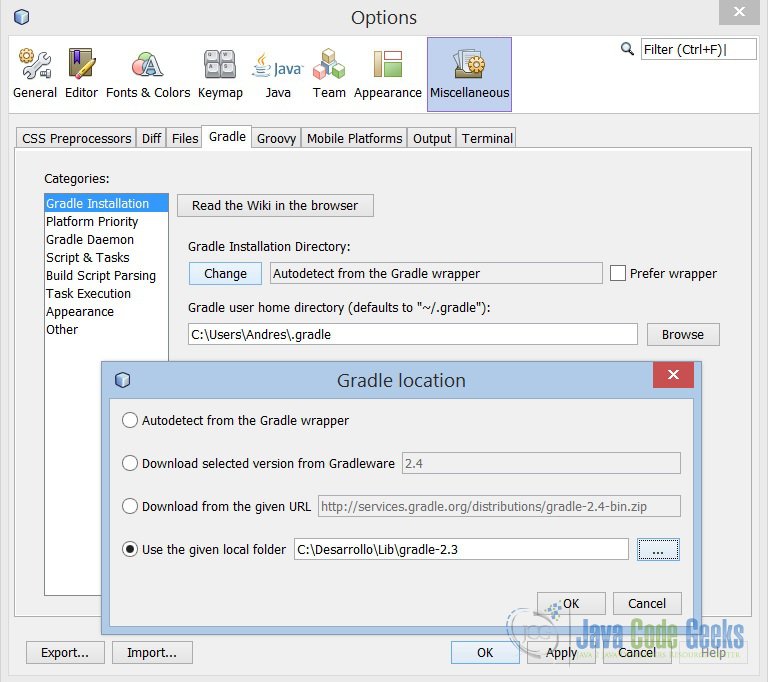
First, make click in change button to set Gradle installation directory by giving a local folder, then do the another configuration, set Gradle user home, if you are a Windows user is on C:\Users\%USER_NAME%\.gradle folder.
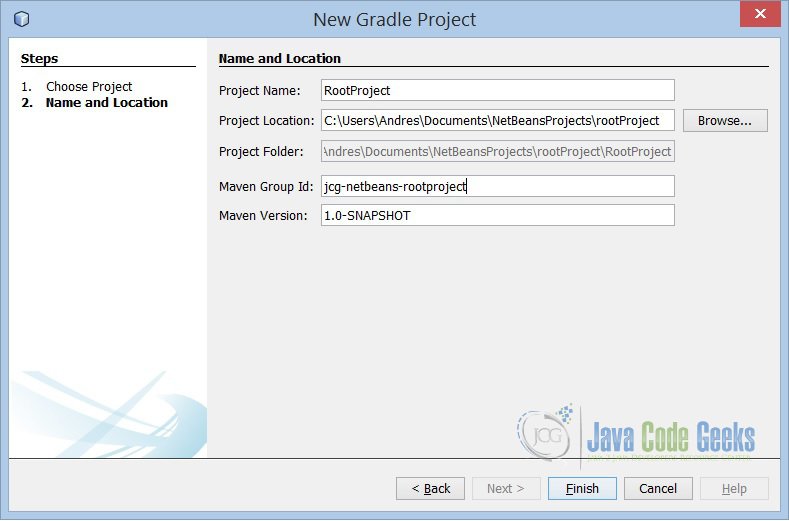
5. Create your first Gradle Project
In NetBeans IDE we need to set a Root Project to start working, so open new project wizard, and in Gradle category choose Gradle Root Project and click next, give a project’s name and Maven Group Id, then click Finish.
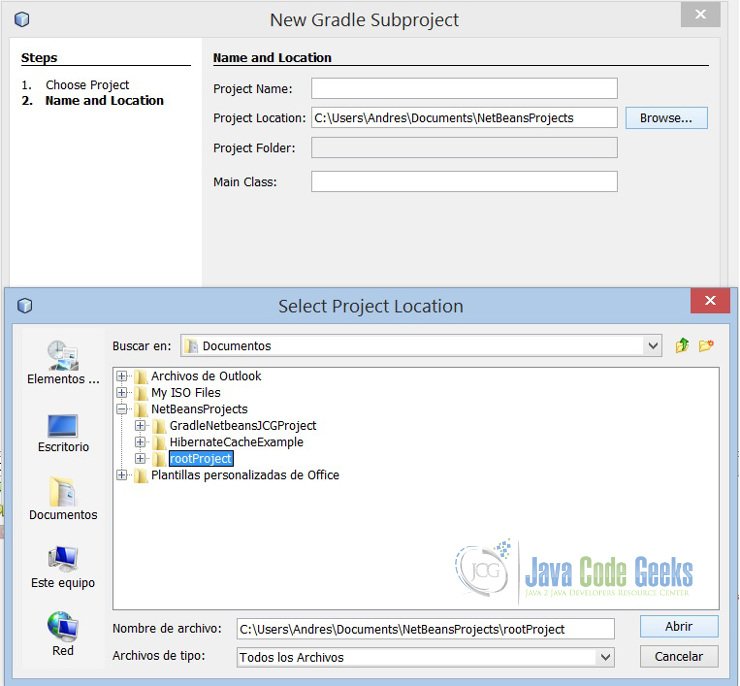
Now, we have to add subprojects to the root project and make them run, so repeat the previous step but instead of choose root project, please select Gradle subproject. Then set the location of your root project so:
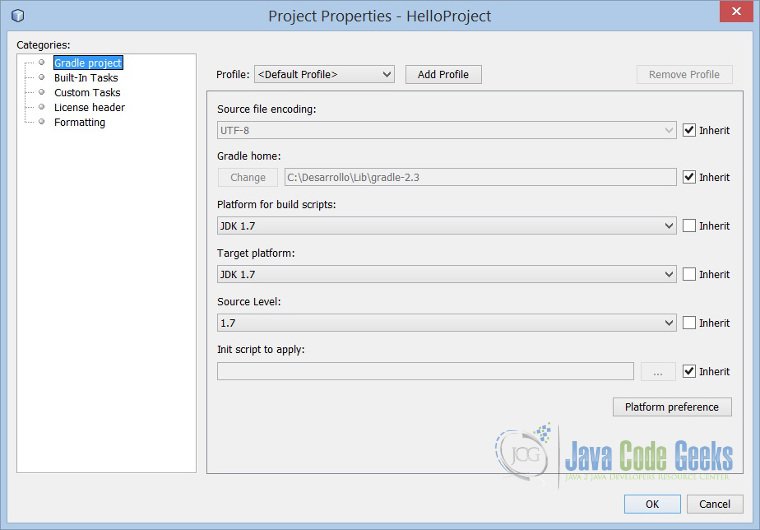
After this step, we have to set in common.gradle script the property sourceCompatibility to the JDK level 1.6, 1.7 or 1.8, for this example we change it to 1.7. Once you have adjusted the property, ensure that both projects (root and subproject) have the same configuration, make right click in the name of both projects and set all properties to Java compilation level 1.7.
6. Testing Gradle Project
Then, we have to add a simple class that executes a print console, so create a package and class on Gradle subproject called Greeting with only a main method.

Greeting.java
package com.javacodegeeks.gradle.netbeans;

/**
 *
 * @author Andres Cespedes
 * @since 1.7
 */
public class Greeting {

    public static void main(String[] args) {
        System.out.println("Hello World JCG in Gradle NetBeans");
    }
}
The last step is to set this class as Main Class, so in build.gradle script of subproject HelloProject type full name without extension. The build.gradle script may looks like this:
    // Note: "common.gradle" in the root project contains additional initialization
    //   for this project. This initialization is applied in the "build.gradle"
    //   of the root project.

    // NetBeans will automatically add "run" and "debug" tasks relying on the
    // "mainClass" property. You may however define the property prior executing
    // tasks by passing a "-PmainClass=" argument.
    //
    // Note however, that you may define your own "run" and "debug" task if you
    // prefer. In this case NetBeans will not add these tasks but you may rely on
    // your own implementation.
    if (!hasProperty('mainClass')) {
        ext.mainClass = 'com.javacodegeeks.gradle.netbeans.Greeting'
    }

    dependencies {
        // TODO: Add dependencies here
        //   but note that JUnit should have already been added in parent.gradle.
        //   By default, only the Maven Central Repository is specified in
        //   parent.gradle.
        //
        // You can read more about how to add dependency here:
        //   http://www.gradle.org/docs/current/userguide/dependency_management.html#sec:how_to_declare_your_dependencies
    }
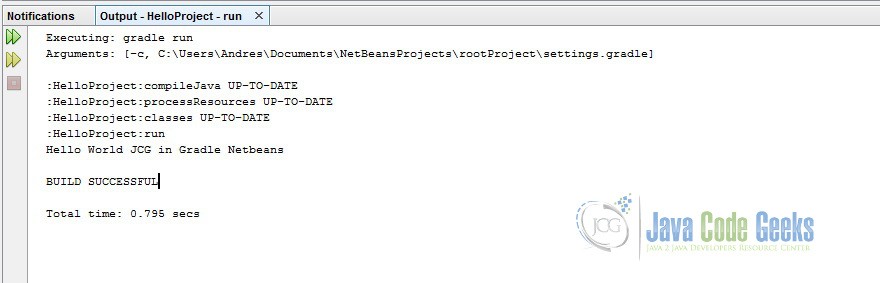
So, make right click on subproject HelloProject then Run, the output will be this:
7. Key Points
Tips
- Gradle NetBeans Plugin is unofficial yet, but Kelemen has done a great job.
- In NetBeans Gradle needs a multiproject structure, is mandatory a root project to work.
- All Gradle configuration needs to be done right in both places to ensure correctly operation, gradle build scripts and project properties.
8. Download the NetBeans Project
This was an example of Gradle NetBeansPlugin.
You can download the full source code of this example here: Gradle NetBeans Project
