In this article, we will explain Spring Boot Microservices with Java through examples.
Microservices is popular because it allows large systems to be composed of smaller systems. Think of it as the single responsibility principle.
The smaller systems have a single responsibilty to the large system. In the monolithic approach, all the smaller systems are bunched up to make up one large system or one large appplication. The microservices approach breaks the large system into smaller chunks.
You can also check this tutorial in the following video:

1. Introduction
This article assumes that you know your way around Eclipse. You are familiar with Maven and Spring. This project has been created using Eclipse Oxygen so all instructions are based on this IDE. Download the example code, load it into Eclipse or your favorite IDE and let’s walk through the code.
Table Of Contents
- 1. Introduction
- 2. Spring Boot Microservices
- 3.POM
- 4.Eureka Server
- 5.Addition Server
- 6.Subtraction Server
- 7.Web Server
- 8.What are Microservices?
- 9.Accessing the Microservices
- 10.Running the Spring Boot Microservices Example
- 11.Microservices benefits and drawbacks
- 12.When to choose microservices instead of monolithic architecture
- 13.Summary
- 14.Download the Source Code
2. Spring Boot Microservices
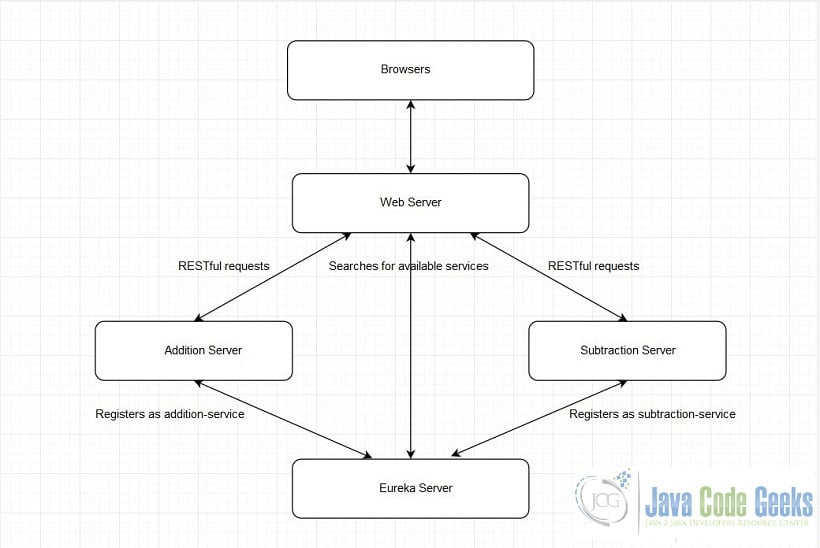
This is a simple Spring Boot Microservices example. This web application does nothing more but an arithmetic service. An arithmetic calculator served in a microservice approach. The diagram below shows our two microservices, Addition Server and Subtraction Server. The servers need to find each other so they need to register to the discovery server called Eureka. Once the Web Server finds the micro service, it can then send requests. In this example, the Web Server sends RESTful requests. When the Web Server receives the response it then serves the result to the browser.
2.1 Prerequisites
Java 8 or 9 is required on the linux, windows or mac operating system. Maven 3.6.1 is required for building the spring boot application.
2.2 Download
You can download Java 8 can be downloaded from the Oracle web site . Apache Maven 3.6.1 can be downloaded fromApache site. Spring framework latest releases are available from the spring website.
2.3 Setup
You can set the environment variables for JAVA_HOME and PATH. They can be set as shown below:
Java Setup
JAVA_HOME="/desktop/jdk1.8.0_73"
export JAVA_HOME
PATH=$JAVA_HOME/bin:$PATH
export PATH
The environment variables for maven are set as below:Environment Setup for Maven
Maven Setup
JAVA_HOME=”/jboss/jdk1.8.0_73″
export M2_HOME=/users/bhagvan.kommadi/Desktop/apache-maven-3.6.1
export M2=$M2_HOME/bin
export PATH=$M2:$PATH
2.4 IDE
2.4.1 Eclipse Oxygen Setup
The ‘eclipse-java-oxygen-2-macosx-cocoa-x86_64.tar’ can be downloaded from the eclipse website. The tar file is opened by double click. The tar file is unzipped by using the archive utility. After unzipping, you will find the eclipse icon in the folder. You can move the eclipse icon from the folder to applications by dragging the icon.
2.4.2 Launching IDE
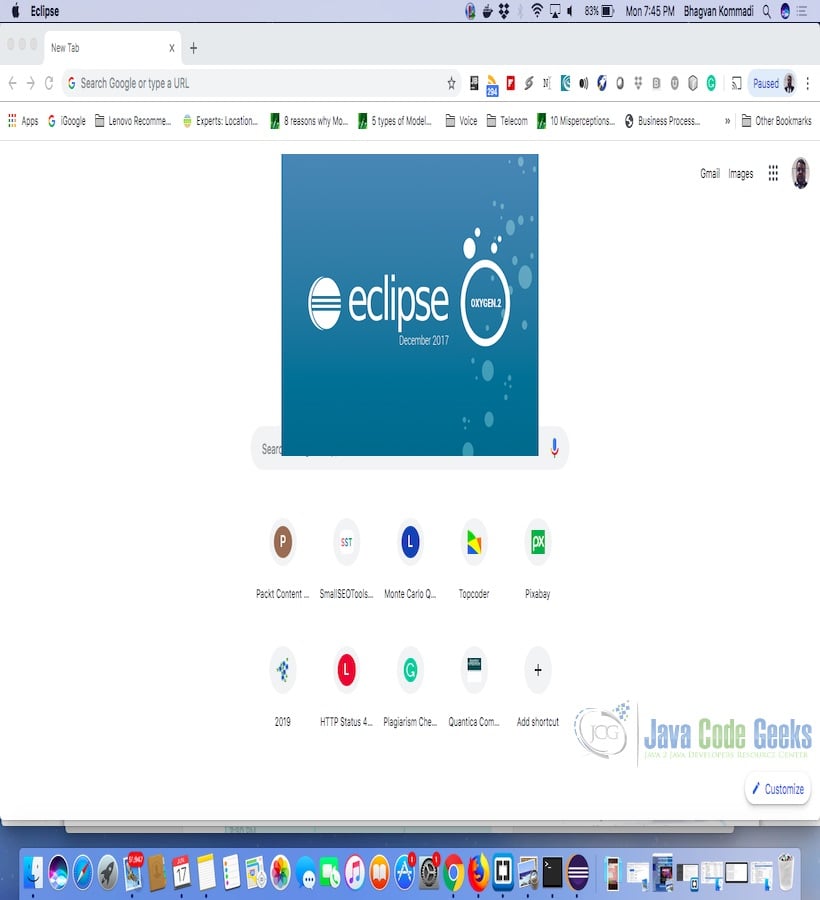
Eclipse has features related to language support, customization, and extension. You can click on the eclipse icon to launch eclipse. The eclipse screen pops up as shown in the screenshot below:
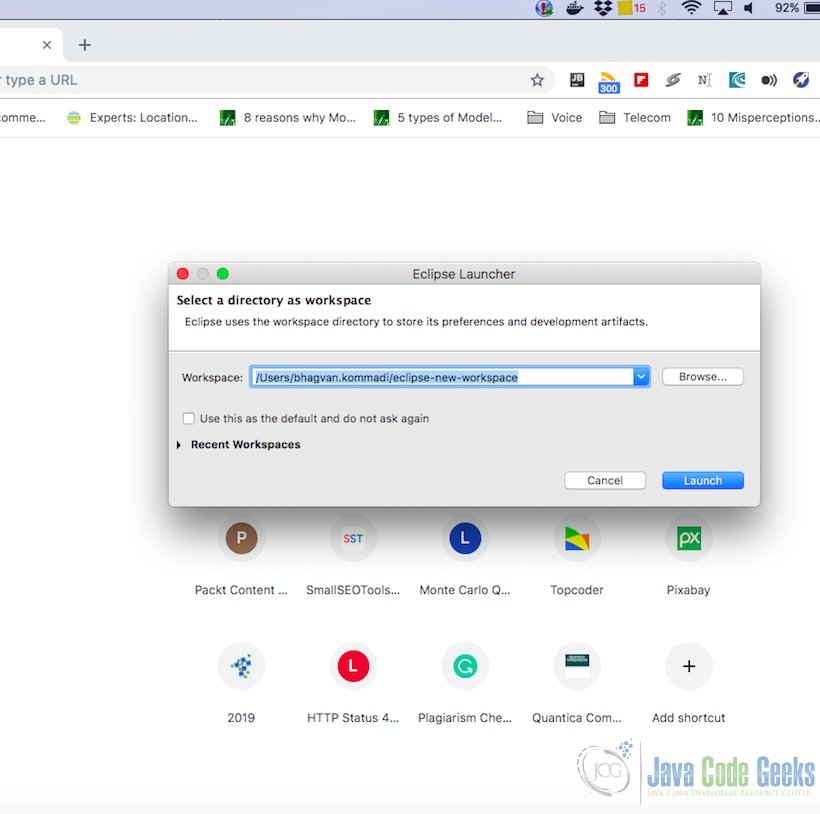
You can select the workspace from the screen which pops up. The attached image shows how it can be selected.
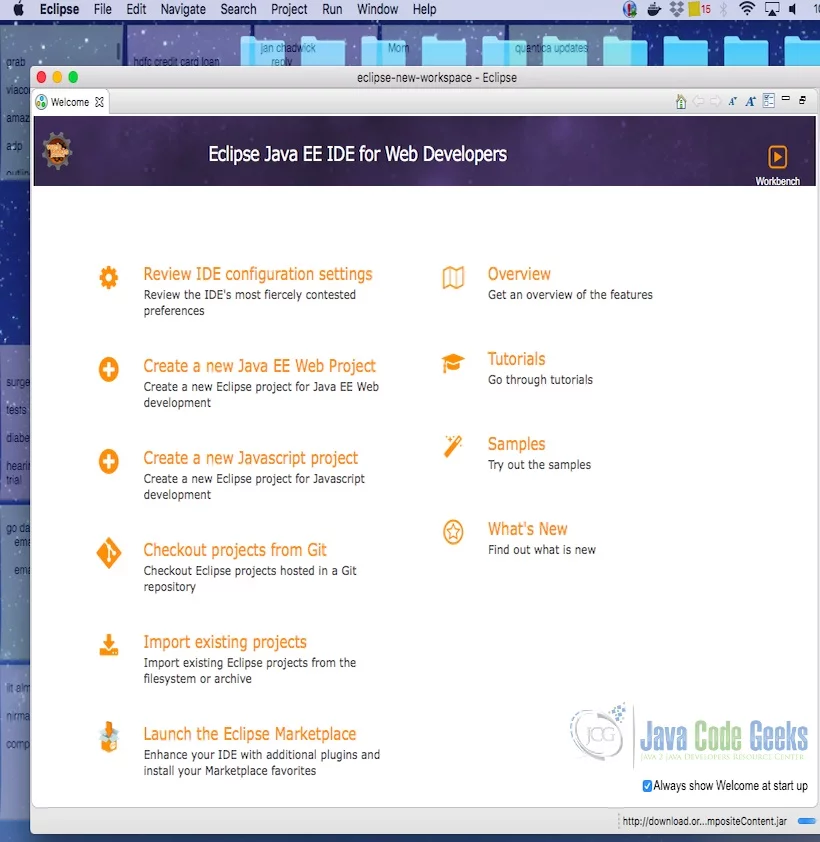
You can see the eclipse workbench on the screen. The attached screenshot shows the Eclipse project screen.
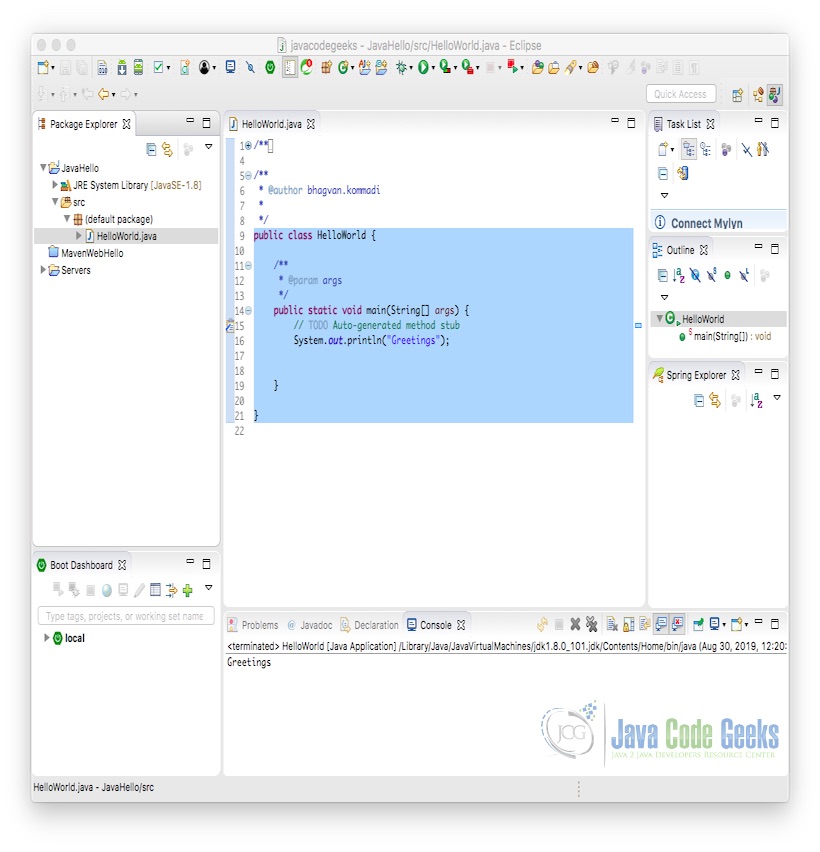
Java Hello World class prints the greetings. The screenshot below is added to show the class and execution on the eclipse.
3. POM
The important parts of the POM are the following:
- spring-boot-starter-parent – provide default configurations for our Spring Boot project
- spring-boot-starter – setup Spring Boot
- spring-boot-starter-web – setup Spring MVC and REST, use Embedded Tomcat
- spring-boot-starter-thymeleaf – use Thymeleaf templating engine
- spring-cloud-starter – setup Spring Cloud
- spring-cloud-starter-netflix-eureka-server – Eureka for service registration
- spring-cloud-dependencies – use the Finchley.RELEASE
4. Eureka Server
The code for the registration server is only a few lines. It really is this short.
EurekaServer.java
EurekaServer
package com.javacodegeeks.example.registration;
import org.springframework.boot.SpringApplication;
import org.springframework.boot.autoconfigure.SpringBootApplication;
import org.springframework.cloud.netflix.eureka.server.EnableEurekaServer;
@SpringBootApplication
@EnableEurekaServer
public class EurekaServer {
    public static void main(String[] args) {
        System.setProperty("spring.config.name", "eureka-server");
        SpringApplication.run(EurekaServer.class, args);
    }
}
@SpringBootApplication is a convenience annotation that is equivalent to declaraing @Configuration, @EnableAutoConfiguration, and @ComponentScan. The @EnableEurekaServer spins up a registry server that other applications can talk to. Line 11 tells Spring Boot to look for the file eureka-server.properties for its configuration.
eureka-server.properties
|
1
2
3
4
5
6
7
|
eureka.instance.hostname=localhosteureka.client.registerWithEureka=falseeureka.client.fetchRegistry=falseserver.port=1111spring.thymeleaf.enabled=false |
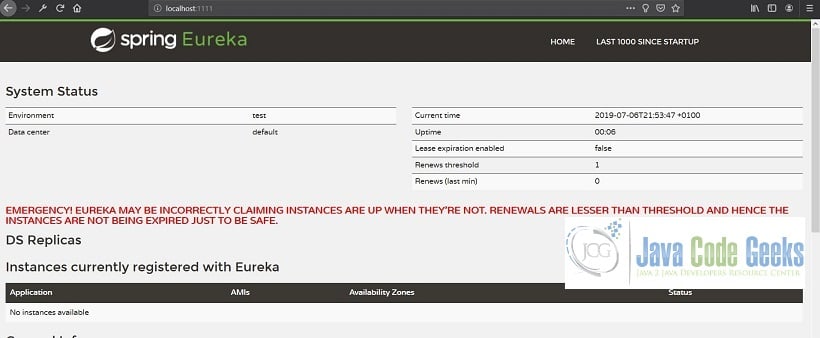
We’ll be running the Eureka Server on port 1111. The default is 8761. Indicating registerWithEureka as false stops the server from registering itself. We would register ourself when we are running multiple discory servers. Open up a command prompt and let’s run the Eureka Server. But first we must compile our project, execute mvn clean package. After successful compilation, run java -jar target/spring-boot-microservices-0.0.1-SNAPSHOT.jar eureka and you should see some standard Spring logging output in the console. Open your web browser, access http://localhost:1111/ and you should see something like below:
5. Addition Server
This server provides the addition service. It simply adds two numbers.
AdditionServer.java
|
01
02
03
04
05
06
07
08
09
10
11
12
13
14
15
16
17
18
19
20
21
22
|
package com.javacodegeeks.example.rest.addition;import java.util.logging.Logger;import org.springframework.boot.SpringApplication;import org.springframework.boot.autoconfigure.EnableAutoConfiguration;import org.springframework.cloud.client.discovery.EnableDiscoveryClient;import org.springframework.context.annotation.ComponentScan;@EnableAutoConfiguration@EnableDiscoveryClient@ComponentScanpublic class AdditionServer { protected Logger logger = Logger.getLogger(AdditionServer.class.getName()); public static void main(String[] args) { System.setProperty("spring.config.name", "addition-server"); SpringApplication.run(AdditionServer.class, args); }} |
@EnableAutoConfiguration defines this as a Spring Boot application. The @EnableDiscoveryClient enables service registration and discovery. The server registers itself with the discovery server provided in the configuration file. The registration with the discovery server makes this a microservice.
addition-server.properties
|
01
02
03
04
05
06
07
08
09
10
11
12
13
14
|
# Spring propertiesspring.application.name=addition-servicespring.freemarker.enabled=falsespring.thymeleaf.cache=falsespring.thymeleaf.prefix=classpath:/addition-server/templates/error.path: /error# HTTP Serverserver.port: 2222eureka.client.serviceUrl.defaultZone=http://localhost:1111/eureka/eureka.client.instance.leaseRenewalIntervalInSeconds=5management.endpoints.web.exposure.include='*' |
As the cofiguration states, this microservice is named as addition-service. It will listen on port 2222. It will use the discovery server at http://localhost:1111/eureka/. leaseRenewalIntervalInSeconds for now is set to five but this is not recommended in production. By default the client refresh time is thirty seconds. By now you should have packaged the application. In case you have not, execute mvn clean package. After successful compilation, run java -jar target/spring-boot-microservices-0.0.1-SNAPSHOT.jar addition and you should see some standard Spring logging output in the console. To check if your microservices is up and running open your web browser, access http://localhost:2222/ and you should see a message saying “Addition Server Microservice is running”. Alternatively, you can access http://localhost:1111/eureka/apps/addition-service/ and you’ll receive an XML of the details of the addition service. Or you could check the Eureka Server page and the addition-service should be listed under instances currently registered with Eureka.
Below are additional source files required to run the Addition Server.
HomeController.java
|
01
02
03
04
05
06
07
08
09
10
11
12
13
14
|
package com.javacodegeeks.example.rest.addition;import org.springframework.stereotype.Controller;import org.springframework.web.bind.annotation.RequestMapping;@Controllerpublic class HomeController { @RequestMapping("/") public String home() { return "index"; }} |
The above controller simply directs requests to the root resource to index.html. All thymeleaf templates are found in src/main/resources. This particular template is located in src/main/resources/addition-server/templates.
AdditionController.java
|
01
02
03
04
05
06
07
08
09
10
11
12
13
14
15
16
17
18
19
20
21
22
23
24
25
|
package com.javacodegeeks.example.rest.addition;import java.util.logging.Logger;import org.springframework.web.bind.annotation.RequestMapping;import org.springframework.web.bind.annotation.RequestParam;import org.springframework.web.bind.annotation.RestController;@RestControllerpublic class AdditionController { protected Logger logger = Logger.getLogger(AdditionController.class .getName()); @RequestMapping("/add") public String doAdd(@RequestParam(defaultValue="0") String addend1, @RequestParam(defaultValue="0") String addend2) { int augend1 = Integer.valueOf(addend1); int augend2 = Integer.valueOf(addend2); int sum = augend1 + augend2; return "{\"addend1\":\"" + addend1 + "\", \"addend2\":\"" + addend2 + "\", \"sum\": \"" + sum + "\"}"; }} |
The doAdd method handles requests made on /add. It retrieves the parameters and adds them. It then returns a JSON string.
6. Subtraction Server
This server provides the subtraction service. It simply deducts a number from another number.
SubtractionServer.java
|
01
02
03
04
05
06
07
08
09
10
11
12
13
14
15
16
17
18
19
20
21
|
package com.javacodegeeks.example.rest.subtraction;import java.util.logging.Logger;import org.springframework.boot.SpringApplication;import org.springframework.boot.autoconfigure.EnableAutoConfiguration;import org.springframework.cloud.client.discovery.EnableDiscoveryClient;import org.springframework.context.annotation.ComponentScan;@EnableAutoConfiguration@EnableDiscoveryClient@ComponentScanpublic class SubtractionServer { protected Logger logger = Logger.getLogger(SubtractionServer.class.getName()); public static void main(String[] args) { System.setProperty("spring.config.name", "subtraction-server"); SpringApplication.run(SubtractionServer.class, args); }} |
The SubtractionServer.java is similar to the AdditionServer.java code. The only difference is the configuration.
subtraction-server.properties
|
01
02
03
04
05
06
07
08
09
10
11
12
13
14
|
# Spring propertiesspring.application.name=subtraction-servicespring.freemarker.enabled=falsespring.thymeleaf.cache=falsespring.thymeleaf.prefix=classpath:/subtraction-server/templates/error.path: /error# HTTP Serverserver.port: 3333eureka.client.serviceUrl.defaultZone=http://localhost:1111/eureka/eureka.client.instance.leaseRenewalIntervalInSeconds=5management.endpoints.web.exposure.include='*' |
As the cofiguration states, this microservice is named as subtraction-service. It will listen on port 3333. It will use the discovery server at http://localhost:1111/eureka/. Run java -jar target/spring-boot-microservices-0.0.1-SNAPSHOT.jar subtraction and you should see some standard Spring logging output in the console. To check if your microservices is up and running open your web browser, access http://localhost:3333/ and you should see a message saying “Subtraction Server Microservice is running”. Or you could check the Eureka Server page and the subtraction-service should be listed under instances currently registered with Eureka. You can also access http://localhost:1111/eureka/apps/subtraction-service/ to get XML details of the service just like the addition server.
Below are additional source files required to run the Subtraction Server.
HomeController.java
|
01
02
03
04
05
06
07
08
09
10
11
12
13
14
|
package com.javacodegeeks.example.rest.subtraction;import org.springframework.stereotype.Controller;import org.springframework.web.bind.annotation.RequestMapping;@Controllerpublic class HomeController { @RequestMapping("/") public String home() { return "index"; }} |
The above controller simply directs requests to the root resource to index.html. All thymeleaf templates are found in src/main/resources. This particular template is located in src/main/resources/subtraction-server/templates.
SubtractionController.java
|
01
02
03
04
05
06
07
08
09
10
11
12
13
14
15
16
17
18
19
20
21
22
23
24
|
package com.javacodegeeks.example.rest.subtraction;import java.util.logging.Logger;import org.springframework.web.bind.annotation.RequestMapping;import org.springframework.web.bind.annotation.RequestParam;import org.springframework.web.bind.annotation.RestController;@RestControllerpublic class SubtractionController { protected Logger logger = Logger.getLogger(SubtractionController.class .getName()); @RequestMapping("/subtract") public String doSubtract(@RequestParam(defaultValue="0") String minuend, @RequestParam(defaultValue="0") String subtrahend) { int m = Integer.valueOf(minuend); int s = Integer.valueOf(subtrahend); int difference = m - s; return "{\"minuend\":\"" + minuend + "\", \"subtrahend\":\"" + subtrahend + "\", \"difference\": \"" + difference + "\"}"; }} |
The doSubtract method handles requests made on /subtract. It retrieves the parameters and subtracts them. It then returns a JSON string.
7. Web Server
This server serves web pages to the browser. This server uses the microservices. Since this article is about microservices, we will not go into detail on how to serve web content with Spring MVC.
WebServer.java
|
01
02
03
04
05
06
07
08
09
10
11
12
13
14
15
16
17
18
19
20
21
22
23
24
25
26
27
28
29
30
31
32
33
34
35
36
37
38
39
40
41
42
43
44
45
46
47
48
49
50
|
package com.javacodegeeks.example.web;import org.springframework.boot.SpringApplication;import org.springframework.boot.autoconfigure.SpringBootApplication;import org.springframework.cloud.client.discovery.EnableDiscoveryClient;import org.springframework.cloud.client.loadbalancer.LoadBalanced;import org.springframework.context.annotation.Bean;import org.springframework.context.annotation.ComponentScan;import org.springframework.web.client.RestTemplate;@SpringBootApplication@EnableDiscoveryClient@ComponentScan(useDefaultFilters = false)public class WebServer { public static void main(String[] args) { System.setProperty("spring.config.name", "web-server"); SpringApplication.run(WebServer.class, args); } @LoadBalanced @Bean RestTemplate restTemplate() { return new RestTemplate(); } @Bean public WebAdditionService additionService() { return new WebAdditionService(ADDITION_SERVICE_URL); } @Bean public WebArithmeticController additionController() { return new WebArithmeticController(additionService(), subtractionService()); } @Bean public WebSubtractionService subtractionService() { return new WebSubtractionService(SUBTRACTION_SERVICE_URL); } @Bean public HomeController homeController() { return new HomeController(); }} |
@SpringBootApplication is a convenience annotation that is equivalent to declaraing @Configuration, @EnableAutoConfiguration, and @ComponentScan. The @EnableDiscoveryClient enables service registration and discovery. The @ComponentScan(useDefaultFilters = false) indicates whether automatic detection of classes annotated with @Component, @Repository, @Service, or @Controller should be enabled.
@LoadBalanced marks RestTemplate< to be configured to use a LoadBalancerClient. This means the RestTemplate bean will be auto-configured by Spring Cloud to use a custom HttpRequestClient that uses Netflix Ribbon to do the microservices lookup. Ribbon is also a load-balancer. If you have multiple instances of a service available, Ribbon picks one for you.
web-server.properties
|
01
02
03
04
05
06
07
08
09
10
11
12
13
14
|
spring.application.name=web-servicespring.freemarker.enabled=falsespring.thymeleaf.cache=falsespring.thymeleaf.prefix=classpath:/web-server/templates/error.path=/errorserver.port:4444eureka.client.serviceUrl.defaultZone:http://localhost:1111/eurekaeureka.instance.leaseRenewalIntervalInSeconds:5 management.endpoints.web.exposure.include='*' |
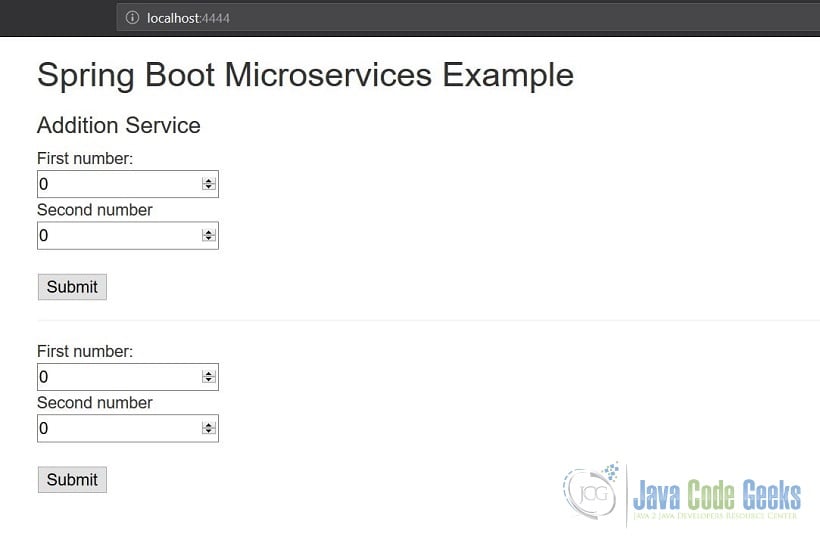
As the cofiguration states, the application name is web-service. It will listen on port 4444. It will use the discovery server at http://localhost:1111/eureka/. Open up a command prompt and run java -jar target/spring-boot-microservices-0.0.1-SNAPSHOT.jar web. After some standard Spring logging, you should be able to access the web server at http://localhost:4444/. By this time, we have four open command prompts running four servers simultaneously. The web server page looks like the one below.
And your Eureka server will have all three services registered as you can see below.

Below are additional source files required to run the Web Server.
HomeController.java
|
01
02
03
04
05
06
07
08
09
10
11
12
13
14
|
package com.javacodegeeks.example.web;import org.springframework.stereotype.Controller;import org.springframework.web.bind.annotation.RequestMapping;@Controllerpublic class HomeController { @RequestMapping("/") public String home() { return "index"; }} |
The above controller simply directs requests to the root resource to index.html. All thymeleaf templates are found in src/main/resources. This particular template is located in src/main/resources/web-server/templates.

WebArithmeticController.java
|
01
02
03
04
05
06
07
08
09
10
11
12
13
14
15
16
17
18
19
20
21
22
23
24
25
26
27
28
29
30
31
32
33
34
35
36
37
38
39
40
41
42
43
44
45
46
47
48
49
50
51
52
|
package com.javacodegeeks.example.web;import java.util.logging.Logger;import org.springframework.beans.factory.annotation.Autowired;import org.springframework.stereotype.Controller;import org.springframework.ui.Model;import org.springframework.web.bind.annotation.RequestMapping;import org.springframework.web.bind.annotation.RequestParam;@Controllerpublic class WebArithmeticController { @Autowired protected WebAdditionService additionService; @Autowired protected WebSubtractionService subtractionService; protected Logger logger = Logger.getLogger(WebArithmeticController.class .getName()); public WebArithmeticController(WebAdditionService additionService, WebSubtractionService subtractionService) { this.additionService = additionService; this.subtractionService = subtractionService; } @RequestMapping("/add") public String doAdd(@RequestParam(defaultValue="0") String addend1, @RequestParam(defaultValue="0") String addend2, Model model) { String sum = additionService.add(addend1, addend2); logger.info("Sum: " + sum); model.addAttribute("json", sum); return "sum"; } @RequestMapping("/subtract") public String doSubtract(@RequestParam(defaultValue="0") String minuend, @RequestParam(defaultValue="0") String subtrahend, Model model) { String difference = subtractionService.subtract(minuend, subtrahend); logger.info("Difference: " + difference); model.addAttribute("json", difference); return "difference"; }} |
The doAdd method handles requests made on /add. It retrieves the parameters and passes it to the additionService object which was automatically injected by Spring. It then returns the sum.html template. The doSubtract method handles requests made on /subtract. It retrieves the parameters and passes it to the subtractionService object which was automatically injected by Spring. It then returns the difference.html template. The service classes are discussed in the next section.
8. What are Microservices?
Microservices are based on the single responsibility principle. The principle is related to grouping things that are impacted by the change. Single responsibility is related to SOLID principles. Robert C.Martin created this principle which states a single unit will have only one responsibility. Microservices architecture helps in creating applications that can be created and managed as different components or services. The components or services are loosely coupled and deployed separately. Every service performs a different type of work and interacts with others using API. Microservices help in creating resilience in the architecture. These services have routing like traditional Unix pipes thorough endpoints for information flow. Spring Boot has features to create and deploy microservices on the cloud and on the enterprise premises.
For example, an eCommerce application can have web and mobile user interfaces talking to different microservices such as user login, user authorization, product catalog, order management, shopping cart, payment, and delivery. Docker is used as a container for each of the services. Docker-compose helps in the orchestration of the services which are containerized.
Microservices are built using Spring Boot, Spark, Jersey, Restlet, Restx, Swagger, and Dropwizard frameworks. Microservices are based on design principles such as Domain Driven Design, Failure Isolation, Continuous delivery, Decentralization, and DevOps. Each microservice can be independently deployed, updated, replaced, and scaled. (DURS)
References related to Micro services:
9. Accessing the Microservices
WebAdditionService.java
|
01
02
03
04
05
06
07
08
09
10
11
12
13
14
15
16
17
18
19
20
21
22
23
24
25
26
27
28
29
30
|
package com.javacodegeeks.example.web;import java.util.logging.Logger;import org.springframework.beans.factory.annotation.Autowired;import org.springframework.cloud.client.loadbalancer.LoadBalanced;import org.springframework.stereotype.Service;import org.springframework.web.client.RestTemplate;@Servicepublic class WebAdditionService { @Autowired @LoadBalanced protected RestTemplate restTemplate; protected String serviceUrl; protected Logger logger = Logger.getLogger(WebAdditionService.class .getName()); public WebAdditionService(String serviceUrl) { this.serviceUrl = serviceUrl.startsWith("http") ? serviceUrl } public String add(String addend1, String addend2) { return restTemplate.getForObject(serviceUrl + "/add?addend1={addend1}&addend2={addend2}", String.class, addend1, addend2); }} |
WebSubtractionService.java
|
01
02
03
04
05
06
07
08
09
10
11
12
13
14
15
16
17
18
19
20
21
22
23
24
25
26
27
28
29
|
package com.javacodegeeks.example.web;import java.util.logging.Logger;import org.springframework.beans.factory.annotation.Autowired;import org.springframework.cloud.client.loadbalancer.LoadBalanced;import org.springframework.stereotype.Service;import org.springframework.web.client.RestTemplate;@Servicepublic class WebSubtractionService { @Autowired @LoadBalanced protected RestTemplate restTemplate; protected String serviceUrl; protected Logger logger = Logger.getLogger(WebSubtractionService.class .getName()); public WebSubtractionService(String serviceUrl) { this.serviceUrl = serviceUrl.startsWith("http") ? serviceUrl } public String subtract(String minuend, String subtrahend) { return restTemplate.getForObject(serviceUrl + "/subtract?minuend={minuend}&subtrahend={subtrahend}", String.class, minuend, subtrahend); }} |
The above classes are similar. Both are annotated with @Service. This indicates that the class is a service which is an operation offered as an interface that stands alone in the model, with no encapsulated state. This annotation serves as a specialization of @Component, allowing for implementation classes to be autodetected through classpath scanning. RestTemplate is load balanced as explained above. The serviceUrl is provided by the main program. The restTemplate returns a JSON string which is displayed by the web server.
10. Running the Spring Boot Microservices Example
Execute mvn clean package to create the fat jar. For conveniece, we have a fat jar whose start class is com.javacodegeeks.example.Main. Just provide the arguments eureka, addition, substraction, or web to run the respective servers.
Main.java
|
01
02
03
04
05
06
07
08
09
10
11
12
13
14
15
16
17
18
19
20
21
22
23
24
25
26
27
28
29
30
31
32
33
34
35
36
|
package com.javacodegeeks.example;import com.javacodegeeks.example.registration.EurekaServer;import com.javacodegeeks.example.rest.addition.AdditionServer;import com.javacodegeeks.example.rest.subtraction.SubtractionServer;import com.javacodegeeks.example.web.WebServer;public class Main { public static void main(String[] args) { String serverName = ""; switch (args.length) { case 2: System.setProperty("server.port", args[1]); case 1: serverName = args[0].toLowerCase(); break; default: return; } if (serverName.equals("eureka")) { EurekaServer.main(args); } else if (serverName.equals("addition")) { AdditionServer.main(args); } else if (serverName.equals("subtraction")) { SubtractionServer.main(args); } else if (serverName.equals("web")) { WebServer.main(args); } else { System.out.println("Unknown server type: " + serverName); } }} |
It is easier to run the different applications by running them from the command line with different windows. It will be eaiser to see their log output.
- java -jar target/spring-boot-microservices-0.0.1-SNAPSHOT.jar eureka – executes the eureka server
- java -jar target/spring-boot-microservices-0.0.1-SNAPSHOT.jar addition – executes the addition server
- java -jar target/spring-boot-microservices-0.0.1-SNAPSHOT.jar subtraction – executes the subtraction server
- java -jar target/spring-boot-microservices-0.0.1-SNAPSHOT.jar web – executes the web server
11. Microservices benefits and drawbacks
Development is faster in the case of microservices as the units of code required for a service is lesser. Deployment can be done independently and scaling the application is easier in the Microservices case. Fault Isolation is better in the case of Microservices architecture. Fixes for the error can be deployed on a specific service without impacting other services. The choice of the technology stack is very easy as each service can be built using a different programming language for a specific requirement. Each service can be integrated into different types of data sources such as relational database, no SQL database, hierarchical database, and web services.
Microservices apps will have lesser merges and code conflicts. Each microservice will have its own repository. Communication across distributed services can be challenging if one of the services is down.Security can be another challenge across multiple services. Each technology stack requires a separate pipeline or workflow for deployment. The readability of the code is affected as the services are decoupled. Configuration of multiple microservices needs to be maintained which can be a challenge (for 100 microservices). DevOps and automation is the only way to deploy and manage these microservices. Centralized logging need to be there to isolate the issue specific to a microservice.
12. When to choose microservices instead of monolithic architecture
A complex application can be broken down into small services and components. Developing this complex app can be a good candidate for a microservice architecture style instead of a monolithic architecture style. The benefit of building using microservices style is in cost and scaling the application. The startup time of a monolithic application is higher compared to microservices-based applications.
Microservices are easy for development, deployment, and testing. Many of monolithic applications are complex for maintenance and upgrades. Microservices help in refactoring complex monolithic architecture based applications for better flexibility, security, and time to market. Microservices architecture embraces new technologies and integrates with legacy easily using web services and messaging approaches. The engineering team can easily get trained on different microservices as microservices are loosely coupled. Unit testing each service helps in a better quality of the overall application. Functional tests for each service will be helpful for overall integration testing of the microservices application. Failures can be handled easily by identifying the service which is causing the failure. Isolation of the problem and resolution is easy in the case of microservices application.
Large applications which are complex for implementation, deployment and upgrades are great candidates of refactoring using microservices architecture. Continuous integration and deployment is feasible using microservices. Reliability is higher as there is no single point of failure. Technology adaption is easier when implementing new microservice.
To start on a complex app, monolithic architecture style helps in creating a small application which has components and deployed as a single app. As new requirements come in and complexity grows, you see the need for microservices. Evolution of application functionality is better in the case of microservices.
13. Summary
In summary, the discovery server is started up first. Then the microservices and the web server register to the discovery server in order for them to find each other. Once the web server knows where to find the microservices, it can then issue RESTful requests to the microservices. The web server performs its task aided by the microservices. The process is made simple and easy with the help of Spring. Microservices architecture based applications can be developed by using Spring Boot. Multi Runtime microservices with a monolith application can be a good middle ground for Microservices architecture style.
14. Download the Source Code
This is an example of Spring Boot Microservices.
You can download the source code of this example here: Spring Boot Microservices Java Example.
Last updated on May 1st, 2020

Very helpful tutorial.
Thank you!
how to debug this code in eclipse?
add break point and run as debug.
really good working example .. thanks a lot
i cant run the application.How to run the application pls let me know.Im using STS spring tool suite for running springboot app.
Its showing the error is — Unknown server type: –spring.output.ansi.enabled=always
Please see ‘Running the Spring Boot Microservices Example’ section. Run the application using the command line.
Impressive example for micro-services…..Thanks!!!!
Thanks!
very good posting. well done.
Thanks!
Very good example!
The bad thing is that if they are microservices, you finally pack them in a single jar, contradicting the nature of the microservices because it becomes a monolith.
I guess you referenced this
https://spring.io/blog/2015/07/14/microservices-with-spring#configuration-options
https://github.com/paulc4/microservices-demo/tree/v2.0.0
Thank you Stanley. Yes, Spring documention was the reference.
I don’t think just because it’s a fat jar, it can’t do microservices. What if that fat jar is only doing one service (i.e. one task) that supports a complex system?
Also, you can break this example down into different jars (e.g. addition server, subtraction server, etc.). The packed jar was for convenience in building and running the example.
The compoments are deployed separately and doing a specific task (section 10) which by definition is what microservices is all about (section 8).
Another plus is that this way you can reuse code between the services.
Agree
How to implement security in between modules?
I loved this example, solved many of my problems and answered many of my questions.
Hello, this is a great tutorial, but I am getting 404 null on the addition service. I haven’t figured out the issue yet. Anyone else have this issue?
I get the same error. I suppose the problem is in the URL resolution : the “web server” attempts to place the GET to “http://localhost:4444/add?addend1=12&addend2=2”;
if you try to call “http://localhost:2222/add?addend1=12&addend2=2” then you get the right result from the addition service:
{“addend1″:”10”, “addend2″:”2”, “sum”: “12”}
I wrote this a long time ago and it seems the content has change. For example, section 2 talks about Eclipse Oxygen. I have always used Eclipse Mars. I doubt if content here is the same as before. Majority of the content looks the same though. Anyway, were all the service instances registered in the Eureka server? Perhaps that’s why you got a 404.
When I click on submit button for Addition or Subtraction service I get the following error below. Any ideas how to fix it?
ERROR:
nested exception is org.springframework.web.client.ResourceAccessException: I/O error on GET request for “http://addition-service/add”: Connection timed out: connect; nested exception is java.net.ConnectException: Connection timed out: connect] with root cause
I get the same error. It seems that the get request doesn’t reach the target
I wrote this a long time ago and it seems the content has change. For example, section 2 talks about Eclipse Oxygen. I have always used Eclipse Mars. I doubt if content here is the same as before. Majority of the content looks the same though. Anyway, were all the service instances registered in the Eureka server? Perhaps that’s why you got a 404.
Could you please fix it and provide us the solution how we can run using http://localhost:4444/add?addend1=12&addend2=2
I wrote this a long time ago and it seems the content has change. For example, section 2 talks about Eclipse Oxygen. I have always used Eclipse Mars. I doubt if content here is the same as before. Majority of the content looks the same though. Anyway, were all the service instances registered in the Eureka server? Perhaps that’s why you got a 404.