Welcome, this tutorial is about Spring Boot Health Check API. We will understand actuators in sping boot to monitor a spring boot application.
1. Introduction
Before going further in this tutorial we will take a look at the actuator in spring boot.
1.1 Actuator
- The actuator is a sub-project of the spring framework that provides certain HTTP and JMX endpoints to monitor and manage the spring boot application
- It offers three main features i.e.
- Endpoints – Allows to monitor the spring boot application and interact with it. It allows to enable and disable each endpoint individually. The endpoints are prefixed with a uniform resource identifier known as –
/actuator - Metrics – Provides dimensional metrics by interacting with the micrometer that provides interfaces for timers, gauges, counters, etc with a dimensional data model
- Audit – Provides a flexible audit framework that publishes events to an
AuditEventRepository. Also publishes the authentication events if spring-security is in execution
- Endpoints – Allows to monitor the spring boot application and interact with it. It allows to enable and disable each endpoint individually. The endpoints are prefixed with a uniform resource identifier known as –
1.1.1 Actuator Endpoints
Some of the important and widely used actuator endpoints are given below:
| Id | Description | Default Enabled? |
|---|---|---|
/actuator | Provides a discovery page for the other endpoints. Requires Spring HATEOAS to be in the classpath | true |
/beans | Display a complete list of all the Spring beans in the application | false |
/configprops | Display a combined list of all @ConfigurationProperties | false |
/env | Displays a list of properties used in the current environment | false |
/health | Displays the application health information | true |
/info | Displays the application information | true |
/loggers | Displays the configuration of loggers in the application | false |
/metrics | Displays the metrics information such as JVM, CPU usage, etc. | false |
/mappings | Display a combined list of all @RequestMapping paths | false |
1.1.2 Actuator Properties
In a spring boot application, the actuator URL’s (other than default) are protected by the spring security. It uses form-based authentication that provides a random user id and a randomly generated password. These security credentials can be overridden by customizing the basic authentication security to the endpoints. For this tutorial, we will expose all endpoints through the below property.
1 | management.endpoints.web.exposure.include=* |
Let us go ahead with the tutorial implementation but before going any further I’m assuming that you’re aware of the Spring boot basics.
2. Spring Boot Health Check API
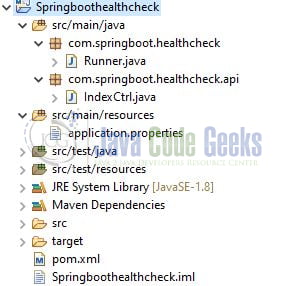
2.1 Tools Used for Spring boot application and Project Structure
We are using Eclipse Kepler SR2, JDK 8, and Maven. In case you’re confused about where you should create the corresponding files or folder, let us review the project structure of the spring boot application.
Let us start building the application!
3. Creating a Spring Boot application
Below are the steps involved in developing the application.
3.1 Maven Dependency
Here, we specify the dependency for the Spring Boot (Web) and Actuator. Maven will automatically resolve the other dependencies. The updated file will have the following code.
pom.xml
01 02 03 04 05 06 07 08 09 10 11 12 13 14 15 16 17 18 19 20 21 22 23 24 25 26 27 28 29 30 31 32 33 34 35 36 37 38 39 40 41 | xsi:schemaLocation="http://maven.apache.org/POM/4.0.0 https://maven.apache.org/xsd/maven-4.0.0.xsd"> <modelVersion>4.0.0</modelVersion> <groupId>com.springboot.healthcheck</groupId> <artifactId>Springboothealthcheck</artifactId> <version>0.0.1-SNAPSHOT</version> <parent> <groupId>org.springframework.boot</groupId> <artifactId>spring-boot-starter-parent</artifactId> <version>2.3.1.RELEASE</version> </parent> <properties> <java.version>1.8</java.version> </properties> <dependencies> <dependency> <groupId>org.springframework.boot</groupId> <artifactId>spring-boot-starter-web</artifactId> </dependency> <dependency> <groupId>org.springframework.boot</groupId> <artifactId>spring-boot-starter-actuator</artifactId> </dependency> </dependencies> <build> <!-- to make the application as fat jar so that spring boot libraries are included --> <plugins> <plugin> <groupId>org.springframework.boot</groupId> <artifactId>spring-boot-maven-plugin</artifactId> </plugin> </plugins> </build></project> |
3.2 Application Properties
Create a new properties file at the location: Springboothealthcheck/src/main/resources/ and add the following code to it. Here the application port-number is – 10095 while the management configuration port-number is – 9091. The management port will be used by the spring boot application to expose the actuator endpoints.
application. properties
01 02 03 04 05 06 07 08 09 10 | # Application configuration.## You can change the server port configuration.server.port=10095# Management configuration## You can change the management port configuration.## Note - Will be used by the actuator endpoint.management.server.port=9091## Property to expose all end points (both sensitive and non-sensitive)## By default only "health" and "info" endpoints are enabled.management.endpoints.web.exposure.include=* |
3.3 Java Classes
Let us write all the java class(es) involved in this application.
3.3.1 Implementation/Main class
Add the following code to the main class to bootstrap the application from the main method. Always remember, the entry point of the spring boot application is the class containing @SpringBootApplication annotation and the static main method.
Runner.java
01 02 03 04 05 06 07 08 09 10 11 12 13 14 15 16 17 | package com.springboot.healthcheck;import org.slf4j.Logger;import org.slf4j.LoggerFactory;import org.springframework.boot.SpringApplication;import org.springframework.boot.autoconfigure.SpringBootApplication;@SpringBootApplicationpublic class Runner { private static final Logger LOGGER = LoggerFactory.getLogger(Runner.class); public static void main(String[] args) { SpringApplication.run(Runner.class, args); LOGGER.info("Springboot actuator application is started successfully."); }} |
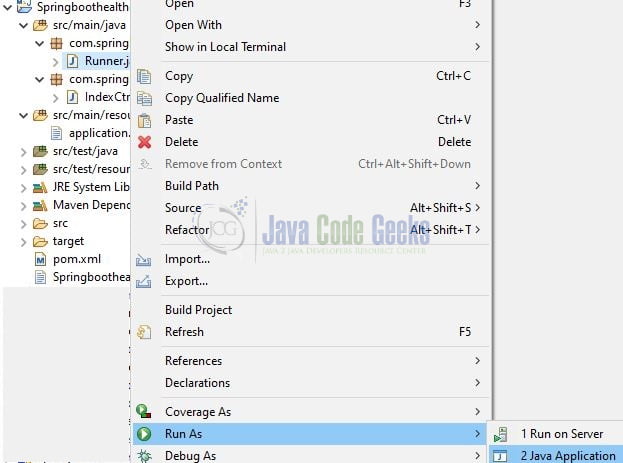
4. Run the Application
To execute the application, right-click on the Runner.java class, Run As -> Java Application.
5. Project Demo
Open the Postman tool and hit the following URL to list the actuator endpoints exposed over HTTP.
1 2 | // HTTP GETcall |
On a successful call following response will be displayed by the endpoint.
JSON Response
01 02 03 04 05 06 07 08 09 10 11 12 13 14 15 16 17 18 19 20 21 22 23 24 25 26 27 28 29 30 31 32 33 34 35 36 37 38 39 40 41 42 43 44 45 46 47 48 49 50 51 52 53 54 55 56 57 58 59 60 61 62 63 64 65 66 67 68 69 70 71 72 73 74 75 76 77 78 79 80 | { "_links": { "self": { "templated": false }, "beans": { "templated": false }, "caches-cache": { "templated": true }, "caches": { "templated": false }, "health": { "templated": false }, "health-path": { "templated": true }, "info": { "templated": false }, "conditions": { "templated": false }, "configprops": { "templated": false }, "env": { "templated": false }, "env-toMatch": { "templated": true }, "loggers": { "templated": false }, "loggers-name": { "templated": true }, "heapdump": { "templated": false }, "threaddump": { "templated": false }, "metrics-requiredMetricName": { "templated": true }, "metrics": { "templated": false }, "scheduledtasks": { "templated": false }, "mappings": { "templated": false } }} |
You can play around with the different actuator endpoints to monitor and manage the spring boot application. For example, you can invoke the health endpoint by calling http://localhost:9091/actuator/health. The output will denote the status “UP” meaning that the application is healthy and running without any error.

1 2 3 | {status: "UP"} |
That is all for this tutorial and I hope the article served you whatever you were looking for. Happy Learning and do not forget to share!
6. Summary
In this section, you learned,
- Spring actuator
- Steps to enable actuator in a spring boot application
You can download the sample application as an Eclipse project in the Downloads section.
7. Download the Eclipse Project
This was an example of actuators in the spring boot application.
You can download the full source code of this example here: Spring Boot Health Check API
