Spring Boot provides a plethora of annotations to simplify application development and configuration. One notable annotation among them is the @ConditionalOnProperty annotation, which serves as a tool for creating beans conditionally, depending on specified properties. In this article, we will delve into the details of @ConditionalOnProperty, understand its usage, and explore various examples to demonstrate its flexibility and usefulness.
1. Understanding @ConditionalOnProperty
The @ConditionalOnProperty annotation allows beans to be conditionally created based on the existence or value of specified properties in the environment. It takes parameters such as name, havingValue, matchIfMissing, and prefix, among others, to define the conditions under which the annotated bean should be created.
name: Specifies the name of the property to be checked.havingValue: Specifies the value that the property should have for the condition to be met.matchIfMissing: Specifies whether the bean should be created if the property is missing.prefix: Specifies a common prefix for property keys.
@ConditionalOnProperty annotation is particularly handy when configuring beans depending on different deployment environments or runtime conditions.
1.1 Basic Syntax
The basic syntax of @ConditionalOnProperty is as follows:
@ConditionalOnProperty(name = "property.name", havingValue = "propertyValue")
2. Examples of @ConditionalOnProperty
2.1 Example 1: Enabling a Bean Based on a Property Value
Conditional bean creation is a feature in Spring Boot that allows us to configure beans to be created only under certain conditions. Let’s say we have a Spring Boot application where we want to create a bean only if a specific property is set to true. We can achieve this using @ConditionalOnProperty as follows:
2.1.1 Create a Configuration Properties File
Let’s start by creating a application.properties file in the src/main/resources directory of our project. This file will contain the configuration properties used by @ConditionalOnProperty.
# Configuration property to enable or disable the feature
myapp.feature.enabled=true
2.1.2 Create a Conditional Bean
Now, let’s create a simple bean that will be conditionally created based on the value of the property defined in application.properties.
@Configuration
public class MyConfiguration {

    @Bean
    @ConditionalOnProperty(name = "myapp.feature.enabled", havingValue = "true")
    public MyBean myBean() {
        return new MyBean();
    }
}
In this example, @Bean annotation is used at the method level within a @Configuration class to define a bean. The method myBean() is annotated with @Bean, indicating that it will create and configure a bean of type MyBean.
The @ConditionalOnProperty annotation is used to conditionally create a bean. In this case, the name attribute specifies the name of the property myapp.feature.enabled, and the havingValue attribute specifies the expected value of the property true. So, the MyBean bean will only be created if the property myapp.feature.enabled is present and set to true in the application’s configuration.
public class MyBean {

    public MyBean() {
        System.out.println("MyBean created!");
    }

    public void doSomething() {
        System.out.println("Doing something...");
    }

}
2.1.3 Testing the Application
Now, let’s test our application to see the conditional bean creation in action. Update the @SpringBootApplication main class:
@SpringBootApplication
public class ConditionalpropertyApplication {

    public static void main(String[] args) {

       ConfigurableApplicationContext context = SpringApplication.run(ConditionalpropertyApplication.class, args);

        // Retrieve the bean and perform an action if it exists
        MyBean myBean = context.getBean(MyBean.class);
        if (myBean != null) {
            myBean.doSomething();
        } else {
            System.out.println("MyBean not created!");
        }
    }

}
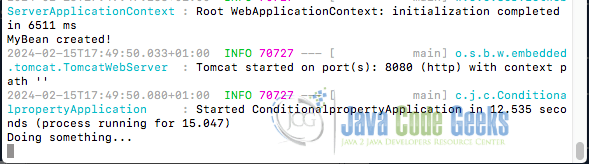
When we run the application, MyBean will be created because the property myapp.feature.enabled has been set to true and we will get the following output from a terminal:
2.1.4 Testing with Arguments
We can set the myapp.feature.enabled to false without any code change in our application’s configuration (application.properties) by passing the property value as an argument to the Spring Boot application like this:
./mvnw spring-boot:run -Dspring-boot.run.jvmArguments="-Dmyapp.feature.enabled=false"
The output will become:
2024-02-15T18:08:13.783+01:00  INFO 72366 --- [           main] o.s.b.w.embedded.tomcat.TomcatWebServer  : Tomcat started on port(s): 8080 (http) with context path ''
2024-02-15T18:08:13.832+01:00  INFO 72366 --- [           main] c.j.c.ConditionalpropertyApplication     : Started ConditionalpropertyApplication in 10.162 seconds (process running for 12.356)
Exception in thread "main" org.springframework.beans.factory.NoSuchBeanDefinitionException: No qualifying bean of type 'com.jcg.conditionalproperty.MyBean' available
The above output indicates that the conditions for the @ConditionalOnProperty are not met for the bean to be created. Therefore, Spring won’t create the bean, leading to this error.
2.2 Example 2: Default Value
Sometimes, we might want to create a bean if a property is missing or has a specific default value. We can accomplish this using the matchIfMissing attribute. The attribute matchIfMissing = true means the condition should match if the property is not set and defaults to false.
@Configuration
public class MyConfiguration {

    @Bean
    @ConditionalOnProperty(name = "myapp.feature.enabled", matchIfMissing = true)
    public MyBean myBean() {
        return new MyBean();
    }
}
Now, If we comment out or remove the myapp.feature.enabled property key in our application’s configuration file and rerun the application, MyBean will be created even if the property myapp.feature.enabled is missing and we will get the following output:
ServerApplicationContext : Root WebApplicationContext: initialization completed in 12905 ms
MyBean created!
2024-02-15T19:09:15.266+01:00  INFO 77785 --- [           main] o.s.b.w.embedded.tomcat.TomcatWebServer  : Tomcat started on port(s): 8080 (http) with context path ''
2024-02-15T19:09:15.340+01:00  INFO 77785 --- [           main] c.j.c.ConditionalpropertyApplication     : Started ConditionalpropertyApplication in 23.032 seconds (process running for 28.035)
Doing something...
2.3 Example 3: Using Prefix
We can also use the prefix attribute to specify a common prefix for property keys:
@Configuration
@ConditionalOnProperty(prefix = "myapp", name = "feature.enabled", havingValue = "true")
public class MyConfiguration {

    @Bean
    public MyBean myBean() {
        return new MyBean();
    }
}
In this example, prefix = "myapp" attribute specifies the prefix for the property keys that will be checked. In this case, properties with keys prefixed by myapp will be considered, so the annotation will look for properties like myapp.feature.enabled.
3. Conclusion
In this article, we explored how to use @ConditionalOnProperty in Spring Boot for conditional bean creation. By configuring beans based on the presence or value of specified properties, developers can control bean creation dynamically, allowing for more flexible and configurable applications.
4. Download the Source Code
You can download the full source code of this example here: spring boot conditionalonproperty example
