Welcome readers, in this tutorial, we will make an introduction to RabbitMQ and we will create a very simple HelloWorld program.
1. Introduction
Before going further in this tutorial, we will look at the RabbitMQ and the common terminology related to it.
1.1 What is RabbitMQ & When is often used?
- It is an AMQP messaging broker and is the famously easy to set up, open-source, and cross-platform message broker
- AMQP stands for Advanced Message Queuing protocol which offers features like Message Orientation, Queuing, Routing (through Point-to-Point or Publish-and-Subscribe), Reliability and Security
- It offers an easy way to exchange different platform applications (like Java and DotNet) and offers helps in communication between different Microservices
- It is a lightweight and easy to deploy application available on-premises and cloud to meet the high scalability and availability requirements
- In the present time, a single application supports multiple tasks (i.e. sending notifications, reports, etc.). So sometimes these tasks add an extra load on the application thereby increasing the maintenance cost (such as space, memory, etc) to serve more requests. Thus, RabbitMQ in such situations acts a blessing to remove some of the heavy tasks

1.2 RabbitMQ Important Concepts
- Queue: A medium through which the messages are transferred or stored until the message is delivered to the consumer or the message time-to-live has expired
- Broker: Offers a storage mechanism for the data produced from one application. Usually meant to be consumed by Consumer(s) of another application(s) that connects to this broker
- Exchange: It is an entry point to the broker as it receives messages from the publisher and routes them to an appropriate queue
- Channel: It is a lightweight connection to a broker via a singular and shared TCP connection
- Producer: Sends or pushes a message to the queue based on the given queue name
- Consumer: Receives or consume the message from the broker, and then process or use it in another process or the application
- VHost: Popularly known as the virtual host makes it possible for a single broker to host multiple isolated environments
1.3 RabbitMq Installation
Usually installing the RabbitMq is a tedious task where one must first install the Erlang and then proceed with the RabbitMq installation. But with the technology advancements, this process has become simple with the help of Docker. Readers can watch the video available at this link to understand the Docker installation on Windows OS. Open the terminal and fire the following commands to get the RabbitMQ up and running on the local machine.
// To download the RabbitMQ from Docker Hub
docker pull rabbitmq:3-management

// To start the RabbitMQ image on the Docker container
// Note: We will keep the container and application port as same for this tutorial
docker run -d -p 15672:15672 -p 5672:5672 --name myrabbitmq rabbitmq:3-management
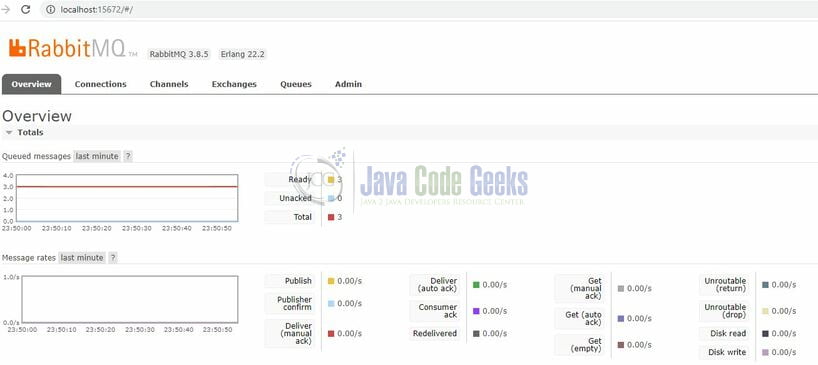
If everything goes well the RabbitMQ console would be up and running as shown in the below image. Users can log in via the default username/password (i.e. guest/guest).
1.4 RabbitMQ Exchanges
When a producer creates a message, it is first sent to the exchange, then after the routing agent reads it, it sends the message to the appropriate queue with the help of header attributes, bindings, and routing keys. Following table list the different type of exchanges that can be used to route the messages:
| # | Exchange Type | Description |
|---|---|---|
| 1 | Direct Exchange | Deliver the messages to the queues based on the message routing key. The message is routed to the queues whose binding key exactly matches with the message’s routing key |
| 2 | Fanout Exchange | Route messages to all the queues that are attached to the exchange |
| 3 | Topic Exchange | Perform a wildcard match between the routing key and the routing pattern specified in the binding to publish messages to the queue |
| 4 | Headers Exchange | Use the message header attributes for routing |
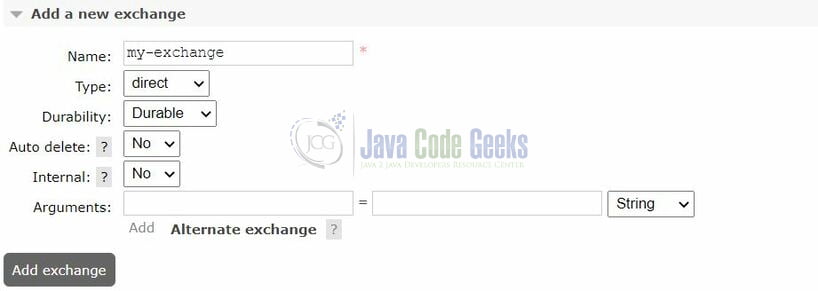
1.4.1 RabbitMQ Exchange Properties
Following table list the important properties required to set-up an exchange in the RabbitMQ –
| # | Property | Description |
|---|---|---|
| 1 | Name | Exchange name that we will set, and it must be unique |
| 2 | Type | Exchange type such topic or fanout, etc |
| 3 | Durability | Means should the message be present after the RabbitMQ is restarted. If Transient is selected, then the message will not be present after the RabbitMQ is restarted |
| 4 | Auto Delete | Helps to decide whether the exchange can be deleted if we unbind the assigned queue |
| 5 | Internal | If yes, then the exchange will not be used directly by publishers, but only when bound to other exchanges |
| 6 | Alternate Exchange | Used if there is an issue in publishing a message to the exchange |
1.4.2 Creating the First Exchange
Once the RabbitMQ console is up and running, head over to the Exchanges tab and click on the Add a new exchange link and add the details as detailed in Section 1.4.1.
After creating the exchange, we can see our new exchange will be available under the exchange tab as shown below.
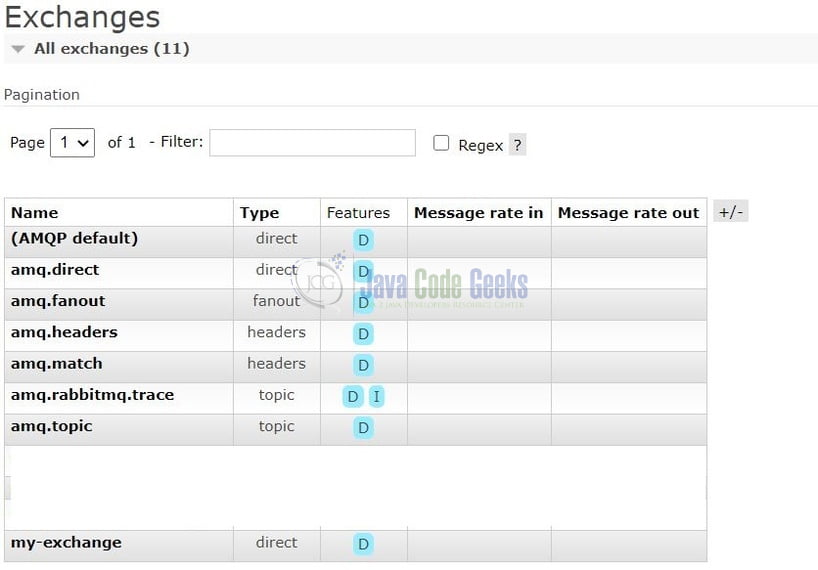
Similarly, we can create multiple exchanges of different types based on the requirement. Now lets us see a simple implementation of publishing a message to the queue and later consuming the message from the queue. But before doing any further I’m assuming that readers have the RabbitMQ set up running and have successfully created the first exchange.
2. RabbitMQ Tutorial for Beginners
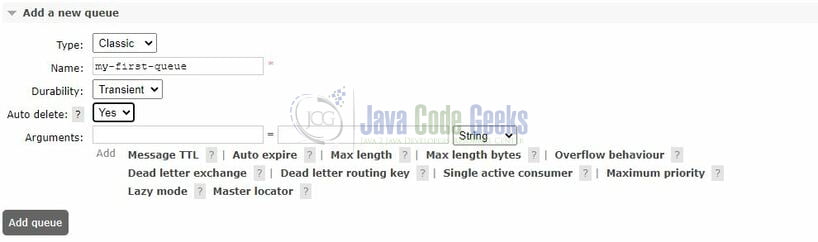
2.1 Creating a Queue
Login to the RabbitMQ head over to the Queues tab and click on the Add a new queue link and add the details.
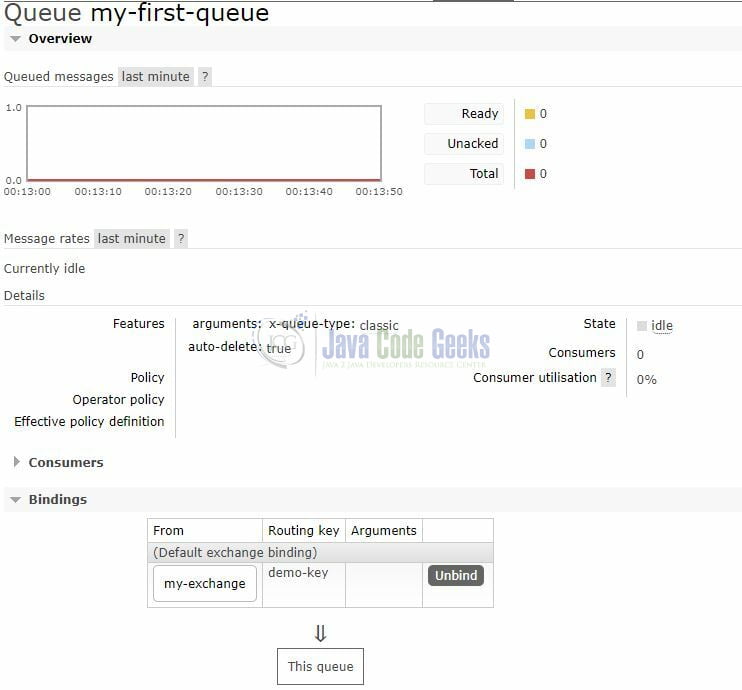
Once the queue is successfully created, click on the newly created queue and navigate to the Bindings link to bind this queue to an exchange created in Section 1.4.2 and routing key as demo-key and click on Bind button. Once successfully bound it will be shown as in the below image.
2.2 Publishing a Message to the Queue
While you’re on the my-first-queue page, navigate to the Publish message link and add the details as shown below (i.e. your message in the Payload area) and click the Publish message button.
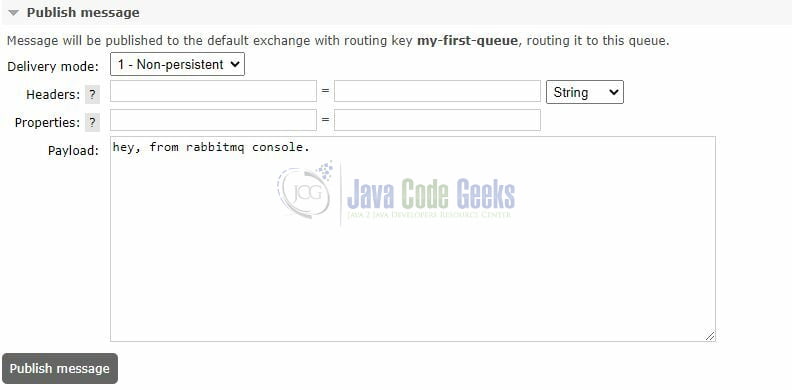
Once the message is successfully published to the queue, a successful message saying Message published. will be shown.
2.3 Consuming a Message to the Queue
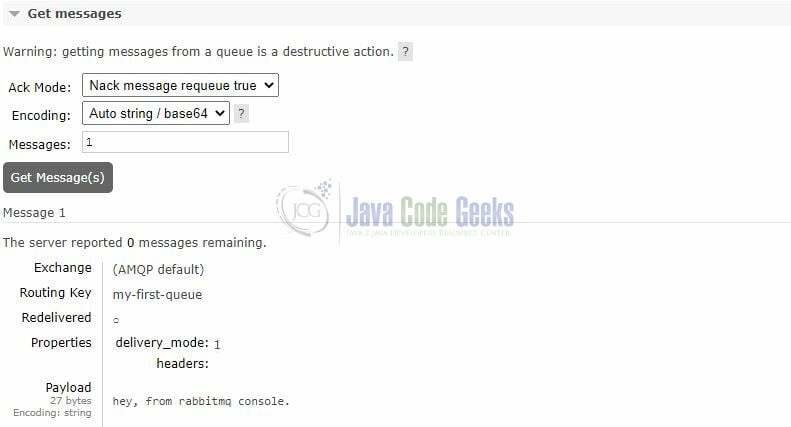
While you’re on the my-first-queue page, navigate to the Get messages link and click the Get messages button. The below image will be shown in the management console after successfully reading a message from the my-first-queue.
3. Creating a HelloWorld program
Let us go through the steps required to create a simple HelloWorld tutorial in RabbitMQ. So the below java files will describe a simple program for Sending a message to the queue and Retrieving a message from the queue.
3.1 Producer Example
Add the following code to the producer class.
Sender.java
01 02 03 04 05 06 07 08 09 10 11 12 13 14 15 16 17 18 19 20 21 22 23 24 25 26 27 28 | package com.rabbitmq.tutorial;import com.rabbitmq.client.Channel;import com.rabbitmq.client.Connection;import com.rabbitmq.client.ConnectionFactory;public class Sender { private final static String HOST_NAME = "localhost"; private final static String QUEUE_NAME = "demo-lab-queue"; public static void main(String[] args) throws Exception { final ConnectionFactory connectionFactory = new ConnectionFactory(); connectionFactory.setHost(HOST_NAME); try (final Connection connection = connectionFactory.newConnection(); final Channel channel = connection.createChannel()) { channel.queueDeclare(QUEUE_NAME, false, false, false, null); for (int i = 1; i < 11; i++) { final String message = "Hello world= " + i; System.out.println("Sending the following message to the queue: " + message); channel.basicPublish("", QUEUE_NAME, null, message.getBytes("UTF-8")); } } }} |
To execute the application, right-click on the Sender.java class, Run As -> Java Application.
Demo logs
01 02 03 04 05 06 07 08 09 10 | Sending the following message to the queue: Hello world= 1Sending the following message to the queue: Hello world= 2Sending the following message to the queue: Hello world= 3Sending the following message to the queue: Hello world= 4Sending the following message to the queue: Hello world= 5Sending the following message to the queue: Hello world= 6Sending the following message to the queue: Hello world= 7Sending the following message to the queue: Hello world= 8Sending the following message to the queue: Hello world= 9Sending the following message to the queue: Hello world= 10 |
3.2 Consumer Example
Add the following code to the consumer class.
Receiver.java
01 02 03 04 05 06 07 08 09 10 11 12 13 14 15 16 17 18 19 20 21 22 23 24 25 26 27 28 29 30 31 | package com.rabbitmq.tutorial;import com.rabbitmq.client.Channel;import com.rabbitmq.client.Connection;import com.rabbitmq.client.ConnectionFactory;import com.rabbitmq.client.DeliverCallback;public class Receiver { private final static String HOST_NAME = "localhost"; private final static String QUEUE_NAME = "demo-lab-queue"; public static void main(String[] args) throws Exception { final ConnectionFactory connectionFactory = new ConnectionFactory(); connectionFactory.setHost(HOST_NAME); final Connection connection = connectionFactory.newConnection(); final Channel channel = connection.createChannel(); channel.queueDeclare(QUEUE_NAME, false, false, false, null); System.out.println("Waiting for messages from the queue. To exit press CTRL+C"); final DeliverCallback deliverCallback = (consumerTag, delivery) -> { final String message = new String(delivery.getBody(), "UTF-8"); System.out.println("Received from message from the queue: " + message); }; channel.basicConsume(QUEUE_NAME, true, deliverCallback, consumerTag -> {}); }} |
To execute the application, right-click on the Receiver.java class, Run As -> Java Application.
Demo logs
01 02 03 04 05 06 07 08 09 10 11 | Waiting for messages from the queue. To exit press CTRL+CReceived a message from the queue: Hello world= 1Received a message from the queue: Hello world= 2Received a message from the queue: Hello world= 3Received a message from the queue: Hello world= 4Received a message from the queue: Hello world= 5Received a message from the queue: Hello world= 6Received a message from the queue: Hello world= 7Received a message from the queue: Hello world= 8Received a message from the queue: Hello world= 9Received a message from the queue: Hello world= 10 |
That is all for this tutorial and I hope the article served you whatever you were looking for. Happy Learning and do not forget to share!
4. Summary
In this tutorial, we learned:
- What RabbitMQ is and what its various properties are
- Steps to publish and consume a simple message to a queue in RabbitMQ
- Introduction to simple HelloWorld program in Java language
You can download the sample application as an Eclipse project in the Downloads section.
5. Download the Eclipse Project
This was an example of a Retry mechanism in a Spring boot application.
You can download the full source code of this example here: RabbitMQ Tutorial for Beginners
