Securing data in transit is a crucial aspect of web application security, and one effective way to achieve this is through the use of SSL/TLS certificates. Securing your Spring Boot applications is crucial to protect sensitive data and ensure the integrity of communication. This article serves as a guide, shedding light on the role of Spring Boot Security SSL bundles in fortifying applications against potential threats, and also demonstrates how to configure RestTemplate to communicate securely.
1. Understanding SSL/TLS Certificates
SSL (Secure Sockets Layer) and its successor TLS (Transport Layer Security) are cryptographic protocols that provide secure communication over a computer network. SSL/TLS certificates play a vital role in establishing a secure connection between a client and a server by encrypting the data transmitted between them. SSL/TLS ensures the confidentiality and integrity of data in transit.
1.1 Types of SSL Certificates
- Self-Signed Certificates: These certificates are generated by the server itself. While they provide encryption, they lack the trust factor as they are not signed by a trusted Certificate Authority (CA). They are suitable for testing or internal use.
- CA-Signed Certificates: Issued by a trusted Certificate Authority, these certificates are ideal for production environments. They establish trust between the client and the server, ensuring a secure connection.
1.2 What are SSL Bundles?
SSL Bundles introduced in Spring Boot 3.1 simplify SSL/TLS configuration by unifying keystores, certificates, and private keys into a single entity.
An SSL Bundle encapsulates all trust-related components and configuration parameters, including keystores, certificates, and private keys, into a single and easily controllable entity. After configuring an SSL Bundle, it can be employed for one or multiple network connections, irrespective of whether they are incoming or outgoing.
1.2.1 Why Use SSL Bundles for Security?
- Encryption: Encrypts data communication between your application and external services, preventing eavesdropping.
- Authentication: Verifies the identity of servers and clients, minimizing the risk of impersonation.
- Data Integrity: Ensures transmitted data remains unaltered, protecting against tampering.
- Simplified Configuration: SSL Bundles offer a cleaner and more manageable approach compared to scattered
server.ssl.*properties.
2. Securing RestTemplate with SSL Bundles
Here’s how to use SSL Bundles with RestTemplate for secure REST API calls:
2.1 Generate SSL Certificates
The first step involves generating SSL certificates. In this article, we’ll use a self-signed certificate. In a production environment, obtaining a CA-signed certificate is recommended. Open a terminal or command prompt and run the following command from the project root of the spring boot application:
# Generate a self-signed certificate
keytool -genkeypair -alias myapplication -keyalg RSA -keysize 4096 -storetype PKCS12 -keystore keystore.p12 -validity 3650
The above command uses Java keytool utility, which is a key and certificate management tool included with the Java Development Kit (JDK) to generate a key pair and store it in a keystore file in PKCS12 format. Note that you’ll be prompted to enter some additional information like your first and last name, organizational unit, city or locality, and your two-letter country code details.
Here’s a breakdown of the command and its parameters:
-alias myapplication: This sets the alias for the key pair to myapplication. An alias is a name that is used to reference the key pair within the keystore.-keysize 4096: This sets the key size to 4096 bits. Larger key sizes generally provide stronger security, but they may also be computationally more expensive.-storetype PKCS12: This specifies the type of keystore to be created. PKCS12 is a standard format for storing private keys with their corresponding public key certificates.-keystore keystore.p12: This sets the filename of the keystore to be created to keystore.p12.-validity 3650: This sets the validity period of the key pair in days. In this case, it’s set to 3650 days, which is equivalent to 10 years.
2.2 Configure Spring Boot for SSL
With Spring boot 3.1, we can set up SSL Bundle properties and apply various certificates to connect to one or more connections, like RestTemplate or an embedded server. In your Spring Boot application, configure the SSL properties in the application.properties or application.yml file:
application.yml
spring:
  ssl:
    bundle:
      jks:
        server:
          key:
            alias: "myapplication"
          keystore:
            location: "classpath:keystore.p12"
            password: "javacodegeeks"
            type: "PKCS12"
application.properties
server.port=8443
server.ssl.bundle=server
spring.ssl.bundle.jks.server.key.alias=myapplication
spring.ssl.bundle.jks.server.keystore.location=classpath:keystore.p12
spring.ssl.bundle.jks.server.keystore.password=javacodegeeks
spring.ssl.bundle.jks.server.keystore.type=PKCS12
The above configuration will configure a JKS-based certificate for the Spring boot embedded server.
Let’s break down the configuration in the provided application.properties file:
server.port=8443:- This configuration sets the port on which the embedded server (typically Tomcat) will listen for incoming HTTPS requests. In this case, it is set to 8443, which is a common default port for secure connections.
server.ssl.bundle=server:- This property is a configuration indicating the name of the SSL bundle. In this case, the name is set to
server.
- This property is a configuration indicating the name of the SSL bundle. In this case, the name is set to
spring.ssl.bundle.jks.server.key.alias=myapplication:- Specifies the alias of the key entry in the keystone. In this case, the alias is set to myapplication.
spring.ssl.bundle.jks.server.keystore.location=classpath:keystore.p12:- Specifies the location of the keystore file. In this example, the Keystore is a PKCS12 file located on the classpath and named
keystore.p12. Theclasspath:prefix indicates that the keystore is bundled with the application.
- Specifies the location of the keystore file. In this example, the Keystore is a PKCS12 file located on the classpath and named
spring.ssl.bundle.jks.server.keystore.password=javacodegeeks:- Sets the password for accessing the keystore. Ensure that this password matches the actual password used to protect the keystore file.
spring.ssl.bundle.jks.server.keystore.type=PKCS12:- Specifies the type of keystore. In this case, it’s set to PKCS12, indicating that the keystore follows the PKCS12 format. PKCS12 is a commonly used format for keystores, especially in Java applications.
To configure another PEM certificate for a RestClient, we will use the same keystore.p12 certificate and convert it to a PEM-based .crt and .key file and use it as another configuration for PEM.
openssl pkcs12 -in keystore.p12 -nokeys -out src/main/resources/client.crt
openssl pkcs12 -in keystore.p12 -nocerts -nodes -out src/main/resources/private.key
Update the application.properties file to use spring.ssl.bundle.pem to configure bundles for the generated PEM-encoded files like this:
spring.ssl.bundle.pem.client.keystore.certificate=classpath:client.crt
spring.ssl.bundle.pem.client.keystore.private-key=classpath:private.key
2.3 Create a Service
Create a service named ProductService to use the configured RestTemplate bean to call a free remote API on (https://jsonplaceholder.typicode.com/).
@Service
public class ProductService {

    private final RestTemplate restTemplate;

    @Autowired
    public ProductService(RestTemplate restTemplate) {

        this.restTemplate = restTemplate;

    }

    public String remoteRestCall() {

        return this.restTemplate.getForObject("https://jsonplaceholder.typicode.com/todos", String.class);
    }

}
The above code utilizes a RestTemplate to make a remote REST call by sending an HTTP GET request to the specified URL (“https://jsonplaceholder.typicode.com/todos“).
2.4 Create a Controller
Create a controller named ProductController. For simplicity, our controller returns a JSON string and also contains a method that is used to delegate the handling of the HTTP request to our service class (ProductService). This method invokes the remoteRestCall() method from the productService bean.
@RestController
@RequestMapping("/api")
public class ProductController {
private final ProductService productService;
@Autowired
public ProductController(ProductService productService) {
this.productService = productService;
}
@GetMapping("/product")
public String product() {
// Construct a JSON string (for simplicity, using a hardcoded string)
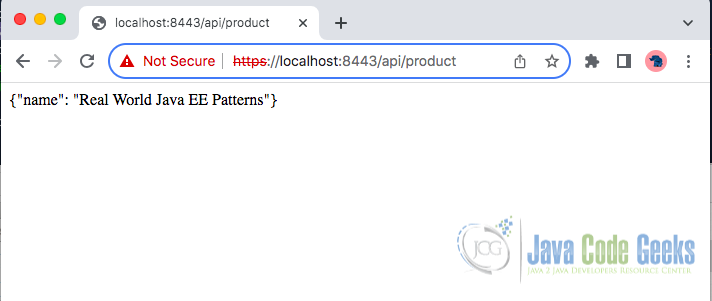
String jsonString = "{\"name\": \"Real World Java EE Patterns\"}";
return jsonString;
}
@GetMapping("/testssl")
public String remoteRestCall() {
return productService.remoteRestCall();
}
}
Next, let’s configure a RestTemplate bean using a RestTemplateBuilder and an SslBundles bean.
@SpringBootApplication
public class SecureappWithSslApplication {

    public static void main(String[] args) {
        SpringApplication.run(SecureappWithSslApplication.class, args);
    }

    @Bean
    public RestTemplate restTemplate(RestTemplateBuilder restTemplateBuilder, SslBundles sslBundles) {
        return restTemplateBuilder.setSslBundle(sslBundles.getBundle("server")).build();
    }

}
The above code configures a RestTemplate instance using the provided RestTemplateBuilder. The setSslBundle() method is called on restTemplateBuilder to apply an SSL bundle, and sslBundles.getBundle("server") retrieves the SSL bundle named server from the SslBundles bean.
3. Run and Test the Application
Now, when we can run our Spring Boot application, we should see the following log messages on the terminal console:
main] o.s.b.w.embedded.tomcat.TomcatWebServer  : Tomcat initialized with port(s): 8443 (https)

Connector [https-jsse-nio-8443], TLS virtual host [_default_], certificate type [UNDEFINED] configured from keystore [/Users/username/.keystore] using alias [myapplication] with trust store [null]

main] o.s.b.w.embedded.tomcat.TomcatWebServer  : Tomcat started on port(s): 8443 (https) with context path ''
These log messages confirm that the application is started and running on port 8443 using HTTPS. Now we can make our request with curl or by opening a browser and navigating to our endpoint URI at https://localhost:8443/api/product.
The output of the application in a web browser should look like this:
We can use the curl command to make a request to the free remote API and get some information about the SSL handshake that happened with the following command:
curl --verbose --insecure https://localhost:843/api/testssl
We should get the following output:
*   Trying ::1...
* TCP_NODELAY set
* Connected to localhost (::1) port 8443 (#0)
* ALPN, offering h2
* ALPN, offering http/1.1
* Cipher selection: ALL:!EXPORT:!EXPORT40:!EXPORT56:!aNULL:!LOW:!RC4:@STRENGTH
* successfully set certificate verify locations:
*   CAfile: /etc/ssl/cert.pem
  CApath: none
* TLSv1.2 (OUT), TLS handshake, Client hello (1):
* TLSv1.2 (IN), TLS handshake, Server hello (2):
* TLSv1.2 (IN), TLS handshake, Certificate (11):
* TLSv1.2 (IN), TLS handshake, Server key exchange (12):
* TLSv1.2 (IN), TLS handshake, Server finished (14):
* TLSv1.2 (OUT), TLS handshake, Client key exchange (16):
* TLSv1.2 (OUT), TLS change cipher, Client hello (1):
* TLSv1.2 (OUT), TLS handshake, Finished (20):
* TLSv1.2 (IN), TLS change cipher, Client hello (1):
* TLSv1.2 (IN), TLS handshake, Finished (20):
* SSL connection using TLSv1.2 / ECDHE-RSA-AES256-GCM-SHA384
* ALPN, server did not agree to a protocol
* Server certificate:
*  subject: C=NG; ST=lagos; L=lagos; O=jcg; OU=jcg; CN=omos aziegbe
*  start date: Jan 24 13:03:58 2024 GMT
*  expire date: Jan 21 13:03:58 2034 GMT
*  issuer: C=NG; ST=lagos; L=lagos; O=jcg; OU=jcg; CN=omos aziegbe
*  SSL certificate verify result: self signed certificate (18), continuing anyway.
> GET /api/testssl HTTP/1.1
> Host: localhost:8443
> User-Agent: curl/7.54.0
> Accept: */*
>
< HTTP/1.1 200
< Content-Type: text/plain;charset=UTF-8
< Content-Length: 24311
< Date: Thu, 25 Jan 2024 17:09:04 GMT
<
[
  {
    "userId": 1,
    "id": 1,
    "title": "delectus aut autem",
    "completed": false
  },
  {
    "userId": 1,
    "id": 2,
    "title": "quis ut nam facilis et officia qui",
    "completed": false
  },
From the output, we can see our server certificate with the following information subject: C=NG; ST=lagos; L=lagos; O=jcg; OU=jcg; CN=omos aziegbe about our SSL certificate.
4. Conclusion
In this article, we walked through the process of obtaining SSL certificates, configuring a Spring Boot application for SSL, setting up RestTemplate to communicate securely, and creating a simple controller to test secure communication.
Furthermore, the article presented a full example code snippet demonstrating using application.properties for configuring SSL bundles. This included setting the server port, SSL bundle information, and keystore details.
In conclusion, we can enhance the security of our Spring Boot 3 applications to protect sensitive information and establish a foundation for secure communication over HTTPS. A final note is that It is crucial to use trusted SSL certificates in production environments to ensure a more secure and trusted application.
5. Download the Source Code
This was an example of securing Spring Boot 3 applications using security SSL bundles.
You can download the full source code of this example here: spring boot security ssl bundles

i dont understand the purpose of pem file created here. i see they are used any where, can you explain?