In modern web development, the ability to seamlessly display images from various sources and allow users to upload images are common requirements. This article explores the dynamic display of images through Spring Boot and Thymeleaf. Thymeleaf is a server-side Java template engine that integrates seamlessly with Spring MVC to provide an efficient way to handle dynamic content rendering.
1. Setting Up the Spring Boot Project
Thymeleaf simplifies the process of rendering dynamic content, including images, within Spring MVC applications. Here’s a guide on how to display images from different sources using Thymeleaf.
1.1 Maven Dependencies
Let us begin by creating a new Spring Boot project in our preferred IDE or by using Spring Initializer to set up the project with the necessary dependencies, including Spring Boot starters for web development, Thymeleaf for template rendering, Spring Data JPA for database access, MySQL Connector for connecting to a MySQL database, Spring Boot Starter Test for testing, and additional Thymeleaf extras.
         <dependencies>
		<dependency>
			<groupId>org.springframework.boot</groupId>
			<artifactId>spring-boot-starter-data-jpa</artifactId>
		</dependency>
		<dependency>
			<groupId>org.springframework.boot</groupId>
			<artifactId>spring-boot-starter-security</artifactId>
		</dependency>
		<dependency>
			<groupId>org.springframework.boot</groupId>
			<artifactId>spring-boot-starter-thymeleaf</artifactId>
		</dependency>
		<dependency>
			<groupId>org.springframework.boot</groupId>
			<artifactId>spring-boot-starter-web</artifactId>
		</dependency>
		<dependency>
			<groupId>org.thymeleaf.extras</groupId>
			<artifactId>thymeleaf-extras-springsecurity6</artifactId>
		</dependency>

		<dependency>
			<groupId>com.mysql</groupId>
			<artifactId>mysql-connector-j</artifactId>
			<scope>runtime</scope>
		</dependency>
		<dependency>
			<groupId>org.springframework.boot</groupId>
			<artifactId>spring-boot-starter-tomcat</artifactId>
			<scope>provided</scope>
		</dependency>
	</dependencies>
Once our project is ready, we can proceed to configure the application properties (src/main/resources/application.properties) like this:
1.2 Application Properties
# Set Thymeleaf template prefix and suffix
spring.thymeleaf.prefix=classpath:/templates/
spring.thymeleaf.suffix=.html
spring.thymeleaf.cache=false

# DataSource Configuration
spring.datasource.url=jdbc:mysql://localhost:3306/displayimagesthymeleaf?useSSL=false
spring.datasource.username=your_username
spring.datasource.password=your_password
spring.datasource.driver-class-name=com.mysql.cj.jdbc.Driver

# JPA (Java Persistence API) Configuration
spring.jpa.hibernate.ddl-auto=update
spring.jpa.show-sql=true

# Server Port
server.port=8080
2. Fetching Images from the File System
To demonstrate image display from the local file system, let’s start by organizing the static resources.
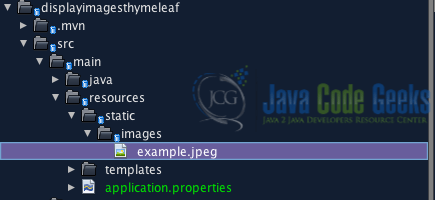
2.1 Organizing Static Resources
Create a static directory within the src/main/resources directory. This is where static resources, including images, will be stored. For example, if we have an image named example.jpg, place it in the src/main/resources/static/images directory. The project structure should look like this:
2.2 Thymeleaf Template for Static Image Display
Next, create a Thymeleaf template that references the static image. Thymeleaf simplifies the integration of dynamic content, including static resources, into HTML templates. We have created an HTML page named imagedisplay.html inside the src/main/resources/templates/ directory.
<!DOCTYPE html>
<html lang="en" xmlns:th="http://www.thymeleaf.org">
<head>
    <meta charset="UTF-8">
    <meta name="viewport" content="width=device-width, initial-scale=1.0">
    <title>Static Image Display</title>
</head>
<body>
    <h1>Displaying Static Images in Spring Boot</h1>

    <!-- Display static image -->
    <img th:src="@{/images/example.jpg}" alt="Example Image">
</body>
</html>
In the above example, @{/images/example.jpg} references the static image in the images directory. The @{/} syntax is used to specify the root context path.
2.3 Controller for Thymeleaf Display
Next, create a controller class to handle requests and direct them to the Thymeleaf template.
@Controller
public class ImageController {

     @GetMapping("/display")
    public String displayImage() {
        return "imagedisplay";
    }
}
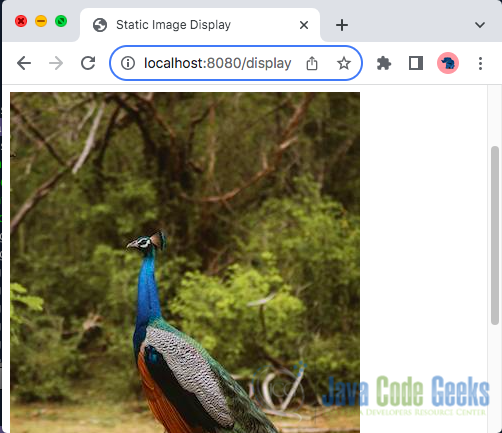
This controller maps the /display URL to the Thymeleaf template, allowing users to view the static image.
Run the Spring Boot application and navigate to http://localhost:8080/display (assuming the application is running on port 8080). We should see the Thymeleaf template displaying the static image.
2.4 External URL
Fetching images from an external URL involves using the URL of the desired image like this:
    <!-- External URL -->
    <img th:src="@{https://path/to/the/externalURL/image/logo.png}" alt="External Image">
3. Fetching Images from a Database using JPA
We can employ Java Persistence API (JPA) entities and repositories for database-backed image retrieval. Let’s create the SQL statements to generate the necessary tables in our MySQL database:
CREATE TABLE image_entity (
    id BIGINT AUTO_INCREMENT PRIMARY KEY,
    image_name VARCHAR(255),
    image_data LONGBLOB
);
This SQL statement defines a table named image_entity with columns for ID, image_name, and image_data stored as a LONGBLOB.
3.1 Database Entity and Repository
Create a JPA entity to represent the images and a repository interface for database interactions.
3.1.1 Define Entity Class
Create an entity class to represent the image data. This class should have a field of type byte[] to store the image as a BLOB (Binary Large Object).
@Entity
public class ImageEntity {
    @Id
    @GeneratedValue(strategy = GenerationType.IDENTITY)
    private Long id;

    @Column
    private String imageName;

    @Lob
    @Column
    private byte[] imageData;

    public ImageEntity() {
    }

    public ImageEntity(Long id, String imageName, byte[] imageData) {
        this.id = id;
        this.imageName = imageName;
        this.imageData = imageData;
    }

    public Long getId() {
        return id;
    }

    public void setId(Long id) {
        this.id = id;
    }

    public String getImageName() {
        return imageName;
    }

    public void setImageName(String imageName) {
        this.imageName = imageName;
    }

    public byte[] getImageData() {
        return imageData;
    }

    public void setImageData(byte[] imageData) {
        this.imageData = imageData;
    }

     public String getImageDataBase64() {
        return Base64.encodeBase64String(this.imageData);
    }

}
3.1.2 Create a Repository Interface
Next, create a repository interface that extends JpaRepository to perform CRUD operations on the ImageEntity.
public interface ImageRepository extends JpaRepository {
}
3.2 Service Layer
Next, create a service class that handles business logic. In this example, it involves saving and retrieving images from the database.
This ImageService class encapsulates the logic related to image manipulation and interaction with the database.
@Service
public class ImageService {

    @Autowired
    private ImageRepository imageRepository;

    public List getAllImages() {
        return imageRepository.findAll();
    }

    public Optional getImageById(Long id) {
        return imageRepository.findById(id);
    }

    public void saveImage(ImageEntity imageEntity, MultipartFile file) {
        try {
            imageEntity.setImageData(file.getBytes());
            imageRepository.save(imageEntity);
        } catch (IOException ex) {
            Logger.getLogger(ImageService.class.getName()).log(Level.SEVERE, null, ex);
        }

    }

}
In the above code, the saveImage(ImageEntity imageEntity, MultipartFile file) method saves an image to the database. It takes an ImageEntity object and a MultipartFile representing the image file uploaded by a user through a form. It reads the content of the uploaded file as a byte array using file.getBytes() and sets it as the imageData property of the ImageEntity. Then, it saves the modified ImageEntity to the database using the save() method provided by the injected imageRepository.
3.3 Controller for Image Upload and Display
Next, we create a controller class to handle requests related to image operations. This controller is responsible for displaying a view that shows a list of images (/imagedisplay/view) and handling the addition of new images (/imagedisplay/add) as shown below:
@Controller
public class DatabaseImageController {

    @Autowired
    private ImageService imageService;

    @GetMapping(value = "/imagedisplay/view", produces = {MediaType.IMAGE_JPEG_VALUE, MediaType.IMAGE_PNG_VALUE})
    public String view(Model model) {
        model.addAttribute("images", imageService.getAllImages());
        return "view";
    }

    @GetMapping("/imagedisplay/add")
    public ModelAndView addImage() {
        return new ModelAndView("addImage", "image", new ImageEntity());
    }

    @PostMapping(value = "/imagedisplay/add", consumes = MULTIPART_FORM_DATA_VALUE)
    public String addImageProfile(ImageEntity image, @RequestPart("file") MultipartFile file) {
        imageService.saveImage(image, file);
        return "redirect:/imagedisplay/view";
    }

}
Here is an explanation of the main part of the code:
@GetMapping("/imagedisplay/view")Method:- This method handles HTTP GET requests for the
/imagedisplay/viewendpoint. It produces images in JPEG or PNG format (as specified by theproducesattribute). It adds a list of images retrieved from the database usingimageService.getAllImages()to the model and returns the view name view. This view is used to display the images.
- This method handles HTTP GET requests for the
@GetMapping("/imagedisplay/add")Method:- This method handles HTTP GET requests for the
/imagedisplay/addendpoint. It returns aModelAndViewobject with the view name addImage and an instance ofImageEntitybound to the image model attribute. This is used for displaying a form for adding images.
- This method handles HTTP GET requests for the
@PostMapping("/imagedisplay/add")Method:- This method handles HTTP POST requests for the
/imagedisplay/addendpoint. It consumes multipart form data (consumes = MULTIPART_FORM_DATA_VALUE). It takes anImageEntityobject and aMultipartFileas parameters, representing the image and the file being uploaded. It saves the image using theimageService.saveImage(image, file)method and then redirects the user to the/imagedisplay/viewendpoint.
- This method handles HTTP POST requests for the
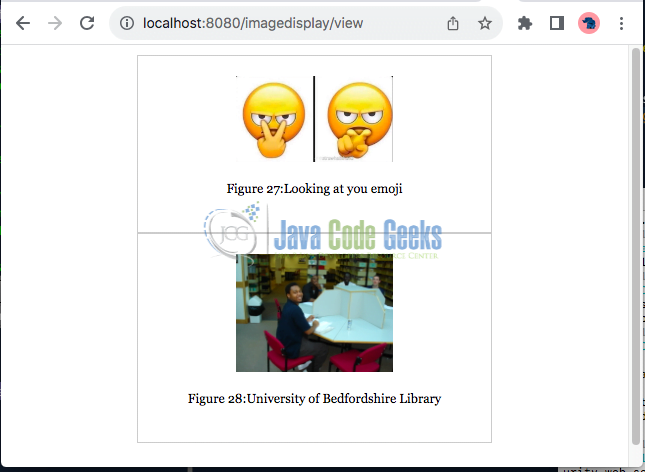
3.4 Displaying Images Fetched from Database using Thymeleaf Template
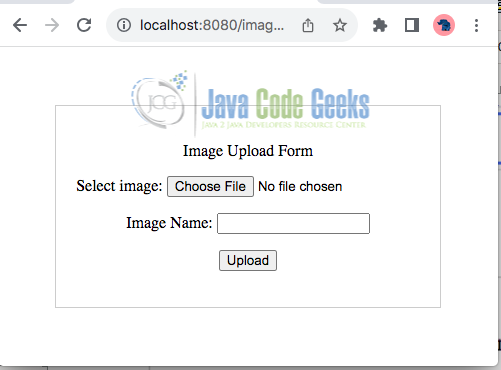
Next, create a Thymeleaf template to display images fetched from the database dynamically. Create a file named addImage.html to upload images to the database and a file named view.html within the src/main/resources/templates/ directory.
<!-- addImage.html -->
<!DOCTYPE html>
<html xmlns:th="http://www.thymeleaf.org">
    <head>
        <meta charset="UTF-8">
        <meta name="viewport" content="width=device-width, initial-scale=1.0">
        <title>Image Upload Form</title>
        <style>

        </style>
    </head>
    <body>
        <div class="center-container">
            <form th:action="@{/imagedisplay/add}" method="post" enctype="multipart/form-data" class="subform">
                <p>Image Upload Form</p>

                <p><label for="file" class="label">Select image:</label>
                    <input type="file" name="file" id="profile-image" accept="image/png, image/jpeg" required/>
                </p>

                <p><label for="imageName">Image Name:</label>
                    <input type="text" id="imageName" name="imageName" required><br>
                </p>

                <p>
                    <input type="submit" value="Upload">
                </p>
            </form>
        </div>
    </body>
</html>
<!-- view.html -->
<!DOCTYPE html>
<html xmlns:th="http://www.thymeleaf.org">
    <head>
        <meta charset="UTF-8">
        <meta name="viewport" content="width=device-width, initial-scale=1.0"/>
        <title>Image List</title>
    </head>
    <body>
        <div th:each="image : ${images}" class="center-container ">
            <img  th:src="@{'data:image/jpeg;base64,'+${image.getImageDataBase64()}}" alt="images from database" width="50%" height="50%"/>

            <p class="" th:text="Figure + ' '+ ${image.id} + ':' + ${image.imageName}"></p>

        </div>
    </body>
</html>
In the above Thymeleaf template, the th:src attribute now uses the Base64-encoded string returned by getImageDataBase64 to display the image.
4. Securing Access to Images to Ensure Unauthorized Entry
To prevent unauthorized access to images using Spring Security, we can enhance our Spring Boot application by securing the endpoints that serve the images. Below are the modifications and additions to our existing code.
4.1 Add Spring Security Dependency
Ensure that you have the Spring Security dependency in your pom.xml:
<dependency>
    <groupId>org.springframework.boot</groupId>
    <artifactId>spring-boot-starter-security</artifactId>
</dependency>
4.2 Create or Update SecurityConfig Class
Create a SecurityConfig class to configure Spring Security in the application:
@Configuration
@EnableWebSecurity
public class SecurityConfig {

    @Bean
    public SecurityFilterChain filterChain(HttpSecurity http) throws Exception {
            http.authorizeRequests()
                .requestMatchers("/").permitAll()
                .requestMatchers("/display/**").permitAll()
                .requestMatchers("/images/**").permitAll() // Permit access to static images
                .requestMatchers("/imagedisplay/view").authenticated() // Require authentication for image view
                .anyRequest().authenticated();

            return http.build();
    }

}
In this example, the pattern /images/** is used to permit access to static images, assuming our static images are served from a directory named images under the static folder.
The .requestMatchers("/images/**").permitAll() method allows access to all URLs starting with /images/ without authentication. This is used for serving the static images.
We secured the /imagedisplay/view endpoint to require authentication.
The .requestMatchers("/imagedisplay/view").authenticated() requires authentication for the /imagedisplay/view URL, therefore users must be authenticated to access this endpoint.
5. Conclusion
This article has provided us with the full source code examples to implement static image display and dynamic image display from a MySQL database using Thymeleaf, Spring Boot, and JPA.
Displaying static images from the resources directory in a Spring Boot project is a straightforward process. By organizing static resources in the static directory and leveraging Thymeleaf for template rendering, we can easily integrate static images into our web applications.
Furthermore, the combination of Thymeleaf templates and Spring Boot’s backend framework has allowed us to effortlessly render dynamic images retrieved from the MySQL database, utilizing JPA for efficient data access and management.
6. Download the Source Code
This was an example of using thymeleaf to display images.
You can download the full source code of this example here: Image Display and Upload with Thymeleaf, Spring MVC, and MySQL
