In this example, we will demonstrate how to use Bean Validation in a Spring Boot REST application.
1. Introduction
Data validation is a basic requirement for any application, especially for web applications that accept data as input. For example, you may want to ensure that an email address or credit card number sent in a request is valid.
Before the Java Bean Validation API was introduced, the JEE developer
was burdened with writing logic to validate data. This was a tedious and time-consuming
task for a developer. This also led to an unwieldy code base that was difficult
to maintain because the validation code might be implemented in more than one
tier of the application (e.g. the presentation,
service, and persistence layers). The Bean Validation specification was
proposed to address these issues.
Table Of Contents
The Bean Validation API is a set of interfaces and annotations used to simplify data validation. The built-in constraints can be applied to fields, properties, and container elements of a Java class. Additionally, the framework allows for the creation of custom constraints when the built-in constraints are inadequate.
Bean validation works by:
- Adding constraints to fields, properties (aka field accessor methods), or container elements of a class.
- Passing an instance of the class to a Validator instance that tests if any constraint has been violated.
If validation fails an exception is thrown, and one or more error messages are returned in the response along with a 400 Bad Request status.
Bean Validation API 2.0 is the latest major release of the API. Spring Boot has Bean Validation support out-of-the-box. You do not need to instantiate a validator programmatically to use Bean Validation with Spring Boot.
1.1 Tools Used in this Example
- Eclipse IDE for Enterprise Java Developers Version: 2019-06 (4.12.0)
Spring Tools 4 – for Spring Boot - Postman 7.3.6
Spring Tools 4 for Spring Boot is a set of plugins for Eclipse that support building and running Spring Boot applications. You can add Spring Tools 4 to your existing Eclipse installation by going to the Eclipse Marketplace and searching for “Spring Tools 4”.
To download Postman, visit https://www.getpostman.com/downloads/.
2. Spring Boot Bean Validation Example
In this example, we will create a Spring Boot REST application to show how we can validate a JSON payload sent in an HTTP request by adding constraints to the JPA entity. If the data passes validation, it will be persisted to a data store. Otherwise, one or more error messages will be returned to the client. We will also demonstrate how to create a custom constraint and how to validate path variables and method return values. Let’s start by creating the Spring Boot application.
2.1 Create the Spring Boot Project
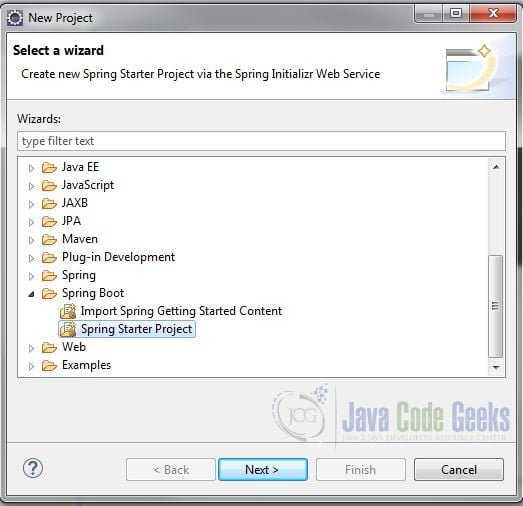
In the New Project – Select a Wizard dialog box, expand Spring Boot and select Spring Starter Project. Click “Next”.
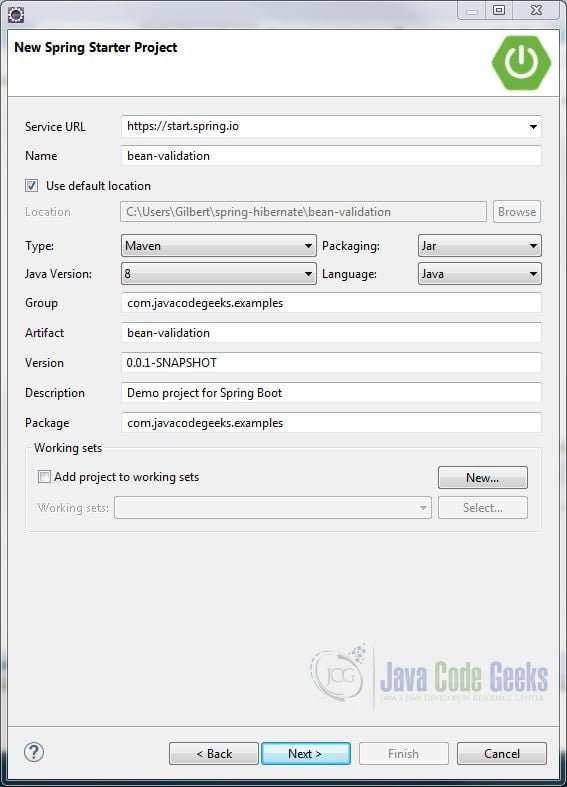
In the New Spring Starter Project dialog box, enter a name for the project. Also, enter the group, artifact and package information. Accept all the other default values. Click “Next”.
In the New Spring Starter Project Dependencies dialog box, select Spring Boot Version 2.1.7. Also, select the Spring Web Starter, Spring Data JPA, and H2 Database dependencies. Click “Finish”.
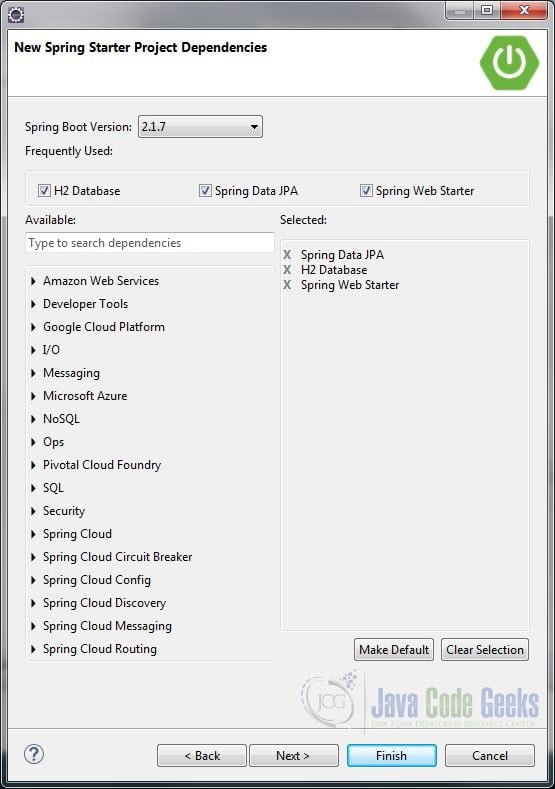
The Spring Data JPA dependency will add JPA and Hibernate ORM capabilities to the project. We will be using an H2 embedded database.
The Spring Web Starter dependency includes the Bean Validation library (hibernate-validator-6.0.17.Final.jar and validation-api-2.0.1.Final.jar). (Hibernate Validator is the certified implementation of the Bean Validation 2.0 API.) Alternatively, you can include the library without Spring MVC by adding the Spring Validation Starter dependency to your POM file.
Spring Validation Starter
<dependency>
	<groupId>org.springframework.boot</groupId>
	<artifactId>spring-boot-starter-validation</artifactId>
</dependency>
2.2 Validating JPA Entities
It is a common practice is to add constraints to your domain classes. This avoids duplication of code since the domain model is generally accessible to all layers of a JEE application. Let’s demonstrate this by creating a JPA entity class and adding constraints to its fields.
Create a package com.javacodegeeks.examples.entities and a class Userwith the following code:
User.java
import java.time.LocalDate;
import java.util.List;

import javax.persistence.ElementCollection;
import javax.persistence.Entity;
import javax.persistence.GeneratedValue;
import javax.persistence.GenerationType;
import javax.persistence.Id;
import javax.validation.constraints.Email;
import javax.validation.constraints.NotEmpty;
import javax.validation.constraints.Past;
import javax.validation.constraints.Pattern;

import com.fasterxml.jackson.annotation.JsonFormat;

@Entity
public class User {

	@Id
	@GeneratedValue(strategy = GenerationType.AUTO)
	private long id;

    @NotEmpty(message = "First name is required")
    private String firstName;

    @NotEmpty(message = "Last name is required")
    private String lastName;

    @NotEmpty(message = "Email is required")
    @Email
    private String email;

    @NotEmpty(message = "Phone number is required")
    @Pattern(regexp="^\\(?(\\d{3})\\)?[- ]?(\\d{3})[- ]?(\\d{4})$",
    		 message="Mobile number is invalid")
    private String mobilePhone;

    @Past
    @JsonFormat(pattern = "yyyy-MM-dd")
    private LocalDate birthday;

    @NotEmpty(message = "Communication preference is required")
    private String commPreference;

    @ElementCollection
    private List<@NotEmpty String> mobileDevices;

	public long getId() {
		return id;
	}

	public void setId(long id) {
		this.id = id;
	}

	public String getFirstName() {
		return firstName;
	}

	public void setFirstName(String firstName) {
		this.firstName = firstName;
	}

	public String getLastName() {
		return lastName;
	}

	public void setLastName(String lastName) {
		this.lastName = lastName;
	}

	public String getEmail() {
		return email;
	}

	public void setEmail(String email) {
		this.email = email;
	}

	public String getMobilePhone() {
		return mobilePhone;
	}

	public void setMobilePhone(String mobilePhone) {
		this.mobilePhone = mobilePhone;
	}

	public LocalDate getBirthday() {
		return birthday;
	}

	public void setBirthday(LocalDate birthday) {
		this.birthday = birthday;
	}

	public String getCommPreference() {
		return commPreference;
	}

	public void setCommPreference(String commPreference) {
		this.commPreference = commPreference;
	}

	public List<String> getMobileDevices() {
		return mobileDevices;
	}

	public void setMobileDevices(List<String> mobileDevices) {
		this.mobileDevices = mobileDevices;
	}

}
The following bullet points describe the JPA annotations used in the Userclass. (Note that these annotations are from the javax.persistence package.)
- @Entity – This class-level annotation informs the JPA provider (Hibernate in our example) that this Java class should be persisted to a database table.
- @Id – This field-level annotation designates the primary key of the entity and maps it to the primary key of the table.
- @GeneratedValue – This annotation specifies how the primary key ID will be generated. In our example, we chose GenerationType.AUTO, meaning that the JPA provider (Hibernate) will decide which strategy to employ based on the database dialect used. (The H2Dialect is used in this example.)
- @ElementCollection – This annotation specifies a one-to-many relationship to an
Embeddableobject orBasicvalue, such as a collection of Strings.
We are using the following Bean Validation constraints in
the User class:
| Constraint | Description |
| @NotEmpty | Tests that the annotated element is not null nor empty |
| Tests that the specified character sequence is a well-formed email address | |
| @Pattern | Tests that the annotated string matches the regular expression specified by the “regex” attribute |
| @Past | Test whether the annotated date is in the past |
You can view the list of built-in Bean Validation constraints here: https://docs.jboss.org/hibernate/beanvalidation/spec/2.0/api/.
Additionally, we are applying the @JsonFormat annotation on the LocalDate field to specify the format for the birthdayfield.
The message attribute for each constraint is optional. If you do not specify a message, the framework will use the default message when processing validation failures. For example, “must be a well-formed email address” is the default error message for the @Email constraint. In most cases, you will want to provide your own error message.
2.3 Create the User Repository
Next, we’ll create a repository for the User entity. We will use the User repository in our REST controller to manage database transactions. Create a package com.javacodegeeks.examples.repository and interface UserRepository that extends Spring JPA’s CrudRepository with the following code:
UserRepository.java
import org.springframework.data.repository.CrudRepository;

import com.javacodegeeks.examples.entities.User;

public interface UserRepository extends CrudRepository<User, Long> {

}
The CrudRepository interface requires an entity class and its ID type as generic type arguments (e.g. User and Long). Spring Data JPA will automatically generate the implementation of generic CRUD operations for the User entity class.
2.4 Create the REST Controller
We will build a simple REST controller for our example. Create a new package com.javacodegeeks.examples.controller and class UserController.
UserController.java
import javax.validation.Valid;

import org.springframework.http.ResponseEntity;
import org.springframework.web.bind.annotation.PostMapping;
import org.springframework.web.bind.annotation.RequestBody;
import org.springframework.web.bind.annotation.RequestMapping;
import org.springframework.web.bind.annotation.RestController;

import com.javacodegeeks.examples.entities.User;
import com.javacodegeeks.examples.repository.UserRepository;

@RestController
@RequestMapping("users")
public class UserController {

	private final UserRepository userRepository;

	public UserController(UserRepository userRepository) {
		this.userRepository = userRepository;
	}

	@PostMapping
	public ResponseEntity<String> addUser(@RequestBody @Valid User user) {
		userRepository.save(user);
		return ResponseEntity.ok("User data is valid");
	}
}
@RestController is a convenience annotation that adds @ResponseBody to all return types of request methods. The @RequestMapping(“users”) annotation indicates that all requests starting with the URI userswill be handled by this controller.
We are using a class
constructor to inject the repository into the REST controller.
@PostMapping is a specialized RequestMapping. It
specifies that HTTP POST requests to /users are to
be mapped to the addUser(User user) method.
The User method parameter is marked with the @RequestBody annotation, indicating that the input data is to be retrieved from the body of the request and deserialized into a User object.
The method returns a ResponseEntity, which represents an HTTP response (status code, headers, and body). We are using the ResponseEntity builder to set the status code to ‘OK 200″ and to set the response body with the string “User data is valid”.
The @Valid annotation attached to the method parameter tells Spring Boot to automatically instantiate a Validator and to validate the object. This check is performed before the method body is executed. If the validation fails, the method will throw a MethodArgumentNotValidException, which is mapped to the 400 Bad Request response status by default.
To further take advantage of the Spring MVC framework, we can use an exception handler to process validation errors and return user-friendly messages to the client. (The default mechanism will return information, such as the stack trace, which may not be relatable to the client.) We can also return something other than the default 400 Bad Request status if required.
Add the following exception handler method to the REST
controller class:
The handleMethodArgumentNotValid Exception Handler
	@ResponseStatus(HttpStatus.BAD_REQUEST)
	@ExceptionHandler(MethodArgumentNotValidException.class)
	public Map<String, String> handleMethodArgumentNotValid(MethodArgumentNotValidException ex) {
		Map<String, String> errors = new HashMap<>();

		ex.getBindingResult().getFieldErrors().forEach(error ->
			errors.put(error.getField(), error.getDefaultMessage()));

		return errors;
	}
This will add the following import statements to the controller class:
import org.springframework.web.bind.MethodArgumentNotValidException;
import org.springframework.web.bind.annotation.ExceptionHandler;
import org.springframework.web.bind.annotation.ResponseStatus;
The handleMethodArgumentNotValid method is decorated with two annotations:
@ResponseStatusspecifies that a 400 Bad Request status will be returned in the response.@ExceptionHandlermarks this method as a handler for allMethodArgumentNotValidExceptions.
The BindingResult interface encapsulates information about errors that result from validating a class instance. We get the BindingResult for the class by calling getBindingResult() on MethodArgumentNotValidException. We obtain a collection of FieldError instances from BindingResult by calling its getFieldErrors() method. We then iterate through the collection and retrieve the field name and error message for each field and put them in the errors Map. The Map is returned to the client in JSON format by default.
2.5 Test the Bean Validation
Right-click your project in Project Explorer and select Run As > Spring Boot App. Start Postman and close the “Create New” dialog box. The top portion of the window is where you select the HTTP method and enter the request URL. The bottom portion of the window is where the response will be displayed.
Open a New Tab. Select POST from the drop-down menu to the left of the request URL bar. Select Body and “raw” located underneath the request URL bar. Change “Text” to “JSON application/json” from the drop-down menu. Paste the following JSON data structure in the Body area.
{
    "firstName": "",
	"lastName": "Biden",
    "email": "joe&sen.de.gov",
    "mobilePhone": "202-555-6258",
	"birthday": "1942-11-20",
	"commPreference": "phone",
	"mobileDevices": [
        "iPhone",
        "Samsung Galaxy",
        ""
    ]
}
Note: The JSON files can be located in the src/main/resources/test.files folder of the downloadable project.
Enter the request URL http://localhost:8080/users and click Send.
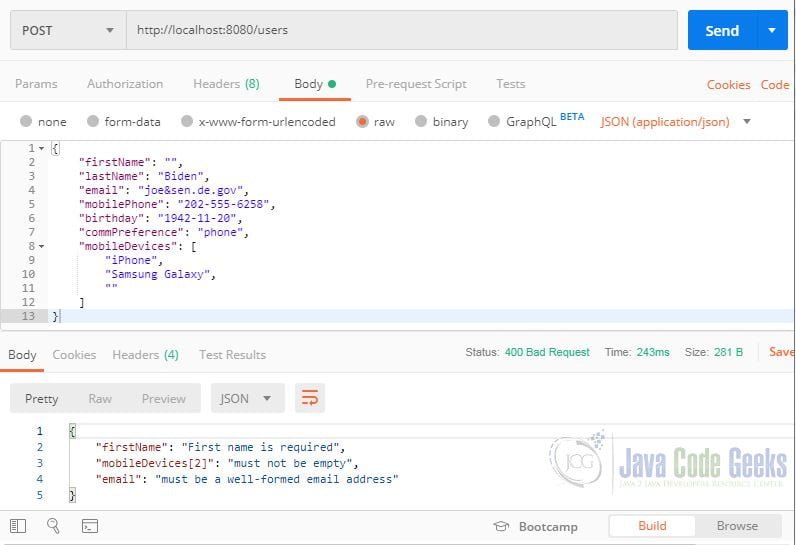
In the response section, you will see the field name and error message for each field that failed validation and a status of 400 Bad Request.
2.6 Define a Custom Constraint
You can create a custom constraint when the built-in constraints are inadequate for your specific needs. Let us say that we have a requirement that states only two possible values are allowed for the commPreferences field in the User entity – “email” or “mobilePhone”. We can create a custom constraint to enforce this rule. Begin by declaring an annotation type. Create a new package com.javacodegeeks.examples.constraint and annotation type CommPreference with the following code:
CommPreference.java
import java.lang.annotation.Documented;
import java.lang.annotation.ElementType;
import java.lang.annotation.Retention;
import java.lang.annotation.RetentionPolicy;
import java.lang.annotation.Target;

import javax.validation.Constraint;
import javax.validation.Payload;


@Target({ElementType.FIELD})
@Retention(RetentionPolicy.RUNTIME)
@Constraint(validatedBy = CommPreferenceValidator.class)
@Documented
public @interface CommPreference {

    String message() default "Communication preference must be email or mobilePhone.";

    Class<?>[] groups() default {};

    Class<? extends Payload>[] payload() default {};
}
Here is a description of the annotations used in CommPreferences.
- @Target({ElementType.FIELD}) – declares that this constraint can be used on class fields.
- @Retention(RetentionPolicy.RUNTIME) – states that this is a runtime annotation.
- @Constraint(validatedBy = CommPreferenceValidator.class) – specifies the class that will perform the validation. (Note: You will see an error “CommPreferenceValidator cannot be resolved to a type”. We’ll fix this issue next.)
- @Documented – causes this annotated type to be included when generating Javadoc documentation.
The annotated type declares three default methods that are
required by the Bean Validation API.

- String message() – allows us to specify the default error message that is returned if the validation fails, in our case, “Communication preference must be email or mobilePhone.”.
- Class<?>[] groups() – allows the specification of validation groups – e.g., @Age(groups=MALE).
- Class<? extends PayLoad> []payLoad() – used to relay metadata information.
Next, create the validator class CommPreferenceValidator that will evaluate our criteria.
CommPreferenceValidator.java
import java.util.Arrays;
import java.util.List;

import javax.validation.ConstraintValidator;
import javax.validation.ConstraintValidatorContext;

public class CommPreferenceValidator implements ConstraintValidator<CommPreference, String> {

	private final List<String> commPreferences  = Arrays.asList("email", "mobilePhone");

	@Override
	public boolean isValid(String value, ConstraintValidatorContext context) {
		return commPreferences.contains(value);
	}

}
The validator class implements the ConstraintValidator interface, which accepts the annotation type and the type to be validated as generic type arguments. In our case, the arguments are CommPreference and String, respectively.
The ConstraintValidator interface has one method that we must implement – isValid() – which returns a boolean value. This is where we put our validation logic.
For our simple requirement, we check that the String value that is being passed into isValid() is contained in our list of qualified values – “email” and “mobliePhone”.
The last step is to apply our custom constraint to the commPreference String field of our entity class as follows:
User.java
import com.javacodegeeks.examples.constraint.CommPreference;

@Entity
public class User {

    // Other fields ...

    @NotEmpty(message = "Communication preference is required")
    @CommPreference
    private String commPreference;

    // More code ...

}
Now we can test our custom constraint. Right-click your project in Project Explorer and select Run As > Spring Boot App. Start Postman and select POST from the drop-down menu to the left of the request URL bar. Select Body and “raw” located underneath the request URL bar. Change “Text” to “JSON application/json” from the drop-down menu. Paste the following JSON data structure in the Body area.
{
    "firstName": "",
	"lastName": "Biden",
    "email": "joe&sen.de.gov",
    "mobilePhone": "202-555-6258",
	"birthday": "1942-11-20",
	"commPreference": "phone",
	"mobileDevices": [
        "iPhone",
        "Samsung Galaxy",
        ""
    ]
}
Enter the request URL http://localhost:8080/users and click Send.
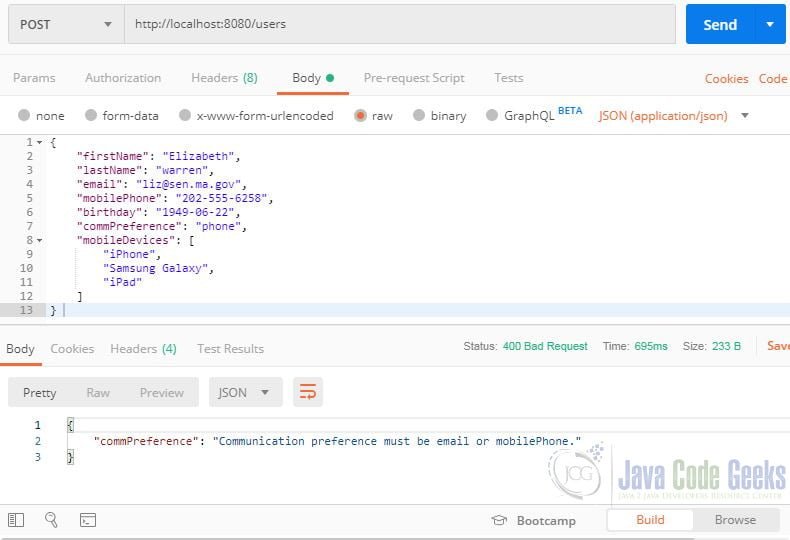
In the response section,
you will see the field name and error message for our custom constraint and a
status of 400 Bad Request.
2.7 Validating Path Variables
We can also validate path variables. Suppose we want to return User data on a GET request based on the id in the URI path. Further, suppose we want to restrict the path variable values to positive numbers only. (This makes sense since there is little likelihood that we would have a User in our database with an id of 0 or less.) We can accomplish this by adding the following method to UserController.
The getUser Method
	@GetMapping("{id}")
	public Optional<User> getUser(@PathVariable @Positive Long id) {
		return userRepository.findById(id);
	}
The @PathVariable annotation binds the path variable “id” to the method parameter Long id. The @Positive annotation checks if the method parameter Long id is a positive number. (0 is considered an invalid value.)
We need to add the @Validated annotation to the class declaration for Spring to automatically validate constraints on method parameters. The UserController class declaration should now look like this:
@RestController
@RequestMapping("users")
@Validated
public class UserController {

    // Other code here ...
}
Note that we will have to add the following import statements to the controller:
import java.util.Optional;

import javax.validation.constraints.Positive;

import org.springframework.validation.annotation.Validated;

import org.springframework.web.bind.annotation.GetMapping;
import org.springframework.web.bind.annotation.PathVariable;
If the path variable fails validation, it will cause a ConstraintViolationException and not a MethodArgumentNotValidException. Let us add an exception handler for the ConstraintViolationException to the UserController. (Note that ConstraintViolationException is from thejavax.validation package.)
The handleConstraintViolation Exception Handler
@ResponseStatus(HttpStatus.INTERNAL_SERVER_ERROR)
@ExceptionHandler(ConstraintViolationException.class)
public Map<String, String> handleConstraintViolation(ConstraintViolationException ex) {
	Map<String, String> errors = new HashMap<>();

	ex.getConstraintViolations().forEach(cv -> {
		errors.put("message", cv.getMessage());
		errors.put("path", (cv.getPropertyPath()).toString());
	});

	return errors;
}
Like the handleMethodArgumentNotValid method defined earlier, the handleConstraintViolation method is decorated with the @ResponseStatus and the @ExceptionHandler annotations. In this case, the method is handling ConstraintViolationExceptions.
The getConstraintViolations() method called on the exception class returns a collection of ConstraintViolation instances. We iterate through the collection and retrieve the error message and the path to the property of the bean for each constraint violation. This information is put in the errors Map. The Map is returned to the client in JSON format by default.
To test this constraint, we will need to create some sample data at application startup. Create a package com.javacodegeeks.examples.bootstrap and class DataLoader that implements ApplicationListener<ContextRefreshedEvent> :
DataLoader.java
import org.springframework.context.ApplicationListener;
import org.springframework.context.event.ContextRefreshedEvent;
import org.springframework.stereotype.Component;

import com.javacodegeeks.examples.entities.User;
import com.javacodegeeks.examples.repository.UserRepository;

@Component
public class DataLoader implements ApplicationListener<ContextRefreshedEvent> {

	private final UserRepository userRepository;

	public DataLoader(UserRepository userRepository) {
		this.userRepository = userRepository;
	}

	@Override
	public void onApplicationEvent(ContextRefreshedEvent event) {
		User user_a = new User();
		user_a.setFirstName("Jane");
		user_a.setLastName("Doe");
		user_a.setEmail("jdoe@gmail.com");
		user_a.setMobilePhone("202-555-1234");
		user_a.setCommPreference("email");
		userRepository.save(user_a);

		User user_b = new User();
		user_b.setFirstName("Jack");
		user_b.setLastName("Frost");
		user_b.setEmail("jfrost@gmail.com");
		user_b.setMobilePhone("202-555-5678");
		user_b.setCommPreference("email");
		userRepository.save(user_b);

	}
}
The DataLoader class listens for the ContextRefreshedEvent that gets raised when the ApplicationContext is initialized or refreshed. It implements the onApplicationEvent method and adds some User entities to the table. Note that we need to decorate this class with @Component so that Spring loads it in the application context.
Now we can test the path variable constraint. Right-click your project in Project Explorer and select Run As > Spring Boot App. Start Postman and select GET from the drop-down menu to the left of the request URL bar. Enter the request URL http://localhost:8080/users/0 and click Send.
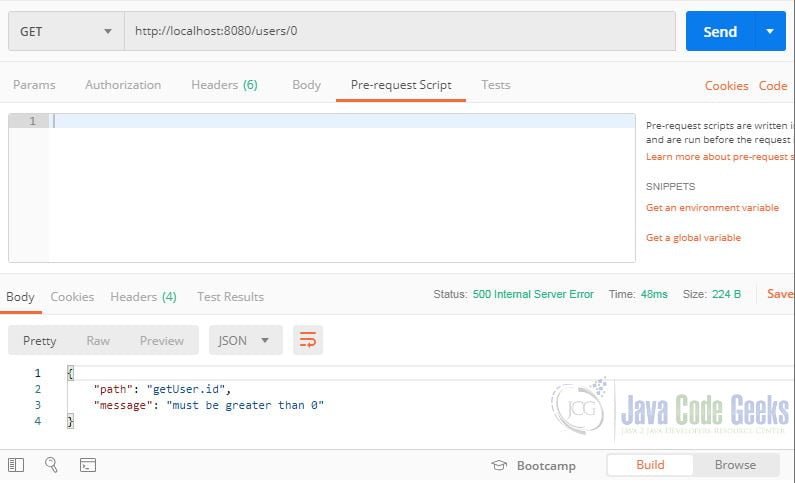
In the response section, you will see the property path, invalid value, and error message for the constraint violation and a status of 500 Internal Server Error.
2.9 Validating Method Return Values
We can also apply constraints to return values of a method or constructor of a Java type. This is useful if your return value has to adhere to some postcondition.
For example, suppose that you have a requirement that the User data returned to the client must be valid. You can add the @Valid annotation to the return value Optional<User> of the getUser method as shown below:
Updated getUser Method
@GetMapping("{id}")
@Valid
public Optional<User> getUser(@PathVariable @Positive Long id) {
	return userRepository.findById(id);
}
The Bean Validation 2.0 API supports the Optional type and its implementations will unwrap the underlying object to validate it.
Let us assume that some invalid data was loaded into the database. We can simulate this by updating a row in the database. Add the following entry to application.properties to enable the H2 console:
application.properties
spring.h2.console.enabled=true
Start the application and access
the H2 console at the following URL: http://localhost:8080/h2-console.
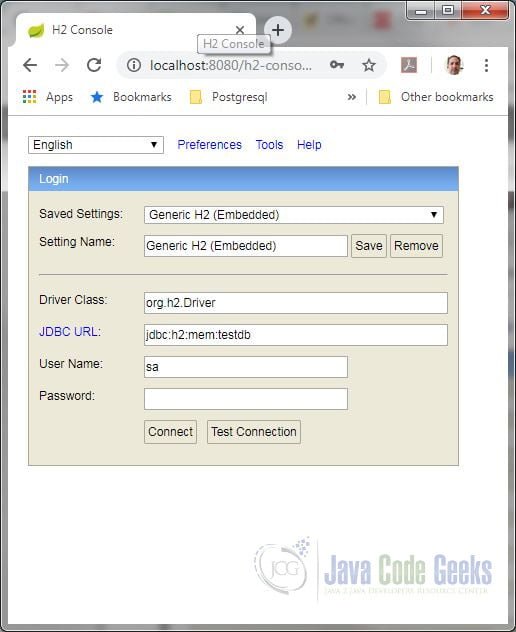
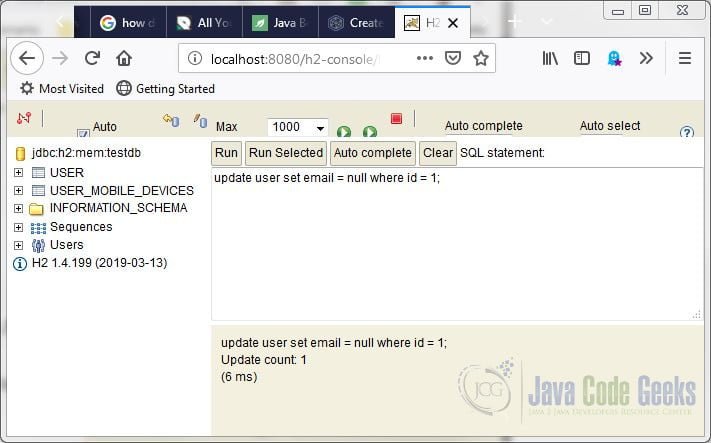
Ensure the JDBC URL is jdbc:h2:mem:testdb and click the Connect button. Run the
following SQL command to update the first row in the database:
update user set email = null where id = 1;
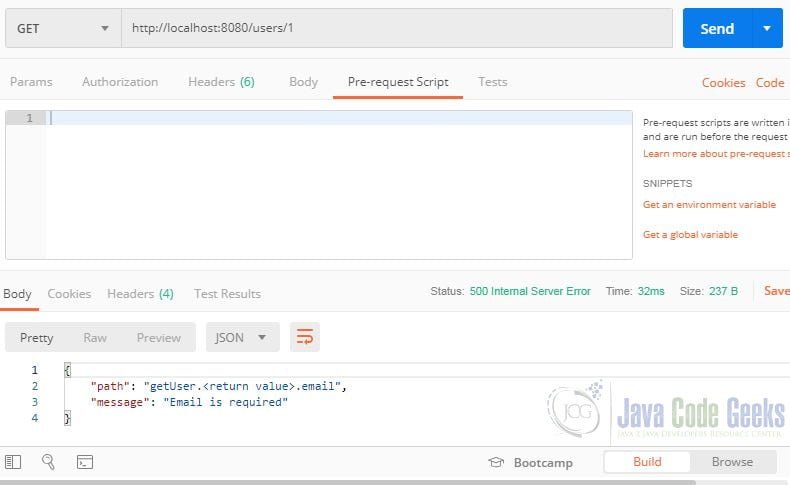
Start Postman and select GET from the drop-down menu to the left
of the request URL bar. Enter the request URL http://localhost:8080/users/1 and
click Send.
In the response section, you will see the timestamp, status, error, message and path for the constraint violation and a status of 500 Internal Server Error.
3. Summary
In this example, we demonstrated how to use the Bean Validation API in a Spring Boot REST application. We showed how to validate JPA entities as well as path variables and method return values. We also showed how to create custom constraints to use in your application.
But the possible applications of the API go beyond what was shown in this article. We can also add constraints to constructor parameters, query parameters and more. For a comprehensive list of features, you can visit the Hibernate Validator 6.0.17.Final – JSR 380 Reference Implementation: Reference Guide.
4. Download the Source Code
This was a Spring Boot Bean Validation Example.
You can download the full source code of this example here:
Spring Boot Bean Validation Example

I am getting this error is given below :
“Could not read document: Can not instantiate value of type [simple type, class java.time.LocalDate] from String value (‘2021-01-08’)