In this tutorial, we will show how to integrate OAuth2 with Spring Security in a Spring Boot application.
1. Introduction
Many web applications use some mechanism for identifying a user, if for nothing more than to provide a personalized experience. Also, an authorization check may be required to determine if the user has the necessary access level to use the services in your application. To these ends, you must start by authenticating the user.
Spring features a Security Framework you can apply for your authorization and authentication needs. It provides a configurable security filter chain used to protects URLs and to validate usernames and passwords.
Traditionally, you would use an in-memory or relational database to store user credentials and roles. The current trend, however, is to use an Identity and Access Management (IAM) platform to manage digital identities and to grant access to web resources. Also, the use of an external Identity Provider (IDP) solution for user authentication has become popular. This has the added benefit of enabling Single Sign-on, making the user’s experience seamless.
These solutions are typically implemented using the OAuth 2 framework for the authorization layer and Open ID Connect (OIDC) for supplying user authentication services. OIDC is also used to obtain basic profile information about the user.
In this example, we will show how to integrate OAuth2 with Spring Security for authentication and authorization in a Spring Boot application.
1.1 Technologies Used
- Eclipse IDE for Enterprise Java Developers Version: 2020-09 (4.17.0)
- Spring Tools 4 – for Spring Boot
Spring Tools 4 for Spring Boot is a set of plugins for Eclipse that support building and running Spring Boot applications. You can add Spring Tools 4 to your existing Eclipse installation by going to the Eclipse Marketplace and searching for “Spring Tools 4”.
2. Spring Boot and OAuth2 Tutorial
2.1 Quick Introduction to OAuth2
OAuth2 is a framework used by client applications to access a user’s resources (with the user’s consent) without exploiting the user’s credentials. It performs this by using access tokens in place of usernames and passwords.
OAuth2 defines four roles:
- Resource Owner – The user that owns the account data to be shared, for example, an end-user employing your application.
- Resource Server – The server that hosts the user’s resources including (but not limited to) credentials and profile data.
- Client Application – The application requesting resources from the resource server on behalf of the resource owner, such as a web application.
- Authorization Server – The server that will process the request to give the client application access to the owner’s resources.
Clear as mud? Hopefully, these concepts will become plainer as we proceed.
2.2 Create the Client Application
We’ll start by creating the client application. Create a new Spring Starter Project using the new project wizard in Eclipse. Select “Spring Web”, “Thymeleaf”, “Spring Boot Actuator”, and “OAuth2 Client” as dependencies.
- Spring Web – adds Spring MVC and embedded Tomcat container
- Thymeleaf – used as the template engine for rendering HTML
- Spring Boot Actuator – adds endpoints for monitoring your application
- OAuth2 Client – adds Spring Security and OAuth2 client support
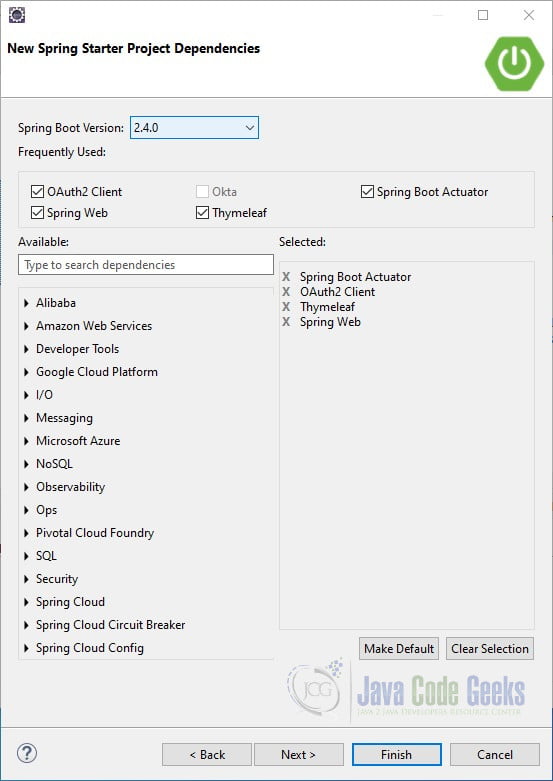
Click Finish.
Start the application using the Boot Dashboard. (Alternatively, you can package the application in an executable jar file or run the “mvn spring-boot:run” command from the console.
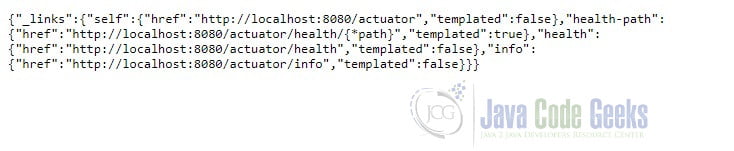
Open a browser and enter http://localhost:8080/actuator.
Spring Security auto-configures a DefaultSecurityFilterChain, which protects all URL requests by default. To allow non-authenticated access to the actuator endpoint, we will need to configure web security. We can do this by creating a configuration class that extends WebSecurityConfigurerAdapter and implement its configure(HttpSecurity http) method.
SecurityConfiguration.java
import org.springframework.context.annotation.Configuration;
import org.springframework.security.config.annotation.web.builders.HttpSecurity;
import org.springframework.security.config.annotation.web.configuration.WebSecurityConfigurerAdapter;

@Configuration
public class SecurityConfiguration extends WebSecurityConfigurerAdapter {

	@Override
	protected void configure(HttpSecurity http) throws Exception {
		http.authorizeRequests()
			.antMatchers("/actuator").permitAll()
			.anyRequest().authenticated();
	}

}
The @Configuration annotation registers this as a configuration classs. We used an antMatcher to specify that the /actuator endpoint is permitted to all. It serves as a whitelist since we then specify that any request is accessible to authenticated users only with .anyRequest().authenticated(). This is typically used as a catch-all mechanism to prevent unauthenticated access to your site.
Restart the application. You will now be able to access the /actuator endpoint.
2.3 More on OAuth2
Access tokens are used by the client application to gain restricted access to a user resource. An access token contains information about the privileges the user consented to give to the client application. Tokens are temporary. You can use a refresh token (if provided) to request a new access token when it has expired. Access tokens are obtained from the authorization server.
A grant type flow is used to acquire an access token. OAuth 2 defines several grant types, each suited for a particular use case. The authorization code grant type is the most appropriate for server-side client applications, such as your typical web application.
In the authorization code grant type, the client uses an authorization code to obtain an access token from the authorization server. The application client id and client secret credentials are used for interactions with the authorization server. Since the application source code is not accessible outside the client application, it is acceptable to store this information in a properties file.
2.4 Integrating OAuth2 with Spring Boot
To use an authentication provider in a Spring Boot application three steps are required:
- Register your application with the authentication provider
- Edit applicaition.properties or application.yml with the configuration details supplied by the provider, e.g. client id and client secret
- Configure OAuth2 in your security configuration class’
configure(HttpSecurity http)method
There are many OAuth2 authentication providers from which to choose. You can use a social network that offers identity services, such as Google or GitHub. (This arrangement is sometimes referred to as a social login). There are also corporate login providers like Okta and AuthO. Spring Security contains default configurations for Google, Facebook, GitHub, and Okta. We will use GitHub in our first example. (You can sign up for a GitHub account at https://github.com/join.)
Once you have a GitHub account you can register the client application at https://github.com/settings/developers.
On the Developer setting page, select “OAuth Apps” and then click the “New OAuth App” button. Enter the application name and the application’s Homepage URL, (http://localhost:8080, in this example). Set the Authorization callback URL as http://localhost:8080/login/oauth2/code/.
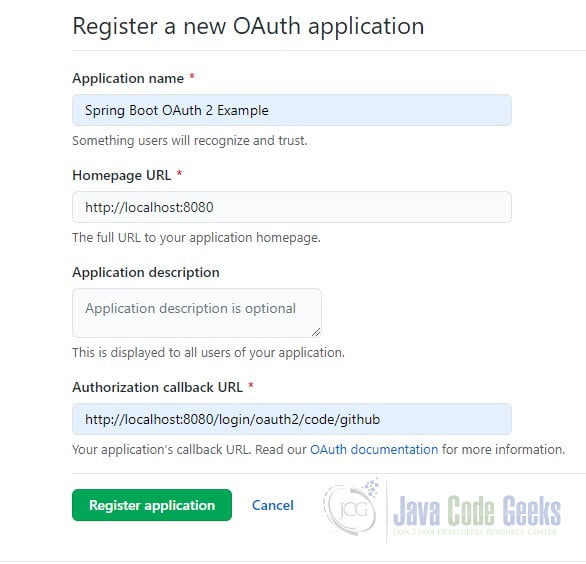
The Authorization callback URL (aka redirection URL) is the path in the client application (our Spring Boot application) that the browser is redirected back to after the user authenticates and grants access. Spring Security uses a URI template for the aforementioned providers:{baseUrl}/login/oauth2/code/{registrationId}. The registrationId is the unique identifier of the provider, in our example, “github”. The redirect URL endpoint receives the authentication code from the provider and uses it to acquire an access token.
Click the Register Application button. Copy the client id and client secret. We will use these credentials to configure our client application to use the client registration we just created.
Open the application.properties file and add the client registration information:
application.properties
spring.security.oauth2.client.registration.github.client-id=<your-client-id>
spring.security.oauth2.client.registration.github.client-secret=<your-client-secret>
If you use Google, Facebook, GitHub, or Okta as your authentication provider, you are only required to provide the client id and client secret as Spring Boot will use a default configuration for the other necessary properties. The property names are prefixed with “spring.security.oauth2.client.registration” followed by the client name, then the name of the client property. If you are using a different provider, additional properties are required. You can view the documentation for configuring your specific provider on their site.
Next, we’ll create two views, home.html and classified.html in the /src/main/resources/templates/ folder.
home.html
<!DOCTYPE html>
<html xmlns:th="http://www.thymeleaf.org">
<head>
<meta charset="ISO-8859-1">
<title>Home Page</title>
</head>
<body>
<h2>Hello!</h2>

</body>
</html>
classified.html
<!DOCTYPE html>
<html xmlns:th="http://www.thymeleaf.org">
<head>
<meta charset="ISO-8859-1">
<title>Classified</title>
</head>
<body>
<h2>This Page is Classified!</h2>


</body>
</html>
Notice that we declare the Thymeleaf namespace within the HTML tag, xmlns:th=“http://www.thymeleaf.org“.
Let’s add a controller to map these views to request URIs.
AppController.java
import org.springframework.stereotype.Controller;
import org.springframework.web.bind.annotation.GetMapping;

@Controller
public class AppController {

	@GetMapping("/")
	public String home() {
		return "home";
	}

	@GetMapping("/classified")
	public String classified() {
		return "classified";
	}
}
Lastly, we’ll update the SecurityConfiguration class. Modify it as follows:
SecurityConfiguration.java
@Configuration
public class SecurityConfiguration extends WebSecurityConfigurerAdapter {

	@Override
	protected void configure(HttpSecurity http) throws Exception {
		http.authorizeRequests()
		.antMatchers("/", "/actuator").permitAll()
		.antMatchers("/classified").authenticated()
		.anyRequest().authenticated()
		.and()
		.oauth2Login();
	}
}
We added “/” to the antMatcher that permits anyone access. We also explicitly protect “/classified” to authenticated users only. Finally, we added the Oauth2LoginConfigurer with oauth2Login().
Restart the application and point your browser to http://localhost:8080/classified. The client application redirects you to the GitHub client login page.
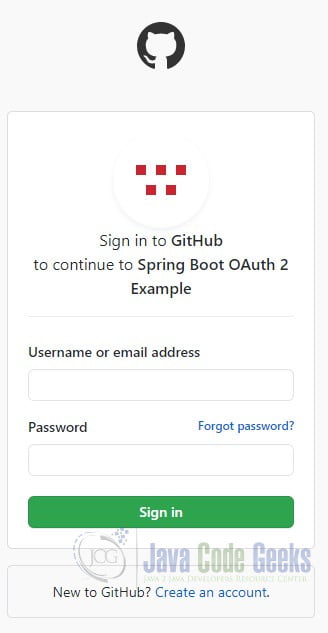
Enter your credentials. You will be asked to give the client application read-only access to your profile data.
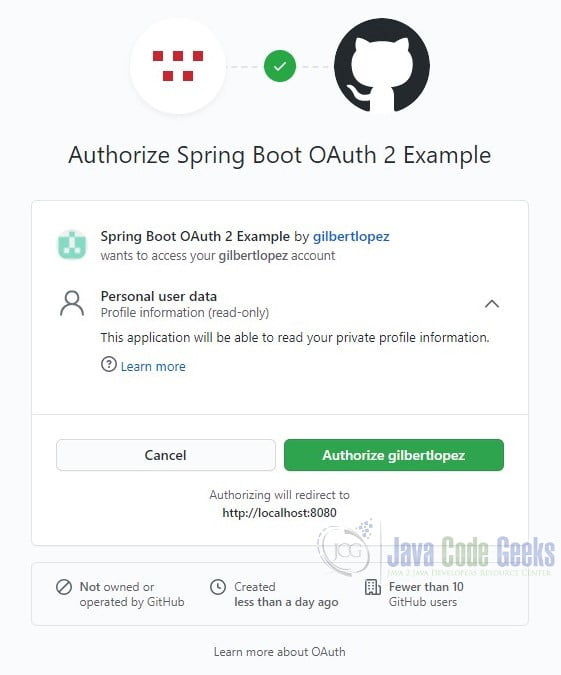
Authorize and you will be redirected to http://localhost:8080/classified.
In this example, GitHub acts as both the authentication server and the resource server. (The user data is the resource.) You can use the Developer Tools in Chrome, Firefox, or Edge to view how the request gets redirected between the client application and GitHub. (Use the Network tab for this task.)
A diagram and detailed explanation of the Authorization Code Grant is available at the IETF tools web site here: https://tools.ietf.org/html/rfc6749#section-4
2.5 Add a Second Authentication Provider
Let’s give the user an option to sign in through Google. First, you’ll need to create a project in the Google API Console. Instructions are provided here https://developers.google.com/identity/protocols/oauth2/openid-connect#appsetup. Don’t forget to copy the client id and client secret. Add the Google registration details in application.properties.
application.properties
spring.security.oauth2.client.registration.github.client-id=<your-client-id>
spring.security.oauth2.client.registration.google.client-secret=<your-client-secret>
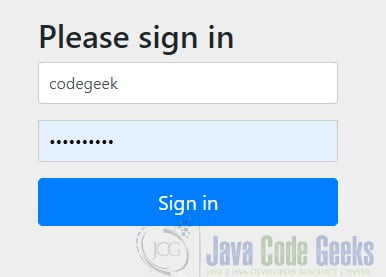
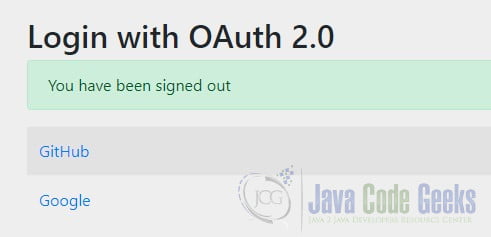
Restart the application and open a private browser window. (This is the simplest way to clear cached cookies and HTTP basic credentials.) Navigate to http://localhost:8080/classified. Spring Boot will generate a login page with both options since it does not know which of the two registered authentication providers to use.
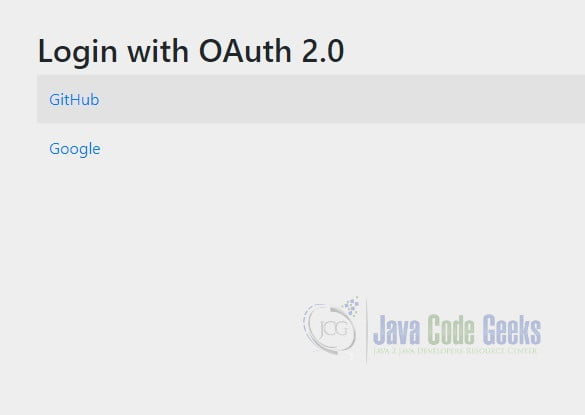
Click on the Google link. You will be redirected to the Google OAuth2 login page. Notice that the page is asking for consent to share your:
- name
- email address
- language preference
- profile picture
Enter your credentials and you will be redirected to http://localhost:8080/classified/classified.
2.6 Add Personalization
Let’s add a touch of personalization by displaying the user’s name on the protected page. We cannot retrieve the name from the Principal object by calling its getName method, since that will return the user’s id and not the name. We can, however, retrieve it with the OAuth2User::getAttribute method and add it to the model. We’ll also add the user’s authorities to the model to display, Add the following code to the controller class’ classified method:
AppController.java
	@GetMapping("/classified")
	public String classified(@AuthenticationPrincipal OAuth2User principal, Model model) {
		model.addAttribute("name", principal.getAttribute("name"));
		model.addAttribute("authorities", principal.getAuthorities());
		return "classified";
	}
@AuthenticationPrincipal is used to resolve Authentication::getPrincipal() to a method argument. OAuth2User represents a user Principal that is registered with an OAuth 2.0 provider. principal.getAuthorities() returns a Collection of GrantedAuthoritys associated with the OAuth 2.0 token
We’ll also add a check on the restricted page to display the name only if the user is authenticated. While there are different ways to accomplish this, let’s make use of Thymeleaf’s Spring Security integration module. Update the pom.xml file by adding the following dependency:
pom.xml
<dependency>
	<groupId>org.thymeleaf.extras</groupId>
	<artifactId>thymeleaf-extras-springsecurity5</artifactId>
</dependency>
Now we can update classified.html. Add follows just below the <h2> heading:
classified.html
<div th:if="${#authorization.expression('isAuthenticated()')}">
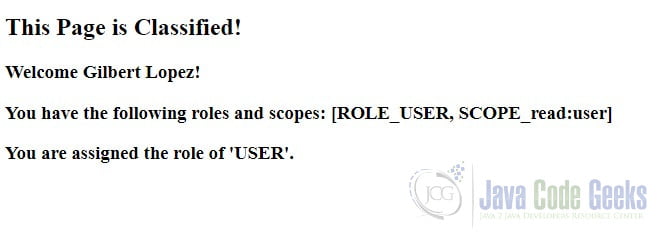
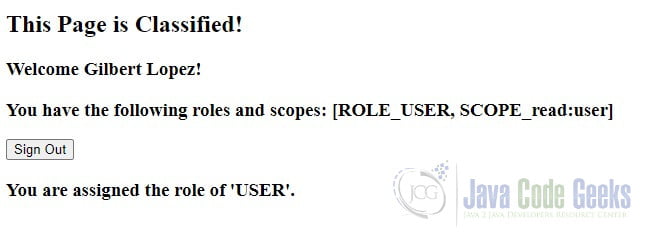
<h3 th:inline="text">Welcome <span th:text="${name}">John Doe</span>!</h3>
<h3 th:inline="text">You have the following roles and scopes: <span th:text="${authorities}">[ROLE_USER, SCOPE_read:user]</span></h3>
</div>
<div th:if="${#authorization.expression('hasRole(''ROLE_ADMIN'')')}">
<h3> You are assigned the role of 'ADMIN'</h3>
</div>
<div th:if="${#authorization.expression('hasRole(''ROLE_USER'')')}">
<h3>You are assigned the role of 'USER'.</h3>
</div>
#authorization. expression is a utility object with methods used to check authorization, based on expressions. If this evaluates to true, we use the inline and text attributes to display the user’s name and authorities.
Also, we will display some feedback, depending on the user’s role. For more information on Thymeleaf’s Spring Security integration module, click here: https://github.com/thymeleaf/thymeleaf-extras-springsecurity
Restart the application and point your browser to http://localhost:8080/classified.
2.7 Add a Logout Button
Let’s add a button that allows the user to logout out of the application. Update classified.html as follows. Be sure to include it within the isAuthenticated() check:
classified.html
    <div th:if="${#authorization.expression('isAuthenticated()')}">
        <h3 th:inline="text">Welcome <span th:text="${name}">John Doe</span>!</h3>
	<h3 th:inline="text">You have the following roles and scopes: <span th:text="${authorities}">[ROLE_USER, SCOPE_read:user]</span></h3>
	<form th:action="@{/logout}" method="post">
            <input type="submit" value="Sign Out"/>
        </form>
    </div>
Let’s also add a link to /classified on the Home page:
home.html
<p>Click <a th:href="@{/classified}">here</a> to see a classified page, if you dare!</p>
Restart the application and test the logout button.
Keep in mind that when using an OAuth2 authorization provider for authentication, Spring Security’s logout function merely logs you out of the client application, not the authorization provider. This may sound confusing, but it makes sense. The client application shouldn’t have the ability to log you out of GitHub or Google. You can verify this by clicking on the GitHub link. You will notice that you will not go through the authorization code grant flow again.
3. Summary
in this tutorial, we showed how to integrate OAuth2 authentication and authorization with a Spring Boot application. We discussed some OAuth2 concepts and explained how they work within the Spring Security model.
4. Download the Source Code
This was a Spring Boot OAuth2 Tutorial.

This was really nice and helpful. Thank you for sharing with us. It would be really great if you could provide the implementation of the Authentication service.