Spring Boot and MongoDB Sequence ID Generator
Welcome, in this tutorial, we will see how to generate a mongodb sequence id in a spring boot application.
1. Introduction
Before going further in this tutorial, we will look at the common terminology such as introduction to Spring Boot and mongodb.
1.1 Spring Boot
- Spring boot is a module that provides rapid application development feature to the spring framework including auto-configuration, standalone-code, and production-ready code
- It creates applications that are packaged as jar and are directly started using embedded servlet container (such as Tomcat, Jetty or, Undertow). Thus, no need to deploy the war files
- It simplifies the maven configuration by providing the starter template and helps to resolve the dependency conflicts. It automatically identifies the required dependencies and imports them into the application
- It helps in removing the boilerplate code, extra annotations, and xml configurations
- It provides powerful batch processing and manages the rest endpoints
- It provides an efficient jpa-starter library to effectively connect the application with the relational databases
- It offers a Microservice architecture and cloud configuration that manages all the application related configuration properties in a centralized manner
1.2 MongoDB
- MongoDB is a high-performance NoSQL database where each database has collections which in turn have documents. Each document has a different number of fields, size, content, and is stored in a JSON-like format (i.e. Binary JSON (BSN)
- The documents in MongoDB doesn’t need to have a schema defined beforehand. Instead, the fields (i.e. records) can be created on the go
- Data model available within the MongoDB allows developers to represent the hierarchical relationships, store arrays, and other more complex structures easily
- This NoSQL solution often comes with embedding, auto-sharding, and onboard replication for better scalability and high availability
1.2.1 Why MongoDB?
- As a NoSQL type database, MongoDB stores the data in the form of a document. Thus, MongoDB offers more flexibility
- This database supports search by field-name, range queries, and regular expressions. It often provides queries to return the particular fields inside the documents
- MongoDB offers indexes to improve the search performance within the NoSQL database
- To offer horizontal scalability, MongoDB uses sharding by splitting the data across the many MongoDB occurrences
- Replication: MongoDB can give high availability with the replica sets
Let us go ahead with the tutorial implementation but before going any further I’m assuming that you’re aware of the Spring boot basics.
2. Spring Boot and MongoDB Sequence ID Generator
2.1 Application Pre-requisite
To start with this tutorial, I am hoping that you have the mongodb and mongodb graphical interface (i.e. mongo-express) up and running in your localhost environment. For easy setup, I have these both up and running on the docker environment. You can execute the below script using the docker-compose command to get both containers running on docker in minutes. If you’re doing it for the first time the mongodb and mongo-express docker images will be downloaded from the docker hub.
docker-compose.yml
services:
  mongodb:
    container_name: mongodb
    image: mongo
    environment:
      MONGO_INITDB_DATABASE: employees
    ports:
      - '27017:27017'
  express:
    container_name: express
    image: mongo-express
    ports:
      - '9001:8081'
    environment:
      - ME_CONFIG_MONGODB_SERVER=mongodb
      - ME_CONFIG_MONGODB_PORT=27017
      - ME_CONFIG_MONGODB_ENABLE_ADMIN=true
    depends_on:
      - mongodb
version: '3'
If everything goes well the containers would be started successfully as shown in Fig. 1. You can use the docker ps -a command to confirm that both the containers are started successfully. For further information on docker basics, you can navigate to this tutorial.
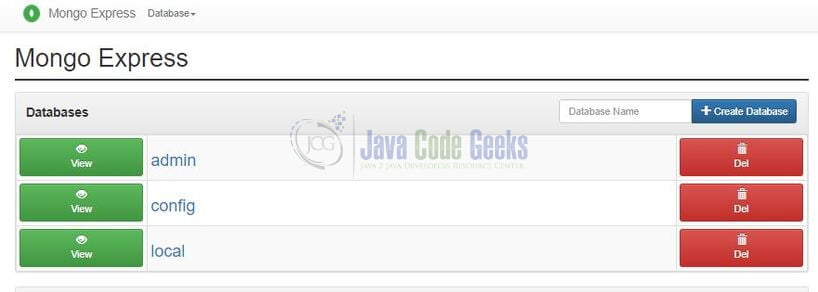
Navigate to the following URL – localhost:9001 to confirm that the mongo-express is running and can bind with the mongodb successfully.
2.2 Tools Used for Spring boot application and Project Structure
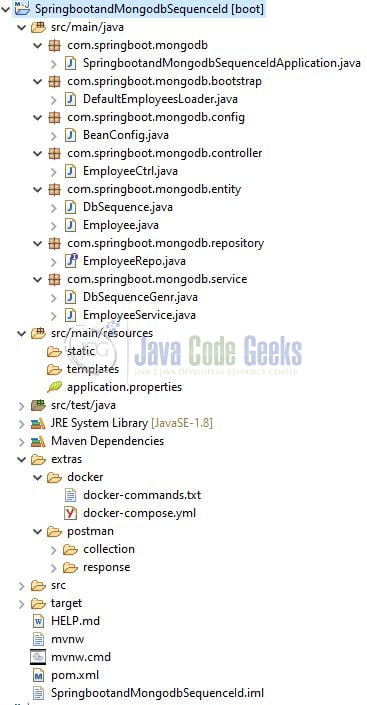
We are using Eclipse Kepler SR2, JDK 8, and Maven. In case you’re confused about where you should create the corresponding files or folder, let us review the project structure of the spring boot application.
Let us start building the application!
3. Creating a Spring Boot application
Below are the steps involved in developing the application.
3.1 Maven Dependency
Here, we specify the dependency for the Spring boot (Web and MongoDB), Lombok, and Java faker (for generating the mock data). Maven will automatically resolve the other dependencies. The updated file will have the following code.
pom.xml
<?xml version="1.0" encoding="UTF-8"?>
<project xmlns:xsi="http://www.w3.org/2001/XMLSchema-instance"
         xmlns="http://maven.apache.org/POM/4.0.0"
         xsi:schemaLocation="http://maven.apache.org/POM/4.0.0 https://maven.apache.org/xsd/maven-4.0.0.xsd">
    <modelVersion>4.0.0</modelVersion>
    <parent>
        <groupId>org.springframework.boot</groupId>
        <artifactId>spring-boot-starter-parent</artifactId>
        <version>2.4.1</version>
        <relativePath/> <!-- lookup parent from repository -->
    </parent>
    <groupId>com.springboot.mongodb</groupId>
    <artifactId>SpringbootandMongodbSequenceId</artifactId>
    <version>0.0.1-SNAPSHOT</version>
    <name>SpringbootandMongodbSequenceId</name>
    <description>Springboot and Mongodb SequenceId generator</description>

    <properties>
        <java.version>1.8</java.version>
    </properties>

    <dependencies>
        <dependency>
            <groupId>org.springframework.boot</groupId>
            <artifactId>spring-boot-starter-data-mongodb</artifactId>
        </dependency>
        <dependency>
            <groupId>org.springframework.boot</groupId>
            <artifactId>spring-boot-starter-web</artifactId>
        </dependency>

        <dependency>
            <groupId>com.github.javafaker</groupId>
            <artifactId>javafaker</artifactId>
            <version>1.0.2</version>
        </dependency>

        <dependency>
            <groupId>org.projectlombok</groupId>
            <artifactId>lombok</artifactId>
            <optional>true</optional>
        </dependency>
        <dependency>
            <groupId>org.springframework.boot</groupId>
            <artifactId>spring-boot-starter-test</artifactId>
            <scope>test</scope>
        </dependency>
    </dependencies>

    <build>
        <plugins>
            <plugin>
                <groupId>org.springframework.boot</groupId>
                <artifactId>spring-boot-maven-plugin</artifactId>
                <configuration>
                    <excludes>
                        <exclude>
                            <groupId>org.projectlombok</groupId>
                            <artifactId>lombok</artifactId>
                        </exclude>
                    </excludes>
                </configuration>
            </plugin>
        </plugins>
    </build>

</project>
3.2 Application properties file
Create a new properties file at the location: SpringbootandMongodbSequenceId/src/main/resources/ and add the following code to it. Here we will define the application and mongo database configuration.
application.properties
# application configuration
server.port=9500
spring.application.name=springboot-mongodb-sequence-id-example
# spring boot and mongodb configuration
# db name
spring.data.mongodb.database=employees
# hostname
spring.data.mongodb.host=localhost
# port number
spring.data.mongodb.port=27017
# sql query logging
logging.level.org.springframework.data.mongodb.core.MongoTemplate=debug
3.3 Java Classes
Let us write the important java class(es) involved in this application. For brevity, we will skip the following classes –
Employee.java– The class contain the employee properties, constructor to set the properties, and getter methodsEmployeeRepo.java– An interface that extends theMongoRepositoryinterface for the database operationsEmployeeService.java– The class that calls the database layer methodsBeanConfig.java– The class used to create the object for theFakerclass so that this class can be autowired
3.3.1 Implementation/Main class
Add the following code to the main class to bootstrap the application from the main method. Always remember, the entry point of the spring boot application is the class containing @SpringBootApplication annotation and the static main method.
SpringbootandMongodbSequenceIdApplication.java
package com.springboot.mongodb;

import lombok.extern.slf4j.Slf4j;
import org.springframework.boot.SpringApplication;
import org.springframework.boot.autoconfigure.SpringBootApplication;

// Lombok annotation for logger
@Slf4j
// Spring annotation
@SpringBootApplication
public class SpringbootandMongodbSequenceIdApplication {

    public static void main(String[] args) {
        SpringApplication.run(SpringbootandMongodbSequenceIdApplication.class, args);
        log.info("Springboot and mongodb sequence id generator started successfully.");
    }

}
3.3.2 Database sequence model class
Add the following code to the sequence model class which will help store the sequence number in the mongodb collection (named – db_sequence).
DbSequence.java
package com.springboot.mongodb.entity;

import lombok.AllArgsConstructor;
import lombok.Data;
import lombok.NoArgsConstructor;
import org.springframework.data.annotation.Id;
import org.springframework.data.mongodb.core.mapping.Document;
import org.springframework.data.mongodb.core.mapping.Field;
import org.springframework.stereotype.Component;

// Mongodb annotation
// marks a class for the domain object that we want to persist in the db
@Document(collection = "db_sequence")
// Lombok annotations
@Data
@NoArgsConstructor
@AllArgsConstructor
// Spring stereotype annotation
@Component
public class DbSequence {

    @Id
    String id;
    // describes the field name as it will be represented in mongodb bson document
    // offers the name to be different than the field name of the class
    @Field("sequence_number")
    int sequence;
}
3.3.3 Database sequence generator class
Add the following code to the service class which helps to generate the next id sequence for the employee record.
DbSequenceGenr.java
package com.springboot.mongodb.service;

import com.springboot.mongodb.entity.DbSequence;
import org.springframework.beans.factory.annotation.Autowired;
import org.springframework.data.mongodb.core.FindAndModifyOptions;
import org.springframework.data.mongodb.core.MongoOperations;
import org.springframework.data.mongodb.core.query.Criteria;
import org.springframework.data.mongodb.core.query.Query;
import org.springframework.data.mongodb.core.query.Update;
import org.springframework.stereotype.Service;

import java.util.Objects;

@Service
public class DbSequenceGenr {

    @Autowired
    private MongoOperations operations;

    public int getNextSequence(final String sequenceName) {
        // get the sequence number
        final Query q = new Query(Criteria.where("id").is(sequenceName));
        // increment the sequence number by 1
        // "sequence" should match the attribute value specified in DbSequence.java class.
        final Update u = new Update().inc("sequence", 1);
        // modify in document
        final DbSequence counter = operations.findAndModify(q, u,
                FindAndModifyOptions.options().returnNew(true).upsert(true), DbSequence.class);

        return !Objects.isNull(counter) ? counter.getSequence() : 1;
    }
}
3.3.4 Default bootstrap class
Add the following code to the bootstrap class which helps to store the employee data into the mongodb collection (named – employees) at the application bootstrap.
DefaultEmployeeLoader.java
package com.springboot.mongodb.bootstrap;

import com.github.javafaker.Faker;
import com.springboot.mongodb.entity.Employee;
import com.springboot.mongodb.service.DbSequenceGenr;
import com.springboot.mongodb.service.EmployeeService;
import lombok.extern.slf4j.Slf4j;
import org.springframework.beans.factory.annotation.Autowired;
import org.springframework.boot.CommandLineRunner;
import org.springframework.stereotype.Component;

import java.util.Random;

// Lombok annotation for logger
@Slf4j
// Spring annotation
@Component
public class DefaultEmployeesLoader implements CommandLineRunner {

    private static final String[] GENDER = {"Male", "Female", "Transgender"};
    private static final Random RANDOM = new Random();

    @Autowired
    private EmployeeService service;
    @Autowired
    private DbSequenceGenr sequenceGenr;
    @Autowired
    private Faker faker;

    // will add the dummy employee data in the mongodb collection
    // will be executed automatically on the application startup
    @Override
    public void run(String... args) {
        if (service.getCollectionCount() == 0) {
            log.info("Saving default employees in the collection");
            for (int i=0; i<11; i++) {
                persist();
            }
        } else {
            log.info("Default employees are already present in the mongo collection");
        }
    }

    // calls the service layer method which in turn calls the dao layer method
    // to save the employee record in the mongodb collection
    private void persist() {
        final Employee e = createEmployee();
        service.save(e);
    }

    // using the faker library to create some mock data for the employee model
    private Employee createEmployee() {
        final String firstName = faker.name().firstName();
        final String lastName = faker.name().lastName();
        final String gender = GENDER[RANDOM.nextInt(GENDER.length)];
        final String email = firstName.toLowerCase() + "." + lastName.toLowerCase() + "@automation.com";

        return Employee.builder()
                .id(sequenceGenr.getNextSequence(Employee.SEQUENCE_NUMBER))
                .firstName(firstName)
                .lastName(lastName)
                .gender(gender)
                .email(email)
                .phoneNumber(faker.phoneNumber().cellPhone())
                .homeAddress(faker.address().fullAddress())
                .build();
    }
}
3.3.5 Controller class
Add the following code to the controller class. The class has two methods that will fetch the employee’s information from the employees collection.
EmployeeCtrl.java
package com.springboot.mongodb.controller;

import com.springboot.mongodb.entity.Employee;
import com.springboot.mongodb.service.EmployeeService;
import lombok.extern.slf4j.Slf4j;
import org.springframework.beans.factory.annotation.Autowired;
import org.springframework.http.HttpStatus;
import org.springframework.http.ResponseEntity;
import org.springframework.web.bind.annotation.GetMapping;
import org.springframework.web.bind.annotation.PathVariable;
import org.springframework.web.bind.annotation.RequestMapping;
import org.springframework.web.bind.annotation.RestController;

import java.util.List;

// Lombok annotation for logger
@Slf4j
// Spring annotations
@RestController
@RequestMapping("/api")
public class EmployeeCtrl {

    @Autowired
    private EmployeeService service;

    // Url - http://localhost:9500/api/employees
    @GetMapping("/employees")
    public ResponseEntity<List<Employee>> getAll() {
        log.info("Fetching all employees from the db");
        return new ResponseEntity<>(service.getEmployees(), HttpStatus.OK);
    }

    // Url - http://localhost:9500/api/employees/gender/Female
    // where gender type can be - Male, Female, or Transgender
    @GetMapping("/employees/gender/{type}")
    public ResponseEntity<List<Employee>> getEmployeesByGender(@PathVariable("type") String type) {
        log.info("Fetching all employees from the db where gender type = {}", type);
        return new ResponseEntity<>(service.getEmployeesByGender(type), HttpStatus.OK);
    }
}
4. Run the Application
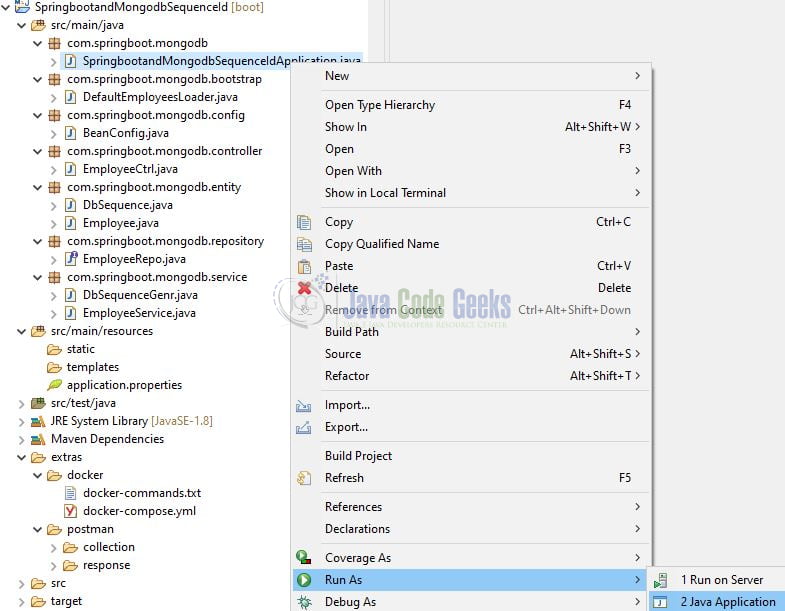
To execute the application, right-click on the SpringbootandMongodbSequenceIdApplication.java class, Run As -> Java Application.
5. Project Demo
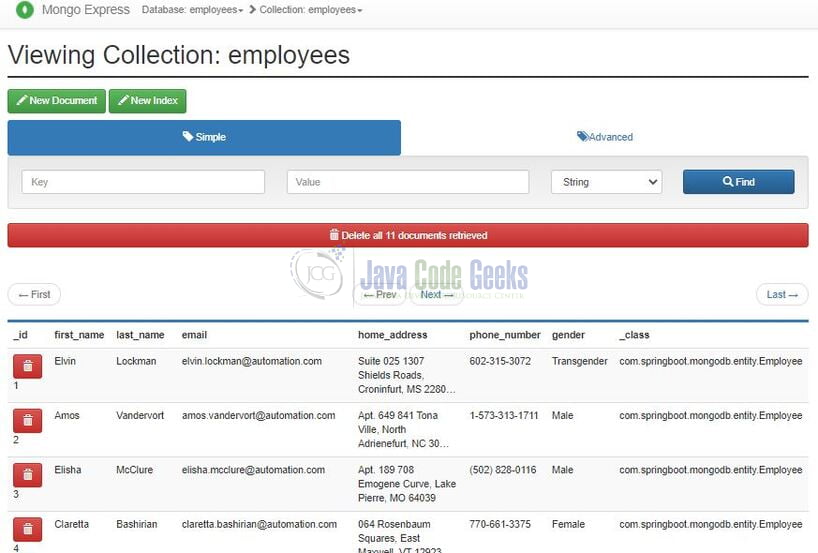
When the application is started, the default data will be pushed to the mongodb collection (named – employees). You can hit the following URL – http://localhost:9001/ to confirm that the default data has been successfully persisted in the mongodb collection.

You are free to use postman or any other tool of your choice to make a post request to the endpoint.
Generate access token endpoint
-- HTTP GET endpoint url –
http://localhost:9500/api/employees

-- HTTP GET endpoint url (to fetch employees by gender)--
http://localhost:9500/api/employees/gender/Female
That is all for this tutorial and I hope the article served you whatever you were looking for. Happy Learning and do not forget to share!
6. Summary
In this section, you learned,
- Spring boot and Mongodb introduction
- Steps to run mongodb and mongo-express on Docker using the
docker-composecommand - Steps to implement mongodb sequence id generator in Spring Boot
You can download the sample application as an Eclipse project in the Downloads section.
7. Download the Project
This was an example of implementing MongoDB sequence id generator in a Spring Boot application.
You can download the full source code of this example here: Spring Boot and MongoDB Sequence ID Generator


