Splunk Schedules and Alerts Example
1. Introduction
Splunk includes scheduled reports to run reports at a scheduled internal. Splunk alert is a saved search which can be run real-time or on a scheduled internal and can trigger one or more actions.
In this example, I will demonstrate how to schedule a report and set up an alert with step-by-step instructions along with screenshots.
2. Technologies Used
The example in this article was built and run using:
- Docker 19.03.8
- Splunk 8.1.1
- Google Chrome 87.0.4280.88
Click my other article to install Splunk.
3. Schedule a Report
Splunk documentation outlines how to schedule a report.
3.1 Schedule an Existing Report
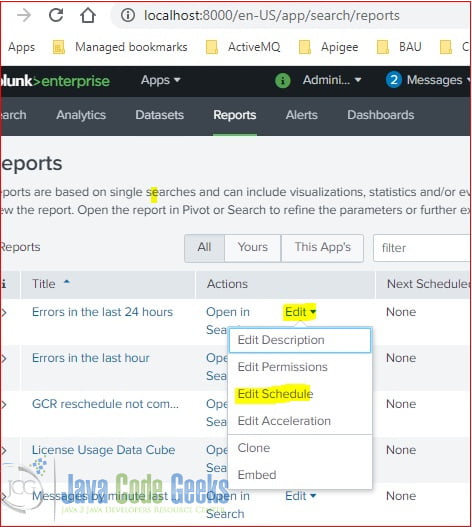
Under the Reports tab, select the desired report and click the Edit drop-down button and choose the “Edit Schedule” option.
3.2 Schedule Configurations
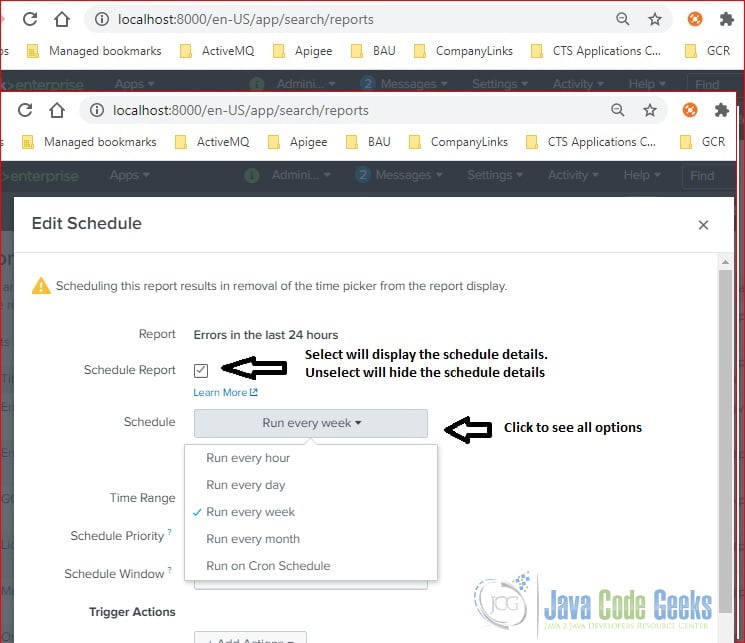
In the pop-up “Edit Schedule” window, check the “Schedule Report” checkbox which will display more configuration settings. Select the desired options: schedule frequency, time range, schedule priority, and schedule windows.
3.3 Trigger Action Options
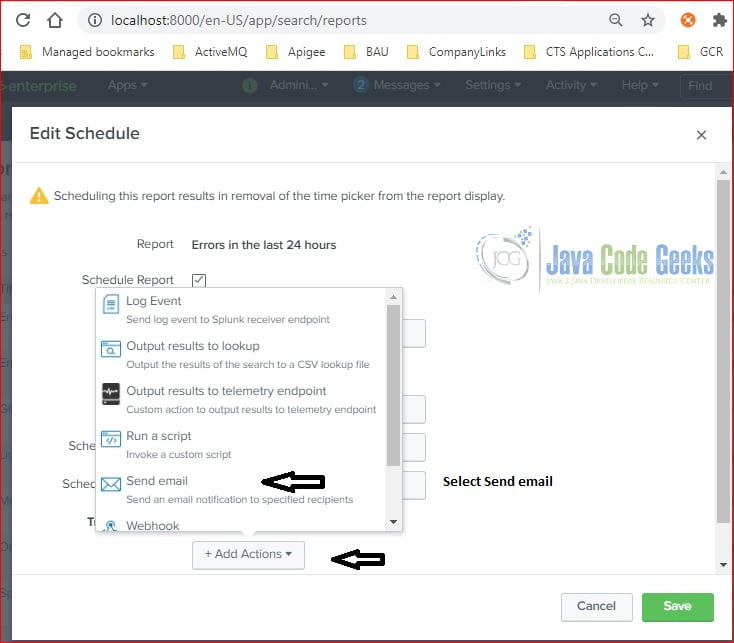
Click the “+Add Actions” button under Trigger Actions. It displays a list of actions. I will choose the “Send Email” option for this example.
3.4 Send Email Action Configurations
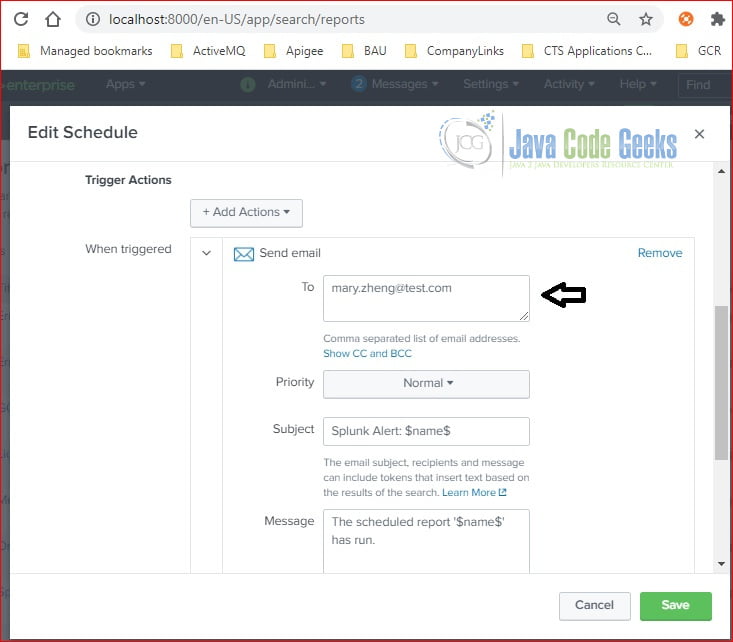
It will expand the “Edit Schedule” screen with “Send Email” configurations. You can click the Remove button to delete it and choose another trigger action which will repaint the screen with different configuration settings.
3.5 Scheduled Time
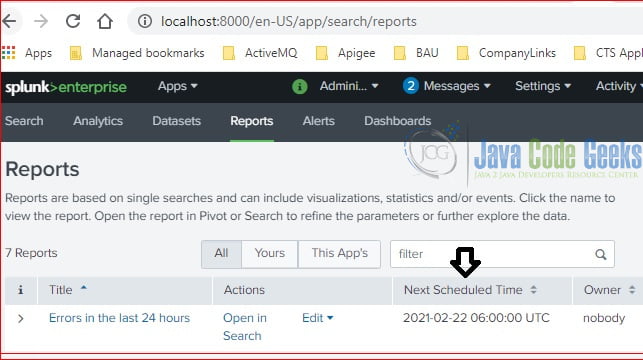
Click the “Save” button after completing the configuration, then you will see the report has the “Next Scheduled Time” column populated.
3.6 Edit Schedule within Report
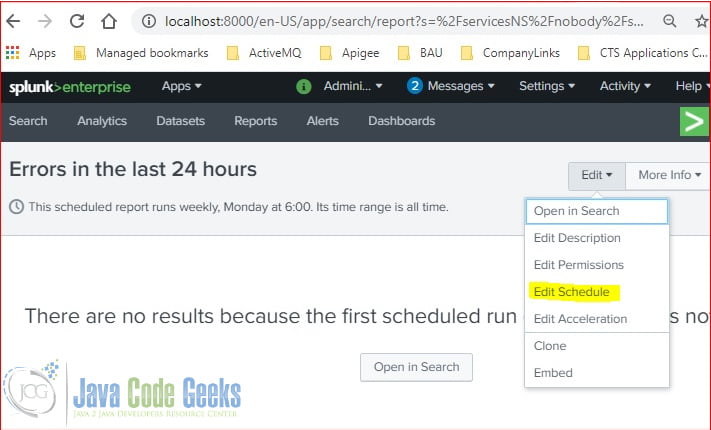
We can schedule a report when editing a report. Click the “Edit” button and select the “Edit Schedule” option.
4. Create an Alert
Pleas reference Splunk documentation for creating an alert.
4.1 Save As an Alert
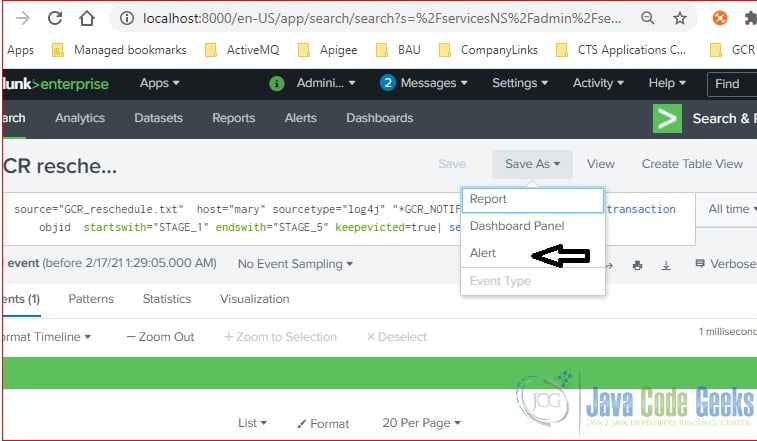
At the search screen, click the “Save As” button and choose the “Alert” option.
4.2 Alert Setting
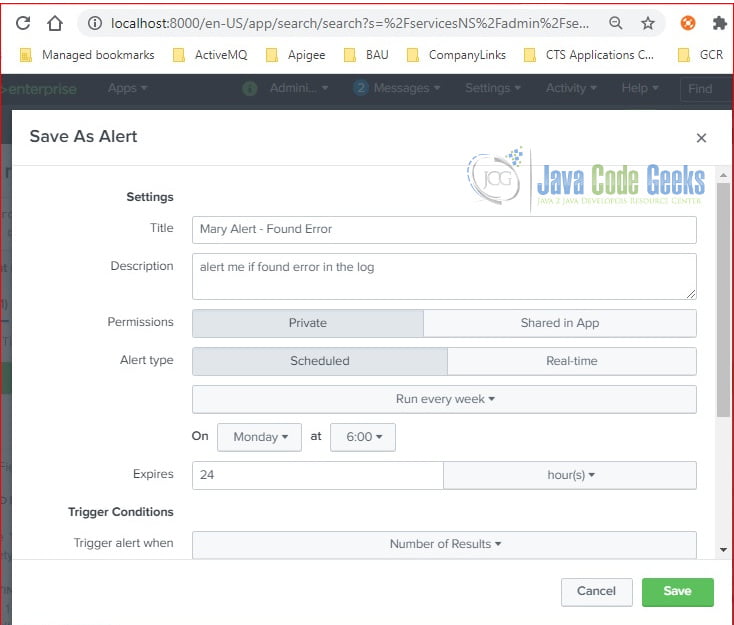
It displays a pop-up “Save As Alert” window. Enter the alert setting: title, description, permission, type, expires, etc.
4.3 Alert Trigger Conditions
Scroll down to enter the Trigger condition.
4.4 Alert Trigger Actions
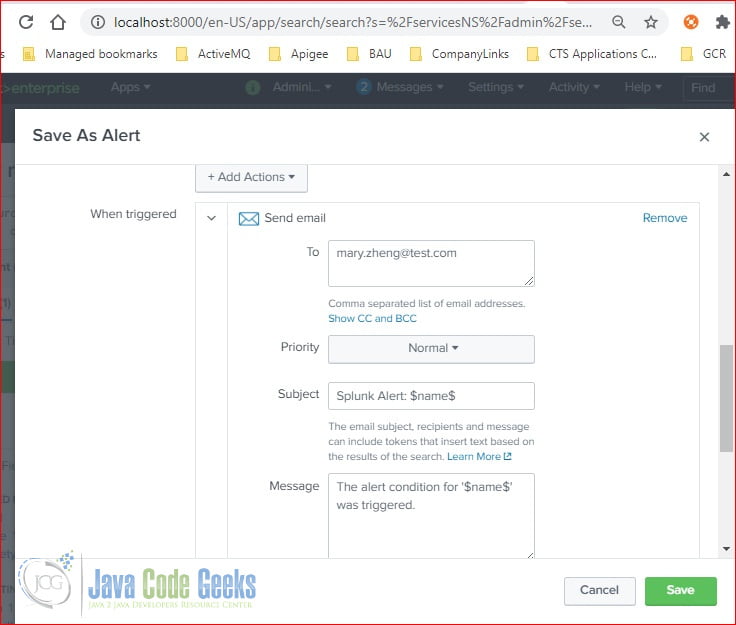
Scroll down to enter the trigger actions. In this step, I chose the “Send Email” option.
4.5 Alert is Saved
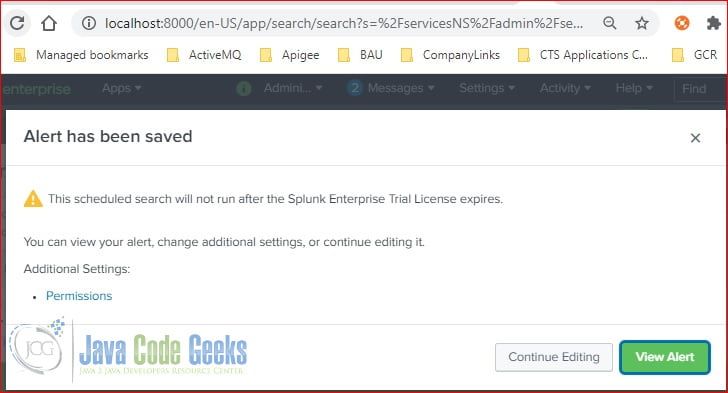
Click “Save” after completing the form. I got a warning message due to my trial licence.
4.6 View Alert
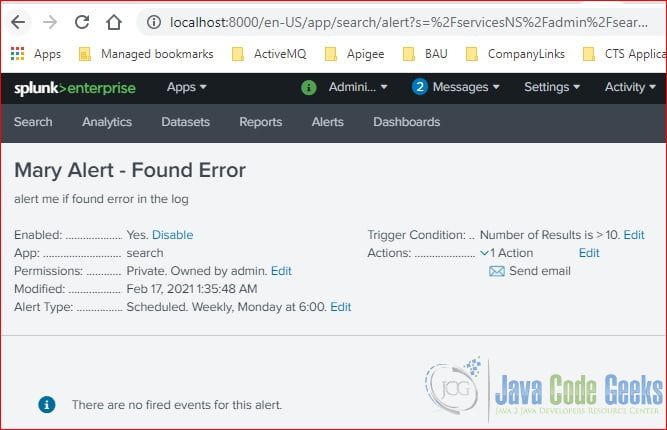
Click the “View Alert” button which displays the alert detail.
4.7 Edit Alert
Under the Alerts tab, you should see the alert you created, click the “Edit” button and select the Edit Alert option to update it. You can manage alerts with other options too.
5. Summary
Splunk provides a very good web interface to schedule a report and create an alert. In this article, I showed how to schedule a report and create an alert from the search result.




Good one Mary, It is understandable and clear. Thank you