In this article, we will explore how to use the ChatGPT API with cURL to seamlessly integrate OpenAI’s powerful language model, GPT-3.5, into your applications, products, or services.
1. Introduction
The ChatGPT API allows you to integrate OpenAI’s powerful language model, GPT-3.5, into your applications, products, or services. By using the API with cURL, you can make HTTP requests to interact with the language model and receive responses in real-time. This guide will walk you through the necessary steps to use the ChatGPT API with cURL, including authentication, making requests, and handling responses.
2. Prerequisites
Before you begin, ensure you have the following prerequisites in place:
- OpenAI Account: You need to have an account on the OpenAI platform, and you should have generated an API key.
- cURL Installed: cURL is a command-line tool for making HTTP requests. Make sure it is installed on your system.
2.1 Create an OpenAI Account and Key
Visit OpenAI. Then choose to Sign Up.

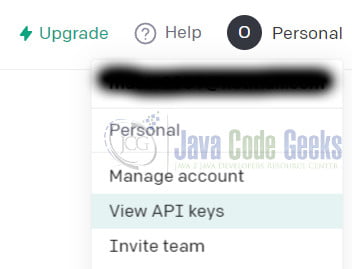
Go to Veiw API Keys.
Choose “Create new secret key”.

2.2 Install cURL
2.2.1 Windows
To install cURL on Windows, you can use the following steps:
Visit the cURL website: https://curl.se/windows/
Scroll down to the “Win64 – Generic” or “Win32 – Generic” section, depending on your system’s architecture (64-bit or 32-bit).
Click on the highlighted link to download the latest cURL executable. This will download a zip file.
Extract the contents of the zip file to a location of your choice (e.g., C:\curl).
Add the path to the cURL executable to your system’s PATH environment variable. Here’s how you can do it:
- Right-click on “This PC” or “Computer” and select “Properties.”
- Click on “Advanced system settings” on the left side of the window.
- In the System Properties window, click on the “Environment Variables” button.
- Under “System variables,” find the “Path” variable and click on “Edit.”
- Click on “New” and add the path to the cURL executable (e.g.,
C:\curl\bin). - Click “OK” to close all windows.
Open a new command prompt or PowerShell window and type curl --version to verify that cURL is installed and accessible.
2.2.2 macOS
macOS usually comes with cURL pre-installed. You can verify if it’s already installed by opening the Terminal and typing curl --version. If it’s not installed or you need to update to the latest version, follow these steps:
Open the Terminal application on your macOS.
Install Homebrew (if you don’t have it already). Homebrew is a popular package manager for macOS. Paste the following command into the Terminal and press Enter:
/bin/bash -c "$(curl -fsSL https://raw.githubusercontent.com/Homebrew/install/HEAD/install.sh)"
Once Homebrew is installed, use it to install cURL. Type the following command in the Terminal and press Enter:
brew install curl
After the installation is complete, you can verify the cURL version by typing curl --version in the Terminal.
2.2.3 Linux (Ubuntu/Debian)
On most Linux distributions, cURL comes pre-installed. However, if it’s not available or you need to update it, follow these steps for Ubuntu/Debian based systems:
Open a terminal window.
Update the package list:
sudo apt update
Install cURL:
sudo apt install curl
Once the installation is complete, you can verify the cURL version by typing curl --version in the terminal.
2.2.4 Linux (Fedora/CentOS)
For Fedora/CentOS based systems, use the following steps:
Open a terminal window.
Update the package list:
sudo dnf update
Install cURL:
sudo dnf install curl
Once the installation is complete, you can verify the cURL version by typing curl --version in the terminal.
That’s it! Now you should have cURL installed on your system, and you can start using it to make HTTP requests from the command line.
3. API Authentication
To authenticate your API requests, you need to include your API key in the headers of each request. The API key should be kept confidential and not shared publicly.
Here’s the command to set up the API key as a variable for later use:
export OPENAI_API_KEY="YOUR_API_KEY"
Replace YOUR_API_KEY with your actual API key.
4. Making API Requests
To use the ChatGPT API, you need to make a POST request to the appropriate endpoint. The base URL for the API is https://api.openai.com/v1/engines/{engine}/completions, where {engine} is the specific engine you want to use. For GPT-3.5, the engine name is “text-davinci-003”.
4.1. Sending a Simple Completion Request
To send a simple completion request, you need to provide a prompt, which is a message or statement to which the model responds. You can also specify additional parameters such as the maximum number of tokens in the response, the temperature (which controls the randomness), and more.
Here’s the cURL command to make a basic completion request:
curl -X POST https://api.openai.com/v1/engines/text-davinci-003/completions \
-H "Authorization: Bearer $OPENAI_API_KEY" \
-H "Content-Type: application/json" \
-d '{
    "prompt": "Once upon a time",
    "max_tokens": 100
}'
In this example, the prompt is “Once upon a time,” and the model will generate a completion with a maximum of 100 tokens.
4.2. Handling the Response
The API will return a JSON response containing the model’s completion. You can extract the completion text from the response using tools like jq in combination with grep to filter the JSON output. Ensure you have jq installed to parse JSON responses.
Here’s an example of extracting the completion text using cURL, jq, and grep:
response=$(curl -X POST https://api.openai.com/v1/engines/text-davinci-003/completions \
-H "Authorization: Bearer $OPENAI_API_KEY" \
-H "Content-Type: application/json" \
-d '{
    "prompt": "Once upon a time",
    "max_tokens": 100
}')

completion_text=$(echo $response | jq -r '.choices[0].text' | grep -o '"[^"]\+"' | sed 's/"//g')
echo $completion_text
5. Conclusion
In this guide, we covered the basics of using the ChatGPT API with cURL. You learned how to authenticate your requests, make basic completions, and handle responses. Additionally, we discussed more advanced usage options to harness the full potential of the API. Now you can integrate ChatGPT into your applications and unlock a world of language generation possibilities.
