Splunk Calculated Fields Example
In this article we are going to show a Splunk Calculated Fields Example.
1. Introduction
Splunk is software for searching, monitoring, and analyzing machine-generated data. Calculated fields are fields added to events at search time. In this example, I will demonstrate:
- How to add a calculated field via web interface
- How to add a calculated field via the eval command
- How to manage calculated fields via web interface
2. Technologies Used
The example in this article was built and run using:
- Docker 19.03.8
- Splunk 8.1.1
- Google Chrome 87.0.4280.88
Click my other article to install Splunk.
3. Fields Web Interface
In this step, I will show how to add and manage a calculated field via web interface.
3.1 Settings
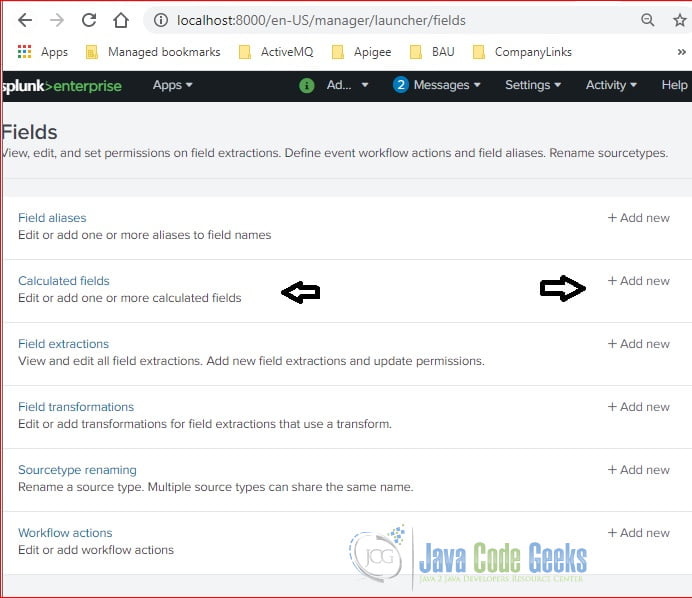
Click the Settings menu and select the Fields link as Figure 1.
Click the Fields link under the Setting section. It will display the Fields page. Click the “Add new” button to add a new calculated field.
Click the “Add new” button for the “Calculated fields“row.
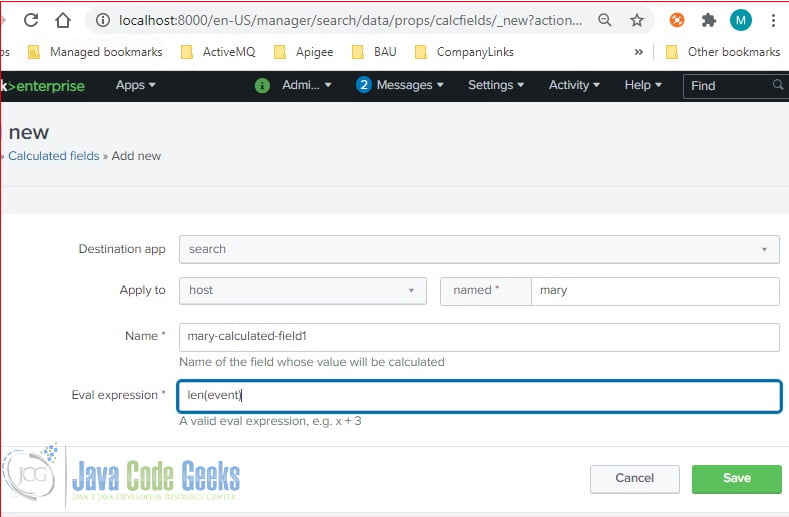
3.2 Add a Calculated Field
Clicking the “Add new” button will pop up a screen with the details. Enter the data and click the “Save” button.
In this step, I create a new field: mary-calculated-field1 with the event’s length.
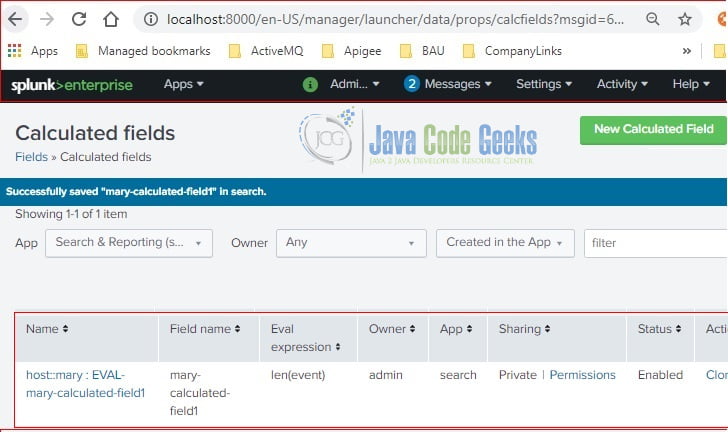
3.3 Manage Calculated Fields
After clicking the “Save” button, it displays the calculated fields. You can click the “New Calculated Field” to add more fields. You can manage by clicking the “delete“, “clone“, etc buttons.
3.4 Use Calculated Field in Search
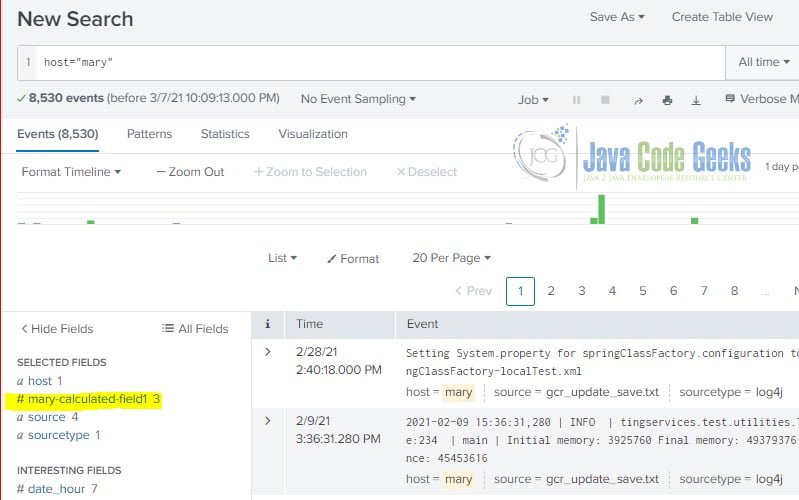
After the calculated field is saved, you should be able to see it in the interesting fields during the searching.
Note: the newly created calculated field- mary-calculated field1– is available.
4. Eval Command
Splunk provides the eval command which creates a field during searching time. Here is the simplified eval command syntax :
eval {calculated_field_name} = {eval statement}4.1 Eval from Existing Field
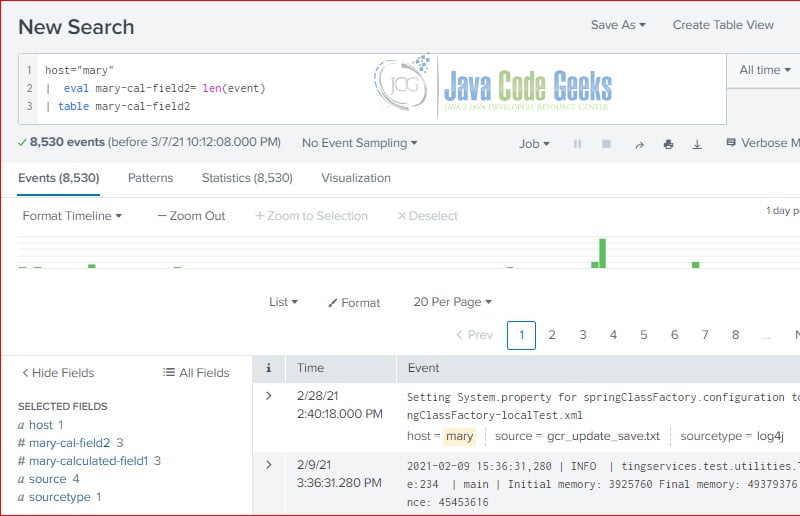
In this step, I will use the eval command to create a calculated field: mary-calculated-field2 which has the same eval statement as the mary-calculated-field1 that we created via web interface.
host="mary"
| eval mary-cal-field2=len(event)
| table mary-cal-field2
As you seen, both calculated fields: mary-calculated-field1 and mary-calculated-field2 are available in the interesting fields section.
Note: the calculated field is based on predefined field: event‘s length.
4.2 Eval with Extracted Fields
The eval statement varies based on the requirements, Please reference Splunk documentation site for more details. In this step, I will use the eval command with an extracted field – avg.
sourcetype="csv"
|  eval avgInMiutes = avg/60
|  table month, avg, avgInMiutes
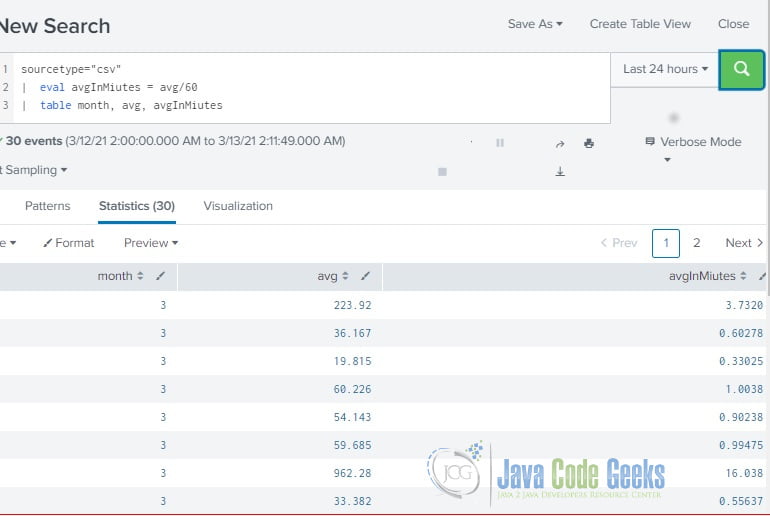
Note: the calculated field – avgMiutes is based on the extracted field – avg.
5. Summary
In this example, I demonstrated how to create and manage calculated fields via web interface. I also showed how to create a calculated field via the eval command. Please remember that eval command can override an existing field if they have the same name.
The calculated fields are similar to extracted fields and predefined fields in Splunk. Calculated fields can reference all types of field extractions and field aliasing, but they cannot reference lookups, event types, or tags. Splunk provides detail steps to create a calculated field via prop.conf file. Please reference here for more details about calculated fields.
6. Download the Source Code
You can download the full source code of this example here: Splunk Calculated Fields Example




This is not as simple as it looks but has amazing information in it. I loved it. At one point I felt Is this a never-ending list? Anyways if you want to learn or need consulting regarding Splunk, Visit this website.