In this post, we feature a comprehensive tutorial for beginners about TensorFlow Python. We will cover the basics of the TensorFlow library and try to understand different use-cases in which it can be used.
1. Introduction
Personally, I’ve looked and heard about TensorFlow so much that I am not sure what it is actually made for and what precisely, is its advantages and superpowers. That is why, at the beginning of this lesson, we will try to cover what are the use-cases in which you will want to try the TensorFlow library in Python and what advantages it can offer to you as compared to its alternatives (if there are any).
Table Of Contents
A lot of different definitions can be provided for TF but we will stick with a simple one. Based on its website, here is one-liner through which TensorFlow is described:
The core open source library to help you develop and train ML models.
Well, that was pretty basic and straightforward. Maybe that’s it! In this lesson, we will not try to cover the complete ground with TensorFlow because that cannot be done in a single lesson. TensorFlow is so huge and important that almost everything can be completed with it. Although everything is a big word, at the beginning of this lesson, we will try to mention some of the use-cases where TensorFlow is put to use in production. Let’s find out more about those use-cases.
2. Top use-cases for TensorFlow
Even as a beginner, I have struggled to understand the importance, use-cases and real advantages of each Data Science and Machine Learning related library because there are so many of them that you couldn’t even count them. Each one of them is popular, widely used, ready for production usage etc. In this section, we will only look at TensorFlow and its top use-cases where it is understood to be a perfect fit for use. Here are they:
- Audio recognition – As TensorFlow is based on Neural networks, it can manage many kind of signals, audio & voice signals are one of them. Even with some noise present in the signal, TensorFlow can provide you excellent results even when you are doing complex operations like sentiment analysis or voice search in your applications.
- Textual analysis – With TensorFlow, it is possible to perform semantic analysis on the text as well. With the implementation of summarisation inside TensorFlow, it is also possible to produce news headline automatically from a given paragraph of news content. Google Translate also makes use of TensorFlow for translating complex dialects into their plain versions.
- Image Recognition – TensorFlow object recognition algorithms help to identify small objects in big pictures, people in real-time video feeds. It can also identify irregular patterns of skin cells at the microscopic level to identify a chronic illness better than a human doctor.
- Time-series analysis – The simplest example for time-series analysis would be the recommendations you get via Google ads whenever you search for something on the web. It is not a surprise how Google is able to identify our needs so fast and translate into a monetary benefit by showing us exactly what we need.
- Classification – One of the real world examples of classification with TensorFlow is what Airbnb does. Airbnb uses TensorFlow in an image classification system where TensorFlow is able to classify an image into different sections of the house, like balcony, dining room, swimming pool, etc. This way, the Airbnb saves a lot of human hours to categorize the images into sections which now can be presented to the users with optimal classification.
As we can infer, it sounds like TensorFlow can actually be used anywhere there is a problem waiting to be solved. Actually, that is it. TensorFlow can be used anywhere where you want to work with patterns, recognition, analysis and it can help you take your products to market with its community support. Many production level deployment systems are also present which supports TensorFlow programs to run on the cloud like Algorithmia. Before we can start to write some programs with TensorFlow, let us first understand what tensors are and what is their importance.
3. What are Tensors?
Tensors are the commons terms we hear whenever we talk about TensorFlow. Simply put, Tensors are just a way to store n-dimensional data in a deep learning (or simply, machine learning) environment. If you know how to imaging 1-d and 2-d arrays, n-d arrays are quite similar.
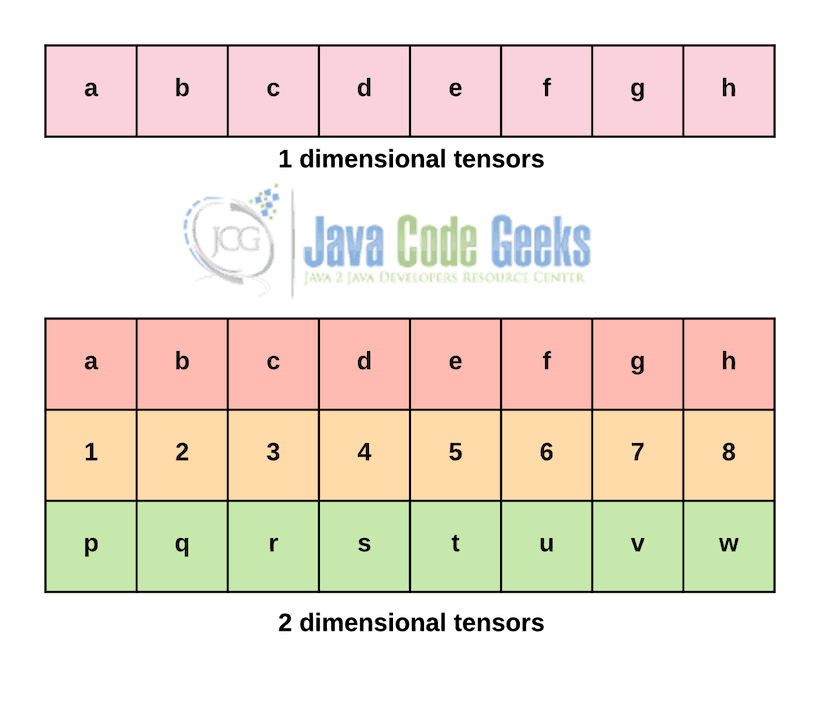
Just like what is represented above, Tensors are simply n-dimensional arrays that are optimized to store and process n-dimensions of data which is considerably complex. Each of the dimensions in a Tensor can be considered as a feature in Machine Learning. This simply means that the more attributes a dataset has, the more dimension & complex nature will its Tensor represents.
One thing to understand is the difference between a matrix and a Tensor. Based on one of the comments on this SO question, a matrix is just a two-dimensional table to organize information and a tensor is just its generalization. You can think of a tensor as a higher-dimensional way to organize information. So a matrix (5×5 for example) is a tensor of rank 2. And a tensor of rank 3 would be a “3D-matrix” like a 5x5x5 matrix. Please note that the dimension of the tensor is called it’s rank.
4. Installing TensorFlow & Python compatibility
TensorFlow is compatible with both Python 2 and Python 3. Apart from Python, TensorFlow API is also available in C++, Haskell, Java, Go, Rust, and R (3rd party library). This means that it is quite extensive in development and readily available for any framework and programming language you might be diving into.
For using TensorFlow on your local environment, using pip is the simplest way to install it. Just use the following command:
pip install tensorflow
I will be making use of the Anaconda manager for all the code in this lesson. I will launch a Jupyter Notebook for the same via the Anaconda manager:
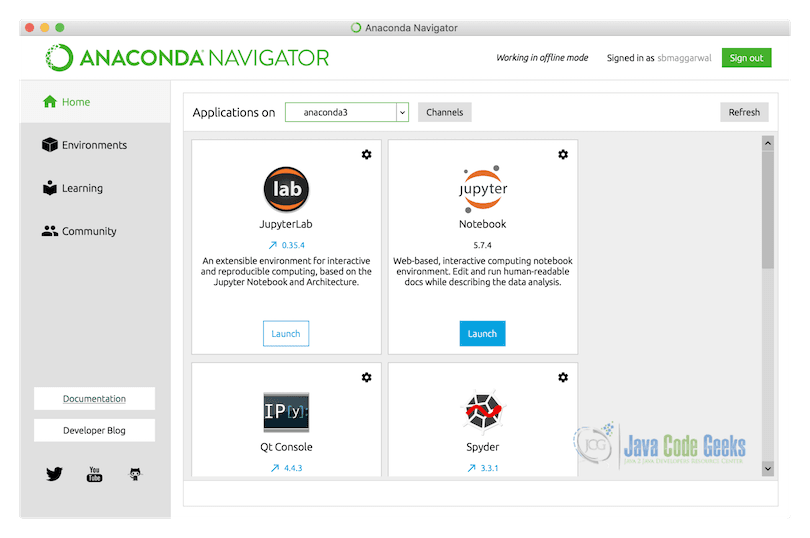
We are using Anaconda Navigator’s based Jupyter notebooks as most of the required packages are already installed in the environment prepared by Anaconda, this means that we can directly dive into the code snippets we want to write. If it doesn’t work for you by default, just make use of the pip command we mentioned earlier and relaunch the Anaconda kernel for the program to work.
5. Nearest Neighbours Algorithm
The nearest neighbor algorithm is one of the commonly used Classification Algorithm. Other examples for Classification Algorithms are Naïve Bayes’ classifier and Decision tree classifier.
The nearest neighbor algorithm is a lazy learning algorithm, which simply means the algorithm delay processing the training data until a new instance must be classified and so, a new instance is examined with respect to all training instances (observations) and is given its target value. The instance-based methods keep using the training data from its memory without learning any knowledge from the data. Every new instance requires the entire training data to be processed due to which classification is delayed and is called lazy learning.
Just like what the algorithm sounds, there must be a way to identify the distance to say that the neighbor is the nearest one. The nearest neighbors are defined in terms of the Euclidean distance. To quickly understand the exact meaning of this algorithm, let’s consider the following two-dimensional points belonging to two different classes represented as two colors:
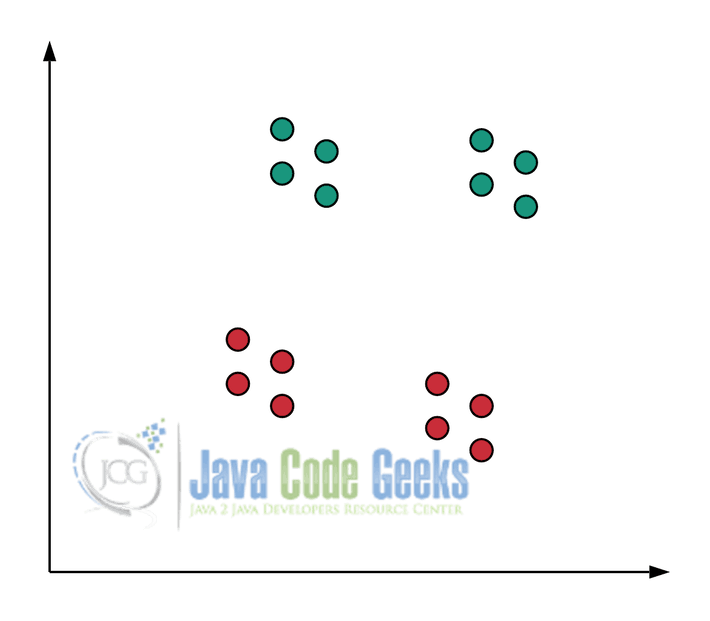
The points are representing training instances by the corresponding feature vectors. The feature vector is an (x, y) coordinate pair for each point. Let a new testing instance arrives (shown as a blue dot) and is plotted on the same coordinate plane:
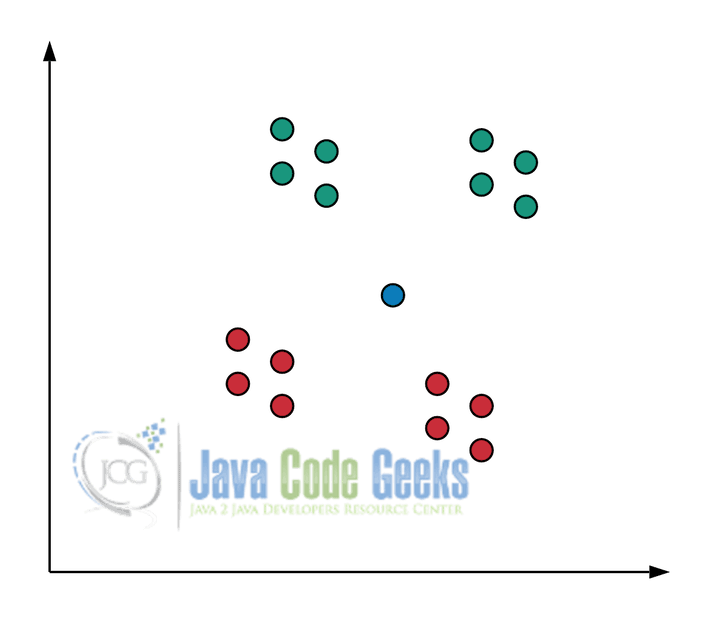
The k-nearest neighbor algorithm requires ‘k’ to be defined as a value. For example, if k=3, we compute the distances of the new instance from all training data and mark the three closest points. If the three closest points belong to the same family, we can easily assign a new point to the identified family.
6. Implementing Nearest Neighbours with TensorFlow
In this section, we will implement the nearest neighbour algorithm we studied in the last section using TensorFlow. To implement a simple but yet important example, we will make use of a dataset which is closer to the real world. We will use the MNIST database of handwritten digits.
To start, we should add the appropriate import statements in our Python program:
import numpy as np
import tensorflow as tf
Next, it is time to import the dataset we mentioned. It is very easy to import the mentioned handwritten dataset as TensorFlow includes it, we just have to inform it that the dataset must be made available at a specific location. Let’s add the code snippet which will do just that:
# Import Handwritten digits data
from tensorflow.examples.tutorials.mnist import input_data
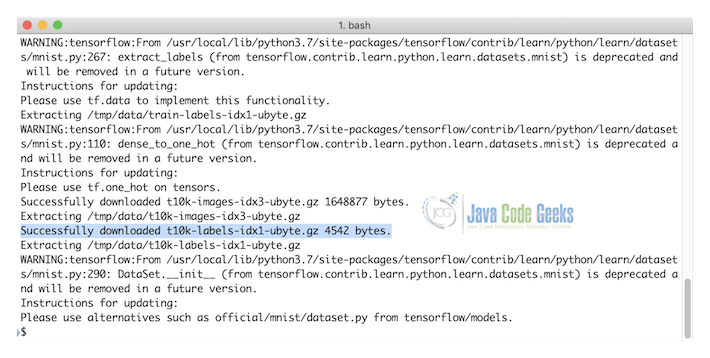
mnist = input_data.read_data_sets("/tmp/data/", one_hot=True)
Although with some warning, we will get a success message that the data has been downloaded over the network in the specified directory. Here is the warnings (and the success message) in the output:
Now that the data is downloaded, we will do what should be done with any dataset to be prepared for a Machine Learning algorithm, we will split it into two parts, one of which will be used to train the ML model and another split will be used to test the model developed. Here is the code snippet which will split the data into two parts:
X_training, Y_training = mnist.train.next_batch(5000)
X_test, Y_test = mnist.test.next_batch(200)
We have correctly split the dataset available into two parts. Now, based on the available training data, we need to plot graphs, plot each of the available data points on the graph so that it can be classified as one of the digits. So, let’s calculate the distance for each of the points here. Here is the code snippet for the next steps:
xtr = tf.placeholder("float", [None, 784])
xte = tf.placeholder("float", [784])

# Calculate L1 Distance
distance = tf.reduce_sum(tf.abs(tf.add(xtr, tf.negative(xte))), reduction_indices=1)
# Prediction: Get Nearest neighbor
pred = tf.argmin(distance, 0)

accuracy = 0.

# Assign default value)
init = tf.global_variables_initializer()
Now that all the variables are in place to get the neighbor which is derived to be the nearest one, we can finally start training the data and provide details regarding the accuracy of our model in the end. We will start by constructing a TF session under which all computations will be done. Here is the code snippet for next steps:
with tf.Session() as sess:
    sess.run(init)

    # loop over test data
    for i in range(len(X_test)):
        # Get nearest neighbor
        nn_index = sess.run(pred, feed_dict={xtr: X_training, xte: X_test[i, :]})
        # Get nearest neighbor class label and compare it to its true label
        print("Test", i, "Prediction:", np.argmax(Y_training[nn_index]), \
            "True Class:", np.argmax(Y_test[i]))
        # Calculate accuracy
        if np.argmax(Y_training[nn_index]) == np.argmax(Y_test[i]):
            accuracy += 1./len(X_test)
    print("Done!")
    print("Accuracy:", accuracy)
As we know about TensorFlow, we must start a TensorFlow session before we make any computations with it. That is what we did with the opening statement. After opening the session, we looped over the test data, got their nearest neighbor, and made a comparison to its true label.
After that, we can finally provide the accuracy of the algorithm, let’s see how accurate our current model comes out to be:
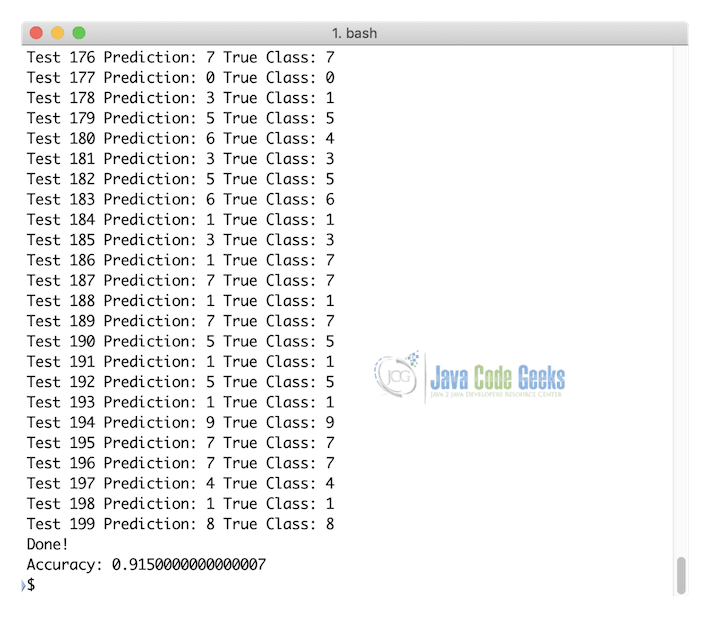
As shown in the output above, our algorithm ran with about 91% accuracy which is quite high. This is one of the reasons for TensorFlow being so successful in production. Not only can it run so fast but it can also produce amazingly accurate results. There are many other reasons to select TensorFlow for your use-case as well, such as:
- A large community of similar users is present for any problem which you can think of solving with TensorFlow. This means that if you face any issue, it is 99% chance that a lot of people have faced exactly the same problem which means, you can find a probable solution as well.
- The inclusion of Keras in TensorFlow means that a lot of advanced models can be built on top of the TensorFlow package without any more requirements. This also means that if you use Keras from inside of TensorFlow, you’ll also get the computational power that comes with TensorFlow.
- TensorBoard is something that allows us to easily visualize the metrics of the developed model and is very straight forward to work with.
Although TensorFlow sounds too good to be true, it has some shortcomings as well. It is beneficial to quote from one of the excerpts from the Hacker News here:
- Tensorflow has a way too large API surface area: parsing command lines arguments handling, unit test runners, logging, help formatting strings… most of those are not as good as available counterparts in python.
- The C++ and Go versions are radically different from the Python version. Limited code reuse, different APIs, not maintained or documented with the same attention.
- The technical debt in the source code is huge. For instance, there are 3 redundant implementations in the source code of a safe division (_safe_div), with slightly different interfaces (sometimes with default params, sometimes not). It’s technical debt.
- If TensorFlow is used in the cloud for a problem that is not so scalable, it can incur a lot of infrastructure cost for the deployment due to the complex computations it performs with Tensors and connected graphs.
In every way, it reminds me of Angular.io project. A failed promise to be true multi-language, failing to use the expressiveness of python, with a super large API that tries to do things we didn’t ask it to do and a lack of general sounding architecture.
7. Why is TensorFlow so slow?
Although the headline of the section is confusing, we will explain what we will discuss here. TensorFlow can be slow sometimes but it is the way it is because we allow it to be. The data structure and computations TensorFlow performs is of huge scale. So, we have some points we can mention here:
- We should check TensorFlow based algorithms speed on a cluster instead of just a home computer. This is because of the computations TensorFlow needs to perform to produce highly accurate results.
- Most of the slowness in program execution in production comes from the read pipelines as network waits too long to read from the disk. For the same reason, TFRecords, an internal file format for TensorFlow exists. For the same reason, part of the training code should be processed on the CPU.
- The quality of a TensorFlow model is very high which means that even if it takes longer to run and train a model, we can be sure that it will be of high quality. I think that is a sacrifice I can make if I want models to be highly accurate. After all, accuracy is something which matters a lot in ML models.
- It may be slow because TF is built that way, a lot of libraries are part of TF by default and are not optional to download.
Based on the points above, it is quite clear that even though TensorFlow might behave a little slow in production, it’s worth the accuracy required in a production system. And not just its accuracy, even the community supports it receives is incredible.
8. Deep Learning with TensorFlow
Programmers can use TensorFlow with Keras for using deep learning techniques. You can Deep learning methods for predictive analytics. tf.keras API helps in making Keras in the Tensorflow implementations. Programmers can use this API for designing and training deep learning models. Deep learning methods are used for classification and regression. Keras is an open-source python framework for deep learning. It was created by Francois Chollet in 2015. Tensorflow 2.0 was released in 2019. It had TensorFlow integrated with Keras API.
Modeling the Neural Network
The lifecycle of the neural network model has definition, compilation, fitting, evaluation, and prediction. The model definition is done by choosing the model type, architecture, and network topology. Now let us look at the model definition in detail.
Model Definition
Defining the model requires that you first select the type of model that you need and then choose the architecture or network topology. The model definition includes definition, configuration, and connection of the layers with nodes and activation function.
Model Compilation
The model compilation is done by choosing the loss function for optimization Loss function can be cross-entropy or mean squared error function. The compilation is done by invoking the compile function with the selected configuration. The configuration has the required data structures in the model. Keras Api has optimizers such as stochastic gradient descent and others. The optimizers are listed below:
- Adadelta
- Adagrad
- Adam
- FTRL
- Nadam
- RMSProp
- SGD
You can compile the model as shown in the example below.
compile command
model.compile(optimizer='sgd', loss='binary_crossentropy', metrics=['accuracy'])
Model Fitting
You can fit the model by choosing the training configuration. The configuration consists of loops, echos, and batch size. The model can be trained by using an optimization method with a loss function. Loss functions will be different for the Machine learning technique. Binary cross-entropy (binary_crossentropy) is used for binary classification. Sparse Categorical cross-entropy (sparse_categorical_crossentropy) is used for multi-class classification. Mean squared error (mse) is used for regression. You can fit the model as shown in the code below
Model fitting
model.fit(X, y, epochs=100, batch_size=32)
Prediction using the Model
You can use the model for prediction. You can invoke a function to predict using a class label, probability, or number value. Sample code is used for prediction.
Model prediction
yvalue = model.predict(X)
Execution of the Neural Network
For image processing, you can use CNN (convolutional neural network). CNN Model consists of convolutional and pooling layers. Convolutional Layers extract features in the form of feature maps. Pooling Layers distill elements from the features. CNN helps in the classification of images. Keras has different datasets which are ready to use. They are MNIST dataset, CIFAR10, CIFAR 100, IMDB movie review, Reuters Newswire, Fashion MNIST, and Boston Housing datasets. MNIST dataset has 10k data elements of handwritten digits.
Sequential API helps in adding layers. You can load the dataset, train the model, test it, and predict for new images as shown in the code below:
Digit Identification
from numpy import asarray
from numpy import unique
from numpy import argmax
from tensorflow.keras.datasets.mnist import load_data as load_mnist_data
from tensorflow.keras import Sequential as keras_Seq
from tensorflow.keras.layers import Dense as keras_Dense
from tensorflow.keras.layers import Conv2D as keras_Conv2D
from tensorflow.keras.layers import MaxPool2D as keras_MaxPool2D
from tensorflow.keras.layers import Flatten as keras_Flatten
from tensorflow.keras.layers import Dropout as keras_Dropout

(train_xcoord, train_ycoord), (test_xcoord, test_ycoord) = load_mnist_data()

train_xcoord = train_xcoord.reshape((train_xcoord.shape[0], train_xcoord.shape[1], train_xcoord.shape[2], 1))
test_xcoord = test_xcoord.reshape((test_xcoord.shape[0], test_xcoord.shape[1], test_xcoord.shape[2], 1))

in_shape = train_xcoord.shape[1:]

n_classes = len(unique(train_ycoord))
print(in_shape, n_classes)

train_xcoord = train_xcoord.astype('float32') / 255.0
test_xcoord = test_xcoord.astype('float32') / 255.0

model = keras_Seq()
model.add(keras_Conv2D(32, (3,3), activation='relu', kernel_initializer='he_uniform', input_shape=in_shape))
model.add(keras_MaxPool2D((2, 2)))
model.add(keras_Flatten())
model.add(keras_Dense(100, activation='relu', kernel_initializer='he_uniform'))
model.add(keras_Dropout(0.5))
model.add(keras_Dense(n_classes, activation='softmax'))
model.compile(optimizer='adam', loss='sparse_categorical_crossentropy', metrics=['accuracy'])
model.fit(train_xcoord, train_ycoord, epochs=10, batch_size=128, verbose=0)
loss, acc = model.evaluate(test_xcoord, test_ycoord, verbose=0)
print('Accuracy is %.3f' % acc)

image = train_xcoord[0]
yhat = model.predict(asarray([image]))
print('Predicted class is %d' % argmax(yhat))
The model created above is executed using the command below:
Command for Model Execution
python digit_identification.py
The output of the above command execution is shown below:
Digit Identification output
apples-MacBook-Air:tensorflow-tutorial bhagvan.kommadi$ python digit_identification.py
(28, 28, 1) 10
Accuracy is 0.987
Predicted: class is5
Evaluation of The Neural Network
Model Evaluation
You can select a dataset for model evaluation. This data set has new scenarios which are not covered by the trianing dataset. The efficiency of the model can be iteratively improved from a cold start. You can evaluate the neural network as shown in the code below:
Model Evaluation
loss = model.evaluate(X, y, verbose=0)
9. Where to go next?
To continue to learn TensorFlow and it’s more applications, we can recommend some of the steps you can take to enhance your learning on the topic:
- If you want to continue with the handwritten digit dataset, try to increase its accuracy to 95% and deploy it as a usable real-time model in your application
- Try to implement other classification algorithms with TensorFlow, like Naive Bayes algorithm
- Try to start with developing simple neural networks and move on to Convolutional neural networks and recurrent neural networks
- A lot of optimizers are available in the TensorFlow package, try to play around those and learn there internal working and how are results computed in each of them
- Another good project for TensorFlow will be to construct a live feed video camera which identified people. It also keeps count of different faces it captures. This means that if the same face appears in front of the camera at a gap of 30 seconds, it will increment its count. Or just capture the number plate data of cars which it captures, which can be used in real-time traffic monitoring systems.
TensorFlow is an extremely big community where finding problems to solve is very easy. This means that one cannot go out of problems which can be solved much more efficiently with TensorFlow. Starting to work with TensorFlow can be a little bit tricky but know, there is always help available out there.
10. TensorFlow Python Tutorial – Summary
In this lesson, we gained a lot of knowledge regarding one of the most used and popular Machine Learning and Data Science related package available in Python, TensorFlow, which is backed up by Google for a very long time now.
Usually, with ML, everything starts to sound complex and that is why we started by discussing the use-cases where TensorFlow can be used and it sounded like I was saying, everywhere. TensorFlow is so powerful due to the fact that a lot of packages have been included in itself, like Keras. Sometimes, it behaves like a little bit slow (and bulkier) package as well, for the same reason that many libraries have been made part of it and those cannot be excluded when you download TensorFlow.
After use-cases, we covered what data structures are used by TensorFlow to complete the computations it is ought to complete and we finally provided a very real example where we showed the high accuracy of a simple and effective TensorFlow based ML model.
One thing for sure, TensorFlow is something no one ever will be afraid to use in production, even in critical cases like Fraud detection, medical analysis, and treatments. This gives a lot of applause to TensorFlow for being so versatile and high-performant in terms of the accuracy of the solution it produces. Deep Learning support through Keras helps in creating applications with CNN, RNN, and MLPs.
11. Download the Source Code
This was an example of Machine Learning with TensorFlow and Python tutorial for beginners.
You can download the full source code of this example here: TensorFlow Python Tutorial For Beginners
Last updated on March 16th, 2021
