In this post, we feature a comprehensive article on Spring Boot Cucumber Tests. We will create a Spring Boot rest application and test the spring boot application with cucumber acceptance testing.
1. Introduction
Spring Boot is an open source Java-based framework used to create a micro Service. It is developed by Pivotal Team and is used to build stand-alone and production ready spring applications. Spring Boot provides a good platform for Java developers to develop a stand-alone and production-grade spring application that you can just run. You can get started with minimum configurations without the need for an entire Spring configuration setup. Spring Boot automatically configures your application based on the dependencies you have added to the project by using @EnableAutoConfiguration annotation. It has starter configurations for various entities.
Acceptance test ensures that the right things are built. Automated acceptance testing is one of the principles of Extreme programming. Cucumber tries to address the area of acceptance testing. Cucumber allows collaboration between business stakeholder and development team to express the business outcomes. Cucumber has its own ubiquitous language and adheres to syntax rules known as Gherkin. We will take a look at how cucumber fits in with Selenium ecosystem. It is a Business Readable, Domain Specific Language that lets you describe software’s behavior without detailing how that behavior is implemented. These are the following constructs of the Gherkin language.
Given: This indicates the prior state of the system. For example, a user must be logged in to perform activities within the site.When: This is the specific activity carried out or the functionality tested.Then: This is our assert/verification scenario which is the result we expect out of the testing.
2. Spring Boot Application
We will implement a calculator web service and automate testing with Cucumber. Our focus is on Automated Acceptance testing and not unit testing the application. We will first look at the Gradle configuration and the corresponding initializers for Spring Boot. Gradle is the build and dependency manager used in our current project.
build.gradle
apply plugin: 'java'
apply plugin: 'eclipse'
apply plugin: 'idea'
apply plugin: 'org.springframework.boot'
apply plugin: 'io.spring.dependency-management'

group 'com.jcg'
version '1.0-SNAPSHOT'
sourceCompatibility = 1.8

buildscript {
    repositories {
        mavenCentral()
    }
    dependencies {
        classpath("org.springframework.boot:spring-boot-gradle-plugin:2.1.4.RELEASE")
    }
}

dependencies {
    compile 'org.springframework.boot:spring-boot-starter-web'
    testCompile group: 'io.cucumber', name: 'cucumber-java', version: '4.3.0'
    testCompile group: 'io.cucumber', name: 'cucumber-junit', version: '4.3.0'
    testCompile group: 'junit', name: 'junit', version: '4.12'
    testCompile group: 'io.cucumber', name: 'cucumber-spring', version: '4.3.0'
    testCompile 'org.springframework.boot:spring-boot-starter-test'
}
- Lines 1-6 specify the plugins to be used most notably Spring Boot plugin and Spring IO Dependency Management plugin
GroupandVersionare specified for our project while Java version is specified as 1.8 insourceCompatibility.- We specify the repository as
mavenCentraland indicate the master dependency as spring boot plugin as part of the build script. - Rest of the section indicates the other dependencies
- Only Spring boot is defined as compile-time dependencies
- Rest of the dependencies are needed only for testing.
We will create a SpringBoot application using the below code.
SpringCucumberApplication
@SpringBootApplication
public class SpringCucumberApplication {
    public static void main(String[] args) {
        SpringApplication.run(SpringCucumberApplication.class, args);
    }
}
- The class is annotated with
SpringBootApplicationto indicate the application as Spring Boot Application. - The application is specified as the execution target in
runmethod.
Let us implement our simple Calculator using Spring Rest.
Calculator.java
@RestController
@RequestMapping("/calc")
public class Calculator {

    @RequestMapping("/add")
    public int add(int a, int b) {
        return a + b;
    }

    @RequestMapping("/sub")
    public int subtract(int a, int b) {
        return a - b;
    }

    @RequestMapping("/mul")
    public int multiply(int a, int b) {
        return a * b;
    }


    @RequestMapping("/div")
    public int divide(int a, int b) {
        return a / b;
    }
}
- A simple class can be transformed as a controller by annotating with
RestController. - We provide a base endpoint for all the methods in the controller with
RequestMappingas/calc. - We implement four different methods corresponding to basic arithmetic operations with their own endpoints. Basically, an add endpoint is represented as
/calc/add.
By default, SpringBoot starts up in port 8080 which can be changed by specifying the port in application.properties as below.
application.properties
server.port=8082
We can test our application by running the SpringCucumberApplication. We can check the application by navigating to the URL which prints the result as 5.
3. Cucumber Acceptance Testing
In this section, We will work on creating test cases for the endpoints created. The first step is to create a feature file capturing all the testing scenarios.
calc.feature
Feature: arithmetic operations

  Scenario: client wants to add two numbers
    When the client calls /calc/add with values 1 and 2
    Then the client receives answer as 3

  Scenario: client wants to subtract two numbers
    When the client calls /calc/sub with values 5 and 3
    Then the client receives answer as 2

  Scenario: client wants to divide two numbers
    When the client calls /calc/div with values 6 and 2
    Then the client receives answer as 3
- The feature file has 3 scenarios each one covering addition, subtraction and division.
- Here there is no predefined state and hence
WhenandThenare only used. Whenscenario specifies the endpoint to hit whileThentakes care of the assertion.
To kick off the test execution, a Spring Boot Execution class has to be created and configured under the test directory.
CalculatorTest.java
@RunWith(Cucumber.class)
@CucumberOptions(features = "src/test/resources")
public class CalculatorTest {
}
This specifies that the test suite has to be run with Cucumber runner and Cucumber has to identify the feature file under the parent directory specified with features options. Cucumber looks for a features folder under the directory for the presence of .feature files. Running the above class produces the following output.
Undefined scenarios:
src/test/resources/features/calculator.feature:3 # client wants to add two numbers
src/test/resources/features/calculator.feature:7 # client wants to subtract two numbers
src/test/resources/features/calculator.feature:11 # client wants to divide two numbers
....

@When("the client calls \\/calc\\/add with values {int} and {int}")
public void the_client_calls_calc_add_with_values_and(Integer int1, Integer int2) {
    // Write code here that turns the phrase above into concrete actions
    throw new cucumber.api.PendingException();
}

@Then("the client receives answer as {int}")
public void the_client_receives_answer_as(Integer int1) {
    // Write code here that turns the phrase above into concrete actions
    throw new cucumber.api.PendingException();
}

@When("the client calls \\/calc\\/sub with values {int} and {int}")
public void the_client_calls_calc_sub_with_values_and(Integer int1, Integer int2) {
    // Write code here that turns the phrase above into concrete actions
    throw new cucumber.api.PendingException();
}

@When("the client calls \\/calc\\/div with values {int} and {int}")
public void the_client_calls_calc_div_with_values_and(Integer int1, Integer int2) {
    // Write code here that turns the phrase above into concrete actions
    throw new cucumber.api.PendingException();
}
It has the structure for the missing steps which can be implemented in a new class. This is exactly moved into a StepDefinition Class as below

CalculatorStepDefinitions.java
public class CalculatorStepDefinitions extends SpringIntegrationTest {

    int response = 0;
    String url = DEFAULT_URL + "calc/";

    @When("the client calls \\/calc\\/add with values {int} and {int}")
    public void the_client_calls_arithmetic_add_with_values_and(int int1, int int2) {
        response = restTemplate.getForObject(url + "add?a=" +
                int1 + "&b=" + int2, Integer.class);
    }

    @Then("the client receives answer as {int}")
    public void the_client_receives_answer_as(int result) {
        assertEquals(result, response);
    }

    @When("the client calls \\/calc\\/sub with values {int} and {int}")
    public void the_client_calls_calc_sub_with_values_and(Integer int1, Integer int2) {
        response = restTemplate.getForObject(url + "sub?a=" +
                int1 + "&b=" + int2, Integer.class);
    }

    @When("the client calls \\/calc\\/mul with values {int} and {int}")
    public void the_client_calls_calc_mul_with_values_and(Integer int1, Integer int2) {
        response = restTemplate.getForObject(url + "mul?a=" +
                int1 + "&b=" + int2, Integer.class);
    }

    @When("the client calls \\/calc\\/div with values {int} and {int}")
    public void the_client_calls_calc_div_with_values_and(Integer int1, Integer int2) {
        response = restTemplate.getForObject(url + "div?a=" +
                int1 + "&b=" + int2, Integer.class);
    }
}
- This file has the step definition snippets copied from the console.
- It also contains the multiplication step which will be used in the next section.
- It uses
restTemplatefrom the base class to connect to the URL (add/sub) based on the scenario and stores the response in its instance variable. - The assertion is a straight forward comparison of the value with its stored instance variable.
We will look at the base class below as that provides the Spring configuration for the Step definition class to be executed.
SpringIntegrationTest.java
@RunWith(SpringJUnit4ClassRunner.class)
@SpringBootTest(
        classes = SpringCucumberApplication.class,
        webEnvironment = SpringBootTest.WebEnvironment.DEFINED_PORT)
public abstract class SpringIntegrationTest {

    protected RestTemplate restTemplate = new RestTemplate();

    protected final String DEFAULT_URL = "http://localhost:8082/";
}
- This class is set up to be run with
SpringJunitRunnerwhich is used to run the step definition class. - This class is configured as
SpringBootTestclassand we specify our application to run in classes options. This is our source SpringBoot Application class specified in the previous section. We want our application to run in specified port and hence the use ofDEFINED_PORT. As discussed in the previous section, We can specify the port to run inapplication.propertiesunder the resources folder. - We create an instance of
RestTemplateto be used in all our subclasses. - Since we specify the port, We can be sure of the URL and hence the base URL for our application is constructed and stored.
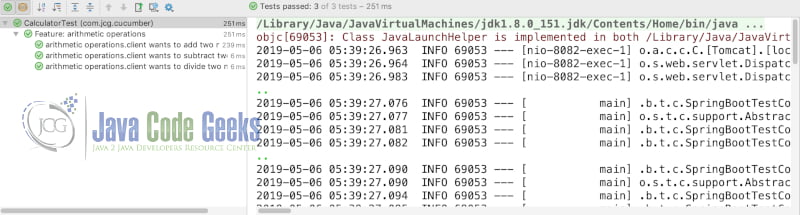
Now running the class CalculatorTest produces the following output
4. Cucumber Scenario Outline
In the previous section, We saw tests with a single data point. But if we wanted to test the same scenario with multiple data points, Cucumber provides the option of a Scenario Outline. We have to modify our feature file to create a Scenario Outline.
calc.feature
Feature: arithmetic operations...
Scenario Outline: client wants to multiply two numbers
    When the client calls /calc/mul with values  and
    Then the client receives answer as

    Examples:
      | number1 | number2 | result |
      | 2       | 3       | 6      |
      | 4       | 6       | 24     |
      | 7       | 8       | 56     |
- We have defined a
Scenario outlinehere to indicate we are going to run the scenario with multiple test values. - The parameters are specified with angled brackets while actual values are specified in the
Examplessection. - The above scenario is run three times which is equal to the number of examples specified.
As specified in the above section, to execute the scenario we need to update the CalculatorStepDefinitions class
CalculatorStepDefinitions.java
public class CalculatorStepDefinitions extends SpringIntegrationTest {
...
 @When("the client calls \\/calc\\/mul with values {int} and {int}")
    public void the_client_calls_calc_mul_with_values_and(Integer int1, Integer int2) {
        response = restTemplate.getForObject(url + "mul?a=" +
                int1 + "&b=" + int2, Integer.class);
    }
}
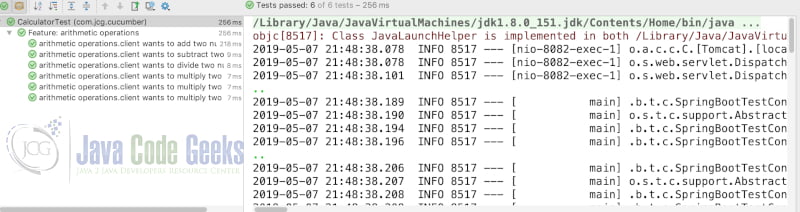
This is similar to the other methods except that here we are calling the Multiply endpoint. Once we now execute the CalculatorTest, we get the output as below
5. Download the Source Code
You can download the full source code of this example here: Spring Boot Cucumber Tests

Its interesting. Thanks for the article. Would have been really nice if the author had explained some real world example (Enterprise Application with Database), along with the simple example he wanted to start with.
Can you please tell me how can i pass an argument to main service while running cucumber test cases.