Welcome readers, in this tutorial, we will create a spring boot restful api application to integrate with the swagger2 tool.
1. Introduction
- Spring Boot is a module that provides rapid application development feature to the spring framework including auto-configuration, standalone-code, and production-ready code
- It creates applications that are packaged as jar and are directly started using embedded servlet container (such as Tomcat, Jetty or Undertow). Thus, no need to deploy the war files
- It simplifies the maven configuration by providing the starter template and helps to resolve the dependency conflicts. It automatically identifies the required dependencies and imports them in the application
- It helps in removing the boilerplate code, extra annotations, and xml configurations
- It provides a powerful batch processing and manages the rest endpoints
- It provides an efficient jpa-starter library to effectively connect the application with the relational databases
1.1 What is Swagger?
- Swagger is a tool that enables the documentation of RESTful services
- It provides an implementation for producing the visual representation of the RESTful services
- It specifies the RESTful services format including service url, method signatures, inputs etc.
Now, open the eclipse ide and let’s see how to integrate Swagger2 into Spring Boot RESTful Api example. Do note, we are going to use the Springfox implementation to generate the Swagger documentation.
2. Spring Boot REST API with Swagger Example
Here is a systematic guide for implementing this tutorial.
2.1 Tools Used
We are using Eclipse Kepler SR2, JDK 8, and Maven.
2.2 Project Structure
In case you are confused about where you should create the corresponding files or folder, let us review the project structure of the spring boot application.

2.3 Project Creation
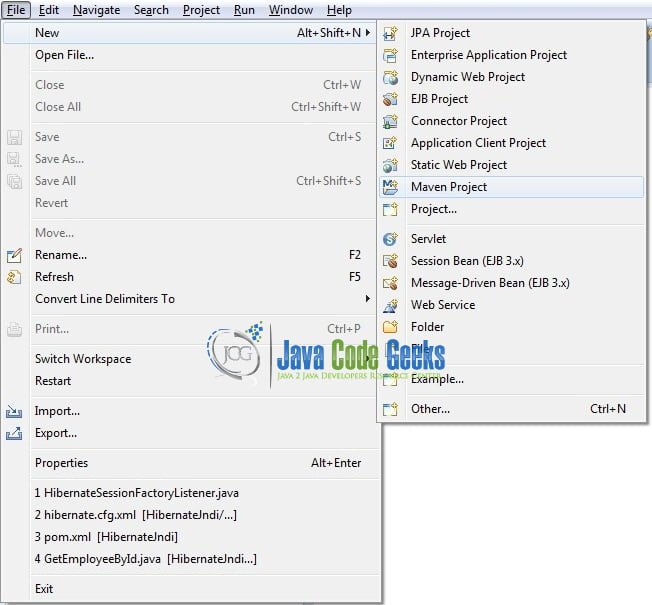
This section will demonstrate how to create a Java-based Maven project with Eclipse. In Eclipse IDE, go to File -> New -> Maven Project.
In the New Maven Project window, it will ask you to select a project location. By default, ‘Use default workspace location’ will be selected. Just click on the next button to proceed.

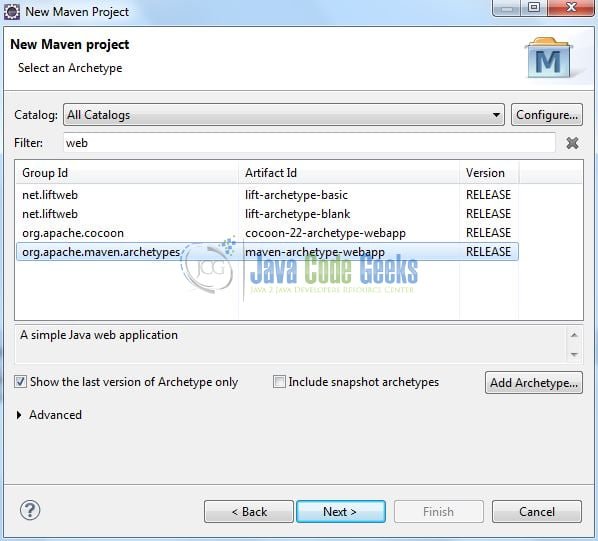
Select the Maven Web App archetype from the list of options and click next.
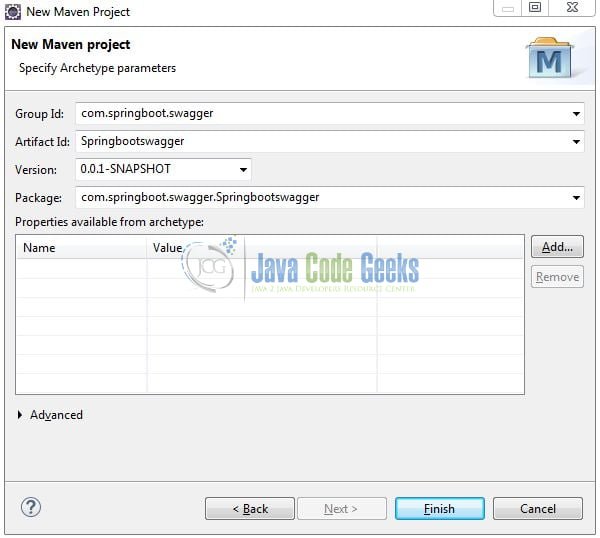
It will ask you to ‘Enter the group and the artifact id for the project’. We will input the details as shown in the below image. The version number will be by default: 0.0.1-SNAPSHOT.
Click on Finish and the creation of a maven project is completed. If you observe, it has downloaded the maven dependencies and a pom.xml file will be created. It will have the following code:
pom.xml
<project xmlns="http://maven.apache.org/POM/4.0.0" xmlns:xsi="http://www.w3.org/2001/XMLSchema-instance" xsi:schemaLocation="http://maven.apache.org/POM/4.0.0 http://maven.apache.org/xsd/maven-4.0.0.xsd">
	<modelVersion>4.0.0</modelVersion>
	<groupId>com.springboot.swagger</groupId>
	<artifactId>Springbootswagger</artifactId>
	<version>0.0.1-SNAPSHOT</version>
	<packaging>war</packaging>
</project>
Let’s start building the application!
3. Creating a Spring Boot application
Below are the steps involved in developing the application.
3.1 Maven Dependencies
Here, we specify the dependencies for the Spring Boot and Swagger2. Maven will automatically resolve the other dependencies. The updated file will have the following code.
pom.xml
<project xmlns="http://maven.apache.org/POM/4.0.0"
	xmlns:xsi="http://www.w3.org/2001/XMLSchema-instance"
	xsi:schemaLocation="http://maven.apache.org/POM/4.0.0 http://maven.apache.org/maven-v4_0_0.xsd">
	<modelVersion>4.0.0</modelVersion>
	<groupId>com.springboot.swagger</groupId>
	<artifactId>Springbootswagger</artifactId>
	<packaging>war</packaging>
	<version>0.0.1-SNAPSHOT</version>
	<name>Springbootswagger Maven Webapp</name>
	<url>http://maven.apache.org</url>

	<!-- Spring boot parent dependency jar -->
	<parent>
		<groupId>org.springframework.boot</groupId>
		<artifactId>spring-boot-starter-parent</artifactId>
		<version>2.1.1.RELEASE</version>
	</parent>
	<dependencies>
		<!-- Spring boot web mvc jar -->
		<!-- Automatically adds tomcat and jackson-databind jars -->
		<dependency>
			<groupId>org.springframework.boot</groupId>
			<artifactId>spring-boot-starter-web</artifactId>
		</dependency>
		<!-- https://mvnrepository.com/artifact/com.github.javafaker/javafaker -->
		<dependency>
			<groupId>com.github.javafaker</groupId>
			<artifactId>javafaker</artifactId>
			<version>0.16</version>
		</dependency>
		<!-- https://mvnrepository.com/artifact/io.springfox/springfox-swagger-ui -->
		<dependency>
			<groupId>io.springfox</groupId>
			<artifactId>springfox-swagger-ui</artifactId>
			<version>2.9.2</version>
		</dependency>
		<!-- https://mvnrepository.com/artifact/io.springfox/springfox-swagger2 -->
		<dependency>
			<groupId>io.springfox</groupId>
			<artifactId>springfox-swagger2</artifactId>
			<version>2.9.2</version>
		</dependency>
	</dependencies>
	<build>
		<finalName>Springbootswagger</finalName>
	</build>
</project>
3.2 Java Classes
Let’s write all the java classes involved in this application.
3.2.1 Implementation/Main class
Add the following code in the main class to bootstrap the application from the main method. Always remember, the entry point of the spring boot application is the class containing @SpringBootApplication annotation and the static main method.
Myapplication.java
package com.ducat.springboot.swagger;

import org.springframework.boot.SpringApplication;
import org.springframework.boot.autoconfigure.SpringBootApplication;

//This annotation enables the auto-configuration feature of the spring boot module (i.e. java-based configuration and component scanning)
@SpringBootApplication

//The main class serves two purpose in a spring boot application: Configuration and bootstrapping.
public class Myapplication {

	public static void main(String[] args) {
		SpringApplication.run(Myapplication.class, args);
	}
}
3.2.2 Swagger Configuration class
Add the following the Swagger Configuration class. The class is annotated with @EnableSwagger2 annotation to enable the swagger support in your application. Here we have added a metadata() method that returns the ApiInfo object with the information about the application information.

Myapplication.java
package com.ducat.springboot.swagger;

// The static import is used for the regex(..) method.
import static springfox.documentation.builders.PathSelectors.regex;

import org.springframework.context.annotation.Bean;
import org.springframework.context.annotation.Configuration;

import springfox.documentation.builders.ApiInfoBuilder;
import springfox.documentation.service.ApiInfo;
import springfox.documentation.spi.DocumentationType;
import springfox.documentation.spring.web.plugins.Docket;
import springfox.documentation.swagger2.annotations.EnableSwagger2;

@Configuration
// This annotation enables the Swagger support in the application.
@EnableSwagger2
public class Myswaggerconfig {

	// The select() method called on Docket bean returns an "ApiSelectorBuilder". This provides "apis()" and "paths()" methods to filter the controllers and methods being documented using string predicates.
	@Bean
	public Docket postsApi() {
		return new Docket(DocumentationType.SWAGGER_2).apiInfo(metadata()).select().paths(regex("/employee.*")).build();
	}

	@SuppressWarnings("deprecation")
	private ApiInfo metadata() {
		return new ApiInfoBuilder().title("Java Code Geeks").description("API reference guide for developers").termsOfServiceUrl("https://www.javacodegeeks.com/").contact("Batra, Yatin").version("1.0").build();
	}
}
3.2.3 Controller class
Add the following code to the controller class designed to handle the incoming requests. This class defines the REST API endpoints which are configured by the @RequestMapping annotation.
Mycontroller.java
package com.ducat.springboot.swagger.controller;

import java.util.List;
import java.util.Optional;

import org.springframework.beans.factory.annotation.Autowired;
import org.springframework.web.bind.annotation.GetMapping;
import org.springframework.web.bind.annotation.PathVariable;
import org.springframework.web.bind.annotation.RequestMapping;
import org.springframework.web.bind.annotation.RestController;

import com.ducat.springboot.swagger.model.Myemployee;
import com.ducat.springboot.swagger.service.Myservice;

@RestController
@RequestMapping(value= "/employee")
public class Mycontroller {

	@Autowired
	Myservice service;

	@GetMapping(value= "/getall")
	public List getEmployees() {
		return service.getEmployeesFromService();
	}
	@GetMapping(value= "/get/{id}")
	public Optional getEmployeeById(@PathVariable(name= "id") int eid) {
		return service.getEmployeeByIdFromService(eid);
	}
}
4. Run the Application
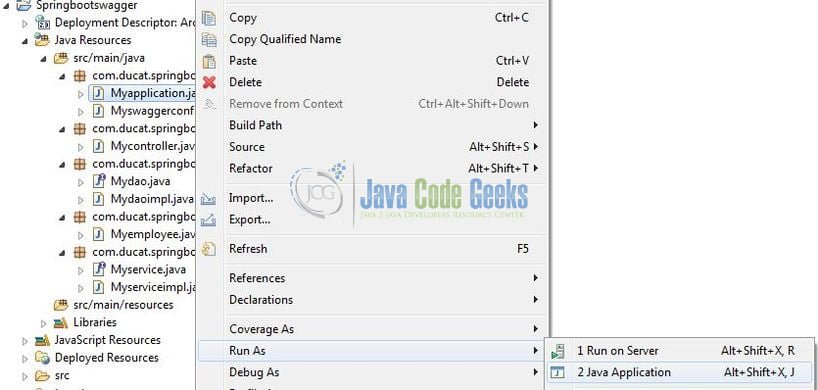
As we are ready with all the changes, let us compile the spring boot project and run the application as a java project. Right click on the Myapplication.java class, Run As -> Java Application.
Developers can debug the example and see what happens after every step. Enjoy!
5. Project Demo
Open your favorite browser and hit the following URL to display the index page of the swagger2 tool.
http://localhost:8080/swagger-ui.html
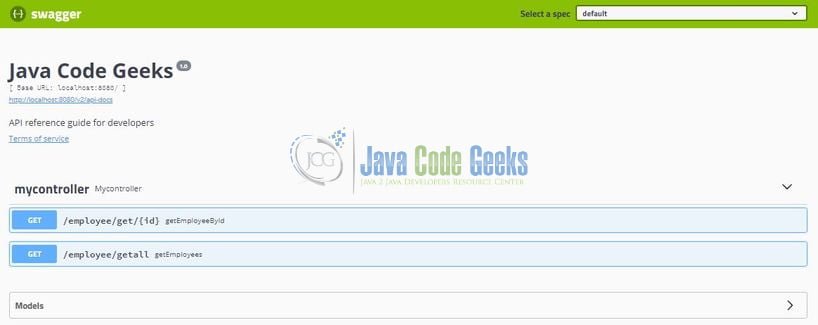
The index page will display the documentation for the exposed api as shown in Fig. 2. Users can click the Try button to check if the service is up or not.

That’s all for this tutorial and I hope the article served you whatever you were looking for. Happy Learning and don’t forget to share!
6. Conclusion
In this section, developers learned how to integrate Swagger2 tool with Spring Boot. Developers can download the sample application as an Eclipse project in the Downloads section.
7. Download the Eclipse Project
This was an example of integrating the swagger tool with the spring boot.
You can download the full source code of this example here: Spring Boot REST API with Swagger Example

Awesome Tutorial, Thank you very much!!
Thank you.