In this example, we will demonstrate how to build a CRUD application using Spring Boot, JPA, and MySQL.
You can also check this tutorial in the following video:

1. Introduction
If you worked on enterprise applications in the past, you probably wrote SQL for querying a relational database. If you are a Java developer, you also had to use JDBC for connecting to the database and executing queries. (Java Database Connectivity, or JDBC, is an API specification for accessing a database in a Java application.)
There are many drawbacks to using this approach,
including but not limited to the following:
- Writing SQL queries is tedious and error-prone.
- Business logic is mixed in with JDBC code.
- SQL prepared statements are typically hard-coded in the application code.
- You need to write a lot of boilerplate code.
A more popular approach for data access is to use the Java
Persistence API, or JPA for short. JPA is a specification used for persisting
Java objects to a database. It provides annotations for object-relational
mapping (ORM), alleviating the developer from writing SQL for common database
operations and JDBC code for interacting with the database. (Actually, JDBC is used “under the covers” by
JPA implementors such as Hibernate.)
JPA abstracts the persistence layer and is, therefore, database
agnostic. If you need to change to a
different database, you simply swap the database driver and change some
configuration settings, typically in an external file.
Spring Data JPA is a Spring project for data access layer abstraction. It makes use of JPA-based repositories to notably reduce the amount of boilerplate code used in your data access applications.
In this example, we will demonstrate how to develop a
Spring Boot CRUD application that connects to a MySQL database and uses JPA for
database communication.
Note: This example requires that you have MySQL Community Server installed on your workstation.
1.1 Tools Used in this Example
- Eclipse IDE for Java Developers Version: 4.10.0
- Spring Tools 4 – for Spring Boot
- MySQL Community Server 8.0
- Postman 7.0.7
Spring Tools 4 for Spring Boot is a set of plugins for Eclipse that support building and running Spring Boot applications. You can add Spring Tools 4 to your existing Eclipse installation by going to the Eclipse Marketplace and searching for “Spring Tools 4”.
To download MySQL, visit https://dev.mysql.com/downloads/mysql/8.0.html. For installation instructions, visit https://dev.mysql.com/doc/refman/8.0/en/installing.html.
To download Postman, visit https://www.getpostman.com/downloads/.
2. Spring Boot JPA MySQL Example
2.1 Create the Database and User
We’ll start by creating a new database and a user that will have privileges to work with the new database. Make sure that MySQL Server is running and open a terminal. (In Windows, open the MySQL 8.0 Command Line Client.) If necessary, connect to MySQL as root user (or another user that can create schemas and users). For example:
$ sudo mysql --password
Once you are connected, run the following commands:
MySQL Commands
mysql> create database jpa_example;
mysql> create user 'jcguser'@'%' identified by 'mypassword';
mysql> grant all on jpa_example.* to 'jcguser'@'%';
The last command grants user jcguser all permissions to the jpa_example database.
Note: The SQL file can be located in the src/main/resources folder of the downloadable project.
2.2 Create the Spring Boot Project
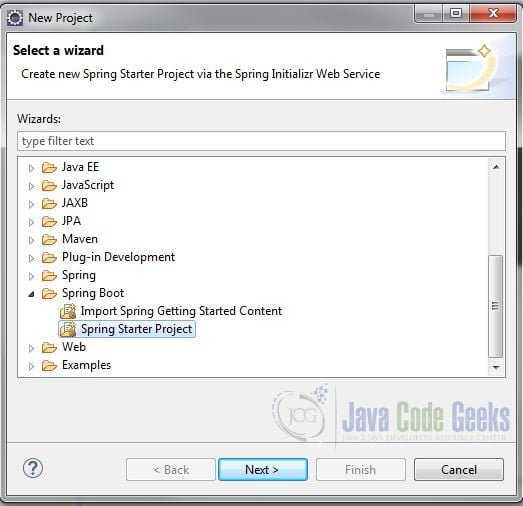
In the New Project – Select a Wizard dialog
box, expand Spring Boot and select Spring Starter Project. Click “Next”.
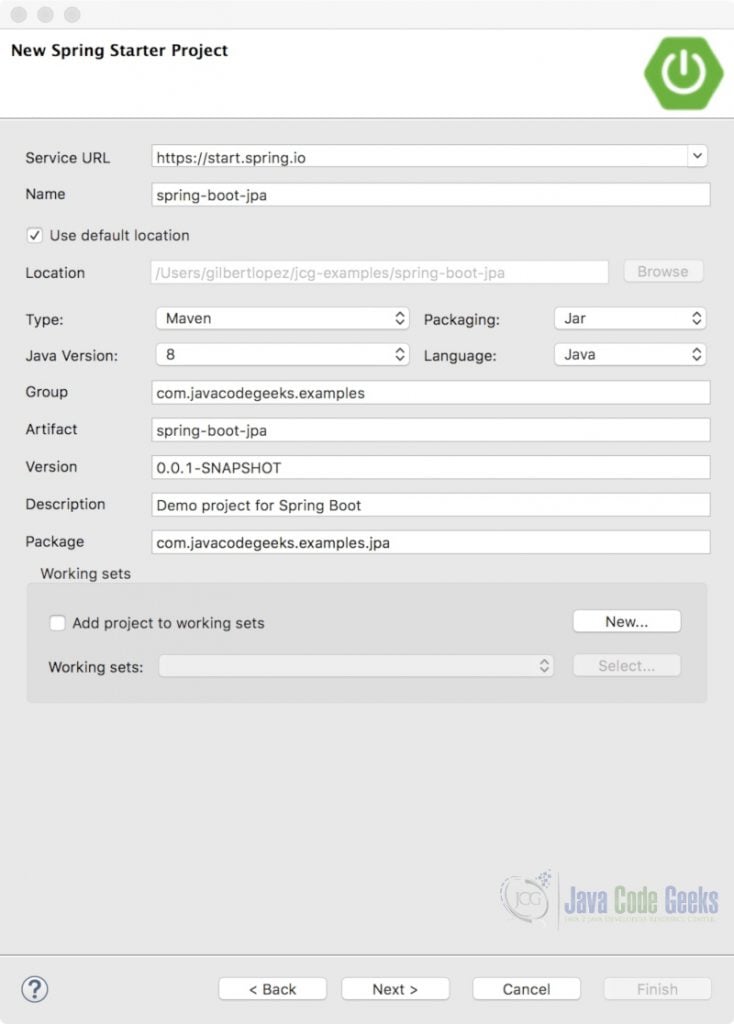
In the New Spring Starter Project dialog box, enter a name for the project. Also, enter the group, artifact and package information. Accept all the other default values. (This project uses Java Version 8.) Click “Next”.
In the New Spring Starter Project Dependencies dialog box, select Spring Boot Version 2.1.3. Also, select the “JPA”, “MySQL”, and “Web” dependencies. Click “Finish”.
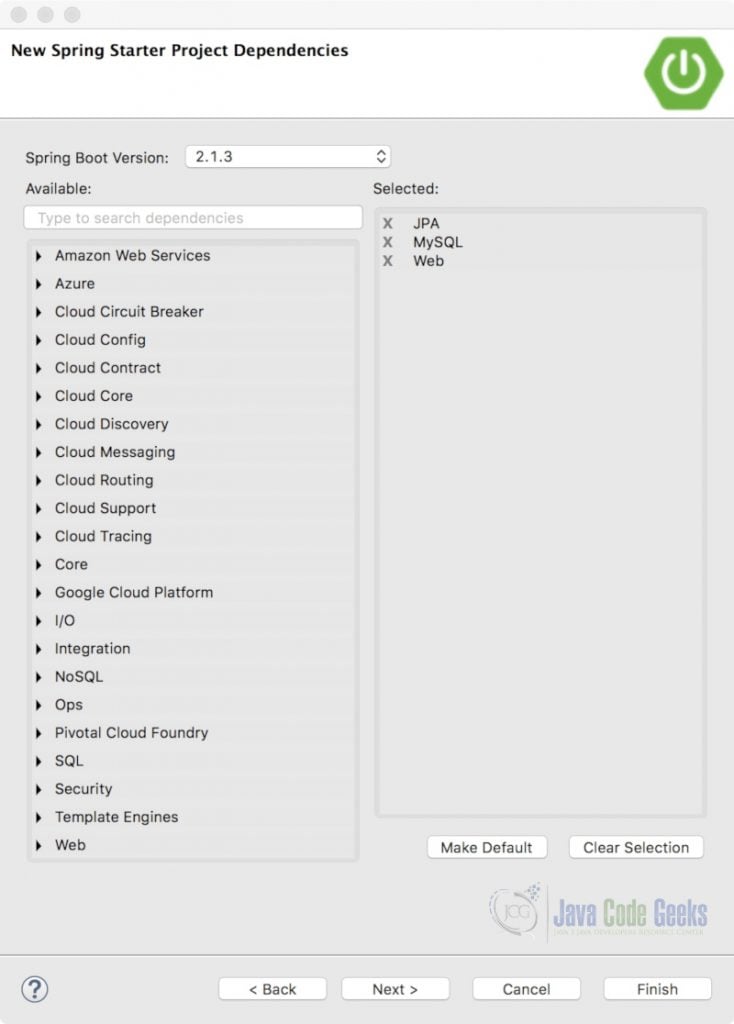
The JPA dependency
will add Spring Data JPA and Hibernate capabilities
to your project. (Hibernate is an implementation
of JPA.) The Web dependency will add Spring MVC capabilities. The MySQL
dependency will add the MySQL database driver to the project.
2.3 Configure the Database
Configuring Hibernate in a Spring Boot application is simple. If you were developing a traditional Spring MVC
application, you would have to configure the session factory, transaction
manager and datasource for Hibernate
using XML or Java configuration. For
example:
HibernateConfig.java
import java.util.Properties;

import javax.sql.DataSource;

import org.hibernate.SessionFactory;
import org.springframework.beans.factory.annotation.Autowired;
import org.springframework.context.annotation.Bean;
import org.springframework.context.annotation.ComponentScan;
import org.springframework.context.annotation.Configuration;
import org.springframework.context.annotation.PropertySource;
import org.springframework.core.env.Environment;
import org.springframework.jdbc.datasource.DriverManagerDataSource;
import org.springframework.orm.hibernate5.HibernateTransactionManager;
import org.springframework.orm.hibernate5.LocalSessionFactoryBean;
import org.springframework.transaction.annotation.EnableTransactionManagement;

@Configuration
@EnableTransactionManagement
@ComponentScan(basePackages="org.lopez.ebookstore")
@PropertySource(value="classpath:application.properties")
public class HibernateConfig {

	@Autowired
	Environment environment;

	@Bean
	public LocalSessionFactoryBean sessionFactory() {
		LocalSessionFactoryBean sessionFactory = new LocalSessionFactoryBean();
		sessionFactory.setDataSource(dataSource());
		sessionFactory.setPackagesToScan("org.lopez.ebookstore.model");
		sessionFactory.setHibernateProperties(hibernateProperties());
		return sessionFactory;
	}

	private Properties hibernateProperties() {
        Properties properties = new Properties();
        properties.put("hibernate.dialect", environment.getRequiredProperty("hibernate.dialect"));
        properties.put("hibernate.show_sql", environment.getRequiredProperty("hibernate.show_sql"));
        properties.put("hibernate.format_sql", environment.getRequiredProperty("hibernate.format_sql"));
        return properties;
	}

	@Bean
	public DataSource dataSource() {
        DriverManagerDataSource dataSource = new DriverManagerDataSource();
        dataSource.setDriverClassName(environment.getRequiredProperty("jdbc.driverClassName"));
        dataSource.setUrl(environment.getRequiredProperty("jdbc.url"));
        dataSource.setUsername(environment.getRequiredProperty("jdbc.username"));
        dataSource.setPassword(environment.getRequiredProperty("jdbc.password"));
        return dataSource;
	}

	@Bean
	@Autowired
	public HibernateTransactionManager transactionManager(SessionFactory s) {
		HibernateTransactionManager txManager = new HibernateTransactionManager();
		txManager.setSessionFactory(s);
		return txManager;
	}
}
With Spring Boot, you usually only need to specify the connection details for the database in the application.properties file and Spring Boot will automatically create the beans for the session factory, transaction manager and datasource. Open application.properties in the src/main/resources directory and add the following connection attributes:
application.properties
spring.datasource.url=jdbc:mysql://localhost:3306/jpa_example
spring.datasource.username=jcguser
spring.datasource.password=mypassword

spring.jpa.hibernate.ddl-auto=create-drop
spring.jpa.show-sql=true
We specify the JDBC connection URL for the database we created earlier, along with the username and password that we will use to connect to the database. We also set two more properties:
- The spring.jpa.hibernate.ddl-auto property is used to initialize the database. The create-drop
option will create any tables mapped to JPA entities during application startup
and drop the tables at shutdown. You will typically use this option
during development. - The spring.jpa.show-sql property is set to true to display the SQL statements in the console or log
file. You typically use this property for testing and for debugging purposes.
2.4 Create the JPA Entity Model
Let’s create the Student model and use annotations to expose it as a JPA entity. Create a package com.javacodegeeks.examples.jpa.model and a class Student with the following code:
Student.java
import javax.persistence.Entity;
import javax.persistence.GeneratedValue;
import javax.persistence.GenerationType;
import javax.persistence.Id;

@Entity
public class Student {

	@Id
	@GeneratedValue(strategy=GenerationType.AUTO)
	private Long id;

	private String firstName;

	private String lastName;

	private String year;

	public Long getId() {
		return id;
	}

	public void setId(Long id) {
		this.id = id;
	}

	public String getFirstName() {
		return firstName;
	}

	public void setFirstName(String firstName) {
		this.firstName = firstName;
	}

	public String getLastName() {
		return lastName;
	}

	public void setLastName(String lastName) {
		this.lastName = lastName;
	}

	public String getYear() {
		return year;
	}

	public void setYear(String year) {
		this.year = year;
	}

}
This is the entity class that Hibernate will map to a table.
The annotations are part of the JPA specification. They define the mapping between the domain model object and the database table. The annotations are described below. (Note that these annotations are from the javax.persistence package.)
- @Entity – This class-level annotation specifies that this Java class should be persisted to a database table.
- @Id – This field-level annotation specifies the primary key of the entity and maps it to the primary key of the table.
- @GeneratedValue – This annotation specifies how the primary key ID will be generated. In our example, we chose GenerationType.AUTO meaning that the JPA provider (Hibernate) will decide which strategy to employ based on the database dialect used.
2.5 Create the Repository
Since we are using Spring Data JPA, we will write a lot less code in our CRUD application. In fact, all we need to do is define an interface that extends CrudRepository to access the data. When you extend the CrudRepository interface, Spring Data JPA will automatically generate the implementation of generic CRUD operations for your domain model object. These include but are not limited to:
- save(S entity) – creates or updates a given entity
- deleteById(ID id) – deletes the entity with the given id
- findById(ID id)– retrieves an entity by its id
- findAll() – returns all entities in the table
Create a package com.javacodegeeks.examples.jpa.repository and interface StudentRepository with the following code:
StudentRepository.java
import org.springframework.data.repository.CrudRepository;

import com.javacodegeeks.examples.jpa.model.Student;

public interface StudentRepository extends CrudRepository<Student, Long> {

}
The CrudRepository interface requires the entity class and its ID type as generic type arguments (e.g. Student and Long).
2.6 Create a Custom Exception Class
We will create a custom exception class to handle cases where the student is not found. Create a package com.javacodegeeks.examples.jpa.exceptions and class StudentNotFoundException that extends RuntimeException with the following code:
StudentNotFoundException.java
import org.springframework.http.HttpStatus;
import org.springframework.web.bind.annotation.ResponseStatus;

@ResponseStatus(HttpStatus.NOT_FOUND)
public class StudentNotFoundException extends RuntimeException {

	private static final long serialVersionUID = 1L;

	public StudentNotFoundException() {
		super("Student does not exist");
	}

}
We added a @ResponseStatus(HttpStatus.NOT_FOUND) annotation to the class so that the exception will return a 404 Not Found status code in the response.
2.7 Create the REST Controller
We will build a simple REST controller for our example. Create a new package com.javacodegeeks.examples.jpa.controller and class SudentController and add the @RestController and @RequestMapping annotations.
SudentController.java
import org.springframework.web.bind.annotation.RequestMapping;
import org.springframework.web.bind.annotation.RestController;

@RestController
@RequestMapping("students")
public class StudentController {

}
@RestController is a convenience
annotation that adds @ResponseBody to all request mapping
methods of a Controller class. The @RequestMapping(“students”) annotation
indicates that all requests starting with the URI students will be
handled by the APIs of this controller.
2.8 Inject the Repository into the Controller Class
We will use
constructor-based injection to pass in the repository to the controller. Add
the following code to the StudentController class:
	private final StudentRepository repository;

	public StudentController(StudentRepository repository) {
		this.repository = repository;
	}
In the next sections, we will add the CRUD methods to our controller.
2.9 Add the Read Methods
First, add the getStudents() method to the controller.
	@GetMapping
	public Iterable<Student> getStudents() {
		return repository.findAll();
	}
@GetMapping is a specialized RequestMapping. It specifies that HTTP GET requests to /students are mapped to the getStudents() method.
getStudents() calls the repository’s findAll() method and returns all the students in the table.
Next add the getStudent(Long id) method.
	@GetMapping("{id}")
	public Student getStudent(@PathVariable Long id) {
		return repository.findById(id).orElseThrow(StudentNotFoundException::new);
	}
@GetMapping("/{id}" specifies that HTTP GET requests to students/"{/id}" are mapped to the getStudent(Long id) method.

The {/id} token is a path variable. We use @PathVariable to bind the token “id” to the method parameter Long id.
The method calls the repository’s findById(Long id) method and returns the student specified by the id method parameter.
So, what is this orElseThrow method at the end of the findById call and what does it do? It is part of the java.util.Optional API. It returns the wrapped Student object if found, otherwise it throws the exception provided by the exception supplier. We can substitute the supplier with a method reference to our custom exception class’ constructor. When this exception is thrown, a “404 Not Found” status code is returned, as described above.
2.10 Add the Create Method
Add theaddStudent(Student student)method to the controller class.
	@PostMapping
	public Student addStudent(@RequestBody Student student) {
		return repository.save(student);
	}
@PostMapping is a specialized RequestMapping. It specifies that HTTP POST requests to /students are to be mapped to the addStudent(Student student) method.
The Student student method parameter is marked with the @RequestBody annotation, meaning that the Student object will be retrieved from the body of the request.
The method returns the newly minted Student instance.
2.11 Add the Update Method
Add the updateStudent(Long id, Student student) method.
@PutMapping("{id}")
public Student updateStudent(@PathVariable Long id, @RequestBody Student student) {
	Student studentToUpdate = repository.findById(id).orElseThrow(StudentNotFoundException::new);

		studentToUpdate.setFirstName(student.getFirstName());
		studentToUpdate.setLastName(student.getLastName());
		studentToUpdate.setYear(student.getYear());

	return repository.save(studentToUpdate);
}
@PutMapping is a specialized RequestMapping. It specifies that HTTP PUT requests to students/{id} are mapped to the updateStudent(Long id, Student student) method.
The {/id} token is a path variable. We use @PathVariable to bind the token “id” to the method parameter Long id.
The Student student parameter for this method is marked with the @RequestBodyannotation.
Using the same mechanism used in addStudent(), we call the repository’s findById(Long id) method and return a “404 Not Found” status code if the resource doesn’t exist. Otherwise, we make use of the getter/setter methods to update the found instance.
The method returns the newly updated Student instance.
2.12 Add the Delete Method
Add the deleteStudent(Long Id) method.
	@DeleteMapping("/{id}")
	public void deleteStudent(@PathVariable Long id) {
		repository.findById(id).orElseThrow(StudentNotFoundException::new);
		repository.deleteById(id);
	}
@DeleteMapping("/{id}" specifies that HTTP DELETE requests to students/"{/id}" are mapped to the deleteStudent(Long id) method. This method also uses @PathVariable to bind the path variable “id” to the method parameter Long id. Using the same mechanism as before, we call the repository’s findById(Long id) method and return a “404 Not Found” status code if the resource doesn’t exist. Otherwise, we call the repository’s deleteById(id) method.
2.13 Create the Data Loader
We can use our Spring Data repository to create some sample data at startup. Create a package com.javacodegeeks.examples.jpa.bootstrap and class DataLoader that implements ApplicationListener<ContextRefreshedEvent> :
DataLoader.java
import org.springframework.context.ApplicationListener;
import org.springframework.context.event.ContextRefreshedEvent;
import org.springframework.stereotype.Component;

import com.javacodegeeks.examples.jpa.model.Student;
import com.javacodegeeks.examples.jpa.repository.StudentRepository;

@Component
public class DataLoader implements ApplicationListener<ContextRefreshedEvent> {

	private final StudentRepository repository;


	public DataLoader(StudentRepository repository) {
		this.repository = repository;
	}

	@Override
	public void onApplicationEvent(ContextRefreshedEvent event) {
		Student student_a = new Student();
		student_a.setFirstName("Jane");
		student_a.setLastName("Doe");
		student_a.setYear("Junior");
		repository.save(student_a);

		Student student_b = new Student();
		student_b.setFirstName("Martin");
		student_b.setLastName("Fowler");
		student_b.setYear("Senior");
		repository.save(student_b);

		Student student_c = new Student();
		student_c.setFirstName("Roy");
		student_c.setLastName("Fielding");
		student_c.setYear("Freshman");
		repository.save(student_c);
	}
}
The DataLoader class listens for the ContextRefreshedEvent that gets raised when the ApplicationContext is initialized or refreshed. It implements the onApplicationEvent method and adds some Student entities to the table. Note that we need to decorate this class with @Component so that Spring loads it in the application context.
2.14 Start the Spring Boot Application
Note: Before you start the application, make sure MySQL Server is started.
Right-click your project in Project Explorer and select Run As > Spring Boot App.
2.15 Test the CRUD Application
There are many tools available for testing REST API endpoints. You can even use cURL. We will use Postman in this example as it will make it easier to POST and PUT data. Also, Postman is a good tool to have in your arsenal if you plan to develop REST APIs.
Start Postman and close the “Create New” dialog box. The top portion of the window is where you select the HTTP method and enter the request URL. The bottom portion of the window is where the response will be displayed.
2.15.1 Retrieve All Students
Enter the request URL http://localhost:8080/students and click Send.
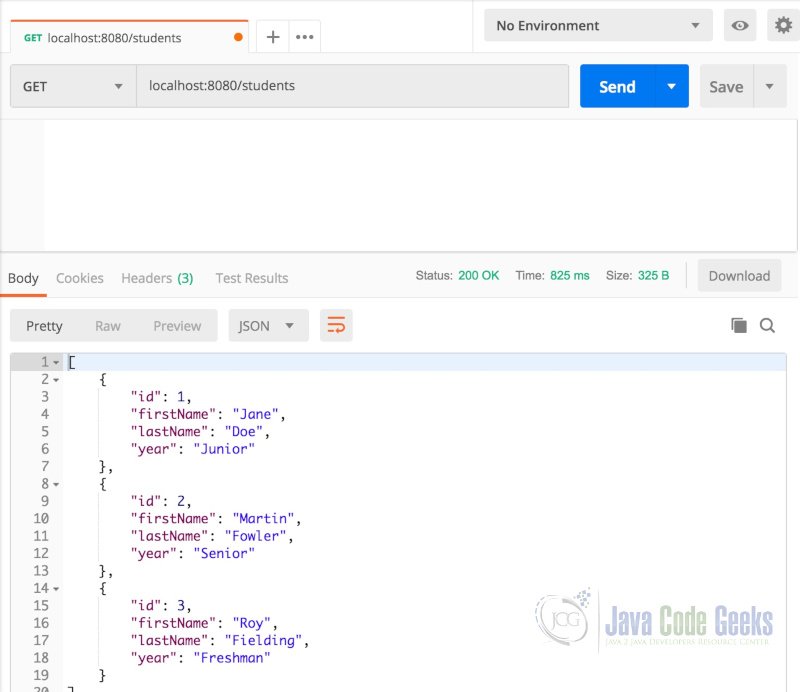
In the Response portion of the window, you will see the list of students in JSON format. (Notice that we did not have to specify the JSON media type in the response. Spring Boot automatically configures JSON message converters by default.) You will also see the status of 200 OK.
2.15.2 Retrieve a Single Student
Open a New Tab. Enter the request URL http://localhost:8080/students/1 and click Send.
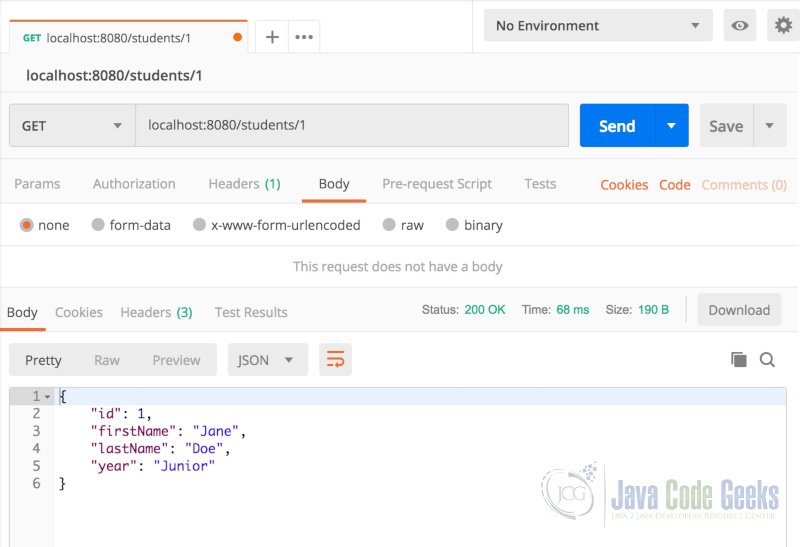
In the Response portion of the window, you will see the details for student 1. You will also see the status of 200 OK.
2.15.3 Add a Student
Open a New Tab. Select POST from the drop-down menu to the left of the request URL bar. Select Body and “raw” located underneath the request URL bar. Change “Text” to ‘JSON application/json” from the drop-down menu. Paste the following JSON data structure in the Body area.
{
    "firstName": "Bill",
    "lastName": "Gates",
    "year": "Freshman"
}
Note: The JSON files can be located in the src/main/resources folder of the downloadable project.
Enter the request URL http://localhost:8080/students and click Send.

In the response section, you will see the JSON representation of the saved entity and a status of 200 OK.
2.15.4 Update a Student
Open a New Tab. Select PUT from the drop-down menu to the left of the request URL bar. Select Body and “raw” located underneath the request URL bar. Change “Text” to ‘JSON application/json” from the drop-down menu. Paste the following JSON data structure in the Body area.
{
    "firstName": "Jane",
    "lastName": "Eyre",
    "year": "Junior"
}
Enter the request URL http://localhost:8080/students/1 and click Send.
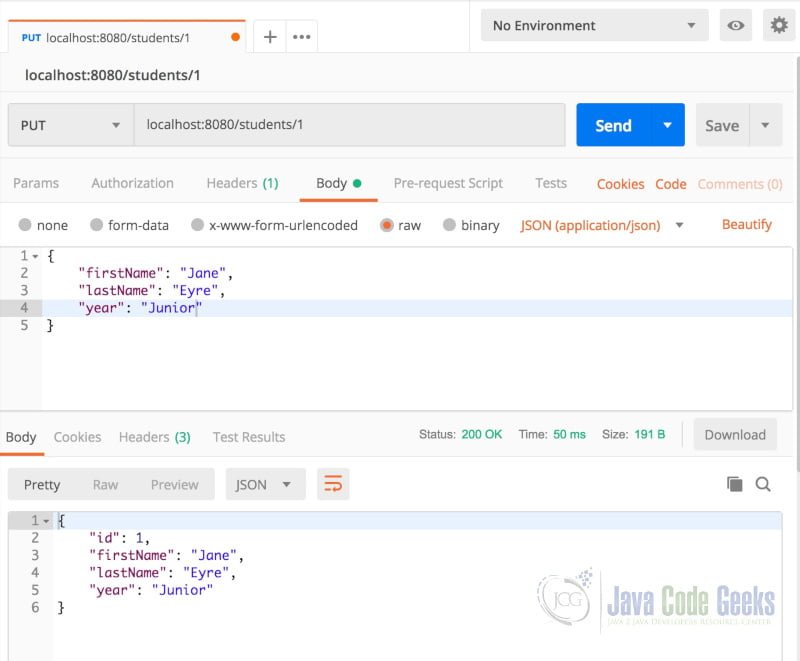
In the response section, you will see the details of the updated student and a status code of 200 OK.
2.15.5 Delete a Students
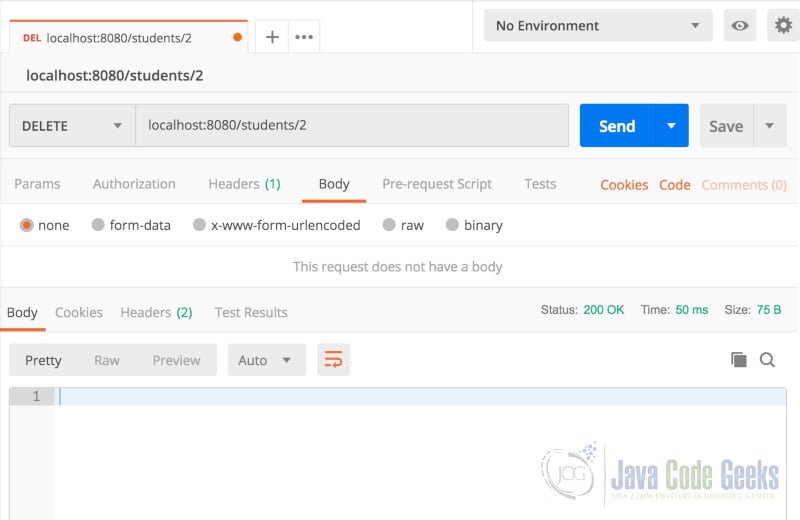
Open a New Tab. Select DELETE from the drop-down menu. Enter the request URL http://localhost:8080/students/2 and click Send. In the response section, you will see a status code of 200 OK.
Go back to the first tab, enter the request URL http://localhost:8080/students and click Send.
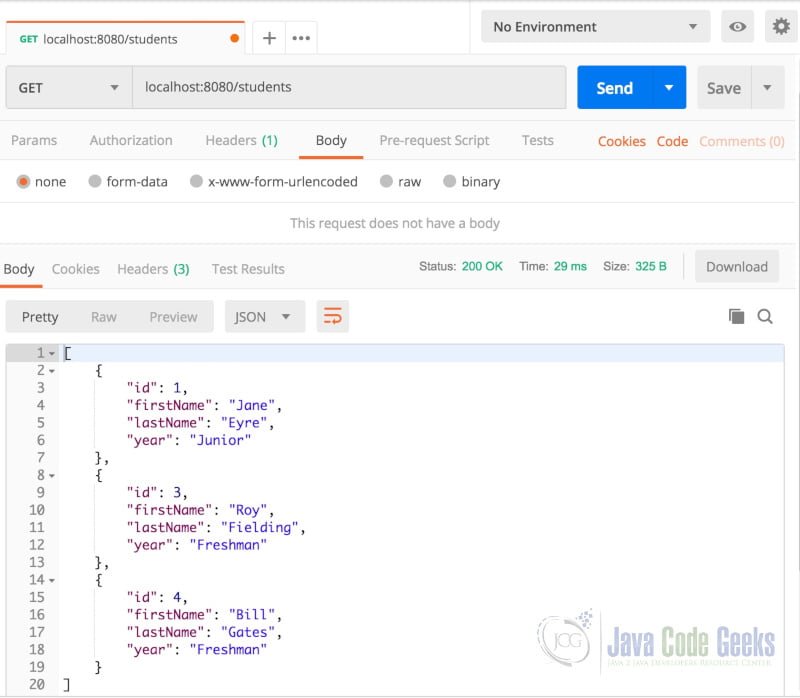
Notice that student 2 has been deleted from the table.
2.15.6 Student Does Not Exist
Open a New Tab. Enter the request URL http://localhost:8080/students/9 and click Send.
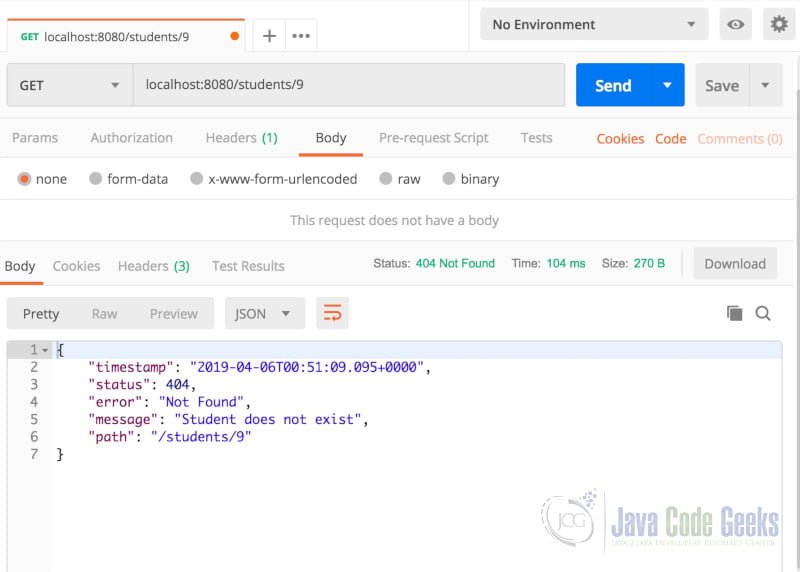
In the Response portion of the window, you will see the details for the “404 Not Found” error and our custom exception message.
3. Spring Boot JPA MySQL – Summary
In this example, we
demonstrated how to develop a CRUD application using Spring Boot, Spring Data JPA,
and Hibernate with MySQL as the database.
4. Download the Source Code
This was a Spring Boot JPA MySQL Example
You can download the full source code of this example here: Spring Boot JPA MySQL Example

Hi Gilbert, thanks for the great explanation and detail. Just wanted to point out a copy/paste error. The spring.jpa.hibernate.ddl-auto and spring.jpa.show-sql property breakdown is duplicated. You have them explained as bullets and then again as paragraphs. Thanks again!
Thank you Andy. I’m glad you liked the article. Also, thank you for pointing out the duplication. It has been fixed.
Hi Gilbert, many thanks for the awesome tutorial – gives a very nice starting point. I am facing the problem that during startup, the DataLoader is not loading the data in the database. public class DataLoader implements ApplicationListener {} and onApplicationEvent(ContextRefreshedEvent event) {} seem to be failing to load the data. I tried by changing it to public class DataLoader implements InitializingBean {} and public void afterPropertiesSet() {}, but same issue – it’s not called during startup. Note that the class is always annotated with @Component, so what could be the reason behind this?
Hi, I resolved the problem. Class DataLoader was defined in com.javacodegeeks.examples.springjpa.bootstrap package which is not under the SpringBootJpaApplication package hierarchy (com.javacodegeeks.examples.jpa). That’s why component scan was not working. Please update the post. Thanks again.
Hi Nirmalya. Sorry for the late response.
I am glad you were able to resolve the issue. Also, thank you for pointing out the discrepancy in the package name. The post has been updated accordingly. Cheers!