In this post, we will demonstrate a Spring Boot Hello World application.
1. Introduction
If you have worked with Spring projects in the past, you might agree that they require quite a bit of configuration. Some of this configuration is boilerplate code related to infrastructure and has nothing to do with business requirements. Spring Boot is a technology that will set up much of this configuration automatically, helping you get your project up and running as quickly as possible.
How does Spring Boot automatically configure your project? Spring Boot will view the JAR files in your classpath and will, using an opinionated approach, configure the application for you. For example, you would typically add @EnableWebMvc to a configuration class of a Spring Web MVC application, but Spring Boot configures the web application automatically if it finds spring-webmvc.jar on the classpath. It will configure such details as setting up a DispatcherServlet, registering HandlerMappings, Adapters, and ViewResolvers. By having Spring Boot manage the infrastructure, the developer can focus on business logic.
Here are some useful benefits of using Spring Boot:
- Automatic configuration of an application uses intelligent defaults based on the classpath and the application context, but they can be overridden to suit the developer’s requirements as needed.
- When creating a Spring Boot Starter project, you select the features that your application needs and Spring Boot will manage the dependencies for you.
- A Spring Boot application can be packaged as a JAR file. The application can be run as a standalone Java application from the command line using the
java -jarcommand. - When developing a web application, Spring Boot configures an embedded Tomcat server so that it can be run as a standalone application. (Tomcat is the default, but you can configure Jetty or Undertow instead.) You can package the application as a WAR file and deploy it to an external servlet container if you prefer
- Spring Boot includes many useful non-functional features (such as security and health checks) right out of the box.
Although Spring Boot will autoconfigure the application for you, it also gives you a lot of flexibility in terms of giving you leeway to make customizations. Consequently, Spring Boot gives you the best of both worlds.
1.1 Tools Used in this Example
- Eclipse Java EE IDE for Web Developers Version: Oxygen.3a
- Maven 3.3.9 (Embedded in Eclipse)
- Spring Tools Plugins 3.9.4.RELEASE
Spring Tools is a set of plugins for Eclipse that speed up the development of Spring applications. You can add Spring Tools to your existing Eclipse installation by going to the Eclipse Marketplace and searching for “Spring IDE”. For more information on Spring Tools for Eclipse visit Spring Tools for Eclipse IDE.
Alternatively, you can download Spring Tools Suite IDE from the Spring Tool Suit page.
2. Spring Boot Hello World Example
In this example, we will develop a Spring Boot web application.
2.1 Create the Spring Boot Project
We will use Maven as the build tool in this example. While you can create a Spring Boot project by writing the Maven POM file from scratch, using the Spring Starter Project Wizard to create the POM file is quicker and less error prone.
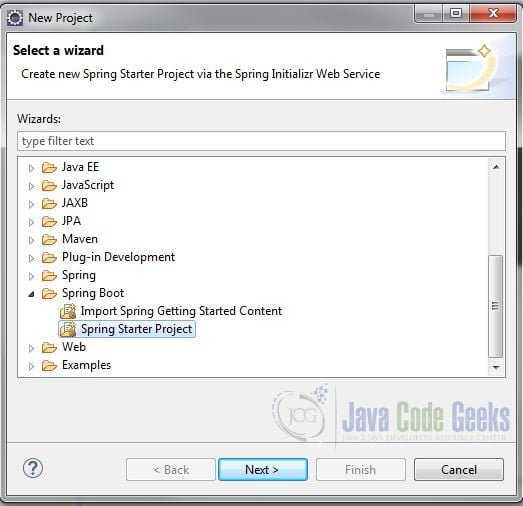
In the New Project – Select a Wizard dialog box, expand Spring Boot and select Spring Starter Project. Click “Next”.
In the New Spring Starter Project dialog box, enter a name for the project. Also, enter the group, artifact and package information. Accept all the other default values. Click “Next”.

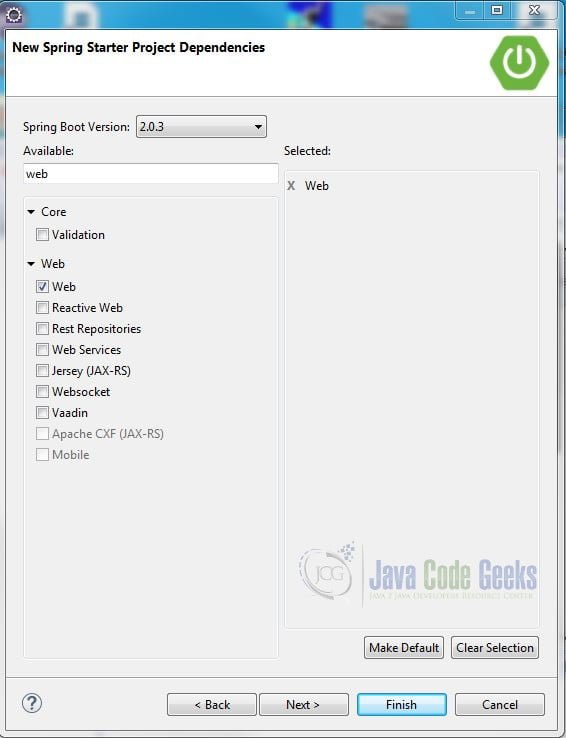
In the New Spring Starter Project Dependencies dialog box, select Spring Boot Version 2.0.3. Also, enter “web” in the Available search box and check Web from the search results. Click “Finish”.
Note: Alternatively, you can create a Spring Boot project using the Spring Initializer at http://start.spring.io. You can then download the zip file and import it into your IDE.
In either scenario, the result is a boilerplate Maven project that has an Application class and an Application tests class. Additionally, a Maven POM file (pom.xml) is created.

Let’s look at the POM file first.
2.2 Spring Boot POM File
The first thing you will notice is the parent POM.
pom.xml
<parent>
  <groupId>org.springframework.boot</groupId>
  <artifactId>spring-boot-starter-parent</artifactId>
  <version>2.0.3.RELEASE</version>
  <relativePath/> <!-- lookup parent from repository -->
</parent>
The spring-boot-starter-parent POM handles dependency and plugin management. A key benefit of using a parent POM is that it helps avoid version conflicts within included dependencies. (The dependencies below inherit the version from the parent.)
In the dependencies section, you will see the “spring-boot-starter-web” dependency.
<dependency>
  <groupId>org.springframework.boot</groupId>
  <artifactId>spring-boot-starter-web</artifactId>
</dependency>
The “spring-boot-starter-web” is a direct dependency that includes several transitive dependencies, which in turn include other dependencies. The takeaway here is that by simply declaring the “spring-boot-starter-web” dependency, Maven will bring in all the transitive dependencies the web application requires. (You can view the transitive dependencies by selecting the Dependency Hierarchy tab.)
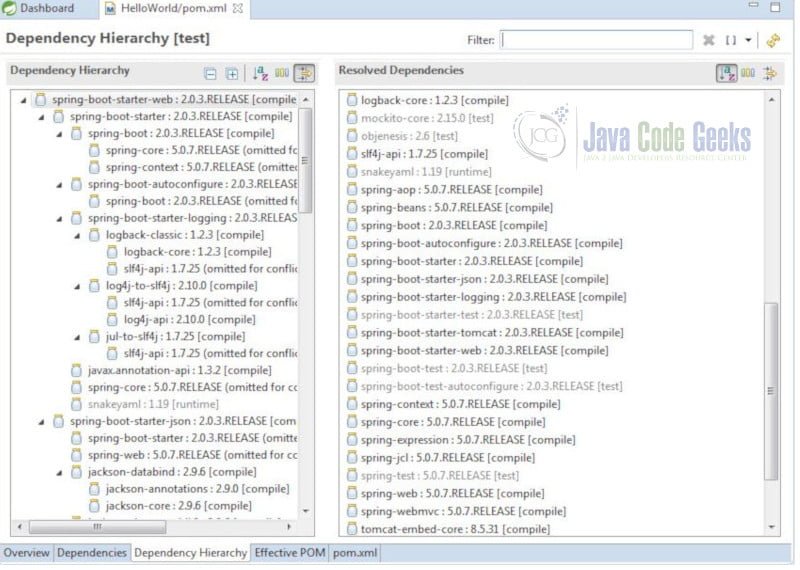
Imagine having to write out all of these dependencies by hand!
2.3 Spring Boot Application Class
Open the HelloWorldApplication class.
HelloWorldApplication.java
import org.springframework.boot.SpringApplication;
import org.springframework.boot.autoconfigure.SpringBootApplication;

@SpringBootApplication
public class HelloWorldApplication {

	public static void main(String[] args) {
		SpringApplication.run(HelloWorldApplication.class, args);
	}
}
You will see @SpringBootApplication on line 4. This convenience annotation is a wrapper for the following:

@Configuration– Flags the class as a source of bean definitions for the application context.@ComponentScan– Searches for beans and components (e.g., Controllers, Services, Repositories, etc.) in the package hierarchy.@EnableAutoCofiguration– Inspects the application context and classpath and automatically configures the required beans using opinionated assumptions.
Clearly, the SpringBootApplication annotation configures much of the application for you.
Notice that the HelloWorldApplication class has a main method. This allows you to run the application as a standalone Java application. The SpringApplication’s run method (line 8) bootstraps and launches the HelloWorldApplication.
You can run the application, but it will not do anything functional at this point. Since this is a web application, let’s add a controller.
2.4 Create the Controller
Create a new Java class HelloWorldController in the com.javacodegeeks.example package with the following code:
HelloWorldController .java
import org.springframework.web.bind.annotation.GetMapping;
import org.springframework.web.bind.annotation.RestController;

@RestController
public class HelloWorldController {

	@GetMapping("/hello")
	public String sayHello() {
		return "Hello Java Code Geeks!";
	}
}
@RestController is another convenience annotation that simply adds @ResponseBody to all request mapping methods of a controller class. RestController is mostly used in REST API programming when no view technology (e.g. JSP, Thymeleaf) is required.
@GetMapping is a specialized RequestMapping. It specifies that HTTP GET requests to “/hello” are mapped to the sayHello() method.
2.5 Configuration
As mentioned before, Spring Boot will use default settings to configure your application out of the box, but you can override these settings. For a Spring Boot web application, the default setting for the port is 8080 and no context path is set. We can change these settings by modifing the application.properties file (located in src/main/resources). Add the following entries:
application.properties
server.port: 8082
server.servlet.context-path: /HelloWorldExample
Other default settings can be overwritten by modifying the POM file or implementing interfaces. Visit the following site for examples of configuring a Spring Boot Web Application. http://www.baeldung.com/spring-boot-application-configuration
2.6 Run the Application
There are a few methods that you can use to run a Spring Boot application. In this example, we will use the Boot Dashboard.
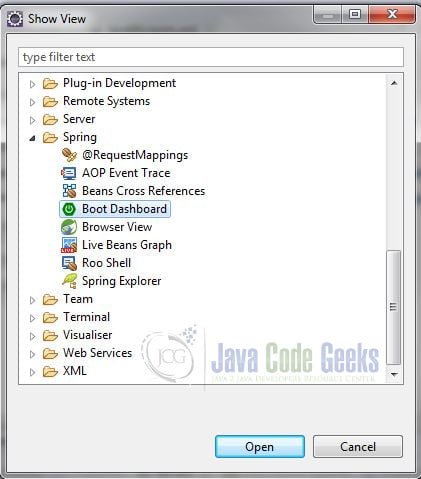
Click Window – Show View -> Other… from the Eclipse menu. In the Show View dialog box, expand Spring and select Boot Dashboard. Click Open.
In the Boot Dashboard, expand “local”, select HelloWorld and click the Start/Restart button. (It’s on the upper left corner of the dashboard.)
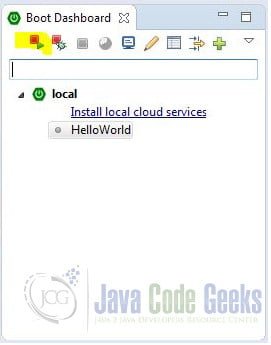
The application is started and deployed to the embedded Tomcat Web Server.
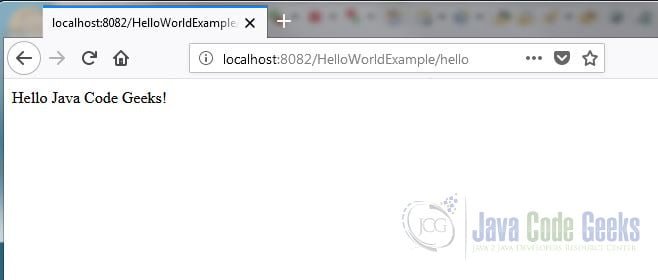
Start your favorite web browser, enter localhost:8082/HelloWorldExample/hello in the address bar and hit Enter.
3. Summary
In this post we demonstrated how to create a Hello World application using Spring Boot.
Spring Boot helps you get your Spring project up and running quickly. By using an opinionated approach, Spring Boot automatically configures your application, so you can focus on business requirements and not on the infrastructure of your Spring Boot project.
4. Download the Source Code
This was a Spring Boot Hello World example.
You can download the full source code of this example here: Spring Boot Hello World Example

It’s… beautiful!
Thank you Gert! I am happy to hear you enjoyed the post.
Thank you. This is helpful
Thank you Cyprian. I am glad you found this post useful.
Its really helpful .