The OSGi specification defines a modularization and component model for Java applications. Jetty leverages OSGi support providing an infrastructure that enables developers to deploy Jetty and web applications inside an OSGi container. One can deploy traditional Java Web Applications or Context Handlers on Jetty within the OSGi container; in addition to this, OSGi bundles can be deployed as web applications.
In this example, we are going to show how we can deploy Web Applications on Jetty within an OSGi container. We are going to enable a Jetty Server on an OSGi container first, thereafter we are going to deploy a Servlet on our OSGi powered Jetty.
1. Environment and Prerequisites
In this example, we are going to use the following programming environment:
- Java 8 (Java 7 is also OK for this example )
- Eclipse for RCP and RAP Developers v4.5 (Mars)
- Equinox 3.10 OSGi implementation (v 3.9 is also fine) configured in Eclipse
- Jetty v9.2.11(We do not necessarily need Jetty installation, however having one will be handy)
At this point, we are not going to detail Equinox configuration in Eclipse, which would be beyond scope of this example. We assume that it is already configured.
2. Adding Jetty dependencies to OSGi Target
2.1 Jetty libraries
Jetty JAR files, which happen to exist under the lib folder of the Jetty installation contain appropriate manifest entries(MANIFEST.MF) for OSGi deployment. All we have to do is, to copy the necessary JARs under our OSGi target.
The necessary libraries are as follows:
- jetty-util
- jetty-http
- jetty-io
- jetty-security
- jetty-server
- jetty-servlet
- jetty-webapp
- jetty-deploy
- jetty-xml
- jetty-osgi-servlet-api
We have to place these libraries in a location that our OSGi container is aware of. We can wither copy to an existing location, or create a new location. In this example, we have copied to an existing OSGi target location.
2.2 jetty-osgi-boot Bundle
After copying Jetty dependencies, we have to add the jetty-osgi-boot bundle to the OSGi target. jetty-osgi-boot is the bundle that performs the initialization of the Jetty server. This bundle is not included in the Jetty installation, but can be easily obtained from Maven Central Repository.
Once we have downloaded the bundle, we should copy it to the OSGi target location.
2.3 Reloading OSGi Target
After we have copied the Jetty libs and boot bundle, we have to refresh our container in Eclipse. This can be performed following the steps below:
- Open Eclipse “Preferences” from the Menu
- Search for “Target” from the search box on the top left.
- Select your OSGi target
- Press “Reload”.
3. Running the Jetty Server on the OSGi container
jetty-osgi-boot bundle provides two options for the server initialization one of which must be configured:
- Setting jetty.home.bundle
- Setting jetty home
The first option stipulates that Jetty runs with the predefined XML files coming with the bundle JAR. The second option requires setting a Jetty home with the necessary configuration files. In this example, we will take the second option.
This can be accomplished as follows:
- Create a folder named “osgi-jetty-home” (You can name is as you wish.)
- Create the folder “osgi-jetty-home/etc”
- Include jetty.xml, jetty-selector.xml and jetty-deploy.xml files under “osgi-jetty-home/etc”. (Alternatively, you can copy from jetty-osgi-boot JAR or jetty installation)
- Add the following JVM parameter to run configuration of your OSGi container: -Djetty.home=/path/to/your/osgi-jetty-home
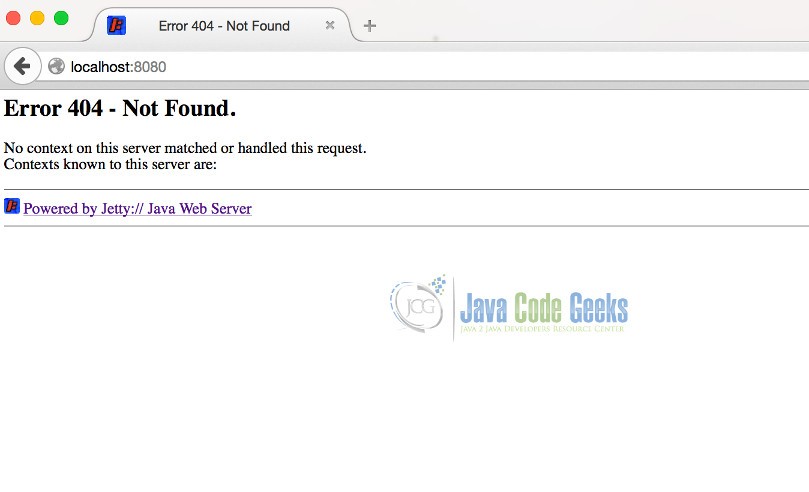
When you run the OSGi container, you will see that Jetty has started on port 8080. You can check via your browser navigating to http://localhost:8080.
4. Deploying a Servlet on the OSGi Jetty
In this part, we will show how to deploy a simple servlet on the Jetty which runs in our OSGi container. The example can be extended to include web apps, resource handlers or other configuration.
In this example we are going to create a simple OSGi bundle, in the activator of which, we will configure a Servlet and register its handler as an OSGi component.
4.1 Creating the Eclipse Project
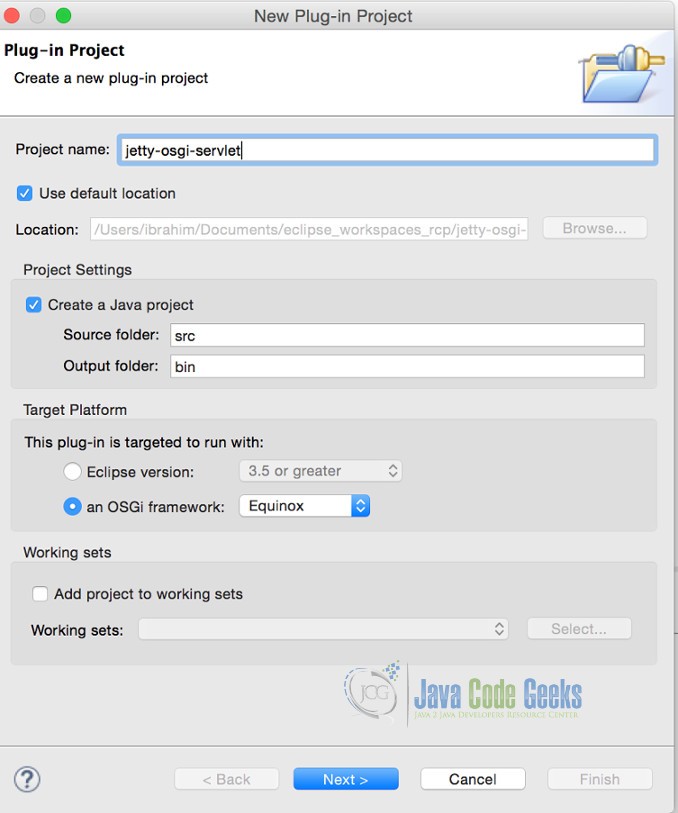
We start with creating the Eclipse project. The steps needed are as follows:
- Click on “File–>New->Plug-in Project”.
- Type project name as “jetty-osgi-example”.
- Select “an OSGi framework” as the target platform.
- Press “Next”.
- Check the option:”Generate an Activator….”.
- Press “Finish”.

Creating the Eclipse project
4.2 Adding Required Plugins
After we have created our project, we have to add Jetty dependencies as Required Plugins in the MANIFEST.MF file. We can do it through Eclipse as follows:
- Open “META-INF/MANIFEST.MF” file with Eclipse Editor
- On the “Dependencies”, click on “Add” button on the “Required Plug-ins” section.
- Type “Jetty” in the search box and add all the Jetty plugins that are available in the OSGi container.
- Press “OK”.
Now, the Jetty dependencies are ready. Our MANIFEST.MF file looks like:
MANIFEST.MF
Manifest-Version: 1.0
Bundle-ManifestVersion: 2
Bundle-Name: Jetty-osgi-example
Bundle-SymbolicName: jetty-osgi-example
Bundle-Version: 1.0.0.qualifier
Bundle-Activator: jetty_osgi_example.Activator
Bundle-RequiredExecutionEnvironment: JavaSE-1.8
Import-Package: org.osgi.framework;version="1.3.0"
Bundle-ActivationPolicy: lazy
Require-Bundle: org.eclipse.jetty.server;bundle-version="9.2.11",
 org.eclipse.jetty.osgi-servlet-api;bundle-version="3.1.0",
 org.eclipse.jetty.servlet;bundle-version="9.2.11",
 org.eclipse.jetty.deploy;bundle-version="9.2.11",
 org.eclipse.jetty.http;bundle-version="9.2.11",
 org.eclipse.jetty.io;bundle-version="9.2.11",
 org.eclipse.jetty.osgi.boot;bundle-version="9.2.11",
 org.eclipse.jetty.security;bundle-version="9.2.11",
 org.eclipse.jetty.util;bundle-version="9.2.11",
 org.eclipse.jetty.webapp;bundle-version="9.2.11",
 org.eclipse.jetty.xml;bundle-version="9.2.11"
4.3 Wiring our Servlet to OSGI and Jetty
After setting the dependencies, we are going deploy a simple Servlet on our OSGi powered Jetty. Our Servlet is named as JcgServlet and very simple as follows:

JcgServlet.java
package jetty_osgi_example;

import java.io.IOException;

import javax.servlet.ServletException;
import javax.servlet.http.HttpServlet;
import javax.servlet.http.HttpServletRequest;
import javax.servlet.http.HttpServletResponse;

public class JcgServlet extends HttpServlet{

	@Override
	protected void service(HttpServletRequest req, HttpServletResponse resp) throws ServletException, IOException {
		resp.getWriter().println("Hello JCG, Hello OSGi");
	}

	public JcgServlet() {
		super();
	}
}
Now we are going to wire this Servlet to our Jetty. As you remember, while creating the Eclipse Project, we had checked the option “Generate an Activator...”. This selection creates a class jetty_osgi_example.Activator. In this class, we can register our components to OSGi once the bundle is activated. Now we are going to register our Servlet Handler, so that it will be available to the Jetty.
We are going to implement the activate() method of the Activator. Below you can see the Activator class decorated with source code comments.
Activator.java
package jetty_osgi_example;

import java.util.Hashtable;

import org.eclipse.jetty.server.handler.ContextHandler;
import org.eclipse.jetty.servlet.ServletContextHandler;
import org.eclipse.jetty.servlet.ServletHandler;
import org.osgi.framework.BundleActivator;
import org.osgi.framework.BundleContext;

public class Activator implements BundleActivator {

	private static BundleContext context;

	static BundleContext getContext() {
		return context;
	}


	public void start(BundleContext bundleContext) throws Exception {
		Activator.context = bundleContext;

		//1. We create a Servlet Handler
		ServletHandler handler = new ServletHandler();

		//2. We register our Servlet and its URL mapping
		handler.addServletWithMapping(JcgServlet.class, "/*");

		//3. We are creating a Servlet Context handler
		ServletContextHandler ch= new ServletContextHandler();

		//4. We are defining the context path
		ch.setContextPath("/jcgservletpath");

		//5. We are attaching our servlet handler
		ch.setServletHandler(handler);

		//6. We are creating an empty Hashtable as the properties
		Hashtable props = new Hashtable();

		// 7. Here we register the ServletContextHandler as the OSGi service
		bundleContext.registerService(ContextHandler.class.getName(), ch, props);

		System.out.println("Registration Complete");
	}


	public void stop(BundleContext bundleContext) throws Exception {
		Activator.context = null;
	}

}
In the activator, we have first created a ServletHandler and registered our Servlet along with a mapping. Thereafter we appended it to a ServletContextHandler with a context path. Lastly we have registered our ServletContextHandler as an OSGi component. Now our Jetty Server will find our ServletContextHandler as its context handler.
Please note that, the the components are resolved by name, therefore the component name ContextHandler.class.getName() shouldn’t be replaced with an arbitrary name.
After we implemented our bundle, we can run our OSGi container. when we try to access http://localhost:8080/jcgservletpath/, we will see that our request is handled by our Servlet with the following response:
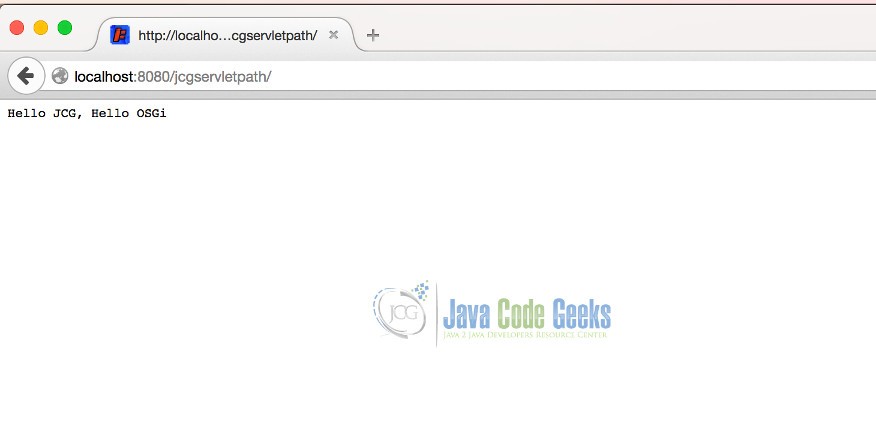
Now we have a Servlet running on the Jetty within an OSGI container. This example can be tried with different Handler and web application configurations. Jetty promises full support for OSGi.
4. Conclusion
Jetty provides full support for OSGi containers in order to leverage modularity. In this example, we have deployed Jetty in an OSGi container thereafter we have deployed a Servlet on this Jetty, in which we have defined our ServletContextHandler as an OSGi service.
You can download the full source code of this example here : Jetty OSGi Example

Thank you so much!!