1. Introduction
In this example, we will be implementing a basic Android SnackBar Activity, which will be able to display a long waiting SnackBar, a short waiting SnackBar, and an interactive SnackBar. To Trigger these different functionalities we will create 3 separate buttons for each one of the SnackBar scenarios. Further, when each one of these buttons will be clicked they will display their corresponding messages.
At the end of this example, we will have a working example build using Android Studio, Gradle, The Android SDK which in our case will come packaged with Android Studio.
2. Technologies used
- Android Studio 3
- Android 7.1.1 (Nougat): API 25
- Android Virtual Device: Nexus 5X.
3. Creating the Project
Below is the first screen when creating a new Android project in Android Studio.
Follow the below instructions as our first step in creating our application:
- Go to the main menu of the Android Studio IDE and select “New Project”
- Then give your project a name: in this example we calling it “SnackBarExample”
- Then give it a package name: ours will be “com.javacodegeeks.snackbarexample”
- Then click next

Below is the second screen when creating a new Android project in Android Studio.
Follow the below instructions as our next step in creating our application:
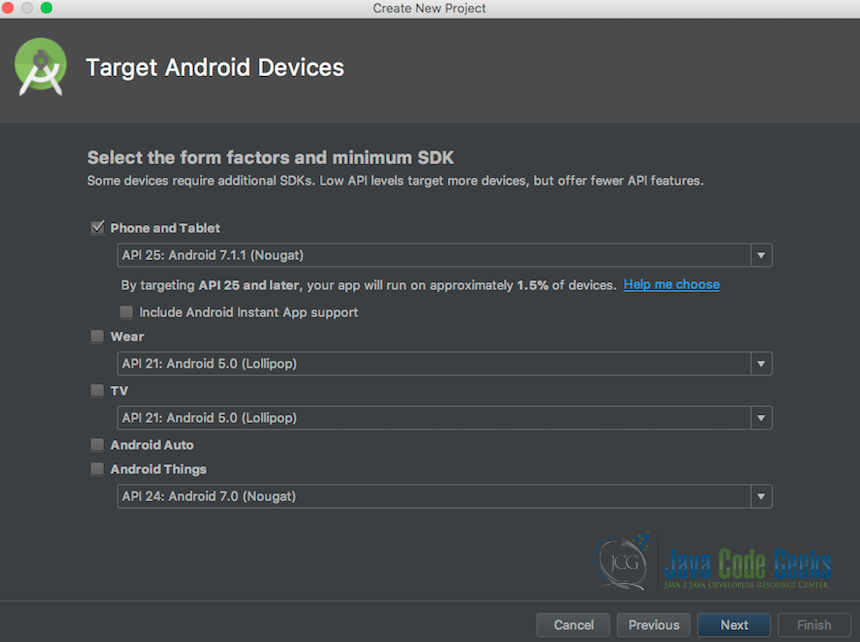
- Select the “Phone and Tablet” you are targeting with your application: in our case, we will be using “Android Nougat”
- Then since we are only building for the cell phone devices we are going to ignore all the other devices.
- Lastly, click Next.
Below is the third screen when creating a new Android project in Android Studio.
Follow the below instructions as our last step in creating our application:
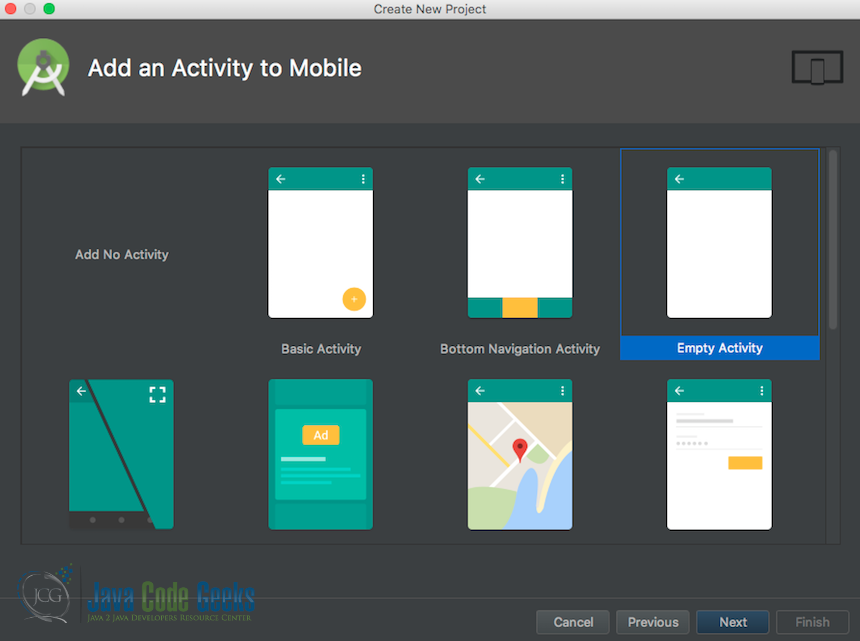
- Select the Activity template you would like to use for the first Activity of the project: in our case, we are going to choose the “Empty Activity” template.
- Then click Next
Below is the last screen when creating a new Android project in Android Studio.
Follow the below instructions as our last step in creating our application:
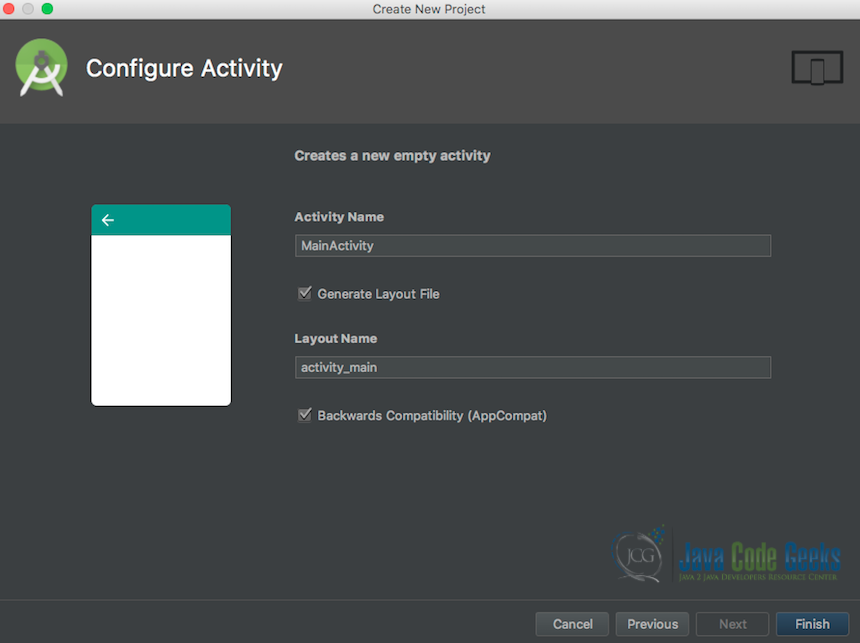
- Choose a name for the Activity: in our case, we are using the default Activity name “MainActivity”
- Select the “Generate Layout File” option. This is so that the corresponding layout file for our activity gets automatically generated.
- Select the “Backwards Compatibility (AppCompact)” option. This is so that our activity becomes backward compatible each time there is an upgrade to the Android platform.
- Then click Finish.
4. Implementing the SnackBar Activity
Below is the code snippet of our completed Activity which will contain our buttons for displaying the different kinds of SnackBar we are going to create. It extends the class AppCompatActivity from the Android platform in order to be compatible with future and previous versions of the Android platform.
MainActivity.java
package com.javacodegeeks.snackbarexample;

import android.graphics.Color;
import android.support.v7.app.AppCompatActivity;
import android.os.Bundle;
import android.view.View;
import android.support.design.widget.Snackbar;
import android.widget.Button;
import android.widget.TextView;
public class MainActivity extends AppCompatActivity {
    private Button firstButton, secondButton, thirdButton;
    @Override
    protected void onCreate(Bundle savedInstanceState) {
        super.onCreate(savedInstanceState);
        setContentView(R.layout.activity_main);

        firstButton = findViewById(R.id.btnfirstbutton);
        secondButton = findViewById(R.id.btnsecondbutton);
        thirdButton = findViewById(R.id.btnthirdbutton);

        firstButton.setOnClickListener(new View.OnClickListener() {
            @Override
            public void onClick(View view) {
                Snackbar.make(view, "The First SnackBar Button was clicked.", Snackbar.LENGTH_SHORT)
                        .setAction("Action", null).show();
            }
        });

        secondButton.setOnClickListener(new View.OnClickListener() {
            @Override
            public void onClick(View view) {
                Snackbar.make(view, "The Second SnackBar Button was clicked.", Snackbar.LENGTH_LONG)
                        .setAction("Action", null).show();
            }
        });

        thirdButton.setOnClickListener(new View.OnClickListener() {
            @Override
            public void onClick(View v) {
                Snackbar snackbar = Snackbar
                        .make(v, "An Error Occurred!", Snackbar.LENGTH_LONG)
                        .setAction("RETRY", new View.OnClickListener() {
                            @Override
                            public void onClick(View view) {
                            }
                        });
                snackbar.setActionTextColor(Color.BLUE);
                View snackbarView = snackbar.getView();
                TextView textView = snackbarView.findViewById(android.support.design.R.id.snackbar_text);
                textView.setTextColor(Color.RED);
                snackbar.show();
            }
        });
    }
}
- line 11: Here we declare all the 3 buttons that will be used to display the SnackBars once clicked.
- line 15: We load the main layout of our activity, which contains all the button declarations.
- line 17 to 19: We register the 3 buttons we created earlier with their corresponding layout component definitions.
- line 21 to 27: We register an
OnClickListeneron thefirstButton.This is so that when this button is clicked the corresponding action gets executed. Inside the body of thesetOnClickListenerwe instantiate an object of anotherOnClickListenerlistener, in which a SnackBar gets created using the staticmakemethod of theSnackBarclass. Themakemethod takes the following arguments: a view, text to display and the duration of the SnackBar on the screen. The last section of the code is to set an action which could be required for the SnackBar. In this case, we don’t need it, so we go straight to calling theshowmethod which eventually displays our SnackBar. - line 29 to 35: We repeat the steps in line 21 to 26 with the only difference that the duration is set to long
Snackbar.LENGTH_LONG. - line 37 to 53: We repeat the steps in 29 to 34 with the difference that we nest another Listener into the
setActionof the SnackBar object method instead of passingnull. Further, we also update the coloring of the message and the Button s text.
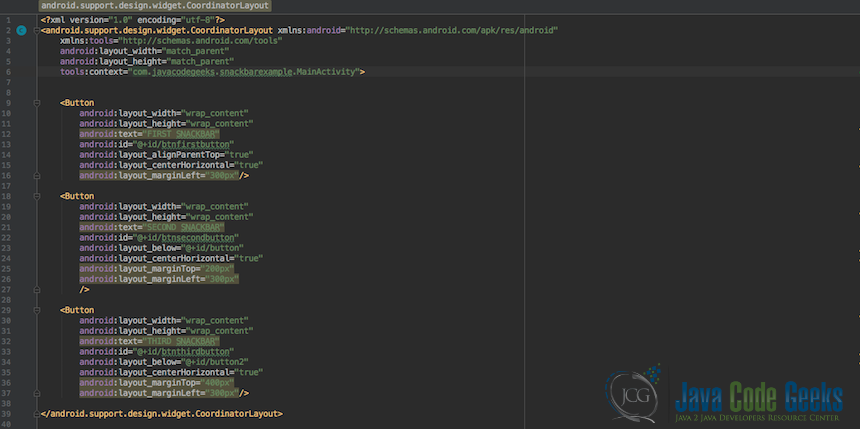
5. The Main Activity Layout Configuration
Below is the main layout file in which we define all the 3 buttons that we have used in our activity, to trigger our SnackBars.

The Button Tag components are used in order to successfully create and configure our buttons. the first button will be used for displaying the short-lived SnackBar. The next button is for the long-lived SnackBar and the last button is for the long-lived and interactive SnackBar.
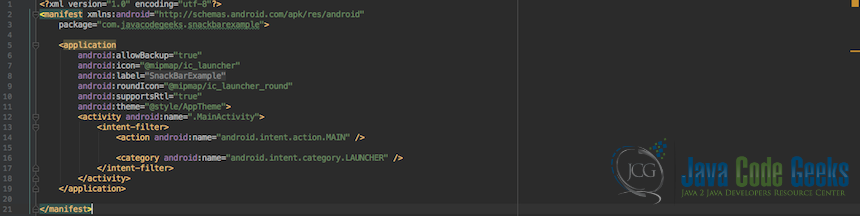
6. Manifest file
Below is the manifest file of our application. it contains our application configuration mainly that of Activities that are in the application. In our example, we only have the MainActivity, so therefore we only have a configuration for one Activity. The tag activity is used to define our configuration, in which we specify that this Activity is the entry point to our application. Further, we also specify the name of the Activity.
7. Final Running Application
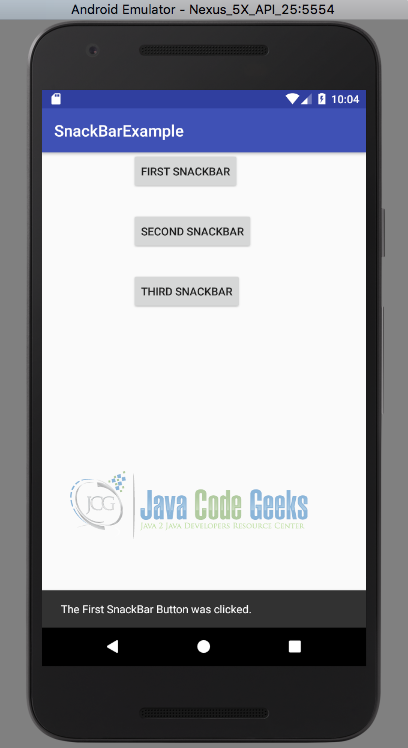
Below is a screenshot of the first SnackBar demonstration.
In order to see the short-lived SnackBar, we must click on the “FIRST SNACKBAR” button.
Below is a screenshot of the second SnackBar demonstration.
In order to see the long-lived SnackBar, we must click on the “SECOND SNACKBAR” button.

Below is a screenshot of the last SnackBar demonstration. In which we can also see the SnackBar action button in blue.
In order to see the long-lived and interactive SnackBar we must click on the “THIRD SNACKBAR” button. Then click the “RETRY” button to hide it.

8. Conclusion
In this example, we went through the process of creating an Activity which had 3 buttons. The 3 buttons were all hocked with event listeners which enable these buttons when clicked to display their corresponding SnackBar. One had a short duration set, the other a longer duration configured and the last had a long duration set as well as an action, which enabled it to perform additional functionalities while the SnackBar was displaying.
9. Download the Source Code
That was Android SnackBar Example.
You can download the full source code of this example here: SnackBarExample
