In this tutorial, we will learn to configure and use the Tomcat Plugin for Eclipse.
Although there are a few tomcat plugins available, but we will specifically use the Sysdeo Tomcat plugin as part of this tutorial. Sysdeo Tomcat plugin offers the following advantages:
- Sysdeo Tomcat Launcher plugin has been one of the most widely accepted and stable tomcat plugins.
- Plugin availability for Eclipse 3.1 to 4.3 with Tomcat 7 support since January 2011.
- Recently released plugin for Eclipse 4.4 in June 2014.
- Provides some salient features for ease of development / debugging, such as:
- Convenient starting and stopping Tomcat
- Capability to debug web application as a stand-alone JVM process
- Exporting a Tomcat project to a WAR File
- Adding Java Projects to Tomcat classpath
- Setting Tomcat JVM parameters, classpath and bootclasspath
- Capability to use a custom Tomcat classloader to load classes in several java projects at the same classloader level.
Pre-requisites
The installation, configuration and usage steps described in the tutorial have been implemented on:
- Ubuntu 14.04 LTS Trusty
- Eclipse 4.3 Kepler
- JDK 1.7 (1.7.0_55)
- Tomcat 7
You will need Eclipse, Java and Tomcat downloaded and installed before using the Sysdeo Tomcat plugin.
The following tutorial is divided into three parts:
- Download and Installation of Sysdeo Tomcat Plugin
- Configuration of the Plugin
- Configuring the Web project and using the Plugin
Download and Installation
NOTE: We could have used the Eclipse Market Place to install the plugin, but as experienced and mentioned by a number of fellow users, the eclipse market place installation of the plugin doesn’t work that well and thus, in turn the web projects are not configured correctly to use the Tomcat plugin. Hence, we use the manual approach to install the plugin.
- Download the Sysdeo Plugin
- Install the Sysdeo Tomcat Plugin
- $ECLIPSE_INSTALLATION/dropins for Eclipse 3.4, 3.5, 3.6, 4.3
- $ECLIPSE_INSTALLATION/plugins for Eclipse 2.1, 3.0, 3.1, 3.2 and 3.3
- Provide DevLoader jar to Tomcat
- Re-start Eclipse
Go to: Sysdeo Downloads Page
Download the zip for the version 3.3. Please use V3.3.1 in case you are using Eclipse 4.4.
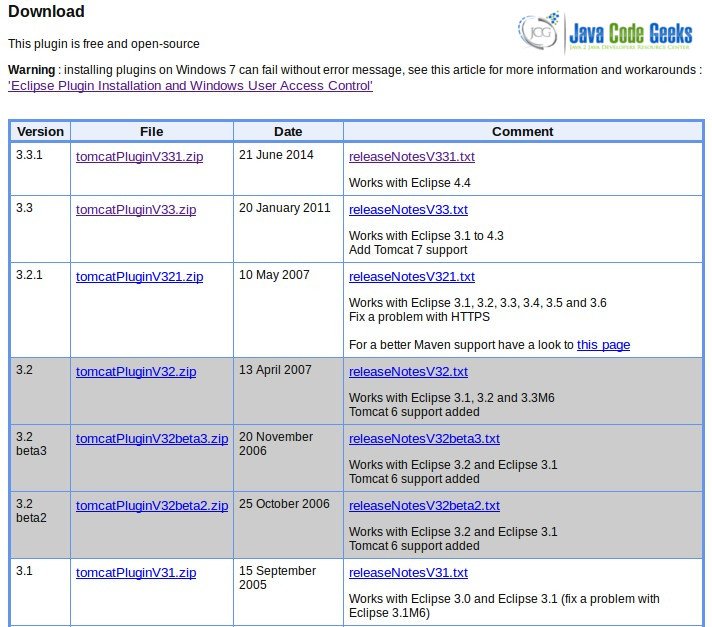
Do read the release-notes for an idea of the features added to the plugin.
Once the tomcatPluginV33.zip is downloaded, manually install the plugin to eclipse.
Unzip the zip file in :
vishal@l-mc-ul14:~/eclipse/dropins$ ls
com.sysdeo.eclipse.tomcat_3.3.0
For version 3.3, copy the DevloaderTomcat7.jar (for Tomcat 7) OR DevLoader.zip (other Tomcat versions) to the $TOMCAT_HOME/lib folder.
The DevLoader.jar is available in the zip for the Sysdeo Plugin downloaded in step 1.
This jar contains the classes for helping load the classes of the web project hypothetically in the tomcat webapp
It is recommended that after copying the plugin zip to the eclipse directory, please use option -clean while restarting eclipse. This will help the plugin be evaluated by eclipse and installed correctly.
After eclipse is started, there would be three icons available in the toolbar –
Start, Stop and Re-start Tomcat as shown in image below. This will confirm that the plugin is installed correctly.

Note: If Tomcat icons are not shown in toolbar as shown above, select Menu –> Window –> Customize Perspective –> Commands and Availability Groups’, and check the ‘Tomcat’ checkbox.
Configure the Tomcat Plugin
The next step is to configure Tomcat server to be used by the plugin.
If you have not downloaded Tomcat Server, use the Tomcat Downloads Page and unzip it for installation.
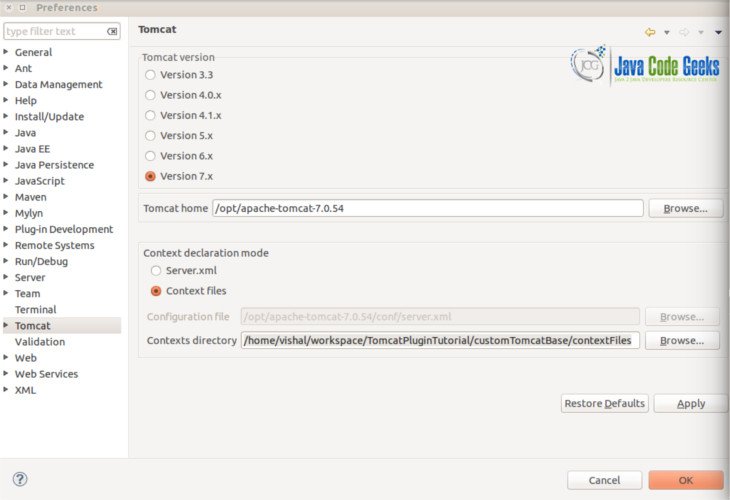
Go to Menu –> Windows –> Preferences –> Tomcat
- Attach Tomcat Server
- Advanced – Configure Tomcat Base
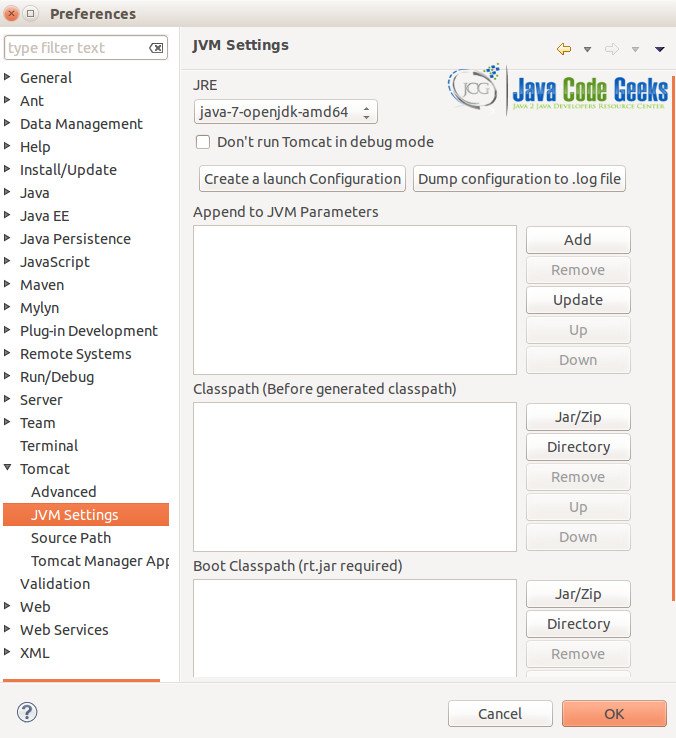
- JVM settings
Select the Tomcat version of your choice and provide the directory where the tomcat installation (unzip version) is available.
Provide the Context Declaration Mode as Context Files. We have used a context files directory here so that we can use the same tomcat server for multiple web projects to be deployed and enable their debugging. If you have a single web project and do not intend to deploy multiple web projects on the same tomcat, then you can use the context entry in server.xml directly.
This would help in customizing any tomcat server configuration properties for specifically the plugin. It would not impact the original tomcat installation that you still might want to use as a container outside of eclipse OR without the plugin.
As a user, you can copy and create your own Tomcat base for the plugin to use while launching tomcat server.
Configure the Advanced Tomcat Settings while starting the Tomcat, for example JRE, JVM Parameters and the like based on your requirement.

Creating, configuring a web project and using the plugin
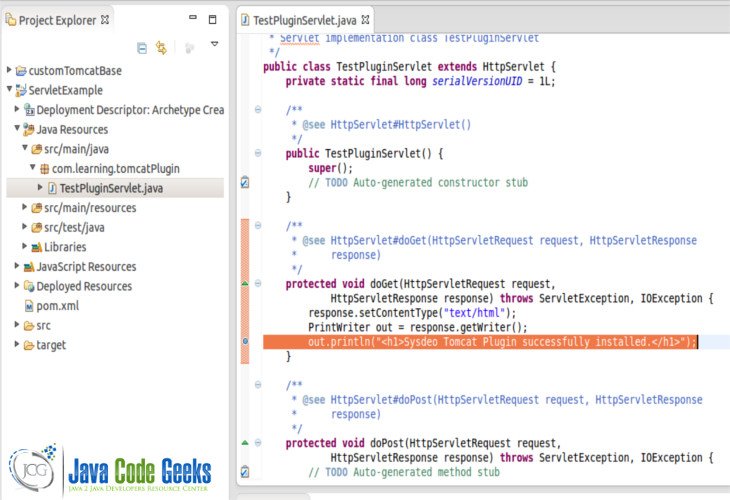
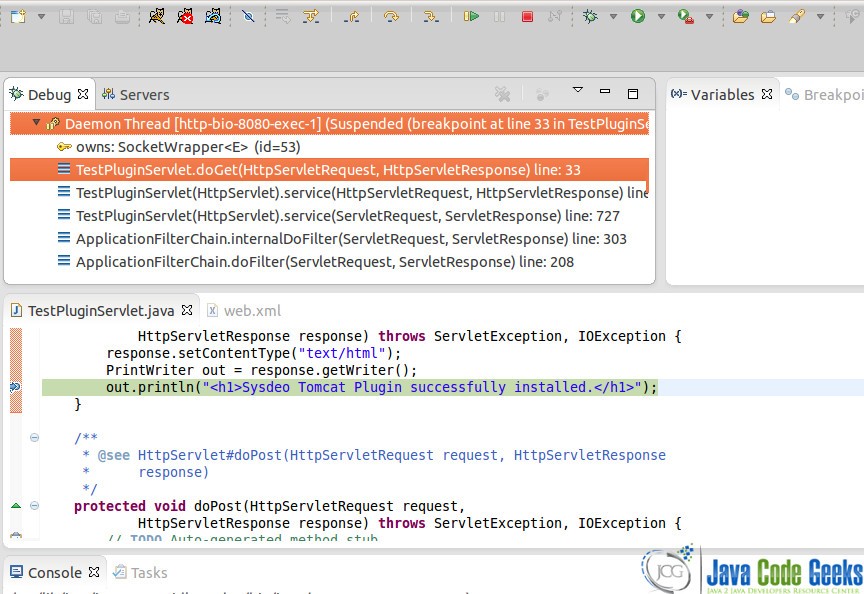
Here, we have created a simple web project using the maven webapp archetype. A new servlet TestPluginServlet has been created, which would have some lines of code in the doGet method. We intend to deploy the web project using the Sysdeo Tomcat plugin and then place a breakpoint in the doGet method of the servlet. On receiving a servlet request, the breakpoint should be reached in eclipse, thus enabling debugging of the container code.
The next step is to configure the project with the plugin, so that the project can be deployed on Tomcat.
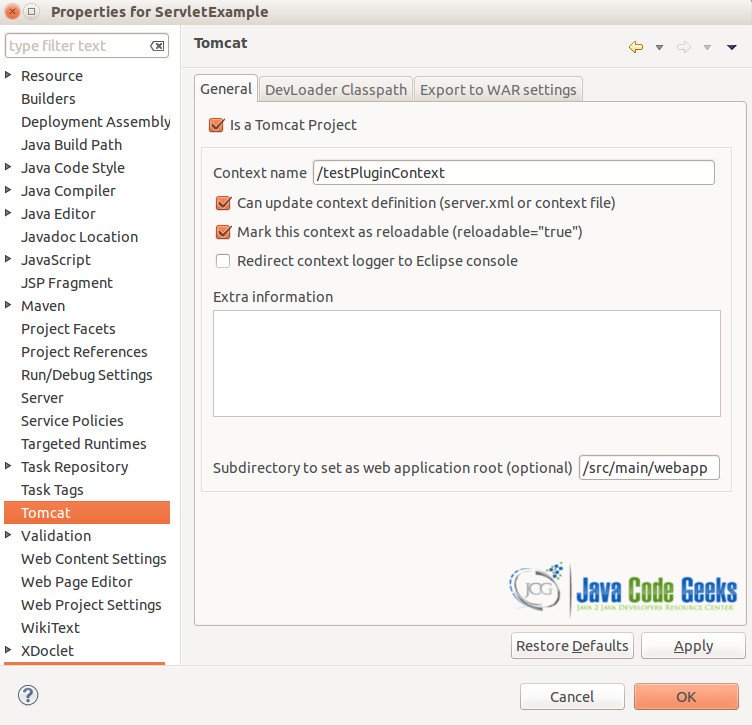
Go to: Right click Project –> Properties –> Tomcat and configure the following:
- the Context path for the web project
- allow update to context.xml
- set context as reloadable to “true”
- subdirectory to set as Web application root as appropriate, we have set it to /src/main/webapp per maven hierarchy
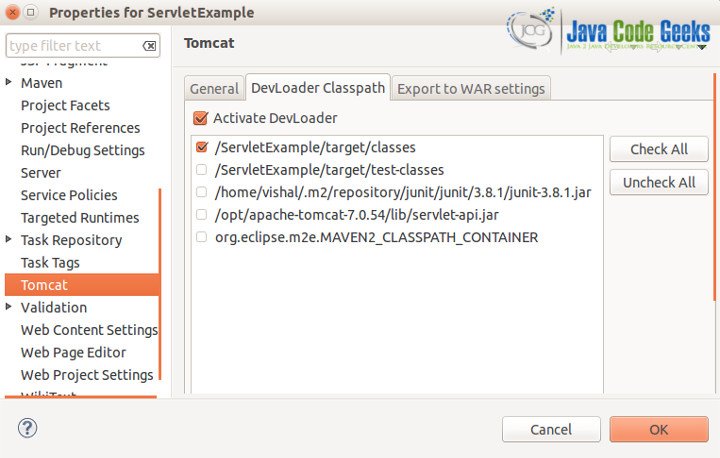
The next step is to configure the DevLoader to load Web project classes with the Tomcat container. Select options as applicable.
Once the project is set up for the plugin usage, a new context file for the project is generated in the directory as mentioned in step 2 while configuring the context directory for the plugin.
- Start the tomcat server using the toolbar button.
- Invoke the servlet by sending a request over url.
- Verify that the breakpoint is hit in eclipse as shown below.
- Resume debug execution and the servlet response is received on the browser.
http://localhost:8080/testPluginContext/TestPluginServlet

The servlet example project used is available for download here.
