1. Introduction
In this example we will discuss Apache Tomcat Servlet/JSP container’s connection pull configuration via JNDI (Java Naming and Directory Interface ) resources. The connection pool we will look at is javax.sql.DataSource, which is a JDBC API for getting a connection instance to a database. In this example we will discuss setting a global DataSource for MySQL database.
javax.sql.DataSource is a factory for getting connections to different physical data sources. javax.sql.DataSource interface is registered with the naming service based on JNDI API. A data source driver allows accessed to the database via DataSource interface. A DataSource object is looked up in the context based on registered through JNDI Resource. The connection to the data source, such as database is attempted when javax.sql.DataSource‘s getConnection() method is called. Connection pooling has many benefits and is part of the Java EE standard implemented by Tomcat. It has many benefits one of which is increased performance and reduced connection creation and removal overhead due to connection reuse by the connection pool.
Use of JDBC API allows for flexibility of changing data source implementation driver form MySQL to Oracle for example, and allows using improved data source specific connection pool implementations. It also abstracts away database connection related plumbing, and allows developers to focus on business logic. Using configurations for setting connection pool also allows for server or web application specific connection pool tuning to meet demands of the application(s) on that particular server.
Read more about JNDI here. The Tomcat version used for this example is 8, the Windows version is 7 Professional SP1, and the data source discussed is MySQL server version 5.1.
Note that you can set up database connection in Java code as well. Read more from Apache’s website, or this stackoverflow question.
Note that in this example we will focus on server wide connection pull configuration, yet similar steps may be performed to do a web application specific connection pool configuration. Configuring the connection pool as a global resource results in the connection pool that is shared by all web applications deployed in the container.
In this example we will create a test web application called “testwebapp”, and a test database called “JCGExampleDB”.
2. Environment
In this example 64-bit Windows 7 Professional SP1 was used. JDK 7 for Windows 7 64-bit was installed and configured.
Note that in this example we use Windows specific directory path separator “\”, which is different from the one used on Linux like systems. Below are critical directories for the Tomcat that will be referenced to in this example:
TOMCAT_ROOT_DIR(known as $CATALINA_HOME, where catalina is the project name of the Tomcat server) is the directory where you have placed Apache Tomcat folder, e.g. C:\apache-tomcat-8.0.20-windows-x64\apache-tomcat-8.0.20 in our example. In addition, Tomcat server can be configured for multiple instances by defining $CATALINA_BASE for each instance of the Tomcat server. By default both folders refer to the single Tomcat server installation.TOMCAT_ROOT_DIR\confis the directory that contains configuration files and related to those files DTDs (Document Type Definition). The files in this folder are used for the server level performance tuning, security, load balancing, etc. We will talk aboutweb.xmlconfiguration file located in this folder.TOMCAT_ROOT_DIR\libis the directory that contains libraries that are shared by all web applications deployed in the container.TOMCAT_ROOT_DIR\webappsis the directory, where the webapps you place in the server are stored.TOMCAT_ROOT_DIR\webapps\PROJECT_DIRis the directory, where a specific webapp is placed, when deployed on the server.TOMCAT_ROOT_DIR\webapps\PROJECT_DIR\WEB-INFis the directory, where the webapp’s specific configuration files are placed. Those configuration files override container’s configuration files.TOMCAT_ROOT_DIR\webapps\PROJECT_DIR\META-INFis the directory that holds web application specific context.xml configuration file.
2.1. Preparing Environment
First we need to have Tomcat setted up. There are many tutorials on how to do that. You could refer to the official Apache Tomcat website here, or you can refer to my previous example for Apache Tomcat set-up and configuration here.
Before we start talking about connection pull configuration for MySQL DataSource, you need to have running MySQL server. I assume that you have already installed and set up MySQL database. If you need a refresher or a reference on how to install MySQL on Windows refer to this official tutorial. You can download MySQL installer for Windows here. When installing MySQL accept defaults. Note, once you installed mysql you can use MySQL command line client for accessing MySQL as root.
2.2. Preparing MySQL server
Before we can proceed, you need to prepare MySQL server to have some data that will help you test the connection to the database.
Start “MySQL command line client” for accessing MySQL as root, and provide your root password.
First create a database with name “JCGExampleDB” by logging to mysql and executing this sql command
CREATE DATABASE JCGExampleDB;
Now create a user with name “test” and with password “test” as follows
GRANT ALL PRIVILEGES ON JCGExampleDB.* TO test@localhost IDENTIFIED BY 'test' WITH GRANT OPTION;. This command creates a user “test” with password “test” and grants to that user access to our database.
Now exit MySQL command line client, and open a cmd. Next, go to the MySQL installation folder. For me it was C:\Program Files\MySQL\MySQL Server 5.6\bin\, so I typed cd C:\Program Files\MySQL\MySQL Server 5.6\bin\ in the cmd (command line prompt).
Next, we need to open mysql as a newly created user. Run this command line in the cmd prompt mysql.exe -u test -ptest
Now run :
use JCGExampleDB;
command to use the newly created database.
Next create a table as follows :
create table testtable ( id int not null);
It does not matter what this table holds, we will not populate it. That is it we have a database, a user, and a table in our database. Now we are ready to proceed.
3. Java DataBase Connectivity JDBC
JDBC API acts as an interface between Java applications and database systems allowing the same Java code base to be used with different database systems. Thus JDBC API provides decoupling of database management systems, such as MySQL, and web application. This decoupling is achieved by deploying a database system specific JDBC driver that must implement JDBC API primitives. In case of MySQL recommended JDBC drivers is Connector/J that can be downloaded from here. This JDBC driver translates JDBC API calls to the database specific primitives.
4. DataBase Connection Pooling DBCP
DataBase Connection Pooling is achieved with connection thread pooling. The goal of connection thread pooling is to allow serving many requests. The basic principal behind this approach is similar to the one used by java.util.concurrent.Executors when creating fixed thread pool.
In DBCP it works the following way. Depending on how you configured your DBCP either on Tomcat start up or on the web application deployment specific number of connection threads is generated. Whenever a new connection request comes, it is queued to the requests queue. If there is available free (idle) connection thread, the request from the queue is allocated that connection thread immediately, otherwise the request needs to wait in the queue until a connection thread becomes available.
When connection thread is allocated it becomes (active), until it is deallocated by the web application explicitly or by the DBCP implicitly (after abandoned wait time expires). This schema allows reusing connection threads, and avoiding creating a connection thread for each new connection request. In addition, it allows developers to assume that each connection request will have dedicated JDBC connection. We will discuss later in more details how to configure the connection pool.
5. JDBC Driver for MySQL
First you need to obtain the MySQL database JDBC driver called Connector/J, and place it in TOMCAT_ROOT_DIR\lib. You can get Connector/J JDBC for MySQL here. Select “Platform Independent option” from the “Select Platform” menu. Then you will be asked to sign up for an Oracle account. Once you have registered, you may download the zip. Unpack the zip in any folder, and copy the mysql-connector-java-5.1.35-bin to TOMCAT_ROOT_DIR\lib folder. As of writing of this article Connector/J with version 5.1.35 was used.
Note that copying Connector/J JDBC Resource factory driver to the TOMCAT_ROOT_DIR\lib folder makes it available to Tomcat’s internal classes and to the web applications deployed in this Tomcat instance.
6. Configuration of JNDI Resource for Connection Pool
Now let’s consider how to configure a database resource to be shared by multiple web applications. Now that you have JDBC driver for MySQL, you can configure Tomcat server to use it to access MySQL server. To make database accessible you need to configure it as a Java Naming and Directory Interface Resource. Based on the Java Servlet 3.1 specifications that Tomcat 8 implements, all JNDI Resources must be specified in two configuration files in the TOMCAT_ROOT_DIR\conf folder:
-
server.xml a “Resource” entry should be added to allow JNDI to locate and JDBC to configure the DataSource. For per web application Resource configuration a file context.xml will need to be created in
TOMCAT_ROOT_DIR\webapps\PROJECT_DIR\META-INFto add “Resource” entry. - web.xml a “Resource Reference” entry should be added to provide a reference to the data source that does not have server specific information, which allows easier portability.
The Resource entry has database server specific configuration information and credentials. Since we will create Resource entry in the Tomcat’s configuration folder, this resource will be globally available to all web applications deployed on this Tomcat instance.
Below is the fragment of the TOMCAT_ROOT_DIR\conf\server.xml file content with Resource entry:
server.xml:
<?xml version='1.0' encoding='utf-8'?>
...
  <GlobalNamingResources>
    ...
    <Resource name="jdbc/JCGExampleDB"
			  global="jdbc/JCGExampleDB"
			  factory="org.apache.tomcat.jdbc.pool.DataSourceFactory"
			  auth="Container"
              type="javax.sql.DataSource"
			  username="test"
			  password="test"
			  driverClassName="com.mysql.jdbc.Driver"
			  description="JCG Example MySQL database."
			  url="jdbc:mysql://localhost:3306/JCGExampleDB"
			  maxTotal="10"
			  maxIdle="10"
			  maxWaitMillis="10000"
			  removeAbandonedTimeout="300"
			  defaultAutoCommit="true" />
     ...
  </GlobalNamingResources>
The element Resource in the GlobalNamingResources is used to configure name, data type, and other parameters of a resource that is made available to all web applications deployed on the container. Below is the description of each attribute:
-
namethis attribute defines the global name for this resource that will be used to reference this resource configuration. Note that “jdbc” is required by convention, so that all Resource names resolve to “jdbc” subcontext, which is relative to thejava:comp/envnaming context. -
The “Container” value for the
authattribute tells container (Tomcat) to login to the database for the web application. Another possible option is “Application”, in this case web application must provide login credentials. -
globalthis attribute defines the global name for this resource. -
factorythis attribute defines the factory to be used to create this resource. -
auththis attribute defines who should perform authentication. In our case “Container” will perform authentication on behalf of the web application. -
typethis attribute defines type of the class that will be returned by this resource. - user name and password are used by the “Container” during authentication to the resource, database in our case.
-
driverClassNameis a fully qualified Java class name of the JDBC driver. The name we used here “com.mysql.jdbc.Driver” is the official driver name for the recommended Connector/J MySQL’s JDBC DataSource driver. -
urlis passed to the JDBC driver for connecting to the MySQL database. -
maxTotalis the maximum number of connections that can be allocated from the connection pool at the same time. Make sure you configure MySQL’s “max_connections” to handle maximum total simultaneous connections. It is desired to have pool size to be small, but not smaller. An optimal pool size is a web application specific and can be found by load testing and monitoring. -
maxIdleis the maximum number of connections that can be idle (not used by web application) at the same time. -
maxWaitMillisis the maximum time in milliseconds that the pool manager will wait for the connection to be released by the web application before throwing an exception. This wait is activated when there is no available connections. In our case it is 10 seconds. -
removeAbandonedTimeoutis the number of seconds to be waited before the active connection considered abandoned, which should be set to the time you expect you longest query to run. In our example we have the default value, you can change it based on your server needs. -
defaultAutoCommitattribute defines if auto-commit of the state of the connection should be performed. In our example we have the default value, which is true.
For more attributes that can be specified for a Resource please refer to the Tomcat’s official website here to the “JDBC Data Sources” section subsection 4. Note that the configuration parameters for the server’s DataSource connection pool should be selected based on the expected needs of all web applications whereas the same parameters for per web application connection pool configuration should only be tuned for that particular web application.
Note:
- The user you specify in the Resource element must exist on MySQL server. Test accessing MySQL with that user name and the password that you specify in the Resource entry. You can read more on how to connect to MySQL server from command line prompt here.
- The Resource name must be unique within Tomcat instance as that name is used to resolve data source reference to the data source instance.
-
If you plan to use Realms for managing database security, the Realm should refer to the Resource by the name defined in the
GlobalNamingResources. Discussing Realm is outside of scope of this article.
Tip: configuring Resource per web application, as opposed to per server as in our example, allows that application to be more portable.
7. Creating “testwebapp” in TOMCAT_ROOT_DIR\webapps folder
Let’s create a sample web application on our server called testwebapp. Note, it is very important that you create a web application project with testwebapp name, otherwise some of the configurations that I demonstrate later will not work.
Creating web application is outside of scope of this article. You can refer to the JCG example Create Web Application Project with Maven Example, which I followed when creating testwebapp.
You will need to follow all steps of that example, and once you are done you will need to change some files. The reason for changing that example is to make this example simpler, otherwise this example would need to be extended to explain the steps that you will perform in the “Creating a Dynamic Web Project in Eclipse” example.
In the article that I followed I had to change the final web.xml of the web appliction. The lines that are I had to add were few, but I will show here the whole updated web.xml and I will point out which lines I added.
web.xml:
<Context>
<?xml version="1.0" encoding="UTF-8"?>

<web-app
  version="3.0"
  xmlns="http://java.sun.com/xml/ns/javaee"
  xmlns:xsi="http://www.w3.org/2001/XMLSchema-instance"
  xsi:schemaLocation="http://java.sun.com/xml/ns/javaee http://java.sun.com/xml/ns/javaee/web-app_3_0.xsd">

 <display-name>Archetype Created Web Application</display-name>

 <servlet>
  <servlet-name><span style="text-decoration: underline;">mvc</span>-dispatcher</servlet-name>
  <servlet-class>
   org.springframework.web.servlet.DispatcherServlet
  </servlet-class>
  <init-param>
        <param-name>contextConfigLocation</param-name>
        <param-value>/WEB-INF/view-resolver-servlet.xml</param-value>
    </init-param>
  <load-on-startup>1</load-on-startup>
 </servlet>

 <servlet-mapping>
  <servlet-name><span style="text-decoration: underline;">mvc</span>-dispatcher</servlet-name>
  <url-pattern>/</url-pattern>
 </servlet-mapping>

 <context-param>
  <param-name>contextConfigLocation</param-name>
  <param-value>/WEB-INF/view-resolver-servlet.xml</param-value>
 </context-param>

 <listener>
  <listener-class>
   org.springframework.web.context.ContextLoaderListener
  </listener-class>
 </listener>
</web-app>
</Context>
And the part that I had to add to make the example that I followed work on Tomcat 8 was the following:
 <init-param>
        <param-name>contextConfigLocation</param-name>
        <param-value>/WEB-INF/view-resolver-servlet.xml</param-value>
 </init-param>
I added that part based on what was indicated on official spring’s website here. Without that part I was getting an error that a dispatcher configuration file cannot be found.
Later we will change another file in that example.
8. Configuration of “Resource Link” element in context.xml
Tomcat has a separate namespace for the global resources for the container. To expose those resources to web applications you need to include ResourceLink element in the per web application context.xml configuration file. Global Resource must be specified as a resource link in the TOMCAT_ROOT_DIR\webapps\PROJECT_DIR\META-INF\context.xml file.
You will need to create META-INF folder and context.xml file in the web appliction project that you have created earlier. The path you create for folder and file will be as follows \testwebapp\src\main\webapp\META-INF\context.xml.
Add the following entry to the newly created context.xml file:
context.xml:
<Context>

	<ResourceLink name="jdbc/JCGExampleDB"
	global="jdbc/JCGExampleDB"
	type="javax.sql.DataSource"
	/>

</Context>
Let’s look at each attribute of the ResourceLink element.
-
nameattribute is the name of the link to be created. For consistency it is better to give the same name to the link as the name of the global resource. -
globalattribute is the name of the global resource defined in the global JNDI context inserver.xmlconfiguration file. -
typeattribute is the fully qualified Java class name expected to be returned on lookup of this resource performed in the web application.
Using ResourceLink ensures that the web application uses the same global resource, instead of creating a new one. Read more about resource link here. You can allow per web application authentication configuration by adding ‘ factory=”org.apache.naming.factory.DataSourceLinkFactory”‘ attribute to the “ResourceLink” element.
9. Configuration of “Resource Reference” in web.xml
“Resource Reference” is needed to enable a web application to look up a Resource using “Context” element prepared for that web application on its deployment, and to keep track of “Resources” that application depends on. “Resource Reference” should be specified in the TOMCAT_ROOT_DIR\webapps\PROJECT_DIR\WEB-INF\web.xml file and may reference a global Resource or a web application specific resource. As stated earlier, “Resource Reference” allows easier web application portability, and hides away resource specific configurations. Below is an example of the resource-ref entry in the “testwebapp” web application’s web.xml file.
web.xml:
<web-app>
...
	<resource-ref>
		<description>
		This is a reference to the global Resource for MySQL database connetion.
		</description>
		<res-ref-name>
		jdbc/JCGExampleDB
		</res-ref-name>
		<res-type>
		javax.sql.DataSource
		</res-type>
		<res-auth>
		Container
		</res-auth>
	</resource-ref>
...
</web-app>
The element resource-ref above is used as a reference to the object factory for resources, such as JDBC DataSource, a JavaMail Session, or any other custom object factories. In our case we use this element to reference JDBC DataSource resource factory. Let’s look at each of the sub-elements:

-
descriptionelement is used to provide description related to the resource reference. -
res-ref-nameelement is used to provide the name of the “Resource” referenced. Note that there must exist a “Resource” entry with the same name as in thin element. -
res-typeelement is used to define the type of the object factory generated by “Resource”. -
res-authelement is used to specify who will authenticate into the “Resource”. In our case the authentication will be performed for us by the “Container”.
Tip: it is important to follow element order defined by Servlet Specification for the deployment descriptors outlined here.
Note:
-
The value of “res-ref-name” must be a name of an existing Resource configured as a global resource in the
TOMCAT_ROOT_DIR\conf\server.xmlor a web application specific resource configured in theTOMCAT_ROOT_DIR\webapps\PROJECT_DIR\META-INF\context.xmlfile. In your web application Java code, you will use the value of “res-ref-name” to get javax.sql.DataSource object for getting database java.sql.Connection.
That is it for configuration. Now to use JDBC for MySQL in your web application you need to restart Tomcat.
10. Accessing Database “Resource” in a Web Application
For demonstrating that database connection works we modified ApplicationController.java that we generated when following Create Web Application Project with Maven Example. The final result after modification looks like following:
ApplicationController.java:
package com.javacodegeeks.controller;

import java.sql.Connection;
import java.sql.ResultSet;
import java.sql.SQLException;
import java.sql.Statement;

import javax.naming.Context;
import javax.naming.InitialContext;
import javax.naming.NamingException;
import javax.sql.DataSource;

import org.springframework.stereotype.Controller;
import org.springframework.ui.ModelMap;
import org.springframework.web.bind.annotation.PathVariable;
import org.springframework.web.bind.annotation.RequestMapping;
import org.springframework.web.bind.annotation.RequestMethod;

@Controller
@RequestMapping("/")
public class ApplicationController {

	@RequestMapping(value = "/Test", method = RequestMethod.GET)
	public String welcome(ModelMap model) throws NamingException, SQLException {

		/**
		 * Get initial context that has references to all configurations and
		 * resources defined for this web application.
		 */
		Context initialContext = new InitialContext();

		/**
		 * Get Context object for all environment naming (JNDI), such as
		 * Resources configured for this web application.
		 */
		Context environmentContext = (Context) initialContext
				.lookup("java:comp/env");
		/**
		 * Name of the Resource we want to access.
		 */
		String dataResourceName = "jdbc/JCGExampleDB";
		/**
		 * Get the data source for the MySQL to request a connection.
		 */
		DataSource dataSource = (DataSource) environmentContext
				.lookup(dataResourceName);
		/**
		 * Request a Connection from the pool of connection threads.
		 */
		Connection conn = dataSource.getConnection();
		StringBuilder msg = new StringBuilder();
		/**
		 * Use Connection to query the database for a simple table listing.
		 * Statement will be closed automatically.
		 */
		try (Statement stm = conn.createStatement()) {
			String query = "show tables;";
			ResultSet rs = stm.executeQuery(query);
			// Store and return result of the query
			while (rs.next()) {
				msg.append(rs.getString("Tables_in_JCGExampleDB"));
			}
		} catch (SQLException e) {
			System.err.println(e.getMessage());
		} finally {
			// Release connection back to the pool
			if (conn != null) {
				conn.close();
			}
			conn = null; // prevent any future access
		}

		model.addAttribute("msgArgument",
				"Maven Java Web Application Project: Success! The show tables result is: "
						+ msg.toString());

		return "index";
	}

	@RequestMapping(value = "/Print/{arg}", method = RequestMethod.GET)
	public String welcomeName(@PathVariable String arg, ModelMap model) {
		model.addAttribute("msgArgument",
				"Maven Java Web Application Project, input variable: " + arg);

		return "index";
	}
}
The part that was added to the example controller code is the following:
ApplicationController.java:
...
		/**
		 * Get initial context that has references to all configurations and
		 * resources defined for this web application.
		 */
		Context initialContext = new InitialContext();

		/**
		 * Get Context object for all environment naming (JNDI), such as
		 * Resources configured for this web application.
		 */
		Context environmentContext = (Context) initialContext
				.lookup("java:comp/env");
		/**
		 * Name of the Resource we want to access.
		 */
		String dataResourceName = "jdbc/JCGExampleDB";
		/**
		 * Get the data source for the MySQL to request a connection.
		 */
		DataSource dataSource = (DataSource) environmentContext
				.lookup(dataResourceName);
		/**
		 * Request a Connection from the pool of connection threads.
		 */
		Connection conn = dataSource.getConnection();
		StringBuilder msg = new StringBuilder();
		/**
		 * Use Connection to query the database for a simple table listing.
		 * Statement will be closed automatically.
		 */
		try (Statement stm = conn.createStatement()) {
			String query = "show tables;";
			ResultSet rs = stm.executeQuery(query);
			// Store and return result of the query
			while (rs.next()) {
				msg.append(rs.getString("Tables_in_JCGExampleDB"));
			}
		} catch (SQLException e) {
			System.err.println(e.getMessage());
		} finally {
			// Release connection back to the pool
			if (conn != null) {
				conn.close();
			}
			conn = null; // prevent any future access
		}

		model.addAttribute("msgArgument",
				"Maven Java Web Application Project: Success! The show tables result is: "
						+ msg.toString());
...
The above code demonstrates how to use JNDI to look up a resource by its name, and use resource’s return class “DataSource” to get a “Connection” from the connection pool. Note, it is very important to release any borrowed resources, and close any resources that needs to be closed.
In the example above, Connection, Statement, and ResultSet needs to be closed. We closed Connection explicitly in the finally close of the try/catch block. The Statement is closed automatically as we used try with resources. This approach was introduced recently with Java 7 and allows to close classes automatically on exiting try/catch block, but such classes must implement AutoClosable interface.
Since Statement is closed automatically any open resources related to Statement, such as ResultSet are also closed automatically. By closing all borrowed resources, we avoid holding up connection, so that other connection requests are served faster.
Also note that we used two names to get two contexts. Those contexts have different scope. The first context retrieved with java:comp/env look up retrieves all configured resources for the web application. After having context with all resources, we need to select a specific “Resource” of the JDBC API abstraction class to manage connection to the database. Thus we had to call another look up with our pre configured resource called “jdbc/JCGExampleDB”. Note how resource name matches the name specified in “res-ref-name” in web application specific web.xml configuration file.
We will not look in depth on how to use the java.sql.Connection. You can read more on how to use java.sql.Connection on oracle’s official website here.
In our example, we closed java.sql.Connection once we were done using it. If we did not, the container would generate java.sql.SQLException after the wait time for the borrowed connection to be returned have expired. We can change this wait time in “Resource” entry as demonstrated above. Make sure that you close the connection only once. To achieve that you can encapsulate database related logic in a separate Java class, and declare appropriate open() and close() methods.
If you get connection time out java.sql.SQLException, it is more likely your “maxWait” attribute value in “Resource” is too small and needs to be increased to allow long queries to run to completion before container forcibly reclaims borrowed connection from the web application. The “maxWait” attribute value is recommended to be set between 10-15 sec as stated here.
11. Verify
To verify that all works you will need to do the following steps:
- Make sure that mysql server is running.
-
Build web application project using
mvn packagecommand in the folder, where pom.xml is located. -
Copy the
testwebapp.warto theTOMCAT_ROOT_DIR\webappsfolder (delete old version if any). -
Start Tomcat service as explained here. The command is
tomcat8and is run in the Tomcat’s bin folder in cmd.
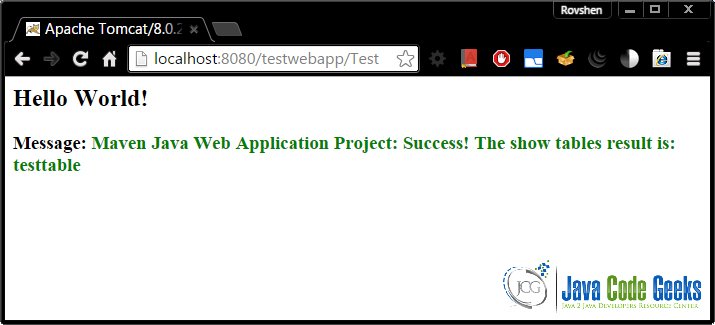
In your favorite web browser (Google Chrome for me) go to this url http://localhost:8080/testwebapp/Test
In the end you should see the image below in the browser. Please feel free to contact me if anything goes wrong, so I could improve this post.
12. Additional tips
If you forget to close a connection borrowed from the pool by forgetting to close ResultSet, Statement, or Connection the instance of connection you borrowed will never be returned back to the pool, creating connection pool “leak”, which may result in database connection failure when there is no more available connections.
A proposed solution to this problem on the Apache Tomcat’s official website here is to track and recover abandoned database connections. You can also configure DBCP to generate a stack trace to see which part of the web application opened resources and never closed them.
To remove and add back to the pool abandoned connection you can set reomovedAbandoned="true" attribute in the “Resource” element in the server.xml.
You can also set logAbandoned="true" to log a stack trace of the code segment that abandoned a database connection. Warning: use the logging with caution as it adds significant overhead.
Note that when you share a database connection pool, you may have many connections to the same database and thus will need to adjust necessary parameters in the “Resource” element entry in the server.xml file. Also in order to limit load on a particular database connection pool, you may need to move connection pool configuration from the server’s configuration file to a web application specific configuration files located in TOMCAT_ROOT_DIR\webapps\PROJECT_DIR\WEB-INF.
Since The configurations used by Tomcat adhere to Java EE standards any web application with its configurations that you create on Tomcat could be ported to any other container that follows Java EE standards and provided JDBC facilities.
13. Conclusion
This example presents steps to configure global JDBC Resource to provide database access to the web application. The benefit of global Resource is that you can share one database by many web applications, and you can tune connection pool configuration for those applications based on the usage by all of them.
Such sharing may be useful, when a dedicated database server is shared among many web applications located on the same Tomcat server. On the other hand, the drawback of global Resource configuration is that there will be more load on a single database, and per web application connection pool tuning will not be possible.
14. Download the Eclipse Project
You can download the full source code of this example here: TomcatConnectionPoolConfigurationExample
Related posts:
Tomcat MySQL Connection – Using JDBC to Connect Tomcat to MySQL
JNDI Datasource HOW-TO Tomcat 8
JNDI Resources HOW-TO Tomcat 8
JNDI Resources HOW-TO Tomcat 7
The Tomcat JDBC Connection Pool Tomcat 7.0.59
The Tomcat JDBC Connection Pool Tomcat 7.0.X
Connecting to MySQL Using the JDBC DriverManager Interface
Tomcat DataSource JNDI Example for Servlet Web Application
JDBC DataSource Example – Oracle, MySQL and Apache DBCP Tutorial
JDBC Example Tutorial – Drivers, Connection, Statement and ResultSet
http://stackoverflow.com/questions/2299469/how-should-i-connect-to-a-mysql-data-source-from-eclipse
