Welcome readers, in this tutorial, we will see how to set up a Standard Queue on Amazon SQS and create a simple spring boot application to send a message to the queue and retrieve from the queue.
1. Introduction
Before going further in this tutorial we will take a look at the common terminology such as introduction to Spring Boot and Amazon SQS.
1.1 What is Spring boot?
- Spring boot is a module that provides rapid application development feature to the spring framework including auto-configuration, standalone-code, and production-ready code
- It creates applications that are packaged as jar and are directly started using embedded servlet container (such as Tomcat, Jetty or Undertow). Thus, no need to deploy the war files
- It simplifies the maven configuration by providing the starter template and helps to resolve the dependency conflicts. It automatically identifies the required dependencies and imports them in the application
- It helps in removing the boilerplate code, extra annotations, and XML configurations
- It provides a powerful batch processing and manages the rest endpoints
- It provides an efficient JPA-starter library to effectively connect the application with the relational databases
- It offers a Microservice architecture and cloud configuration that manages all the application related configuration properties in a centralized manner.
1.2 What is Amazon SQS?
It is a fully managed message queuing service that lets developers integrate and decouple distributed architectures. It is a temporary repository for messages that are awaiting processing. Acts as a buffer between the component producing and saving data, and the component receiving the data for processing. It resolves problems that arise if the producer is producing faster than the consumer can process it or if the producer and consumer are intermittently connected to the network. This is known as decoupling or loose coupling and this helps to achieve elasticity in an application.
- It is a pull-based mechanism
- Messages are up to 256 kilobytes in size
- Messages can be kept in the queue from 1 min to 14 days and the default retention period s 4 days
- Guarantees that the messages will be processed at least once
- Supports two types i.e. Standard and FIFO queues
As in this tutorial, we are primarily focusing on the Standard queue so let us take a look at these queues.
1.2.1 Standard Queues in Amazon SQS
- Provide unlimited throughput
- Offers best-effort ordering but sometimes messages might be delivered in an order different from which they were sent
- Offers at least once delivery but sometimes more than one copy of a message is delivered
Let us go ahead with the tutorial implementation but before going any further I’m assuming that readers are aware of the Spring boot and AWS basics and have an AWS account for testing purposes (i.e. creation of Standard queue on SQS console).
2. Using Amazon SQS with Spring Boot
Here is a systematic guide for implementing this tutorial.
2.1 Create a Standard queue on AWS
Creating a queue on AWS is a simple process. Sign in to AWS console with your credentials and navigate to the SQS console. Once you land onto the SQS page click on Create Queue button and something like below will be shown.
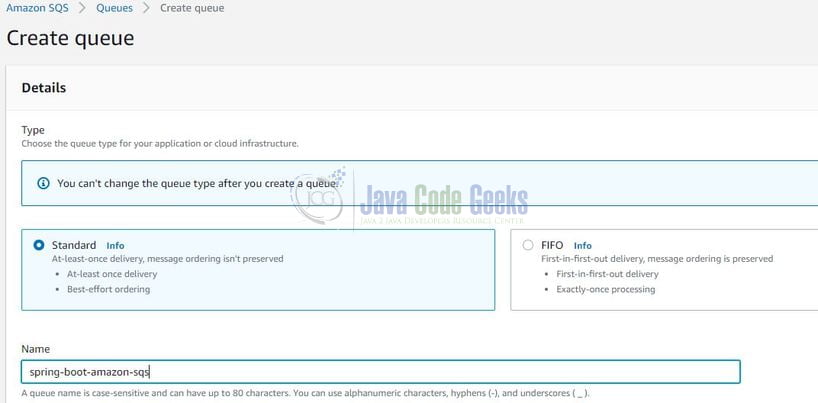
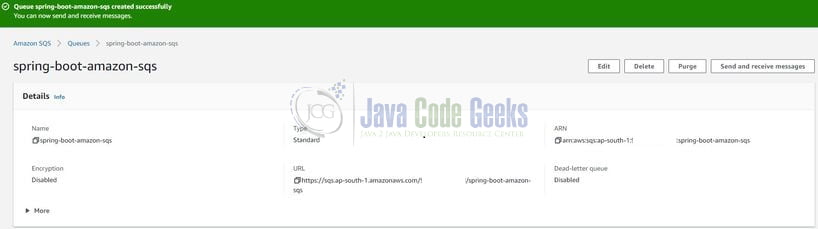
Fill in the queue name and select the Standard queue radio button and leave rest details as default. Submit the form and on the successful creation of the queue, you will get a green toaster saying queue created successfully.
Users can download the high-resolution images from the Downloads section.
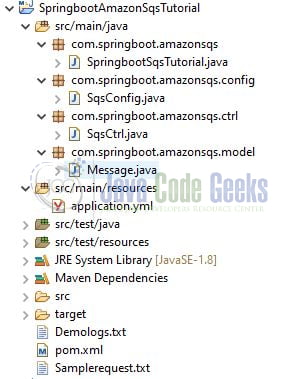
2.2 Tools Used for Spring boot application and Project Structure
We are using Eclipse, JDK 8, and Maven. In case you’re confused about where you should create the corresponding files or folder, let us review the project structure of the spring boot application.
Let us start building the application!
3. Creating a Spring boot application
Below are the steps involved in developing the application.
3.1 Maven Dependency
Here, we specify the dependency for the Spring boot. Maven will automatically resolve the other dependencies. The updated file will have the following code.
pom.xml
01 02 03 04 05 06 07 08 09 10 11 12 13 14 15 16 17 18 19 20 21 22 23 24 25 26 27 28 29 30 31 32 33 34 35 36 37 38 39 40 41 42 43 44 45 46 47 48 49 50 51 52 53 54 55 56 | xsi:schemaLocation="http://maven.apache.org/POM/4.0.0 https://maven.apache.org/xsd/maven-4.0.0.xsd"> <modelVersion>4.0.0</modelVersion> <groupId>com.springboot.amazonsqs</groupId> <artifactId>SpringbootAmazonSqsTutorial</artifactId> <version>0.0.1-SNAPSHOT</version> <parent> <groupId>org.springframework.boot</groupId> <artifactId>spring-boot-starter-parent</artifactId> <version>2.0.5.RELEASE</version> </parent> <properties> <java.version>1.8</java.version> <spring-cloud.version>Finchley.SR1</spring-cloud.version> </properties> <dependencies> <dependency> <groupId>org.springframework.boot</groupId> <artifactId>spring-boot-starter-web</artifactId> </dependency> <dependency> <groupId>org.springframework.cloud</groupId> <artifactId>spring-cloud-starter-aws</artifactId> </dependency> <dependency> <groupId>org.springframework.cloud</groupId> <artifactId>spring-cloud-starter-aws-messaging</artifactId> </dependency> </dependencies> <dependencyManagement> <dependencies> <dependency> <groupId>org.springframework.cloud</groupId> <artifactId>spring-cloud-dependencies</artifactId> <version>${spring-cloud.version}</version> <type>pom</type> <scope>import</scope> </dependency> </dependencies> </dependencyManagement> <build> <plugins> <plugin> <groupId>org.springframework.boot</groupId> <artifactId>spring-boot-maven-plugin</artifactId> </plugin> </plugins> </build></project> |
3.2 Application Properties file
Create a new properties file at the location: SpringbootAmazonSqsTutorial/src/main/resources/ and add the AWS IAM credentials for the user who will be able to talk to SQS and perform the required actions. In case developers need a read for AWS IAM they can head over to this link.
application.yml
01 02 03 04 05 06 07 08 09 10 11 | server: port: 10091 # Application port cloud: aws: region: static: ap-south-1 # Region where you have created the queue. In this example, we have created the queue in 'ap-south-1' region. auto: false credentials: access-key: # YOUR_ACCESS_KEY secret-key: # YOUR_SECRET_KEY |
3.3 Java Classes
Let us write all the java classes involved in this application.
3.3.1 Implementation/Main class
Add the following code to the main class to bootstrap the application from the main method.
SpringbootSqsTutorial.java
01 02 03 04 05 06 07 08 09 10 11 12 13 14 15 16 17 18 19 | package com.springboot.amazonsqs;import org.slf4j.Logger;import org.slf4j.LoggerFactory;import org.springframework.boot.SpringApplication;import org.springframework.boot.autoconfigure.SpringBootApplication;// @SpringBootApplication annotation enables the auto-configuration feature of the spring boot module (i.e. java-based configuration and component scanning).@SpringBootApplicationpublic class SpringbootSqsTutorial { private static final Logger LOGGER = LoggerFactory.getLogger(SpringbootSqsTutorial.class); public static void main(String[] args) { // The "run()" method returns the "ConfigurableApplicationContext" instance which can be further used by the spring application. SpringApplication.run(SpringbootSqsTutorial.class, args); LOGGER.info("Springboot with amazonsqs application started successfully."); }} |
3.3.2 Configuration class
Add the following code to the configuration class where we define the configuration for Amazon SQS.
SqsConfig.java
01 02 03 04 05 06 07 08 09 10 11 12 13 14 15 16 17 18 19 20 21 22 23 24 25 26 27 28 29 30 31 32 33 34 35 36 37 38 39 40 41 42 43 44 45 46 47 48 49 | package com.springboot.amazonsqs.config;import org.springframework.beans.factory.annotation.Value;import org.springframework.cloud.aws.messaging.core.QueueMessagingTemplate;import org.springframework.context.annotation.Bean;import org.springframework.context.annotation.Configuration;import org.springframework.context.annotation.Primary;import com.amazonaws.auth.AWSStaticCredentialsProvider;import com.amazonaws.auth.BasicAWSCredentials;import com.amazonaws.services.sqs.AmazonSQSAsync;import com.amazonaws.services.sqs.AmazonSQSAsyncClientBuilder;// Marker annotation that tells spring to generate bean definitions at runtime for the methods annotated with @Bean annotation.@Configurationpublic class SqsConfig { // Value is populated by the region code. @Value("${cloud.aws.region.static}") private String region; // Value is populated with the aws access key. @Value("${cloud.aws.credentials.access-key}") private String awsAccessKey; // Value is populated with the aws secret key @Value("${cloud.aws.credentials.secret-key}") private String awsSecretKey; // @Bean annotation tells that a method produces a bean that is to be managed by the spring container. @Bean public QueueMessagingTemplate queueMessagingTemplate() { return new QueueMessagingTemplate(amazonSQSAsync()); } @Bean // @Primary annotation gives a higher preference to a bean (when there are multiple beans of the same type). @Primary // AmazonSQSAsync is an interface for accessing the SQS asynchronously. // Each asynchronous method will return a Java Future object representing the asynchronous operation. public AmazonSQSAsync amazonSQSAsync() { return AmazonSQSAsyncClientBuilder .standard() .withRegion(region) .withCredentials(new AWSStaticCredentialsProvider( new BasicAWSCredentials(awsAccessKey, awsSecretKey))) .build(); }} |
3.3.3 Controller class
Add the following code to the controller class designed to handle the incoming requests. The class is annotated with the @RestController annotation which consists of the HTTP POST method to accept the user input and an SQS Listener method that polls the messages from the SQS queue and displays it on the console. Also, note Message is a simple POJO class that consists of id and message parameters.

SqsCtrl.java
01 02 03 04 05 06 07 08 09 10 11 12 13 14 15 16 17 18 19 20 21 22 23 24 25 26 27 28 29 30 31 32 33 34 35 36 37 38 39 40 41 42 43 44 45 46 47 48 49 50 51 52 53 | package com.springboot.amazonsqs.ctrl;import javax.validation.Valid;import org.slf4j.Logger;import org.slf4j.LoggerFactory;import org.springframework.beans.factory.annotation.Autowired;import org.springframework.cloud.aws.messaging.core.QueueMessagingTemplate;import org.springframework.cloud.aws.messaging.listener.SqsMessageDeletionPolicy;import org.springframework.cloud.aws.messaging.listener.annotation.SqsListener;import org.springframework.http.HttpStatus;import org.springframework.messaging.handler.annotation.Header;import org.springframework.web.bind.annotation.PostMapping;import org.springframework.web.bind.annotation.RequestBody;import org.springframework.web.bind.annotation.RequestMapping;import org.springframework.web.bind.annotation.ResponseStatus;import org.springframework.web.bind.annotation.RestController;import com.springboot.amazonsqs.model.Message;// For creating the REST controllers.@RestController// Used to map incoming web requests onto the handler methods in the controller.@RequestMapping(value = "/sqs")public class SqsCtrl { // Name of the queue. Developers are free to choose their queue name. private static final String QUEUE = "spring-boot-amazon-sqs"; public static final Logger LOGGER = LoggerFactory.getLogger(SqsCtrl.class); // QueueMessagingTemplate initializes the messaging template by configuring the destination resolver as well as the message converter. @Autowired private QueueMessagingTemplate queueMessagingTemplate; // HTTP POST url - http://localhost:10091/sqs/send @PostMapping(value = "/send") // @ResponseStatus annotation marks the method with the status-code and the reason message that should be returned. @ResponseStatus(code = HttpStatus.CREATED) public void sendMessageToSqs(@RequestBody @Valid final Message message) { LOGGER.info("Sending the message to the Amazon sqs."); queueMessagingTemplate.convertAndSend(QUEUE, message); LOGGER.info("Message sent successfully to the Amazon sqs."); } // @SqsListener listens to the message from the specified queue. // Here in this example we are printing the message on the console and the message will be deleted from the queue once it is successfully delivered. @SqsListener(value = QUEUE, deletionPolicy = SqsMessageDeletionPolicy.ON_SUCCESS) public void getMessageFromSqs(@Valid Message message, @Header("MessageId") String messageId) { LOGGER.info("Received message= {} with messageId= {}", message, messageId); // TODO - Developer can do some operations like saving the message to the database, calling any 3rd party etc. }} |
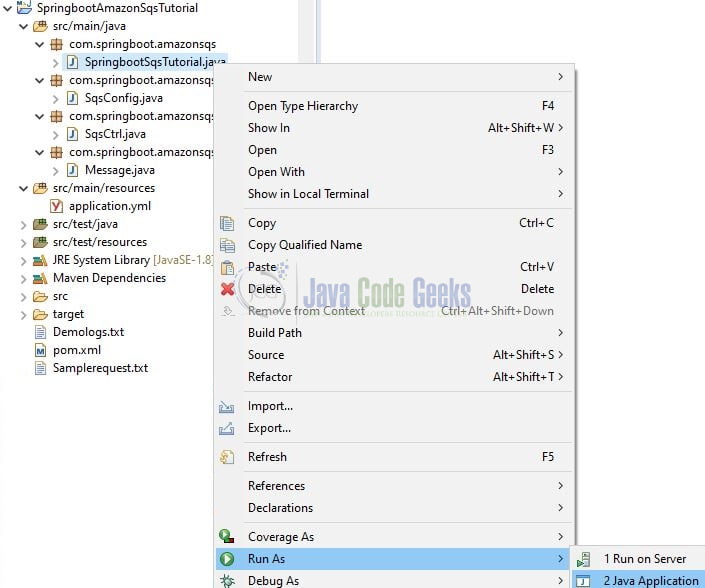
4. Run the Application
To execute the application, right-click on the SpringbootSqsTutorial.java class, Run As -> Java Application.
5. Project Demo
Open the Postman tool and hit the following URL to send an HTTP POST request to the controller method.
1 2 3 4 5 6 7 8 | // HTTP POST URL// Sample Request Body for the HTTP POST call{ "id": 102, "message": "Welcome to spring sqs tutorial"} |
Once the request is successfully processed by the application and the HTTP 200 OK response is received, we’ll head over the application’s console log. As we have a method annotated with the @SqsListener annotation it keeps polling the messages from the queue and will display them onto the console as soon as it is fetched from the queue.
1 2 3 4 5 6 7 8 9 | -- Message12020-07-20 23:10:55.553 INFO 16828 --- [io-10091-exec-1] com.springboot.amazonsqs.ctrl.SqsCtrl : Sending the message to the Amazon sqs.2020-07-20 23:10:55.670 INFO 16828 --- [io-10091-exec-1] com.springboot.amazonsqs.ctrl.SqsCtrl : Message sent successfully to the Amazon sqs.2020-07-20 23:10:55.698 INFO 16828 --- [enerContainer-3] com.springboot.amazonsqs.ctrl.SqsCtrl : Received message= Message [id=101, message=Hello-world] with messageId= be289e3e-4af9-4631-9740-872569cf16e1-- Message22020-07-20 23:11:17.150 INFO 16828 --- [io-10091-exec-3] com.springboot.amazonsqs.ctrl.SqsCtrl : Sending the message to the Amazon sqs.2020-07-20 23:11:17.208 INFO 16828 --- [io-10091-exec-3] com.springboot.amazonsqs.ctrl.SqsCtrl : Message sent successfully to the Amazon sqs.2020-07-20 23:11:17.232 INFO 16828 --- [enerContainer-3] com.springboot.amazonsqs.ctrl.SqsCtrl : Received message= Message [id=102, message=Welcome to spring sqs tutorial] with messageId= 7adb304d-5cc3-4649-bc28-9322112ed437 |
That is all for this tutorial and I hope the article served you whatever you were looking for. Happy Learning and do not forget to share!
6. Summary
In this section, we learned:
- Spring Boot and Amazon SQS
- Steps to create a Standard Queue on Amazon SQS console
- Steps to implement SQS in spring boot with a simple application
You can download the sample application as an Eclipse project in the Downloads section.
7. Download the Eclipse Project
This was an example of using Amazon SQS with Spring boot.
You can download the full source code of this example here: Using Amazon SQS with Spring Boot
