Welcome readers, in this tutorial, we will create a spring boot application that connects to an h2 database.
You can also check this tutorial in the following video:
1. Introduction
- Spring boot is a module that provides rapid application development feature to the spring framework including auto-configuration, standalone-code, and production-ready code
- It creates applications that are packaged as jar and are directly started using embedded servlet container (such as Tomcat, Jetty or Undertow). Thus, no need to deploy the war files
- It simplifies the maven configuration by providing the starter template and helps to resolve the dependency conflicts. It automatically identifies the required dependencies and imports them in the application
- It helps in removing the boilerplate code, extra annotations, and xml configurations
- It provides a powerful batch processing and manages the rest endpoints
- It provides an efficient jpa-starter library to effectively connect the application with the relational databases
- It offers a Microservice architecture and cloud configuration that manages all the application related configuration properties in a centralized manner.
1.1 H2 Database
H2 databases are open-source compact relational databases written in Java language. They are popularly known as in-memory databases and are generally used for unit testing or proof-of-concept purposes.
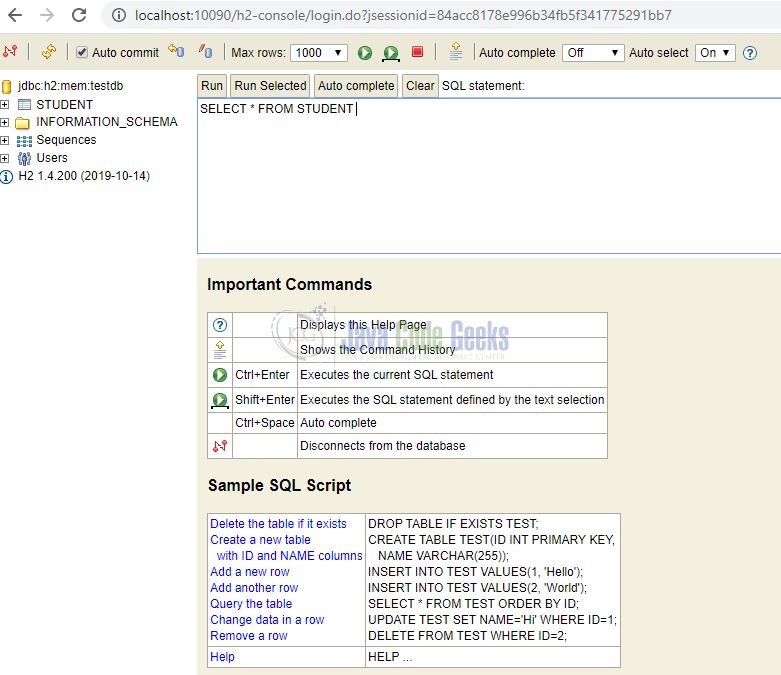
The data in-memory database only exists when the application works (i.e. the H2 database is created/initialized when an application starts) and is destroyed when the application shuts down. The H2 database provides developers with an administration window known as the H2 console.
In this tutorial, we will create a spring boot application and integrate it with an H2 database to understand the concept of in-memory databases. To follow this concept, let us open the eclipse ide and implement this tutorial. But before going any further I’m assuming that readers are aware of the concepts of creating and running a basic spring boot application.
2. Spring Boot H2 Database Example
Here is a systematic guide for implementing this tutorial.
2.1 Tools Used
We are using Eclipse Kepler SR2, JDK 8, and Maven.
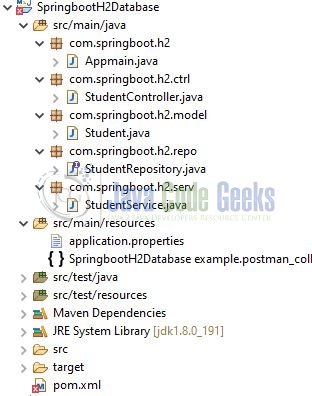
2.2 Project Structure
In case you’re confused about where you should create the corresponding files or folder, let us review the project structure of the spring boot application.
Let us start building the application!
3. Creating a Spring Boot application
Below are the steps involved in developing the application.
3.1 Maven Dependency
Here, we specify the dependency for the spring boot. Maven will automatically resolve the other dependencies. The updated file will have the following code.
pom.xml
<project xmlns="http://maven.apache.org/POM/4.0.0"
	xmlns:xsi="http://www.w3.org/2001/XMLSchema-instance"
	xsi:schemaLocation="http://maven.apache.org/POM/4.0.0 http://maven.apache.org/xsd/maven-4.0.0.xsd">
	<modelVersion>4.0.0</modelVersion>
	<groupId>com.jcg.springboot.h2</groupId>
	<artifactId>SpringbootH2Database</artifactId>
	<version>0.0.1-SNAPSHOT</version>
	<name>Springboot H2 database example</name>
	<description>A tutorial on springboot and h2 database</description>

	<parent>
		<groupId>org.springframework.boot</groupId>
		<artifactId>spring-boot-starter-parent</artifactId>
		<version>2.2.2.RELEASE</version>
	</parent>

	<properties>
		<java.version>1.8</java.version>
	</properties>

	<dependencies>
		<!-- spring boot web mvc dependency. -->
		<dependency>
			<groupId>org.springframework.boot</groupId>
			<artifactId>spring-boot-starter-web</artifactId>
		</dependency>
		<!-- spring boot database communication dependency. -->
		<dependency>
			<groupId>org.springframework.boot</groupId>
			<artifactId>spring-boot-starter-data-jpa</artifactId>
		</dependency>
		<!-- h2 database dependency. -->
		<dependency>
			<groupId>com.h2database</groupId>
			<artifactId>h2</artifactId>
			<scope>runtime</scope>
		</dependency>
	</dependencies>

	<build>
		<finalName>SpringbootH2Database</finalName>
	</build>
</project>
3.2 Application Properties
Create a new properties file at the location: SpringbootH2Database/src/main/resources/ and add the following code to it.
application.properties
### Server port ###
server.port=10090
### Springboot application name ###
spring.application.name=SpringbootH2Database
### Springboot default configuration properties for the h2 database ###
spring.datasource.url=jdbc:h2:mem:testdb
spring.datasource.driverClassName=org.h2.Driver
spring.datasource.username=sa
spring.datasource.password=
### Property to enable the console for the h2 database ###
### Browser url for h2 console - http://localhost:/h2-console
spring.h2.console.enabled=true
3.3 Java Classes
Let us write all the java classes involved in this application.
3.3.1 Implementation/Main class
Add the following code to the main class to bootstrap the application from the main method. Always remember, the entry point of the spring boot application is the class containing @SpringBootApplication annotation and the static main method.
Appmain.java
package com.springboot.h2;

import org.springframework.boot.SpringApplication;
import org.springframework.boot.autoconfigure.SpringBootApplication;

@SpringBootApplication
public class Appmain {

	public static void main(String[] args) {
		SpringApplication.run(Appmain.class, args);
	}
}
3.3.2 Model class
Add the following code to the Student model class.
Student.java
package com.springboot.h2.model;

import javax.persistence.Entity;
import javax.persistence.GeneratedValue;
import javax.persistence.Id;

// @Entity annotation specifies that the class is mapped to a database table.
@Entity
public class Student {

	// @Id annotation specifies the primary key of an entity.
	// @GeneratedValue provides the generation strategy specification for the primary key values.
	@Id
	@GeneratedValue
	private int id;
	private String name;
	private int age;
	private String emailAddress;

	// Default constructor.
	public Student() {	}

	// Parameterized constructor.
	public Student(int id, String name, int age, String emailAddress) {
		this.id = id;
		this.name = name;
		this.age = age;
		this.emailAddress = emailAddress;
	}

	// Getters.
	public int getId() {
		return id;
	}
	public String getName() {
		return name;
	}
	public int getAge() {
		return age;
	}
	public String getEmailAddress() {
		return emailAddress;
	}
}
3.3.3 Data-Access-Object interface
Add the following code to the Dao interface that extends the JPA repository to automatically handle the crud queries.
StudentRepository.java
package com.springboot.h2.repo;

import org.springframework.data.repository.CrudRepository;
import org.springframework.stereotype.Repository;

import com.springboot.h2.model.Student;

@Repository
public interface StudentRepository extends CrudRepository<Student, Integer>{

}
3.3.4 Service class
Add the following code to the service class where we will call the methods of the dao interface to handle the SQL operations.

StudentService.java
package com.springboot.h2.serv;

import java.util.ArrayList;
import java.util.List;

import org.springframework.beans.factory.annotation.Autowired;
import org.springframework.stereotype.Service;

import com.springboot.h2.model.Student;
import com.springboot.h2.repo.StudentRepository;

@Service
public class StudentService {

	// @Autowired annotation provides the automatic dependency injection.
	@Autowired
	StudentRepository repository;

	// Save student entity in the h2 database.
	public void save(final Student student) {
		repository.save(student);
	}

	// Get all students from the h2 database.
	public List<Student> getAll() {
		final List<Student> students = new ArrayList<>();
		repository.findAll().forEach(student -> students.add(student));
		return students;
	}
}
3.3.5 Controller class
Add the following code to the controller class designed to handle the incoming requests. The class is annotated with the @RestController annotation where every method returns a domain object as a JSON response instead of a view.
StudentController.java
package com.springboot.h2.ctrl;

import java.util.List;

import javax.validation.Valid;

import org.slf4j.Logger;
import org.slf4j.LoggerFactory;
import org.springframework.beans.factory.annotation.Autowired;
import org.springframework.web.bind.annotation.GetMapping;
import org.springframework.web.bind.annotation.PostMapping;
import org.springframework.web.bind.annotation.RequestBody;
import org.springframework.web.bind.annotation.RestController;

import com.springboot.h2.model.Student;
import com.springboot.h2.serv.StudentService;

@RestController		// Useful to create the RESTful webservices.
public class StudentController {

	private final Logger log = LoggerFactory.getLogger(this.getClass());

	// @Autowired annotation provides the automatic dependency injection.
	@Autowired
	StudentService service;

	// Save student entity in the h2 database.
	// @PostMapping annotation handles the http post request matched with the given uri.
	// @RequestBody annotation binds the http request body to the domain object.
	// @Valid annotation validates a model after binding the user input to it.
	@PostMapping(value= "/student/save")
	public int save(final @RequestBody @Valid Student student) {
		log.info("Saving student details in the database.");
		service.save(student);
		return student.getId();
	}

	// Get all students from the h2 database.
	// @GetMapping annotation handles the http get request matched with the given uri.
	@GetMapping(value= "/student/getall", produces= "application/vnd.jcg.api.v1+json")
	public List<Student> getAll() {
		log.info("Getting student details from the database.");
		return service.getAll();
	}
}
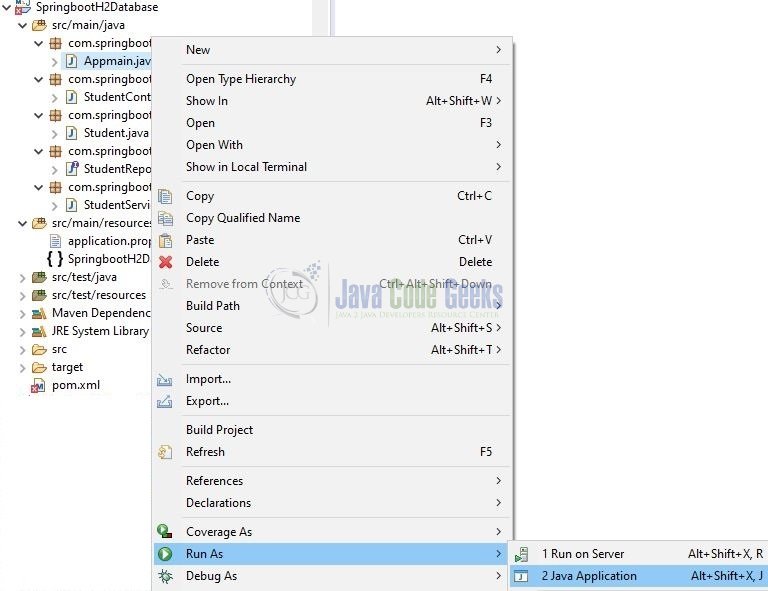
4. Run the Application
To execute the application, right-click on the Application.java class, Run As -> Java Application.
5. Project Demo
Open the Postman tool and hit the following URLs to display the data in the JSON format.
1 2 3 4 5 | // Create a new student// Get all students |
That is all for this tutorial and I hope the article served you whatever you were looking for. Happy Learning and do not forget to share!
6. Spring Boot H2 Database – Conclusion
In this section, developers learned how to integrate an h2 database with a spring boot application. Developers can download the sample application as an Eclipse project in the Downloads section.
7. Download the Eclipse Project
This was an example of integrating the H2 database in a Spring Boot application.
You can download the full source code of this example here: Spring Boot H2 Database Example

The db scripts to create the table in h2 database seems to be missing in the project.