Welcome readers, in this tutorial, we will show how to upload a file to an AWS S3 bucket using the spring boot framework.
1. Introduction
- Spring boot is a module that provides rapid application development feature to the spring framework including auto-configuration, standalone-code, and production-ready code
- It creates applications that are packaged as jar and are directly started using embedded servlet container (such as Tomcat, Jetty or Undertow). Thus, no need to deploy the war files
- It simplifies the maven configuration by providing the starter template and helps to resolve the dependency conflicts. It automatically identifies the required dependencies and imports them in the application
- It helps in removing the boilerplate code, extra annotations, and XML configurations
- It provides a powerful batch processing and manages the rest endpoints
- It provides an efficient jpa-starter library to effectively connect the application with the relational databases
- It offers a Microservice architecture and cloud configuration that manages all the application related configuration properties in a centralized manner
1.1 AWS Storage Service
AWS Storage Service or simply known as AWS S3 is an online storage facility for the users. It cheap, easy to set up and the user only pays for what they utilize. It offers,
- To host static web-content and data or even the dynamic pages
- Data storage for analytics
- Backup and archival of data
- Disaster recovery solutions
1.1.1 S3 Bucket
Amazon S3 Bucket has two primary entities i.e. Object and Bucket, where objects are stored inside the buckets. It provides high availability and durability solutions by replicating the data of one bucket in multiple data centers. Each AWS account offers 100 buckets as free, however, this count can be increased on submitting a request to the support center. Amazon S3 features –
- Each object in a bucket is given a unique id
- S3 allows a developer to upload/delete or read an object via the REST API
- S3 offers two read-after-write and eventual consistency models to ensure that every change command committed to a system should be visible to all the participants
- Objects stored in a bucket never leave it’s location unless the user transfer it out
- Objects can be made private or public and rights can be granted to specific users
1.1.2 Setting up AWS S3 bucket and IAM user
If someone needs to go through the process of creating an S3 bucket and attach it to an IAM user, please watch this video.
To start with this tutorial, we are hoping that users at present have their AWS account created and know how to set up an S3 bucket and attach it to an IAM user of their choice.
2. Spring boot and AWS S3: Upload file
Here is a systematic guide for implementing this tutorial.
2.1 Application pre-requisite
To upload a file on S3 via spring boot application, users need to ensure that they have created an S3 bucket and the corresponding IAM user. For this tutorial, we will use the following –
- S3 bucket –
assignment-s3-bucket - IAM user –
some_public_user - Other details like AWS Access Id, AWS Secret Key, and S3 Bucket Region are hidden for security purposes
2.2 Tools Used
We are using Eclipse, JDK 8.x, Maven, and AWS S3.
2.3 Project Structure
In case you’re confused about where you should create the corresponding files or folder, let us review the project structure of the spring boot application.
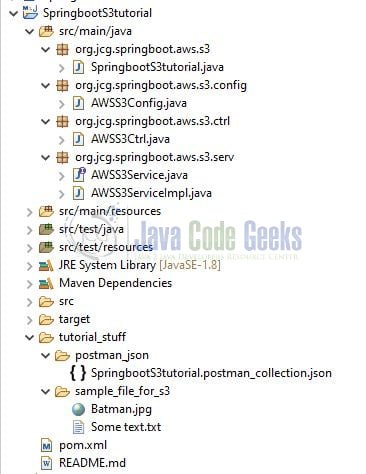
Let us start building the application!
3. Creating a Spring Boot application
Below are the steps involved in developing the application.
3.1 Maven Dependency
Here, we specify the dependency for the spring boot and AWS S3 SDK. Maven will automatically resolve the other dependencies. The updated file will have the following code.
pom.xml
<project xmlns="http://maven.apache.org/POM/4.0.0"
	xmlns:xsi="http://www.w3.org/2001/XMLSchema-instance"
	xsi:schemaLocation="http://maven.apache.org/POM/4.0.0 https://maven.apache.org/xsd/maven-4.0.0.xsd">
	<modelVersion>4.0.0</modelVersion>

	<groupId>org.jcg.springboot.aws.s3</groupId>
	<artifactId>SpringbootS3tutorial</artifactId>
	<version>0.0.1-SNAPSHOT</version>

	<name>Springboot and AWS S3 tutorial</name>
	<description>A tutorial to illustrate the springboot and aws s3 interactions</description>

	<properties>
		<maven.compiler.target>1.8</maven.compiler.target>
		<maven.compiler.source>${maven.compiler.target}</maven.compiler.source>
		<aws-java-sdk.version>1.11.750</aws-java-sdk.version>
	</properties>

	<parent>
		<groupId>org.springframework.boot</groupId>
		<artifactId>spring-boot-starter-parent</artifactId>
		<version>2.2.5.RELEASE</version>
	</parent>

	<dependencies>
		<dependency>
			<groupId>org.springframework.boot</groupId>
			<artifactId>spring-boot-starter-web</artifactId>
		</dependency>
		<!-- Aws dependency. -->
		<dependency>
			<groupId>com.amazonaws</groupId>
			<artifactId>aws-java-sdk</artifactId>
			<version>${aws-java-sdk.version}</version>
		</dependency>
	</dependencies>

	<build>
		<finalName>SpringbootS3tutorial</finalName>
		<!-- To make spring boot as a fat jar so that all required jar files and
			main file is added for running the code from Docker. -->
		<plugins>
			<plugin>
				<groupId>org.springframework.boot</groupId>
				<artifactId>spring-boot-maven-plugin</artifactId>
			</plugin>
		</plugins>
	</build>
</project>
3.2 Application Properties
Create a new properties file at the location: SpringbootS3tutorial/src/main/resources/ and add the following code to it.
application.properties
# Application server port
server.port=9098
# AWS S3 configuration
aws.access_key_id=<aws_access_key_id>
aws.secret_access_key=<aws_secret_access_key>
aws.s3.bucket=<s3_bucket>
aws.s3.region=<s3_region>
3.3 Java Classes
Let us write all the java classes involved in this application.
3.3.1 Configuration Class
Create a configuration class in the org.jcg.springboot.aws.s3.config package and add the following code to it. This class is responsible for communicating with AWS S3 and providing an AmazonS3 object for further interactions.
AWSS3Config.java
package org.jcg.springboot.aws.s3.config;

import org.springframework.beans.factory.annotation.Value;
import org.springframework.context.annotation.Bean;
import org.springframework.context.annotation.Configuration;

import com.amazonaws.auth.AWSStaticCredentialsProvider;
import com.amazonaws.auth.BasicAWSCredentials;
import com.amazonaws.regions.Regions;
import com.amazonaws.services.s3.AmazonS3;
import com.amazonaws.services.s3.AmazonS3ClientBuilder;

@Configuration
public class AWSS3Config {

	// Access key id will be read from the application.properties file during the application intialization.
	@Value("${aws.access_key_id}")
	private String accessKeyId;
	// Secret access key will be read from the application.properties file during the application intialization.
	@Value("${aws.secret_access_key}")
	private String secretAccessKey;
	// Region will be read from the application.properties file  during the application intialization.
	@Value("${aws.s3.region}")
	private String region;

	@Bean
	public AmazonS3 getAmazonS3Cient() {
		final BasicAWSCredentials basicAWSCredentials = new BasicAWSCredentials(accessKeyId, secretAccessKey);
		// Get AmazonS3 client and return the s3Client object.
		return AmazonS3ClientBuilder
				.standard()
				.withRegion(Regions.fromName(region))
				.withCredentials(new AWSStaticCredentialsProvider(basicAWSCredentials))
				.build();
	}
}
3.3.2 Service Class
Create a service class in the org.jcg.springboot.aws.s3.serv package and add the following code to it. This class consists of a method that is responsible for uploading the file to the S3 bucket.
AWSS3ServiceImpl.java
package org.jcg.springboot.aws.s3.serv;

import java.io.File;
import java.io.FileOutputStream;
import java.io.IOException;
import java.time.LocalDateTime;

import org.slf4j.Logger;
import org.slf4j.LoggerFactory;
import org.springframework.beans.factory.annotation.Autowired;
import org.springframework.beans.factory.annotation.Value;
import org.springframework.scheduling.annotation.Async;
import org.springframework.stereotype.Service;
import org.springframework.web.multipart.MultipartFile;

import com.amazonaws.AmazonServiceException;
import com.amazonaws.services.s3.AmazonS3;
import com.amazonaws.services.s3.model.PutObjectRequest;

@Service
public class AWSS3ServiceImpl implements AWSS3Service {

	private static final Logger LOGGER = LoggerFactory.getLogger(AWSS3ServiceImpl.class);

	@Autowired
	private AmazonS3 amazonS3;
	@Value("${aws.s3.bucket}")
	private String bucketName;

	@Override
	// @Async annotation ensures that the method is executed in a different background thread
	// but not consume the main thread.
	@Async
	public void uploadFile(final MultipartFile multipartFile) {
		LOGGER.info("File upload in progress.");
		try {
			final File file = convertMultiPartFileToFile(multipartFile);
			uploadFileToS3Bucket(bucketName, file);
			LOGGER.info("File upload is completed.");
			file.delete();	// To remove the file locally created in the project folder.
		} catch (final AmazonServiceException ex) {
			LOGGER.info("File upload is failed.");
			LOGGER.error("Error= {} while uploading file.", ex.getMessage());
		}
	}

	private File convertMultiPartFileToFile(final MultipartFile multipartFile) {
		final File file = new File(multipartFile.getOriginalFilename());
		try (final FileOutputStream outputStream = new FileOutputStream(file)) {
			outputStream.write(multipartFile.getBytes());
		} catch (final IOException ex) {
			LOGGER.error("Error converting the multi-part file to file= ", ex.getMessage());
		}
		return file;
	}

	private void uploadFileToS3Bucket(final String bucketName, final File file) {
		final String uniqueFileName = LocalDateTime.now() + "_" + file.getName();
		LOGGER.info("Uploading file with name= " + uniqueFileName);
		final PutObjectRequest putObjectRequest = new PutObjectRequest(bucketName, uniqueFileName, file);
		amazonS3.putObject(putObjectRequest);
	}
}
3.3.3 Controller Class
Add the following code to the controller class created in the org.jcg.springboot.aws.s3.ctrl package. This class handles the incoming requests and exposes the uploadFile method to handle the file input parameter coming in the request.
AWSS3Ctrl.java
package org.jcg.springboot.aws.s3.ctrl;

import org.jcg.springboot.aws.s3.serv.AWSS3Service;
import org.springframework.beans.factory.annotation.Autowired;
import org.springframework.http.HttpStatus;
import org.springframework.http.ResponseEntity;
import org.springframework.web.bind.annotation.PostMapping;
import org.springframework.web.bind.annotation.RequestMapping;
import org.springframework.web.bind.annotation.RequestPart;
import org.springframework.web.bind.annotation.RestController;
import org.springframework.web.multipart.MultipartFile;

@RestController
@RequestMapping(value= "/s3")
public class AWSS3Ctrl {

	@Autowired
	private AWSS3Service service;

	@PostMapping(value= "/upload")
	public ResponseEntity<String> uploadFile(@RequestPart(value= "file") final MultipartFile multipartFile) {
		service.uploadFile(multipartFile);
		final String response = "[" + multipartFile.getOriginalFilename() + "] uploaded successfully.";
		return new ResponseEntity<>(response, HttpStatus.OK);
	}
}
3.3.4 Main Class
Add the following code to the main class to bootstrap the application from the main method. Always remember, the entry point of the spring boot application is the class containing @SpringBootApplication annotation and the static main method.
SpringbootS3tutorial.java
package org.jcg.springboot.aws.s3;

import org.slf4j.Logger;
import org.slf4j.LoggerFactory;
import org.springframework.boot.SpringApplication;
import org.springframework.boot.autoconfigure.SpringBootApplication;

/**
 * Main implementation class which serves two purposes in a spring boot application: Configuration and bootstrapping.
 * @author yatin-batra
 */
@SpringBootApplication
public class SpringbootS3tutorial {

	private static final Logger LOGGER = LoggerFactory.getLogger(SpringbootS3tutorial.class);

	public static void main(String[] args) {
		SpringApplication.run(SpringbootS3tutorial.class, args);
		LOGGER.info("SpringbootS3tutorial application started successfully.");
	}
}
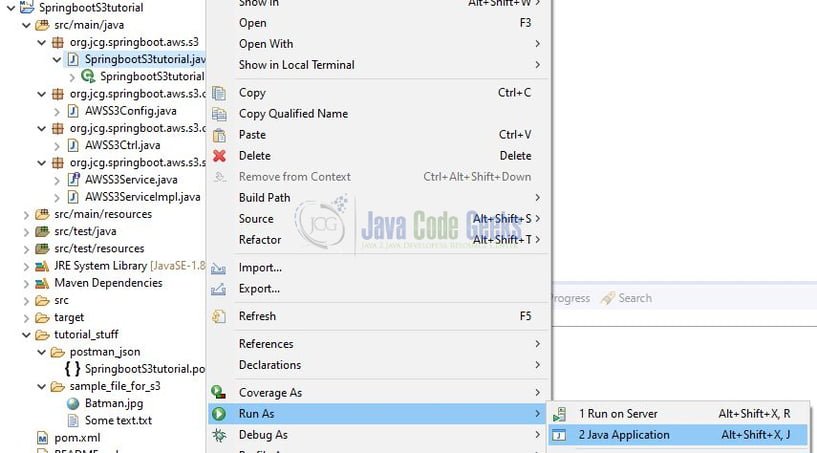
4. Run the Application
To execute the application, compile the project and right-click on the SpringbootS3tutorial.java class, Run As -> Java Application.
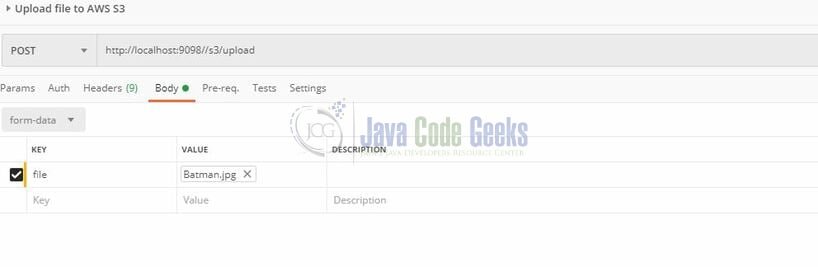
5. Project Demo
Once the application is started successfully, open the Postman tool. Hit the following URL (HTTP POST request) to upload the file to S3 bucket. Remember to select the correct option in the body or refer to Fig. 3 for a sample request.
http://localhost:9098//s3/upload
Once the file is uploaded successfully to the S3 bucket, the API will return the 200 OK response as shown in Fig. 4.
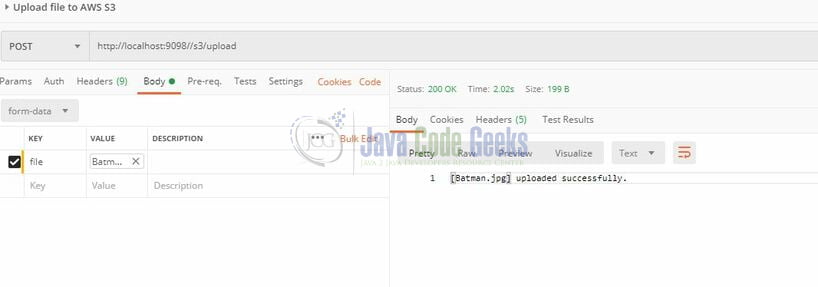
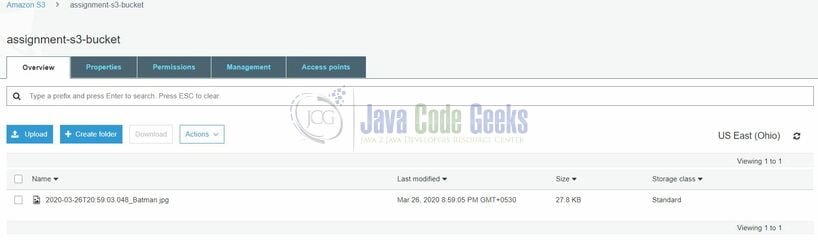
And the users can navigate to the AWS console to validate that the same file is now present in the S3 bucket.
That is all for this tutorial and I hope the article served you whatever you were looking for. Happy Learning and do not forget to share!
6. Conclusion
In the above sections, developers learned how to upload files to an S3 bucket via a spring boot application. Developers can download the sample application from the Download section.
7. Download the Project
This was an example of uploading a file to the AWS S3 bucket via a spring boot application.
You can download the full source code of this example here: Spring boot and AWS S3: Upload file

Useful – thank you
Hi,
Very useful. However you missed to provide the interface AWSS3Service in the above example hence it is very confusing unless someone downloads your code and check. Can you please add that interface as well in your explanation/
I keep getting 400 not found errorr, whay am I doing wrong?