Hello readers! In this tutorial, we will install Tomcat and we will do some basic Tomcat configurations on the Kali Linux System. To complete this tutorial, developers will have to have a normal user with the sudo privileges.
1. Introduction
Apache Tomcat commonly known as Tomcat is an application server that can be used to serve Java applications to the web users. It is written primarily in Java and released under Apache License 2.0. If developers develop Java applications, Tomcat is a quick and easy way to serve them in a full server environment specifically designed for that purpose. This tutorial will help developers install the Tomcat on a 64-bit Kali Linux Operating system.
The Tomcat consists of the following components:
- Catalina: It is the Servlet Container of Tomcat
- Coyote: Coyote acts as a connector and supports HTTP 1.1
- Jasper: It is the Tomcat’s JSP Engine
- Cluster: A component for load balancing to manage the large applications
- High availability: A Tomcat component to schedule system upgrades and changes without affecting live environment
- Web Application: Manage Sessions, Support deployment across different environments
1.1 Prerequisites
For this tutorial, we need:
- Kali Linux Operating System (64 Bit or 32 Bit)
- Root privileges
- Significant amount of RAM
1.2 Download Kali Operating System
The download is straightforward. Go to Kali website and download the .ISO image through the direct link or developers can torrent it by clicking on the Torrent link.
1.3 Download & Install VMware Workstation
Developers can watch this video in order to download and install VMware Workstation on Windows Operating system.
1.4 Install Kali on VMware Workstation
Developers can watch this video in order to install the Kali Linux Operating System on a VMware Workstation.
2. Installation of Tomcat on Kali
Below are the steps that need to be executed on the Kali Linux Operating system in order to successfully perform the Tomcat installation.
2.1 Java 8 Installation
Before installing Tomcat developers need to make sure that they have the latest version of Java Development Kit (JDK) installed and configured on the system. It is preferred to use Oracle Java.
To carry out this installation, developers need to install the latest Oracle Java (JDK) on Kali. Developers can watch this video in order to download and install the JDK on Kali Linux Operating system.
2.2 Download and Install Apache Tomcat8
Once the latest Java is installed and configured correctly on the system, we will move forward to download and install the latest stable version of Tomcat8 (i.e. 8.5.14). If developer’s want to cross-check, if any newer version is available, go to the following Tomcat download page and cross-check.
Next, create a /opt/tomcat/ directory and download the latest version of Apache Tomcat8 under this directory. Also to cross-check the downloaded file, we will download a hash file. The download will take some time depending upon the network speed.
# mkdir /opt/tomcat/

# cd /opt/tomcat

# wget http://mirror.fibergrid.in/apache/tomcat/tomcat-8/v8.5.14/bin/apache-tomcat-8.5.14.zip

# wget https://www.apache.org/dist/tomcat/tomcat-8/v8.5.14/bin/apache-tomcat-8.5.14.zip.md5
Note: Make sure to replace the version number in the above download link with the latest version available.
Now verify the MD5 Checksum against the key.
# cat apache-tomcat-8.5.14.zip.md5

# md5sum apache-tomcat-8.5.14.zip
Make sure that the output (Hash Value) matches, as shown below.

Extract the Tomcat zip folder and cd to apache-tomcat-8.5.14/bin/ directory.
# unzip apache-tomcat-8.5.14.zip

# cd apache-tomcat-8.5.14/bin/
Now make the Linux scripts that is under apache-tomcat-8.5.14/bin/ executable and then create a symbolic link of startup and shutdown script for the Tomcat.
# chmod 700 /opt/tomcat/apache-tomcat-8.5.14/bin/*.sh
Create a Symbolic link for Tomcat Startup Script.
# ln -s /opt/tomcat/apache-tomcat-8.5.14/bin/startup.sh /usr/bin/tomcatup
Create a Symbolic link for Tomcat Shutdown Script.
# ln -s /opt/tomcat/apache-tomcat-8.5.14/bin/shutdown.sh /usr/bin/tomcatdown
Now to start Tomcat, developers just need to fire the below command as root from anywhere in the shell.
# tomcatup
The below output image shows the snippet of Tomcat startup script.

Once Tomcat is started, developers can point the browser to http://127.0.0.1:8080 or http://localhost:8080 and should see something as this:
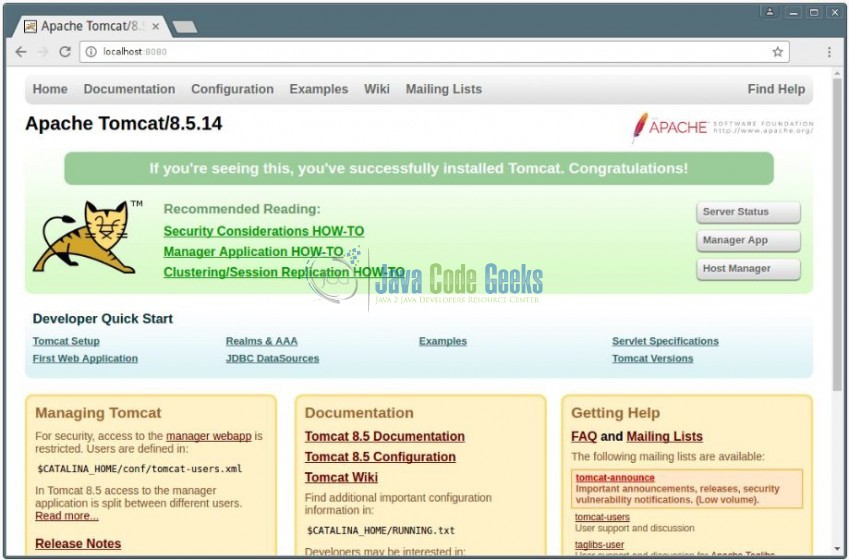

Do note, Server name (localhost) and port (8080) may vary as per the Tomcat configuration.
2.3 Changing Apache Tomcat Port
Do remember that 8080 is the default port that Tomcat uses. To change the Tomcat port from 8080 to any other unused port (for e.g. 137), developers may first need to shut down the Tomcat server simply by typing the below command from anywhere in the shell.
# tomcatdown
Next, open the /opt/tomcat/apache-tomcat-8.5.14/conf/server.xml file in your favorite editor (for e.g. Nano, VI) to edit. Change the port no. from 8080 to 137, save and exit.
# nano /opt/tomcat/apache-tomcat-8.5.14/conf/server.xml
Make the connector port changes, as shown below.

After changing the Tomcat port to 137, restart Tomcat service again and point the browser to http://127.0.0.1:137 or http://localhost:137.
# tomcatup
Similarly, developers can use any port of their choice. Make sure the port that Tomcat is using doesn’t conflict with any other application or resource.
2.4 Configuring Apache Tomcat
By default, the Tomcat page is accessed by the developers only due to its security implementation so that unauthorized users don’t have access to it. To access Admin and other sections like Server Status, App. Manager and Host Manager, developers need to add the user accounts for administrators and managers.
To add a Tomcat user, edit file /opt/tomcat/apache-tomcat-8.5.14/conf/tomcat-users.xml, in your favorite editor.
# nano /opt/tomcat/apache-tomcat-8.5.14/conf/tomcat-users.xml
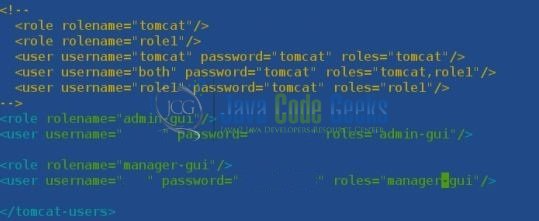
Add the following lines just before </tomcat-users>.
<role rolename="admin-gui"/>
<user username="admin123" password="jcg@123" roles="admin-gui"/>
<role rolename="manager-gui"/>
<user username="mananger123" password="temp@123" roles="manager-gui"/>
Below image clearly, shows where to add the user account information in the tomcat-users.xml.
In order to bring the new changes into effect, developers need to restart the Tomcat server again.
# tomcatdown

# tomcatup
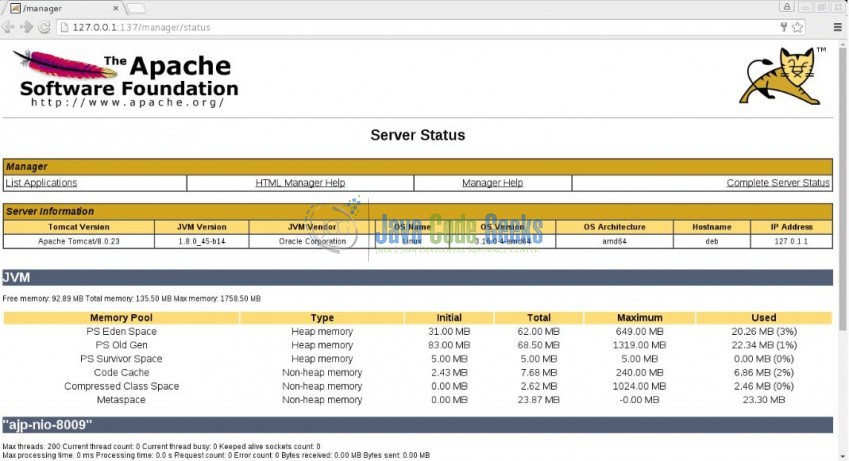
After restarting the Tomcat, make sure to access the sections like Server Status, Host Manager etc at http://127.0.0.1:137 or http://localhost:137. It will ask developers to enter the User Name and Password. Just enter the credentials created above and after the successful login, developers will see something like the below interface.
Congratulations! You have successfully completed all the settings and the basic configuration of Tomcat. Hope this helped!
3. Conclusion
As developers can see, Tomcat provides a nice platform for controlling and serving the Java applications in a web environment. Developers can easily deploy the .war files and have them up and running in a very little time.
