Welcome readers, in this tutorial, we will implement the security mechanism with JSON Web Token (popularly known as JWT’s) in a spring boot application.
You can also check this tutorial in the following video:
1. Introduction
- Spring Boot is a module that provides rapid application development feature to the spring framework including auto-configuration, standalone-code, and production-ready code
- It creates applications that are packaged as jar and are directly started using embedded servlet container (such as Tomcat, Jetty or Undertow). Thus, no need to deploy the war files
- It simplifies the maven configuration by providing the starter template and helps to resolve the dependency conflicts. It automatically identifies the required dependencies and imports them in the application
- It helps in removing the boilerplate code, extra annotations, and xml configurations
- It provides a powerful batch processing and manages the rest endpoints
- It provides an efficient jpa-starter library to effectively connect the application with the relational databases
Now, open the eclipse ide and let’s see how to implement this tutorial in spring boot.
2. Spring Boot JWT Authentication Example
Here is a systematic guide for implementing this tutorial.
2.1 Tools Used
We are using Eclipse Kepler SR2, JDK 8, and Maven.
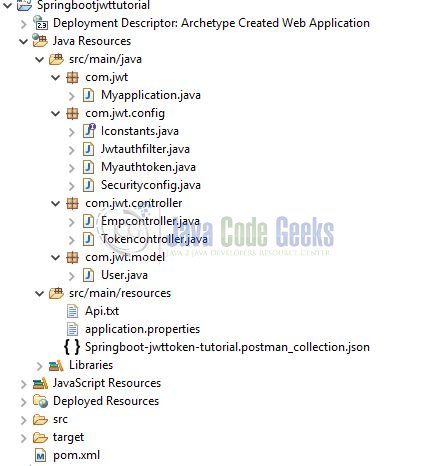
2.2 Project Structure
In case you are confused about where you should create the corresponding files or folder, let us review the project structure of the spring boot application.
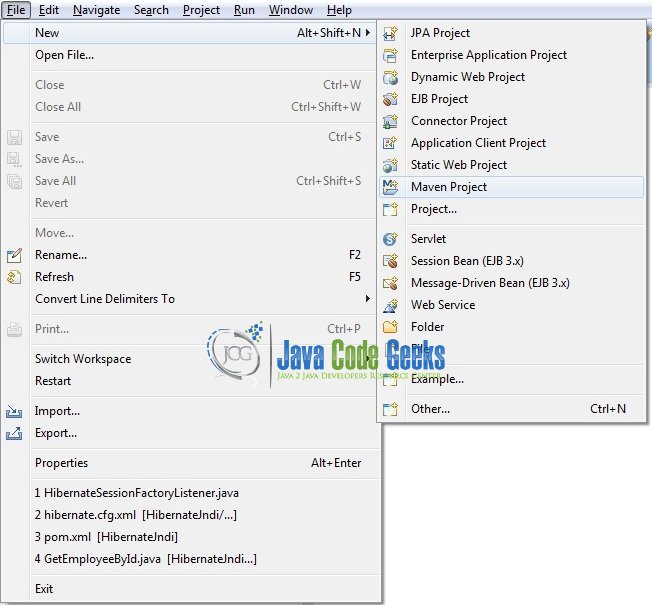
2.3 Project Creation
This section will demonstrate how to create a Java-based Maven project with Eclipse. In Eclipse IDE, go to File -> New -> Maven Project.
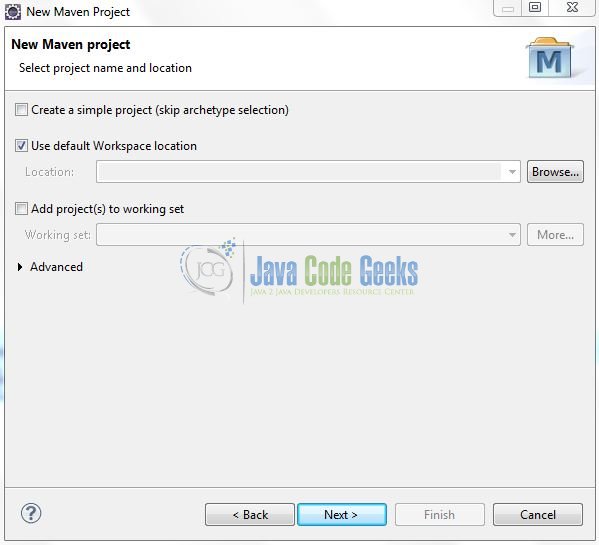
In the New Maven Project window, it will ask you to select a project location. By default, ‘Use default workspace location’ will be selected. Just click on the next button to proceed.
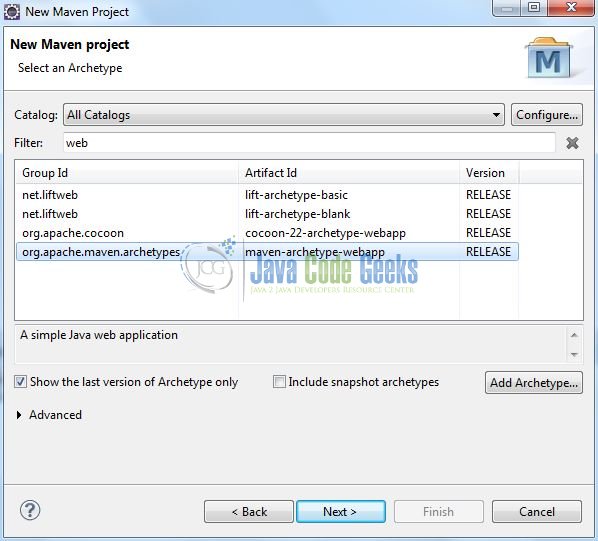
Select the Maven Web App archetype from the list of options and click next.
It will ask you to ‘Enter the group and the artifact id for the project’. We will input the details as shown in the below image. The version number will be by default: 0.0.1-SNAPSHOT.
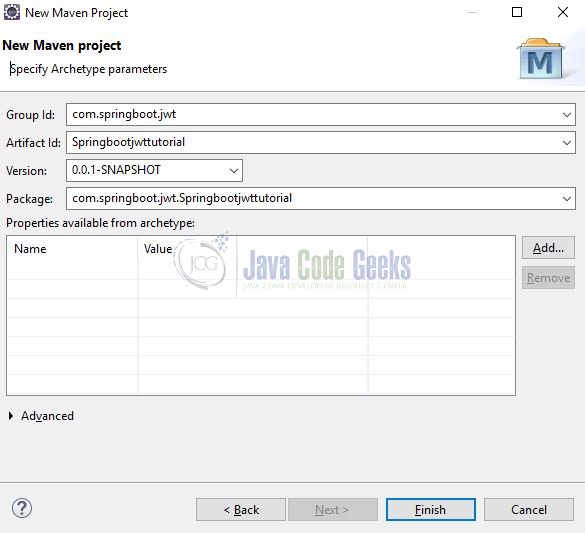
Click on Finish and the creation of a maven project is completed. If you observe, it has downloaded the maven dependencies and a pom.xml file will be created. It will have the following code:
pom.xml
<project xmlns="http://maven.apache.org/POM/4.0.0" xmlns:xsi="http://www.w3.org/2001/XMLSchema-instance" xsi:schemaLocation="http://maven.apache.org/POM/4.0.0 http://maven.apache.org/xsd/maven-4.0.0.xsd">
	<modelVersion>4.0.0</modelVersion>
	<groupId>com.springboot.jwt</groupId>
	<artifactId>Springbootjwttutorial</artifactId>
	<version>0.0.1-SNAPSHOT</version>
	<packaging>war</packaging>
</project>
Let’s start building the application!
3. Creating a Spring Boot application
Below are the steps involved in developing the application.
3.1 Maven Dependencies
Here, we specify the dependencies for the Spring Boot and Freemarker. Maven will automatically resolve the other dependencies. The updated file will have the following code.
pom.xml
<project xmlns="http://maven.apache.org/POM/4.0.0"
	xmlns:xsi="http://www.w3.org/2001/XMLSchema-instance"
	xsi:schemaLocation="http://maven.apache.org/POM/4.0.0 http://maven.apache.org/maven-v4_0_0.xsd">
	<modelVersion>4.0.0</modelVersion>
	<groupId>com.springboot.jwt</groupId>
	<artifactId>Springbootjwttutorial</artifactId>
	<packaging>war</packaging>
	<version>0.0.1-SNAPSHOT</version>

	<name>Springboot jwt token authentication tutorial</name>
	<url>http://maven.apache.org</url>

	<parent>
		<groupId>org.springframework.boot</groupId>
		<artifactId>spring-boot-starter-parent</artifactId>
		<version>2.0.1.RELEASE</version>
	</parent>

	<dependencies>
		<!-- spring boot web mvc dependency. -->
		<dependency>
			<groupId>org.springframework.boot</groupId>
			<artifactId>spring-boot-starter-web</artifactId>
		</dependency>
		<!-- spring boot security dependency. -->
		<dependency>
			<groupId>org.springframework.boot</groupId>
			<artifactId>spring-boot-starter-security</artifactId>
		</dependency>
		<!-- jwt token dependency. -->
		<dependency>
			<groupId>io.jsonwebtoken</groupId>
			<artifactId>jjwt</artifactId>
			<version>0.9.1</version>
		</dependency>
	</dependencies>

	<build>
		<finalName>Springbootjwttutorial</finalName>
	</build>
</project>
3.2 Application Properties
Create a new properties file at the location: Springbootjwttutorial/src/main/resources/ and add the following code to it.
application.properties
# Application configuration.
server.port=8102
3.3 Java Classes
Let’s write all the java classes involved in this application.
3.3.1 Implementation/Main class
Add the following code the main class to bootstrap the application from the main method. Always remember, the entry point of the spring boot application is the class containing @SpringBootApplication annotation and the static main method.
Myapplication.java
package com.jwt;

import org.springframework.boot.SpringApplication;
import org.springframework.boot.autoconfigure.SpringBootApplication;

/**
 * Main implementation class which serves two purpose in a spring boot application: Configuration and bootstrapping.
 * @author yatin-batra
 */
@SpringBootApplication
public class Myapplication {

	public static void main(String[] args) {
		SpringApplication.run(Myapplication.class, args);
	}
}
3.3.2 Token Controller class
Let us include the following code to this class that has a publicly exposed endpoint for user validation and acquiring an authentication token for communicating with protected resources.
Tokencontroller.java
package com.jwt.controller;

import java.time.LocalDateTime;
import java.time.format.DateTimeFormatter;
import java.util.HashMap;
import java.util.Map;

import javax.servlet.ServletException;

import org.springframework.http.HttpStatus;
import org.springframework.http.ResponseEntity;
import org.springframework.web.bind.annotation.PostMapping;
import org.springframework.web.bind.annotation.RequestBody;
import org.springframework.web.bind.annotation.RestController;

import com.jwt.config.Iconstants;
import com.jwt.model.User;

import io.jsonwebtoken.Jwts;
import io.jsonwebtoken.SignatureAlgorithm;

// Class to acquire the jwt token for the authenticated user.
@RestController
public class Tokencontroller {

	// Here we are assuming that the reader know about the model classes in mvc architecture.
	// User is a model class having two parameters i.e. username and password. This class will be used to fetch the login credentials from the request.
	@PostMapping("/token")
	public ResponseEntity<String> getToken(@RequestBody User login) throws ServletException {

		String jwttoken = "";

		// If the username and password fields are empty -> Throw an exception!
		if(login.getUsername().isEmpty() || login.getPassword().isEmpty())
			return new ResponseEntity<String>("Username or password cannot be empty.", HttpStatus.BAD_REQUEST);

		String name = login.getUsername(),
				password = login.getPassword();

		// If the username and password are not valid -> Thrown an invalid credentials exception!
		if(!(name.equalsIgnoreCase("Test") && password.equalsIgnoreCase("1234")))
			return new ResponseEntity<String>("Invalid credentials. Please check the username and password.", HttpStatus.UNAUTHORIZED);
		else {
			// Creating JWT using the user credentials.
			Map<String, Object> claims = new HashMap<String, Object>();
			claims.put("usr", login.getUsername());
			claims.put("sub", "Authentication token");
			claims.put("iss", Iconstants.ISSUER);
			claims.put("rol", "Administrator, Developer");
			claims.put("iat", LocalDateTime.now().format(DateTimeFormatter.ofPattern("yyyy-MM-dd HH:mm:ss")));

			jwttoken = Jwts.builder().setClaims(claims).signWith(SignatureAlgorithm.HS512, Iconstants.SECRET_KEY).compact();
			System.out.println("Returning the following token to the user= "+ jwttoken);
		}

		return new ResponseEntity<String>(jwttoken, HttpStatus.OK);
	}
}
3.3.3 Employee Controller class
Let us include the following code to the employee class. Do remember, the resources of this class will only be available if the request has a valid & authenticated jwt token.

Empcontroller.java
package com.jwt.controller;

import org.springframework.http.HttpStatus;
import org.springframework.http.ResponseEntity;
import org.springframework.web.bind.annotation.GetMapping;
import org.springframework.web.bind.annotation.RestController;

// Class will be served if the requests to this protected controller will have the valid authentication token.
@RestController
public class Empcontroller {

	@GetMapping(value= "/welcome")
	public ResponseEntity<String> welcome() {
		return new ResponseEntity<String>("Welcome User!", HttpStatus.OK);
	}
}
3.3.4 Security Configuration class
Let us include the following code to the security configuration class where we’ll permit the /token uri as public in nature.
Securityconfig.java
package com.jwt.config;

import org.springframework.context.annotation.Bean;
import org.springframework.context.annotation.Configuration;
import org.springframework.security.config.annotation.web.builders.HttpSecurity;
import org.springframework.security.config.annotation.web.configuration.EnableWebSecurity;
import org.springframework.security.config.annotation.web.configuration.WebSecurityConfigurerAdapter;
import org.springframework.security.web.authentication.UsernamePasswordAuthenticationFilter;

// Spring boot security configuration class.
@Configuration
@EnableWebSecurity
public class Securityconfig extends WebSecurityConfigurerAdapter {

	// The Jwt token authentication filter. This filter will intercept all the requests other than the “/token” uri.
	// The class is created to fetch the authentication token from the request, parse and validate the jwt token for further processing.
	@Bean
	public Jwtauthfilter jwtAuthenticationFilter() {
		return new Jwtauthfilter();
	}

	@Override
	protected void configure(HttpSecurity http) throws Exception {
		http
		.authorizeRequests()
		.antMatchers("/token")
		.permitAll()
		.anyRequest()
		.authenticated()
		.and()
		.csrf().disable()
		.addFilterBefore(jwtAuthenticationFilter(),
				UsernamePasswordAuthenticationFilter.class);
	}
}
3.3.5 Authentication Filter class
Let us include the following code to the authentication filter which will parse and validate the jwt token.
Jwtauthfilter.java
package com.jwt.config;

import java.io.IOException;
import java.util.ArrayList;
import java.util.List;

import javax.servlet.FilterChain;
import javax.servlet.ServletException;
import javax.servlet.http.HttpServletRequest;
import javax.servlet.http.HttpServletResponse;

import org.springframework.security.core.AuthenticationException;
import org.springframework.security.core.GrantedAuthority;
import org.springframework.security.core.authority.SimpleGrantedAuthority;
import org.springframework.security.core.context.SecurityContext;
import org.springframework.security.core.context.SecurityContextHolder;
import org.springframework.web.filter.OncePerRequestFilter;

import io.jsonwebtoken.Claims;
import io.jsonwebtoken.Jws;
import io.jsonwebtoken.Jwts;
import io.jsonwebtoken.SignatureException;

// This class is created to validate the jwt authentication token.
// If the token will be valid the requests to the protected url will be served and the response will be given back to the user.
// If the token is not valid, an exception will be thrown to the user.
public class Jwtauthfilter extends OncePerRequestFilter {

	@Override
	protected void doFilterInternal(HttpServletRequest request, HttpServletResponse response, FilterChain filterChain)
			throws ServletException, IOException {

		// Fetching the authorization header from the request.
		// This header will contain the bearer token having the jwt token.
		String authenticationHeader= request.getHeader(Iconstants.HEADER);

		try {
			SecurityContext context= SecurityContextHolder.getContext();

			if(authenticationHeader != null && authenticationHeader.startsWith("Bearer")) {

				final String bearerTkn= authenticationHeader.replaceAll(Iconstants.BEARER_TOKEN, "");
				System.out.println("Following token is received from the protected url= "+ bearerTkn);

				try {
					// Parsing the jwt token.
					Jws<Claims> claims = Jwts.parser().requireIssuer(Iconstants.ISSUER).setSigningKey(Iconstants.SECRET_KEY).parseClaimsJws(bearerTkn);

					// Obtaining the claims from the parsed jwt token.
					String user= (String) claims.getBody().get("usr");
					String roles= (String) claims.getBody().get("rol");

					// Creating the list of granted-authorities for the received roles.
					List<GrantedAuthority> authority= new ArrayList<GrantedAuthority>();
					for(String role: roles.split(","))
						authority.add(new SimpleGrantedAuthority(role));

					// Creating an authentication object using the claims.
					Myauthtoken authenticationTkn= new Myauthtoken(user, null, authority);
					// Storing the authentication object in the security context.
					context.setAuthentication(authenticationTkn);
				} catch (SignatureException e) {
					throw new ServletException("Invalid token.");
				}
			}

			filterChain.doFilter(request, response);
			context.setAuthentication(null);
		} catch(AuthenticationException ex) {
			throw new ServletException("Authentication exception.");
		}
	}
}
4. Run the Application
As we are ready with all the changes, let us compile the spring boot project and run the application as a java project. Right click on the Myapplication.java class, Run As -> Java Application.

5. Project Demo
Open the postman tool and hit the following urls to display the data in the json format.
FETCH AUTHENTICATION TOKEN
	Url- http://localhost:8102/token
	Note - The username and password must be sent in the request to validate the login credentials.
	Request body-
		{
			"username": "Test",
			"password": "1234"
		}

WELCOME USER (PROTECTED URL)
	Url - http://localhost:8102/welcome
	Note- This request must contain bearer token in the header.
That is all for this tutorial and I hope the article served you whatever you were looking for. Happy Learning and do not forget to share!
6. Conclusion
In this section, developers learned how to create a JWT security mechanism in a spring boot application. Developers can download the sample application as an Eclipse project in the Downloads section.
7. Download the Eclipse Project
This was an example of configuring the JWT security mechanism in a Spring Boot application.
You can download the full source code of this example here: Spring Boot JWT Authentication Example

the project running successfully but i am not applicable to send request using postman
http://localhost:8080/Springbootjwttutorial/token
you have to provide .json file but how it is work.
project running successfully but how can i send request using postman .
localhost:8080/Springbootjwttutorials/token with requestbody in i have added username and password but not getting request. kindly please provide full description
error internal server in post