In this example, we will demonstrate how to configure a Spring Boot application using the application.properties file.
1. Introduction
Spring Boot is an application development solution that will automatically configure your Spring application for you, helping you get your project up and running as quickly as possible. It will consider the dependencies in your project and will use an opinionated view and default settings to configure the application.
In most cases, however, you will want to override some of the default settings. For example, you may want to specify the port for your web application (the default port is 8080) or you may want to specify the servlet context path. (The default context path is “/”.) You can use the application.properties file (or application.yml if you prefer) for this purpose. Spring Boot will load the file at startup and look for known properties to configure your application. You can also use the application.properties file to define custom properties.
In this example,
we will demonstrate how to use the application.properties file to configure
your Spring Boot application.
1.1 Tools Used in this Example
- Eclipse Java EE IDE for Java Developer 2018-12
- Spring Tools 4 – for Spring Boot
Spring Tools 4 for Spring Boot is a set of plugins for Eclipse that support building and running Spring Boot applications. You can add Spring Tools 4 to your existing Eclipse installation by going to the Eclipse Marketplace and searching for “Spring Tools 4”.
2. Spring Boot Application Properties Example
2.1 Create the Spring Boot Project
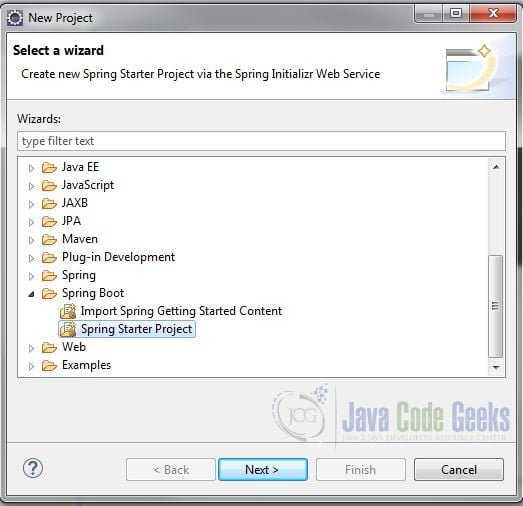
In the New Project – Select a Wizard dialog box, expand Spring Boot and select Spring Starter Project. Click “Next”.
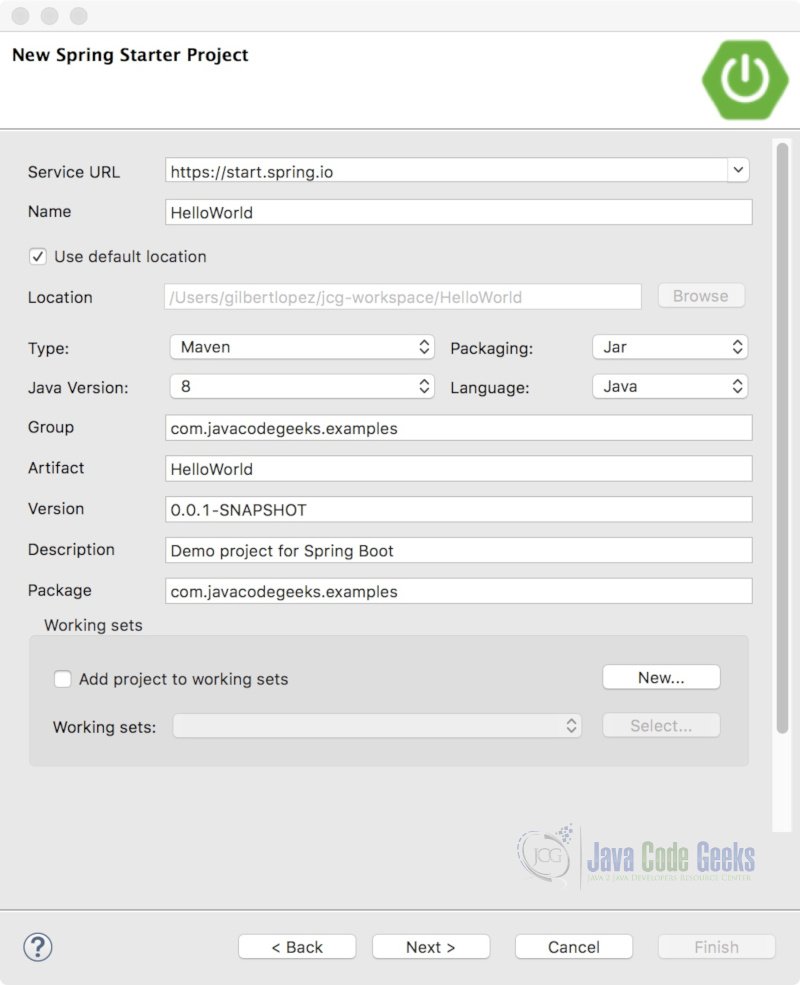
In the New Spring Starter Project dialog box, enter a name for the project. Also, enter the group, artifact and package information. Accept all the other default values. Click “Next”.
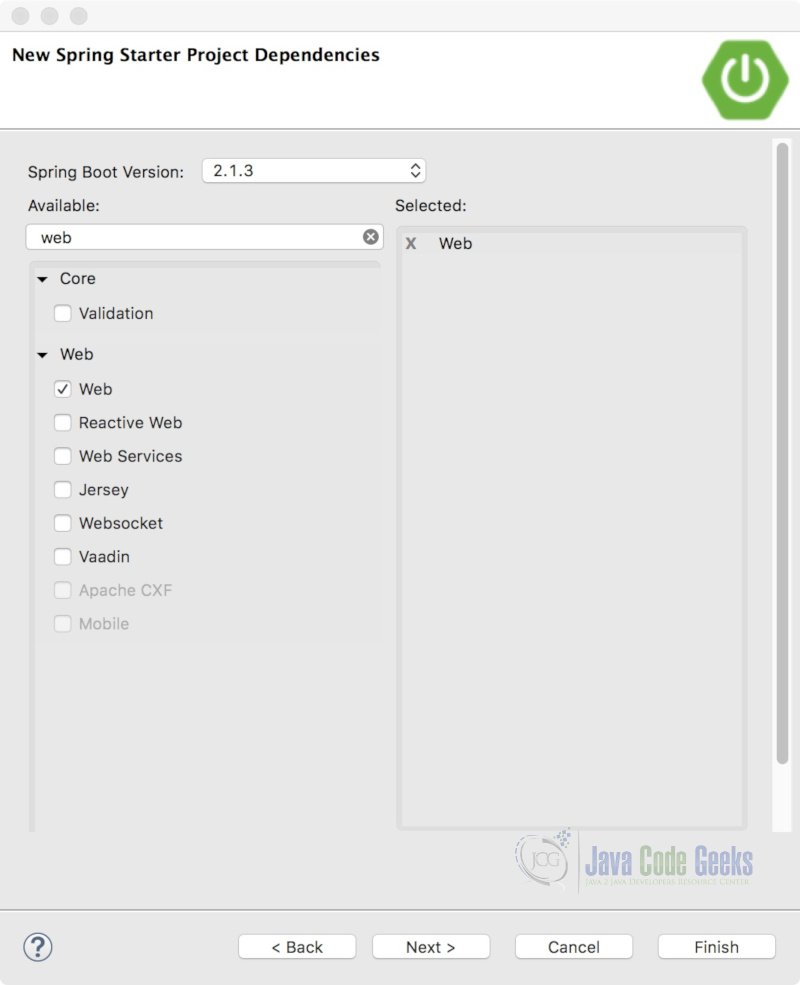
In the New Spring Starter Project Dependencies dialog box, select Spring Boot Version 2.1.3. Also, enter “web” in the Available search box and check Web from the search results. Click “Finish”.
2.2 Create the Controller
We’ll use a simple Rest controller for this example. Create a new Java class HelloControllerwith the following code:
HelloController.java
import org.springframework.web.bind.annotation.GetMapping;
import org.springframework.web.bind.annotation.RestController;

@RestController("/")
public class HelloController {

	@GetMapping("/hello")
	public String hello() {
		return "Hello World!";
	}

}
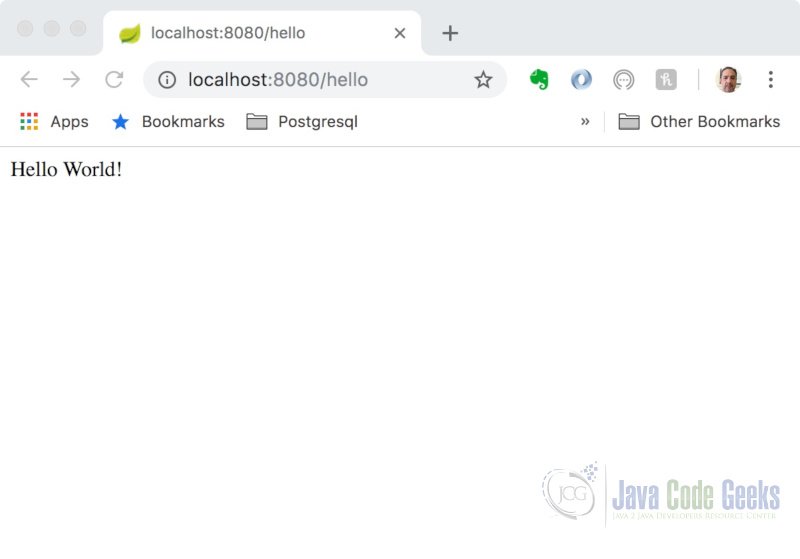
Let’s run and test the application. Right-click your project in Project Explorer and select Run As > Spring Boot App. Open a browser, enter localhost:8080/hello in the address bar and hit Enter. Notice that we are using the default settings for the server port (8080) and the context path (‘/’).
2.3 Configuration Properties
There are over 1,000 configuration properties defined in Spring Boot. You don’t need to set all available properties. You only need to set the properties you want to configure in your application.
Properties are grouped into these general categories:
- Core
- Web
- Security
- Data
- Actuator
- Integration
- DevTools
- Testing
The most common application properties are documented on Spring’s official website at https://docs.spring.io/spring-boot/docs/current/reference/html/common-application-properties.html.
We’ll cover some of these properties in this article.
2.4 Core Properties
The core properties are applicable in most Spring Boot applications. For example, you may want to configure the log file for your application. Right-click application.properties under src/main/resources in the Project Explorer and select Open with > Generic Editor – Spring Properties. (If you don’t see this option, make sure you installed Spring Tools.)
Add the following property to application.properties:
application.properties
# Log file
logging.file=logs/my-log-file.log
As you type the property name, you will notice that the Spring Properties editor provides “content-assist”. This is a big time-saver as you do not have to consult the online documentation for property names, data types, etc. (Note: You may have to hit Control + spacebar to invoke content-assist.)
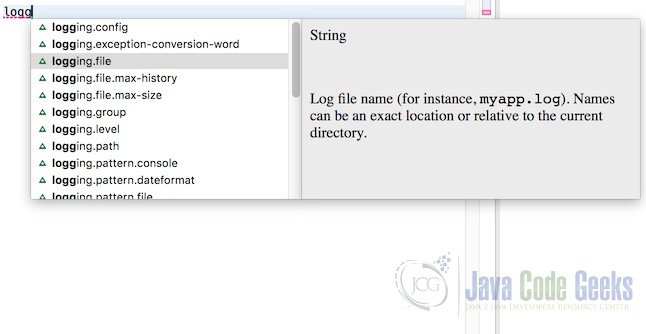
If you scroll through the properties, you will see their data type, description, and in some cases their default value. The properties and their attributes are contained in the configuration metadata for Spring Boot. In the Project Explorer expand Maven Dependencies > spring-boot-2.1.3.RELEASE.jar > META-INF. In the META-INF folder, you will see two JSON files.
- spring-configuration-metadata.json
- additional-spring-configuration-metadata.json
Open the spring-configuration-metadata.json
file and search for logging.file. You will see the metadata for the property.
spring-configuration-metadata.json
    {
      "name": "logging.file",
      "type": "java.lang.String",
      "description": "Log file name (for instance, `myapp.log`). Names can be an exact location or relative to the current directory.",
      "sourceType": "org.springframework.boot.context.logging.LoggingApplicationListener"
    }
Property attributes include the name (required), and optionally, type, description, sourceType, defaultValue and deprecated. (For more information on configuration metadata, visit the Spring Boot documentation at https://docs.spring.io/spring-boot/docs/current/reference/html/configuration-metadata.html)
Save the application.properties file. Now start or restart the application. Spring Boot will bootstrap the application, load the application.properties file and configure the log file. If you refresh the project, you will see that my-log-file.log has been created under the logs folder.
Another useful core property is spring.profiles.active, which is used to specify the Spring profile(s) to load during startup. This property is only applicable if you have configured profiles in your application. For more information on Spring profiles, view the documentation at https://docs.spring.io/spring-boot/docs/current/reference/html/boot-features-profiles.html.
2.5 Web Properties
The embedded server can be configured using web properties. For example, you can specify the port on which your server will listen for requests. You can also specify the servlet context path for your application. Add the following properties to application.properties:
application.properties
# Server port
server.port=9080

# Servlet context path
server.servlet.context-path=/helloworld
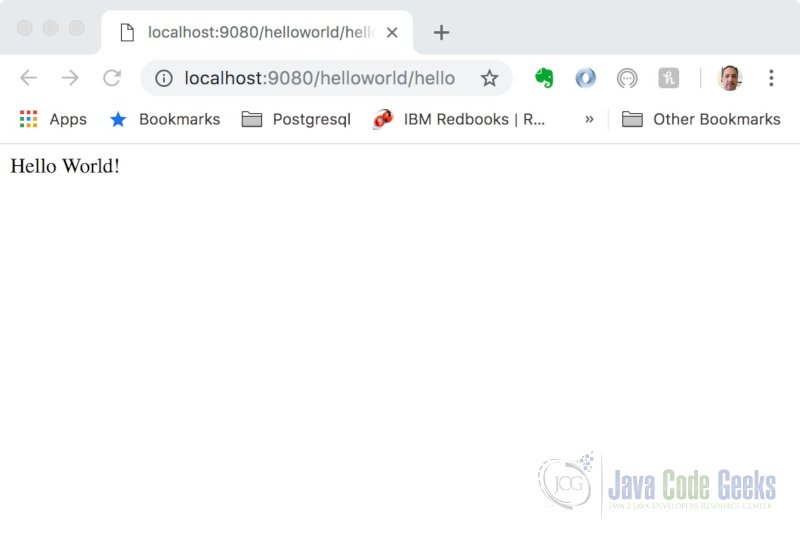
When you restart your application, you will see
the following line in the console:
Console Output
Tomcat started on port(s): 9080 (http) with context path '/helloworld'
Open a browser and use the following URL to send a request: http://localhost:9080/helloworld/hello.
Spring Boot automatically casts string values from the application.properties file to the appropriate data type. For example, the server.port value will be converted to an integer.
2.6 Custom Properties
You can define your own custom properties in the application.properties file. Let’s look at an example.
Add the following property to the properties
file:
application.properties
# Custom property
person.name=Java Code Geeks!
You can use the @Value annotation and a property place holder (${…}) to inject the value into your bean. Modify the controller class with the following code:
HelloController.java
import org.springframework.beans.factory.annotation.Value;
import org.springframework.web.bind.annotation.GetMapping;
import org.springframework.web.bind.annotation.RestController;

@RestController("/")
public class HelloController {

	@Value("${person.name}")
	private String name;

	@GetMapping("/hello")
	public String hello() {
		return "Hello " + name;
	}
}
Note: Make sure the key in the property place holder matches the key in application.properties. If you mistype and the key is not found, Spring will throw an IllegalArgumentException when trying to create the bean.

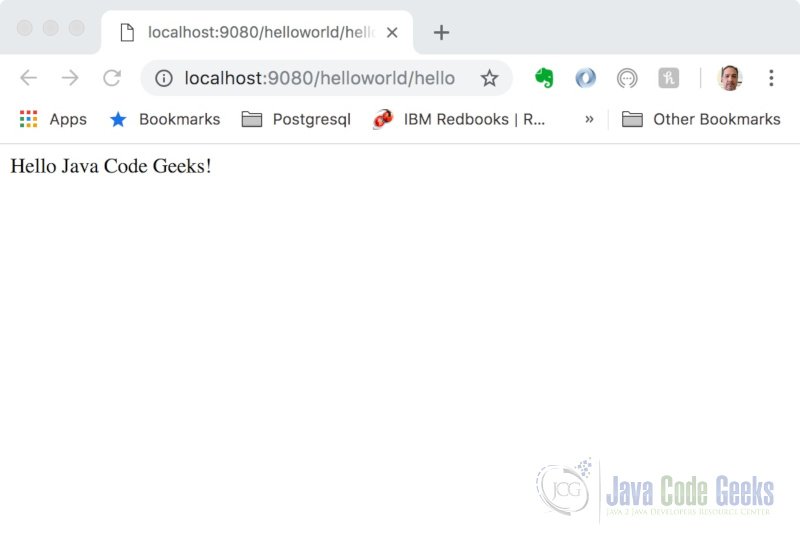
Restart the application and reload the page. You will see that the value from the custom property is used in the response.
2.7 Creating Metadata for Properties
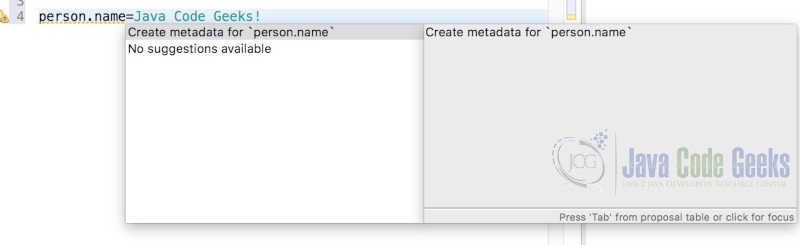
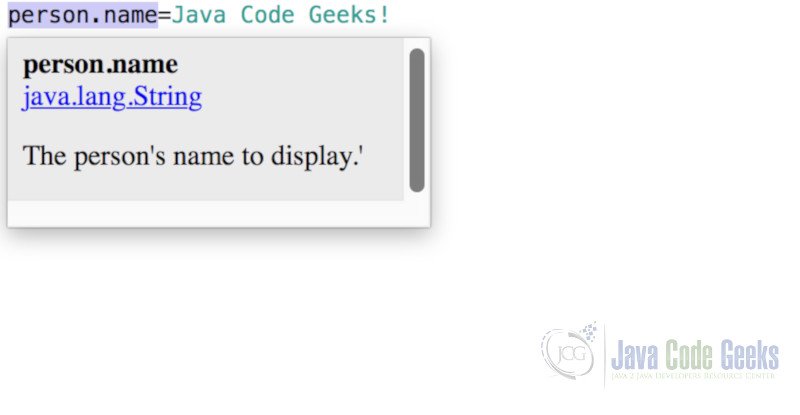
You may have noticed that there is a warning
for the custom property – person.name is
an unknown property. You can fix
this by creating metadata for that property.
Set your cursor after person.name and hit Control + 1 (or Command +1 on macOS). Select Create metadata for person.name and hit enter.
This will create a file additional-spring-configuration-metadata.json under the META-INF folder in your project. Open the file with the JSON editor and edit the description.
additional-spring-configuration-metadata.json
{"properties": [{
  "name": "person.name",
  "type": "java.lang.String",
  "description": "The person's name to display."
}]}
Now hover over the property. You will see the information for the property including the updated description.
You can add as many custom properties and their supporting metadata to the JSON file. This is a great way to share custom properties with other members of your team.
2.8 Organizing Custom Properties
It can be cumbersome to use the @Value annotation if you have many custom properties in your application. If the properties are related, you can organize them using a prefix. Define the following additional custom properties in application.properties:
application.properties
# Custom property
person.name=Java Code Geeks!
person.age=25
person.title=Mr.
We are using “person” as the prefix to group these properties. This allows us to treat these properties as attributes of a single data structure. Create a POJO “Person” with the following code.
Person.java
import org.springframework.boot.context.properties.ConfigurationProperties;
import org.springframework.context.annotation.Configuration;
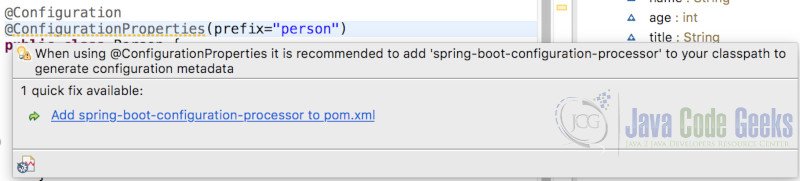
@Configuration
@ConfigurationProperties(prefix="person")
public class Person {
String name;
int age;
String title;
public String getName() {
return name;
}
public void setName(String name) {
this.name = name;
}
public int getAge() {
return age;
}
public void setAge(int age) {
this.age = age;
}
public String getTitle() {
return title;
}
public void setTitle(String title) {
this.title = title;
}
}
The @Configuration annotation registers this POJO as a bean. The @ConfigurationProperties annotation allows us to bind this POJO to properties of an external properties file, e.g. application.properties. Notice that we are using the prefix “person” to filter the properties.
At this point, you will see a warning if you hover over the @ConfigurationProperties annotation – “When using @ConfigurationProperties it is recommended to add ‘spring-boot-configuration-processor’ to your classpath to generate configuration metadata”. Click on the quick fix to add the spring-boot-configuration-processor dependency to the pom.xml.
Since this POJO is registered as a bean in the application context, we can autowire it in the controller class in order to access its properties. Modify the controller class with the following:
HelloController.java
import javax.annotation.PostConstruct;

import org.springframework.beans.factory.annotation.Autowired;
import org.springframework.beans.factory.annotation.Value;
import org.springframework.web.bind.annotation.GetMapping;
import org.springframework.web.bind.annotation.RestController;

@RestController("/")
public class HelloController {

	@Value("${person.name}")
	private String name;

	@Autowired
	private Person person;

	@GetMapping("/hello")
	public String hello() {
		return "Hello " + name;
	}

	@PostConstruct
	private void printPerson() {
		System.out.println("name: " + person.name);
		System.out.println("age: " + person.age);
		System.out.println("title: " + person.title);
	}
}
Restart the application. You will see the following output in the console:
2019-03-14 22:13:15.385  INFO 6146 --- [           main] o.s.web.context.ContextLoader            : Root WebApplicationContext: initialization completed in 1115 ms
name: Java Code Geeks!
age: 25
title: Mr.
2019-03-14 22:13:15.622  INFO 6146 --- [           main] o.s.s.concurrent.ThreadPoolTaskExecutor  : Initializing ExecutorService 'applicationTaskExecutor'
2019-03-14 22:13:15.832  INFO 6146 --- [           main] o.s.b.w.embedded.tomcat.TomcatWebServer  : Tomcat started on port(s): 9080 (http) with context path '/helloworld'
2019-03-14 22:13:15.836  INFO 6146 --- [           main] c.j.examples.HelloWorldApplication       : Started HelloWorldApplication in 1.962 seconds (JVM running for 4.612)
The @ConfigurationProperties annotation provides a more manageable means of working with related properties. It also allows for a centralized way to validate properties but that is beyond the scope of this article.
3. Summary
In this example, we looked as some of the common Spring Boot application properties and showed how they are used. We also demonstrated how to create your own custom properties and how to use them in your application.
4. Download the Source Code
This was a Spring Boot Application Properties Example
You can download the full source code of this example here:
Spring Boot Application Properties Example
