Jetty Authentication Configuration Example
Jetty provides support for standard authentication methods BASIC, DIGEST, FORM and CLIENT-CERT as well as other pluggable mechanisms like JASPI and SPNEGO. Jetty also offers a set of built-in Login Service alternatives for authenticating the user along with extension capabilities.
In this example we will configure authentication in Jetty. Among the various alternatives, we have chosen BASIC authentication for this example with HashLoginService. We are going to start with an Embedded Jetty; we will configure BASIC authentication with a security realm and login service programmatically.
We will also demonstrate different access rights for different role types. In the last part of our example, we are going to apply same configuration on a standalone Jetty server.
1. Environment
In the example, following environment will be used:
- Java 7
- Maven 3.x.y
- Eclipse Luna(as the IDE)
- Jetty v9.2.11 (In Embedded Jetty example, we will add Jetty libraries through Maven)
2. Creating the Maven Project
We will create the Maven project in Eclipse, applying the steps below:
- Go to File -> New ->Other -> Maven Project
- Tick Create a simple project and press “Next”.
- Enter groupId as : com.javacodegeeks.snippets.enterprise
- Enter artifactId as : jetty-authentication-example
- Select packaging as “war”.
- Press “Finish”.
In this example, we are going to add two Maven dependencies to our pom.xml:
- jetty-server
- jetty-webapp
After adding these two, the dependencies section of our pom.xml will look like:
   <dependencies>
		<!--Jetty dependencies start here -->
		<dependency>
			<groupId>org.eclipse.jetty</groupId>
			<artifactId>jetty-server</artifactId>
			<version>9.2.11.v20150529</version>
		</dependency>


		<dependency>
			<groupId>org.eclipse.jetty</groupId>
			<artifactId>jetty-webapp</artifactId>
			<version>9.2.11.v20150529</version>
		</dependency>

		<!--Jetty dependencies end here -->

	</dependencies>
In addition to the dependencies, we are going to add maven-war-plugin in order to package our project as a web application. On this purpose following lines of codes have to be added to the pom:
<build>
		<plugins>
			<plugin>
				<groupId>org.apache.maven.plugins</groupId>
				<artifactId>maven-war-plugin</artifactId>
				<version>2.6</version>
				<configuration>
					<warName>jetty-authentication-example</warName>
				</configuration>
			</plugin>
		</plugins>
</build>
3. Creating Static Content for the Example
In this example, we are going to create a simple web application with only static content which will suffice for authentication demonstration. We will assume that there are two types of roles in the system, namely “admin” and “user”. We will first create an index page which will be available to all users, whether authenticated or not. Thereafter we are going to create folders for each role type with dummy content.
The steps can be summed up as follows:
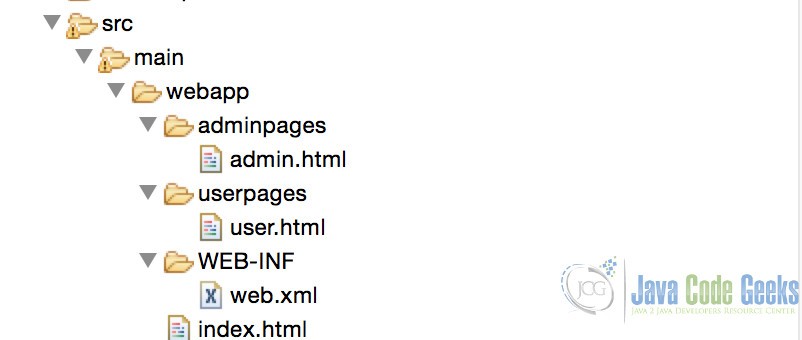
- Create folder “src/main/webapp” in your project home (if not exists).
- Create an HTML file named “index.html”. The content is not important.
- Create a folder named “userpages” under “src/main/webapp”. This folder will be exclusive for the role type “user”.
- Create an HTML file named “user.html” under “src/main/webapp/userpages”. The content of the file is not important and can be dummy.
- Create a folder named “adminpages” under “src/main/webapp”. This folder will be exclusive for the role type “admin”.
- Create an HTML file named “admin.html” under “src/main/webapp/adminpages”. The content of the file is not important and can be dummy.
4. Configuring web.xml
Up to this point we have created the static content, but haven’t stated anything about the security constraints on the content. web.xml is the file where constraints are defined. The web.xml page can be configured applying the following steps:
- Create folder “WEB-INF” under “src/main/webapp” (if not exists).
- Create “web.xml” under “src/main/webapp/WEB-INF” with the content below:
web.xml
<web-app xmlns="http://java.sun.com/xml/ns/javaee" xmlns:xsi="http://www.w3.org/2001/XMLSchema-instance"
	xsi:schemaLocation="http://java.sun.com/xml/ns/javaee
	      http://java.sun.com/xml/ns/javaee/web-app_3_0.xsd"
	version="3.0">

	<display-name>Jetty Authentication Configuration Example</display-name>

	<login-config>
		<auth-method>BASIC</auth-method>
		<realm-name>JCGRealm</realm-name>
	</login-config>

	<security-constraint>
		<web-resource-collection>
			<web-resource-name>Secure resources</web-resource-name>
			<url-pattern>/adminpages/*</url-pattern>
		</web-resource-collection>
		<auth-constraint>
			<role-name>admin</role-name>
		</auth-constraint>
	</security-constraint>

	<security-constraint>
		<web-resource-collection>
			<web-resource-name>Secure resources</web-resource-name>
			<url-pattern>/userpages/*</url-pattern>
		</web-resource-collection>
		<auth-constraint>
			<role-name>user</role-name>
		</auth-constraint>
	</security-constraint>

</web-app>
Here, the login-config element states that, the application will use BASIC authentication and our realm will be named as “JCGRealm”. A Realm is a repository where users, roles and passwords are stored. Our realm “JCGRealm” will be defined and configured in the following sections.
We have two security-constraint elements defining the content to be secured. With the configuration, we have restricted content under “userpages” to the role “user” and content under “adminpages” to the role “admin”.
Now our web application structure will look like the tree displayed below:
5. Configuring Embedded Jetty Programmatically
Now, we are going to initiate our Embedded Jetty server with some simple Java programming. In order to keep things simple, we will be creating and configuring our Server through the main class our application.
We will name our main class as com.javacodegeeks.snippets.enterprise.embeddedjetty.AuthenticationConfigurationMain. The content of the class decorated with comments can be viewed below:
AuthenticationConfigurationMain.java
package com.javacodegeeks.snippets.enterprise.embeddedjetty;

import org.eclipse.jetty.security.HashLoginService;
import org.eclipse.jetty.server.Server;
import org.eclipse.jetty.webapp.WebAppContext;

public class AuthenticationConfigurationMain {

	public static void main(String[] args) throws Exception {


		//1. Creating the server on port 8080
		Server server = new Server(8080);

		//2. Creating the WebAppContext for the created content
		WebAppContext ctx = new WebAppContext();
		ctx.setResourceBase("src/main/webapp");

		//3. Creating the LoginService for the realm
		HashLoginService loginService = new HashLoginService("JCGRealm");

		//4. Setting the realm configuration there the users, passwords and roles reside
		loginService.setConfig("jcgrealm.txt");

		//5. Appending the loginService to the Server
		server.addBean(loginService);

		//6. Setting the handler
		server.setHandler(ctx);

		//7. Starting the Server
		server.start();
		server.join();

	}
}
We have first created our Jetty Server on port 8080(1), thereafter we have created a Web Application Context for the content we had previously created (2). These steps are typical embedded application creation and has nothing to do with the Authentication concept.
The interesting part related with Authentication starts with (3); here we have defined the login service which is of type HashLoginService. A login service is a class that implements org.eclipse.jetty.security.LoginService. One can define his/her own LoginService implementing this interface. Other than HashLoginService, Jetty provides other Login Service implementations such as JDBCLoginService which enables storage of user info through a relational database.
HashLoginService is a LoginService implementation that stores user information in an in-memory Map. We have provided the constructor argument “JCGRealm” which is the realm we have referred in the web.xml. After creating the login service, we have provided the config file for this realm (4). The config is a text file with the following content:
admin: adminpass,admin,user
user1: user1pass,user
In this file, each line defines a user along with its password and roles. Password and roles are separated with a comma. We have defined two users here:
- “admin” with roles “user” and “admin”
- “user1” with role “user”
Here “admin” has two roles, which means he/she will have access to both admin and user content whereas “user1” will access to user content only. The passwords in this example are stored as clear text. However it is possible to store them in an obfuscated or encrypted form.
After setting the realm config, the remaining code is pretty straightforward. We attach the login service to the server(5), set the server context handler(6) and start our Embedded Jetty(7).
6. Running the Application
As we run our main class, our Jetty starts on 8080. When we try to access http://localhost:8080 we will see the index page without any security constraint.

When we try to access http://localhost:8080/userpages, the browser will prompt us a login dialog asking for username and password.
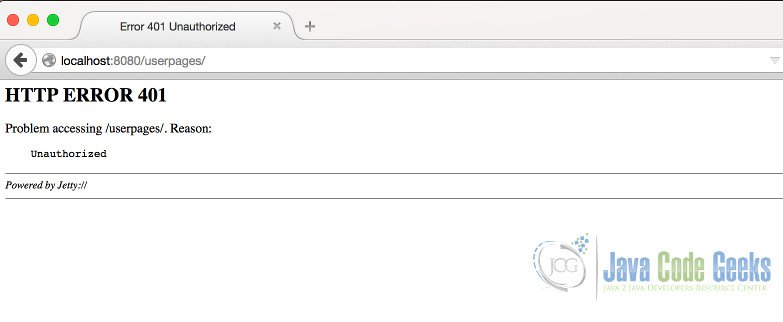
The browser will keep asking until a matching username-password combination is provided. If user presses “Cancel”, a page with a 401 error, which can be viewed below, is displayed to the user.
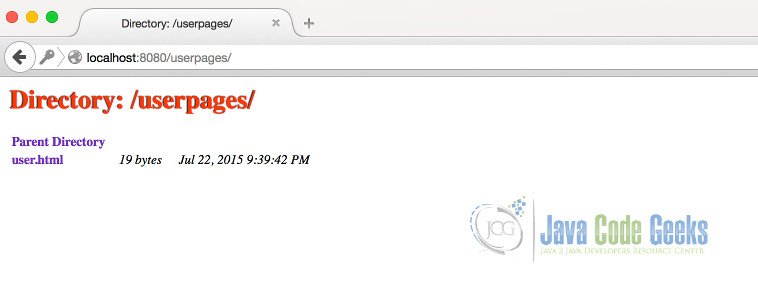
When we type user1 as the username and user1pass as the password, the content will be available as in the image below.
Now we have logged in with a “user” role. If we try to access “admin” content (http://localhost:8080/adminpages) , which is not available to “user” role; Jetty returns a 403 response. 403 Error Page can be seen below:
In order to access admin pages , we have to provide credentials with an “admin” role. Please note that, you may need to clear session data in your browser before you try with a different user.
7. Configuration in Standalone Jetty
We have configured authentication for Embedded Jetty; now we are going to apply the same for a standalone instance. The steps are parallel with the Embedded Jetty Example.
We will first package our example project as a WAR archive. Steps are below:
- Package your project as a WAR file. We can do this running mvn package in our project directory.
- Copy the WAR file under JETTY_HOME/webapps.
Thereafter we will apply the login configuration to through jetty.xml file with the following steps:
- Copy the JCGRealm.txt in the Embedded example under JETTY_HOME/etc.
- Open the configuration file “jetty.xml” under JETTY_HOME/etc.
- Add the following XML snippet and save the file.
...
<Call name="addBean">
    <Arg>
      <New class="org.eclipse.jetty.security.HashLoginService">
        <Set name="name">JCGRealm</Set>
        <Set name="config"><SystemProperty name="jetty.home" default="."/>/etc/jcgrealm.txt</Set>
        <Set name="refreshInterval">0</Set>
      </New>
    </Arg>
  </Call>
...
Here we have repeated the same configuration of our Embedded Jetty, this time with XML. When we run our standalone Jetty, our application is accessible under http://localhost:8080/jcg-authentication-example with the defined security constraints.
8. Conclusion
Jetty facilitates a variety authentication methods providing an extensible and pluggable infrastructure. In this post, we have discussed Jetty authentication capabilities and provided examples with BASIC Authentication and HashLoginService for both Embedded and Standalone modes.
You can download the full source code of this example here:Jetty Authentication Example


