Embedded Jetty Server Example
In this example, we will show how to use Jetty in embedded mode. Jetty can be used in standalone mode, but the main purpose behind building jetty was so that it could be used inside an application instead of deploying an application on jetty server.
Generally you write a web application and build that in a WAR file and deploy WAR file on jetty server. In Embedded Jetty, you write a web application and instantiate jetty server in the same code base.
1. Environment
- Windows 7 SP 1
- Eclipse Kepler 4.3
- Java version 7
- Java Servlet Library – servlet-api-3.1
- Maven 3.0.4
2. Example Outline
In this example, we will cover multiple aspects about Jetty server other than embedded mode. At first, we will show a simple example of embedded jetty server. Further, we will show how to add connectors, handlers, contexts and servlets.
3. Embedded Jetty Example
Most times, it is easier to write an application and a jetty server together rather writing an application and deploying a WAR file on jetty server. It saves time and keeps things simple with application handling.
At first, we will create a simple embedded jetty server and a servlet and run that servlet on that server.
3.1 Create a Maven Project
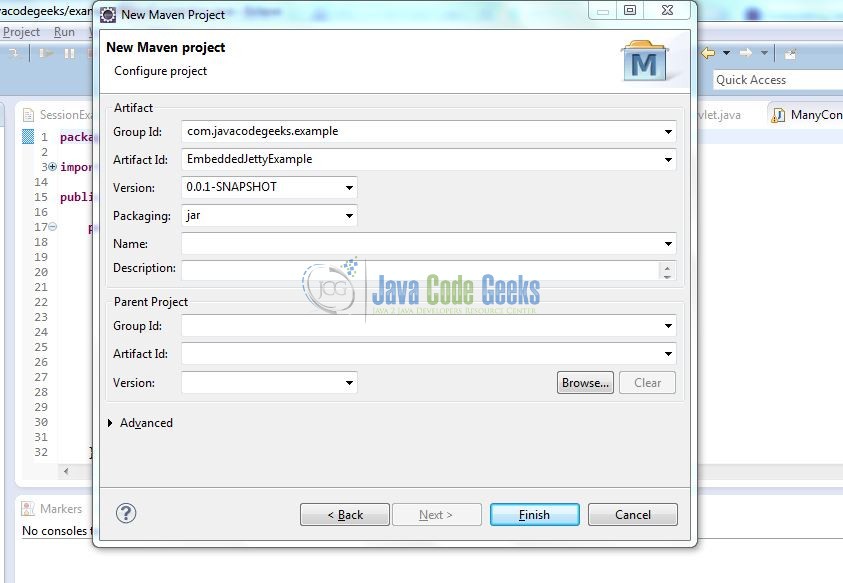
As shown in below screenshot, create a new maven project and enter details for GroupId as com.javacodegeeks.example and ArtifactId as EmbeddedJettyExample .
3.2 Modify pom.xml
We will add some dependencies jetty-server , , jetty-servlet in pom.xml. We will need these to run a simple web application on an embedded jetty server.
pom.xml
<project xmlns="http://maven.apache.org/POM/4.0.0" xmlns:xsi="http://www.w3.org/2001/XMLSchema-instance" xsi:schemaLocation="http://maven.apache.org/POM/4.0.0 http://maven.apache.org/xsd/maven-4.0.0.xsd">
  <modelVersion>4.0.0</modelVersion>
  <groupId>com.javacodegeeks.example</groupId>
  <artifactId>EmbeddedJettyExample</artifactId>
  <version>0.0.1-SNAPSHOT</version>
  <packaging>war</packaging>
  <dependencies>
	        <dependency>
	            <groupId>org.eclipse.jetty</groupId>
	            <artifactId>jetty-server</artifactId>
	            <version>9.2.15.v20160210</version>
	        </dependency>
			<dependency>
  				<groupId>org.eclipse.jetty</groupId>
  				<artifactId>jetty-servlet</artifactId>
  				<version>9.2.15.v20160210</version>
			</dependency>
	</dependencies>
</project>
3.3 Simple Embedded Jetty Server
Create a java source file under src->main->java as EmbeddedJettyExample.java .
EmbeddedJettyExample.java
package com.javacodegeeks.example;

import org.eclipse.jetty.server.Server;
import java.io.IOException;
import javax.servlet.ServletException;
import javax.servlet.http.HttpServlet;
import javax.servlet.http.HttpServletRequest;
import javax.servlet.http.HttpServletResponse;

public class EmbeddedJettyExample {

        public static void main(String[] args) throws Exception {
              Server server = new Server(8680);
              try {
		 server.start();
		 server.dumpStdErr();
	         server.join();
	      } catch (Exception e) {
			e.printStackTrace();
	      }
        }
}
You can run this project in eclipse by executing JettyEmbeddedExample . This runs an HTTP server on port 8680. It’s just a simple server, but it won’t do anything useful work as there are no handlers. This will return 404 error for every request.
3.4 More on Embedded Jetty Server
We will expand on the example we created earlier. Jetty requires Handler on the server to create a response. A handler generally examines HTTP request and generates HTTP response. We will add a handler class in our last example and then run that handler over jetty server.
EmbeddedJettyExample.java
package com.javacodegeeks.example;

import org.eclipse.jetty.server.Server;
import java.io.IOException;
import javax.servlet.ServletException;
import javax.servlet.http.HttpServlet;
import javax.servlet.http.HttpServletRequest;
import javax.servlet.http.HttpServletResponse;

public class EmbeddedJettyExample {

        public static void main(String[] args) throws Exception {
              Server server = new Server(8680);
              try {
		 server.start();
		 server.dumpStdErr();
	         server.join();
	      } catch (Exception e) {
			e.printStackTrace();
	      }
        }

        public static class HelloHandler extends AbstractHandler {

		public HelloHandler() {
			this("Hello Java Code Geeks - First Handler");
		}

		public HelloHandler(String arg) {
			this(arg, null);
		}

		public HelloHandler(String arg1, String arg2){
			this.greetmessage = arg1;
			this.bodymessage = arg2;
		}
		public void handle(String target, Request baseRequest, HttpServletRequest request,
				HttpServletResponse response) throws IOException, ServletException {
			response.setContentType("text/html; charset=utf-8");
			response.setStatus(HttpServletResponse.SC_OK);

			PrintWriter out = response.getWriter();

			out.println(greetmessage);
			if(bodymessage != null){
				out.println(bodymessage);
			}

			baseRequest.setHandled(true);

		}

		final String greetmessage;
		final String bodymessage;

	}
}
Any Handler created needs to implement the method handle. The parameters in this method handle are
- target – the target of the request, which is either URI or a name from a named dispatcher
- baseRequest – the Jetty mutable request object
- request – the immutable request object
- response – the response, which may have been wrapped by a filter or a servlet
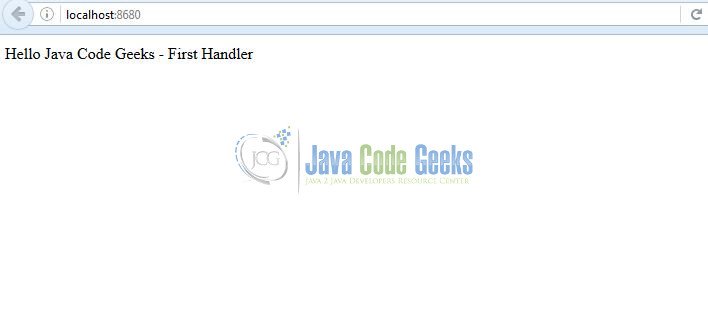
In our embedded server code, we set the handler for our server and start the server. Now if we execute the JettyEmbeddedExample , our server will run on port 8680 and we will be able to see our handler returning a response as below:

Here we showed a custom handler. But there are already HandlerWrappers that contain chain handlers together like ContextHandler, SessionHandler, SecurityHandler, Servlet Handler.
3.5 Embedded Jetty Server with ServletHandler
Here we will show a simple servlet running inside embedded jetty server with ServletHandler handling the servlet. Below example creates a ServletHandler instance and configures a single HelloServlet.
EmbeddedJettyExample.java
package com.javacodegeeks.example;

import java.io.IOException;

import javax.servlet.ServletException;
import javax.servlet.http.HttpServlet;
import javax.servlet.http.HttpServletRequest;
import javax.servlet.http.HttpServletResponse;

import org.eclipse.jetty.server.Connector;
import org.eclipse.jetty.server.Server;
import org.eclipse.jetty.server.ServerConnector;
import org.eclipse.jetty.servlet.ServletHandler;

public class EmbeddedJettyExample {

	public static void main(String[] args) throws Exception {

		Server server = new Server(8680);

		ServletHandler servletHandler = new ServletHandler();
		server.setHandler(servletHandler);

		servletHandler.addServletWithMapping(HelloServlet.class, "/");

		server.start();
		server.join();

	}

	public static class HelloServlet extends HttpServlet
	{
		protected void doGet(HttpServletRequest request, HttpServletResponse response) throws ServletException, IOException
		{
			response.setContentType("text/html");
			response.setStatus(HttpServletResponse.SC_OK);
			response.getWriter().println("<h1>New Hello Simple Servlet</h1>");
               }
        }
 }
In similar fashion, we can add a ContextHandler to set a context path.
4. Conclusion
In this example, we saw how to create an embedded jetty server, then we showed how to add a handler to an embedded jetty server. At last, we showed how to use a standard handler ServletHandler in an embedded jetty server.
5. Download
This was an example of Embedded Jetty Server.
You can download the full source code of this example here: EmbeddedJettyExample
6. Related Articles
Following articles were referred in developing this example:


