How to Install IntelliJ IDEA on Ubuntu Linux
Some years ago, Eclipse was probably the king of the IDEs of Java development. But, in the last times, IntelliJ IDEA, from JetBrains (developers of WebStorm, PhpStorm or TeamCity, among many other IDEs and software engineering tools), has become very popular, being considered by many developers the best Java IDE nowadays. This tutorial will show how to install it on Linux.
For this tutorial, Linux Mint 18 (an Ubuntu based Linux distribution) and IntelliJ IDEA 2016.2.5 have been used.
1. Download
We can download IntelliJ IDEA from the official JetBrains site. As you can see, JetBrains offers two editions: Community Edition, free and open source (GitHub repository); and Ultimate Edition, proprietary and non-free (check prices).
In this tutorial, we will use the Community Edition. You can follow the direct download link.
After the download, we should verify the file checksum, to check that the download has been made correctly and that the file is not corrupted. In this case, for the 2016.2.5 version, the SHA-256 checksum is the following:
1bccc6689c5a140cc8e3b6496a07c7c7c2d2b403034aaff98ace0c9badd63734
(Got from IntelliJ IDEA).
For checking the checksum of the file we just have downloaded, we have to open the terminal, navigate to the directory of the download, and execute the sha256sum command:
cd path/to/download
sha256sum ideaIC-2016.2.5.tar.gz
In this case, we got the same checksum, so we can proceed with the installation. If we would have got a distinct checksum, we would have to download it again.
2. Installation
Of course, the first step is to extract the downloaded compressed file:
tar -zxvf ideaIC-2016.2.5.tar.gz
Now, we have to execute the installation script (idea.sh) inside the bin/ directory of the directory where the files have been extracted. So, before, we have to give execution permissions to the script:
cd idea-IC-162.2228.15
sudo chmod a=+rx bin/idea.sh
bin/idea.sh
Note: if you want to install IntelliJ IDEA for all the user, you must execute the script with superuser privileges:
sudo bin/idea.sh
If everything went correctly, the installation window should appear.
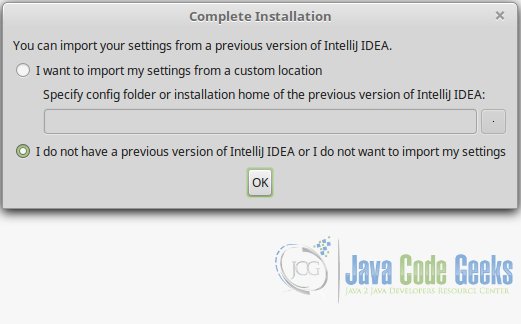
If you have a previous IntelliJ IDEA installation and you want to preserve its configuration, you can choose the first option, specifying the configuration folder of the version. If not, just leave the second option.
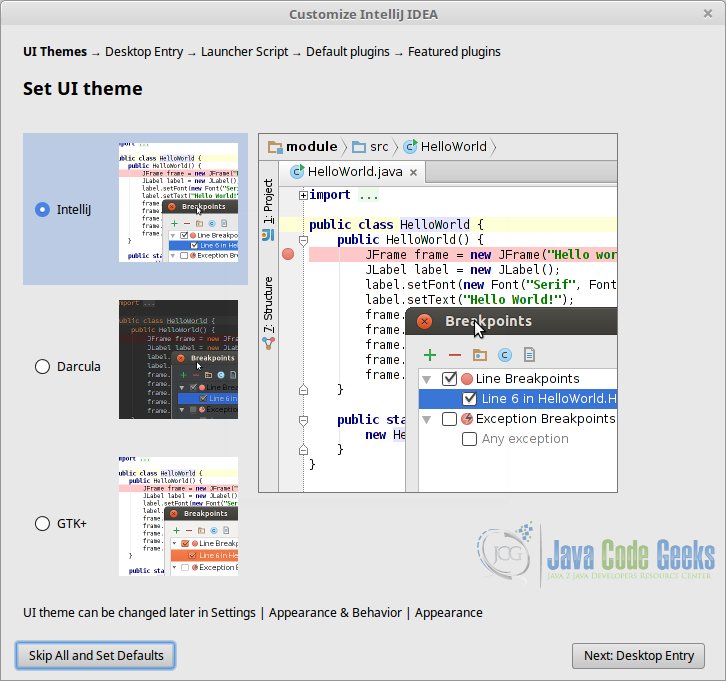
Now, you can choose your favorite theme for the IDE. The theme does not affect to IntelliJ IDEA behavior.
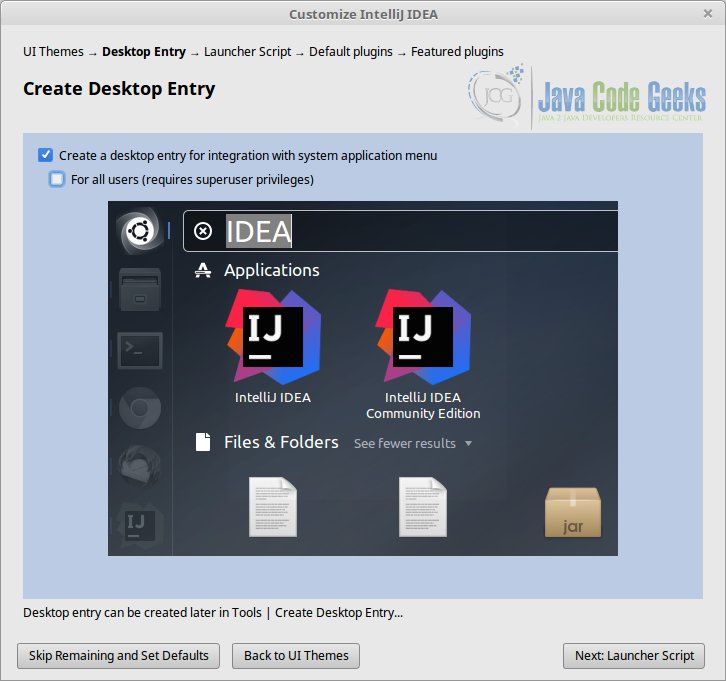
The next window is for selecting if we want to integrate IntelliJ IDEA with system application menu. In almost every case the answer will be yes, otherwise, for starting IntelliJ IDEA, we would have to manually execute the idea.sh script, which is not the most comfortable way.
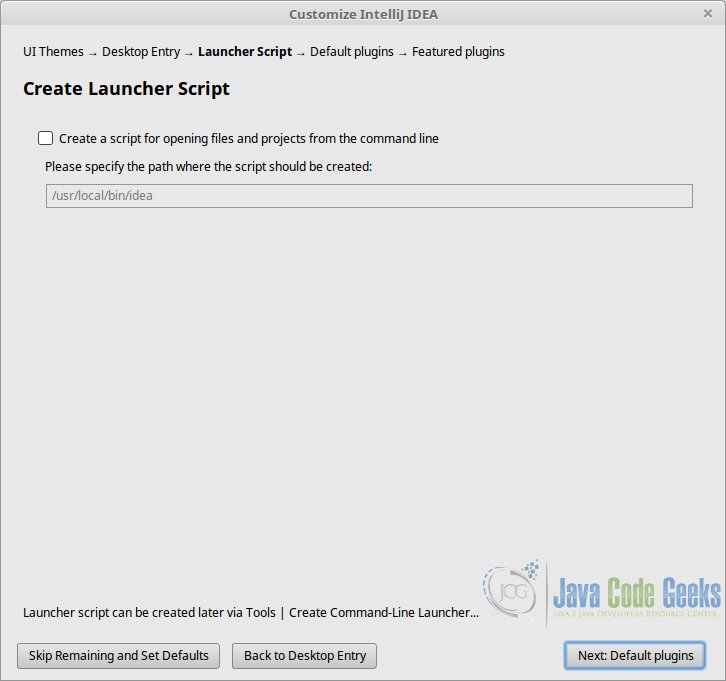
The launcher creation script…
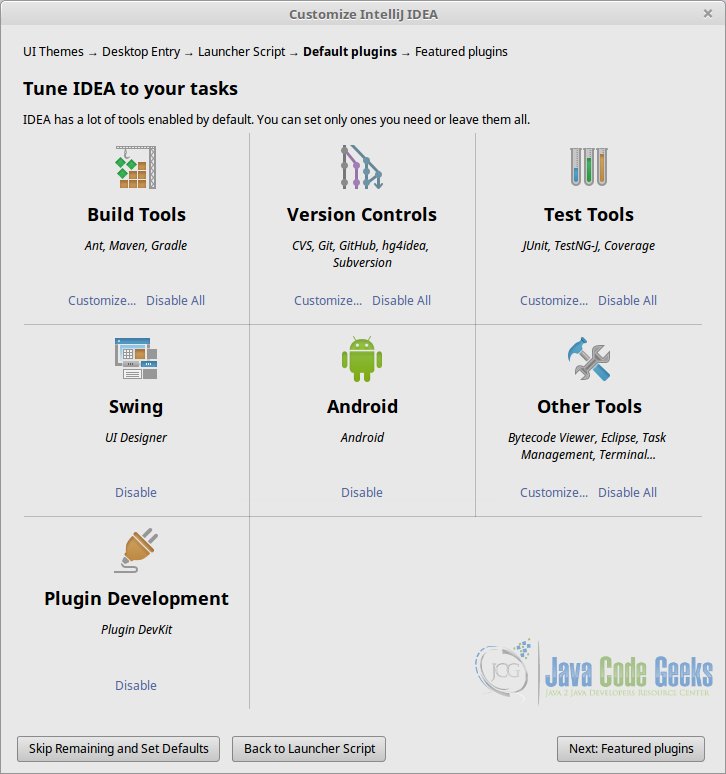
In the following window, we can choose some useful tools, including build tools (Apache Ant, Maven, Gradle), version controlling tools (of course Git, and Mercurial, Subversion, etc.), and many others, as shown in the following image. Don’t worry if you disable something and later you want to use it; you can change the configuration later.
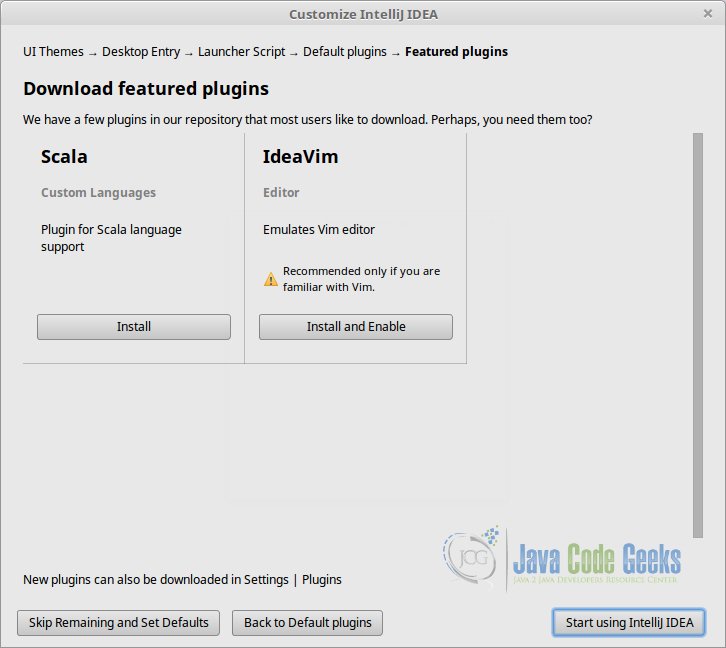
The last window shows two featured plugins. One is for Scala developing, and the other for emulating the Vim editor in IntelliJ IDEA. Of course, you can install these, and many more plugins, whenever you want.
After this step, we finally can start IntelliJ IDEA!
3. Become an IntelliJ IDEA expert!
Check out Java Code Geeks’ tutorials about IntelliJ IDEA:
- IntelliJ IDEA Format Code Example: an example about formatting the code, in many aspects.
- IntelliJ IDEA Create Test Tutorial: about creating JUnit tests with IntelliJ IDEA.
- IntelliJ IDEA Keyboard Shortcuts Tutorial: useful shortcuts for the IDE to save time.
- Top 10 IntelliJ IDEA plugins: a top of most useful plugins (among many) for IntelliJ.
- One and the Only One Reason to Customize IntelliJ IDEA Memory Settings: about advanced settings regarding the memory usage.
- IntelliJ IDEA Color Schemes / Themes Configuration: for customizing IntelliJ.
4. Summary
This tutorial has shown you how to download and install IntelliJ IDEA Java IDE on Linux systems. We have seen how to install it step by step, understanding the meaning and implications of each one. To end up, we have seen a list of other JCG posts to dive into IntelliJ IDEA, once successfully installed.


